CYCLONE-User-Manual.pdf - 第15页
User Manual For Cyclone LC Programmers 15 Step 4. Adding Basic Programming Commands The user should then add other basic programming commands, using the list of commands on the left side of the Programming Sequence area.…
User Manual For Cyclone LC Programmers 14
The following instructions walk the user through each of these steps:
Step 1. Run Cyclone Image Creation Utility
CreateImage.exe is in the “ImageCreation” folder, in the location where the Cyclone software was
installed. For an in-depth description of the Cyclone Image Creation Utility, see Section 6.1 - Cyclone
Image Creation Utility.
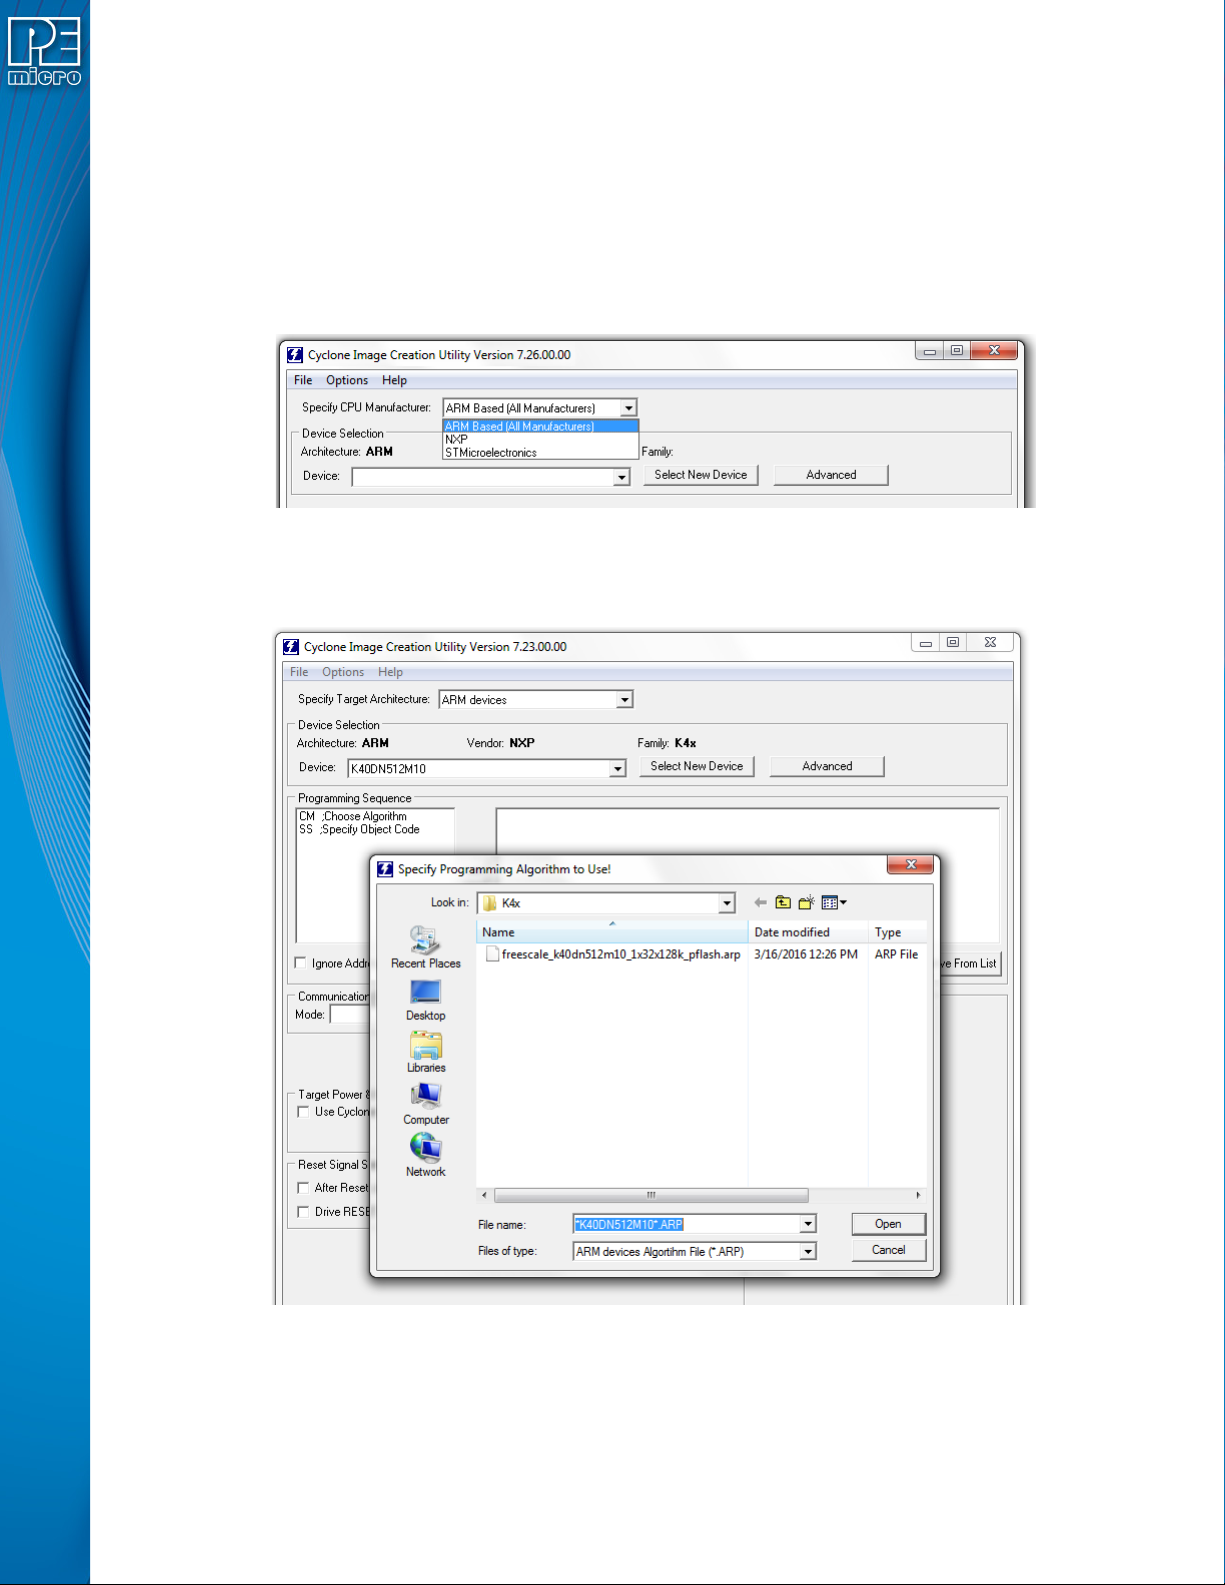
Step 2. Select Device Manufacturer and Device
Specify CPU Manufacturer and Select New Device are used to choose the manufacturer of the target
device, and then the specific device or architecture.
Step 3. Programming Sequence Setup
The user should double-click on CM in the Programming Sequence window to choose the appropriate
Algorithm for the target device. They can navigate to the algorithm using the dialog provided.
Based on the algorithm that was selected, additional commands will be made available in the box of
programming commands on the left.
The user should then double-click on the SS command to specify the Object Code.
User Manual For Cyclone LC Programmers 15
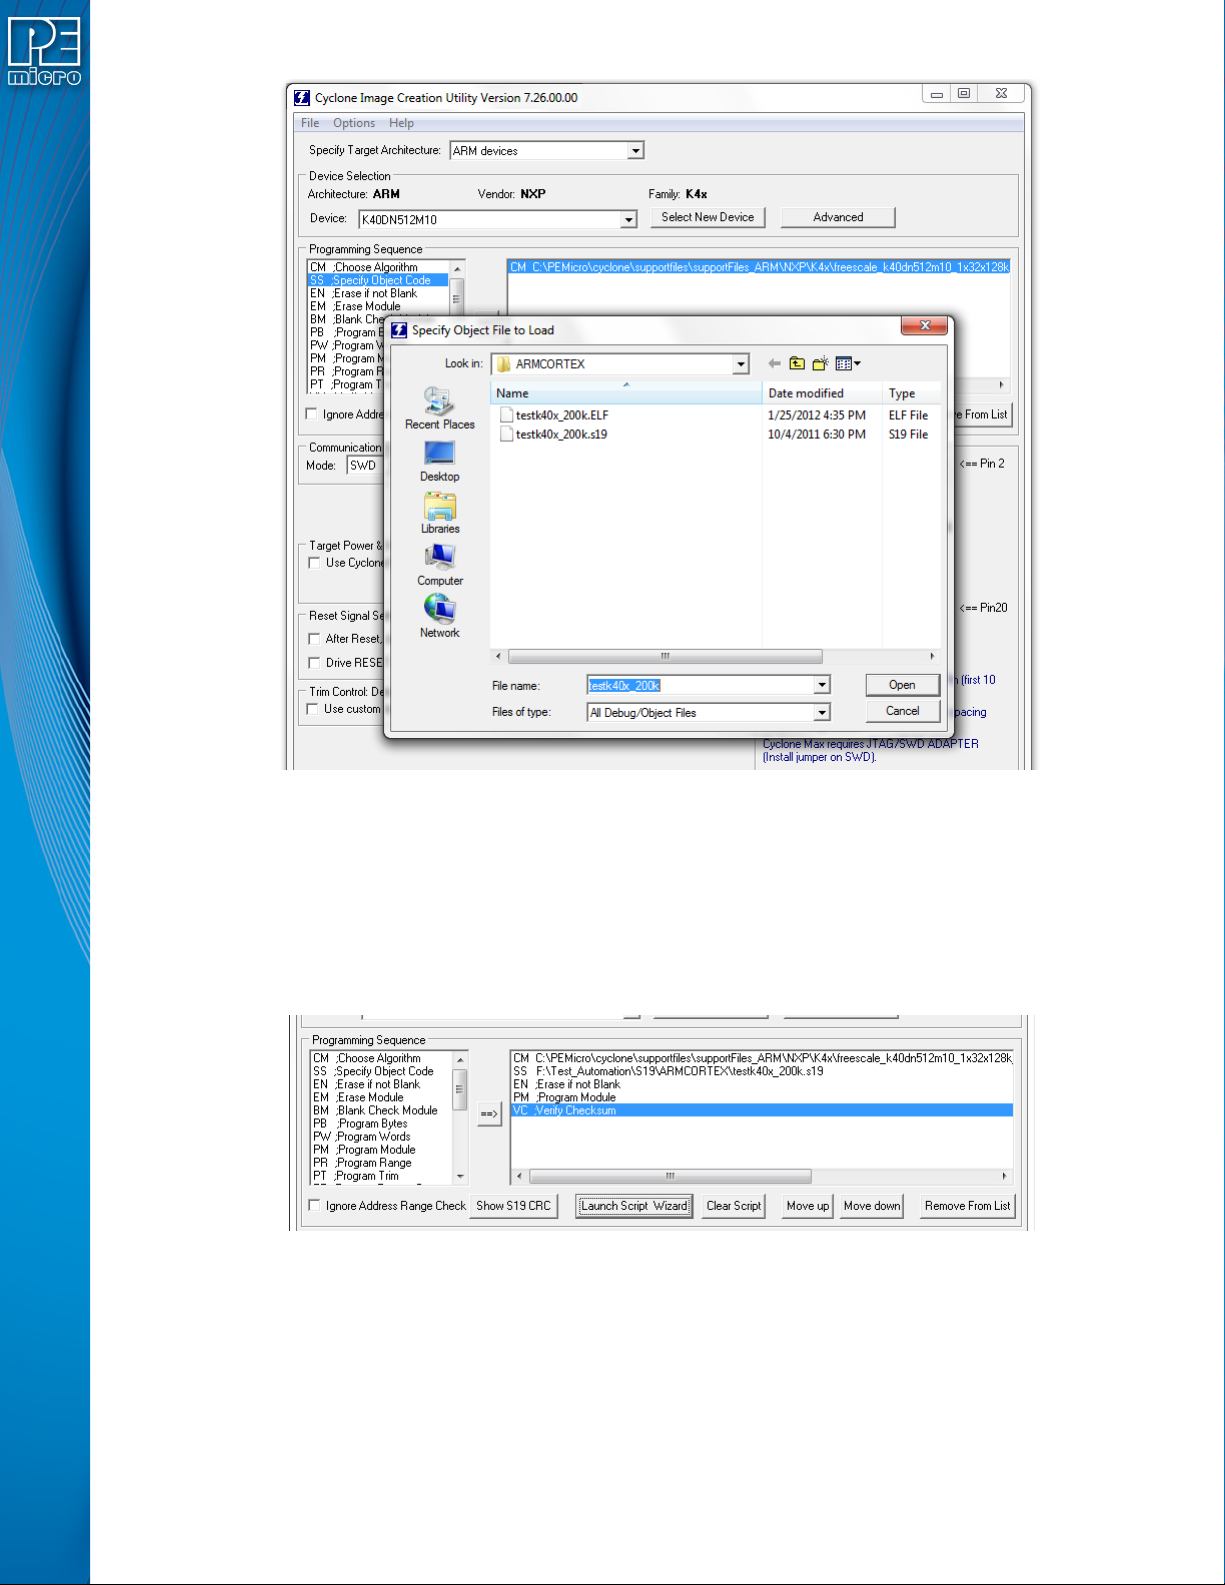
Step 4. Adding Basic Programming Commands
The user should then add other basic programming commands, using the list of commands on the left
side of the Programming Sequence area. The arrow and buttons allow the user to add, remove, and
re-sequence the commands, in the box on the right. As an example, some basic commands might be
• Erase
• Program
• Verify
Note: Launch Script Wizard can also be used to quickly complete Steps 3 and 4.
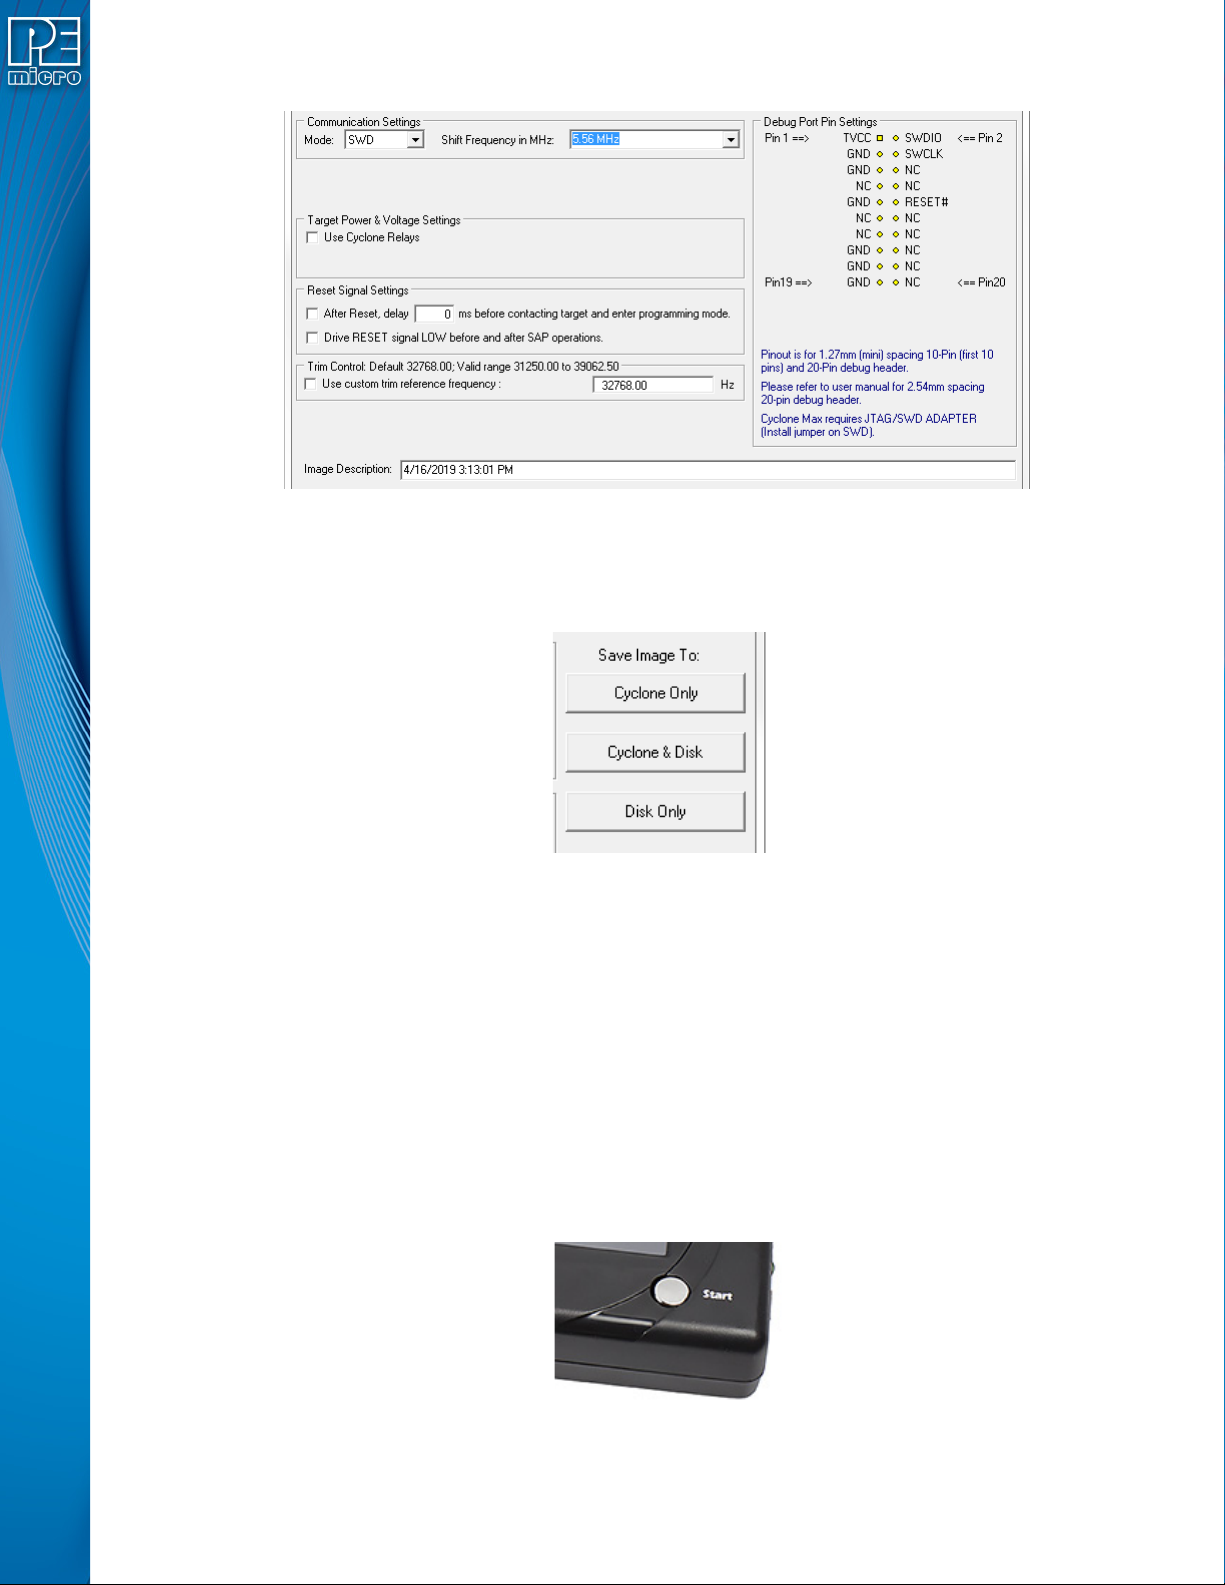
Step 5. Other Settings
The user should then specify any other settings that the SAP image should contain in order to program
correctly, such as
• Communication SWD vs JTAG
• Shift frequency
• Target Power and Voltage Settings
User Manual For Cyclone LC Programmers 16
These settings can be made using the corresponding areas of the Cyclone Image Creation Utility.
Step 6. Save SAP image to Cyclone
The user should then save the SAP image onto the Cyclone by clicking the button to save to “Cyclone
Only” or “Cyclone & Disk.” The image will be automatically selected as the current SAP image on the
Cyclone.
2.3.1 Advanced Features
Cyclone programmers can take advantage of several advanced features that are beyond the scope of
this Getting Started guide, such as RSA/AES encrypted programming images, programming
restrictions on images (see Section 6.1.8 - ProCryption Security License Features), and use of a
barcode scanner to launch programming (see CHAPTER 12 - USING A BARCODE SCANNER TO
SELECT AN IMAGE & INITIATE PROGRAMMING). CYCLONE FX programmers include all of these
features, and CYCLONE programmers can use many of these features with the appropriate activation
license.
2.4 Launching Cyclone Programming
There are three ways to launch programming.
1. Cyclone Start Button Press - The user simply presses the Start button located on top of
the Cyclone programmer.
2. Cyclone Control Console (command-line utility) - The user writes a script that specifies
parameters and initiates programming using the command line. More information is avail-