c900773.R02_EN.pdf - 第123页
6 . Additional Function 7 Placement of O-Ring to Screw Pump Follow the instructions below and place the O-ring to the screw pump. Apply the silicon gr ease. Use the silicon grease which has been shipped along with the ma…
6.Additional Function
6
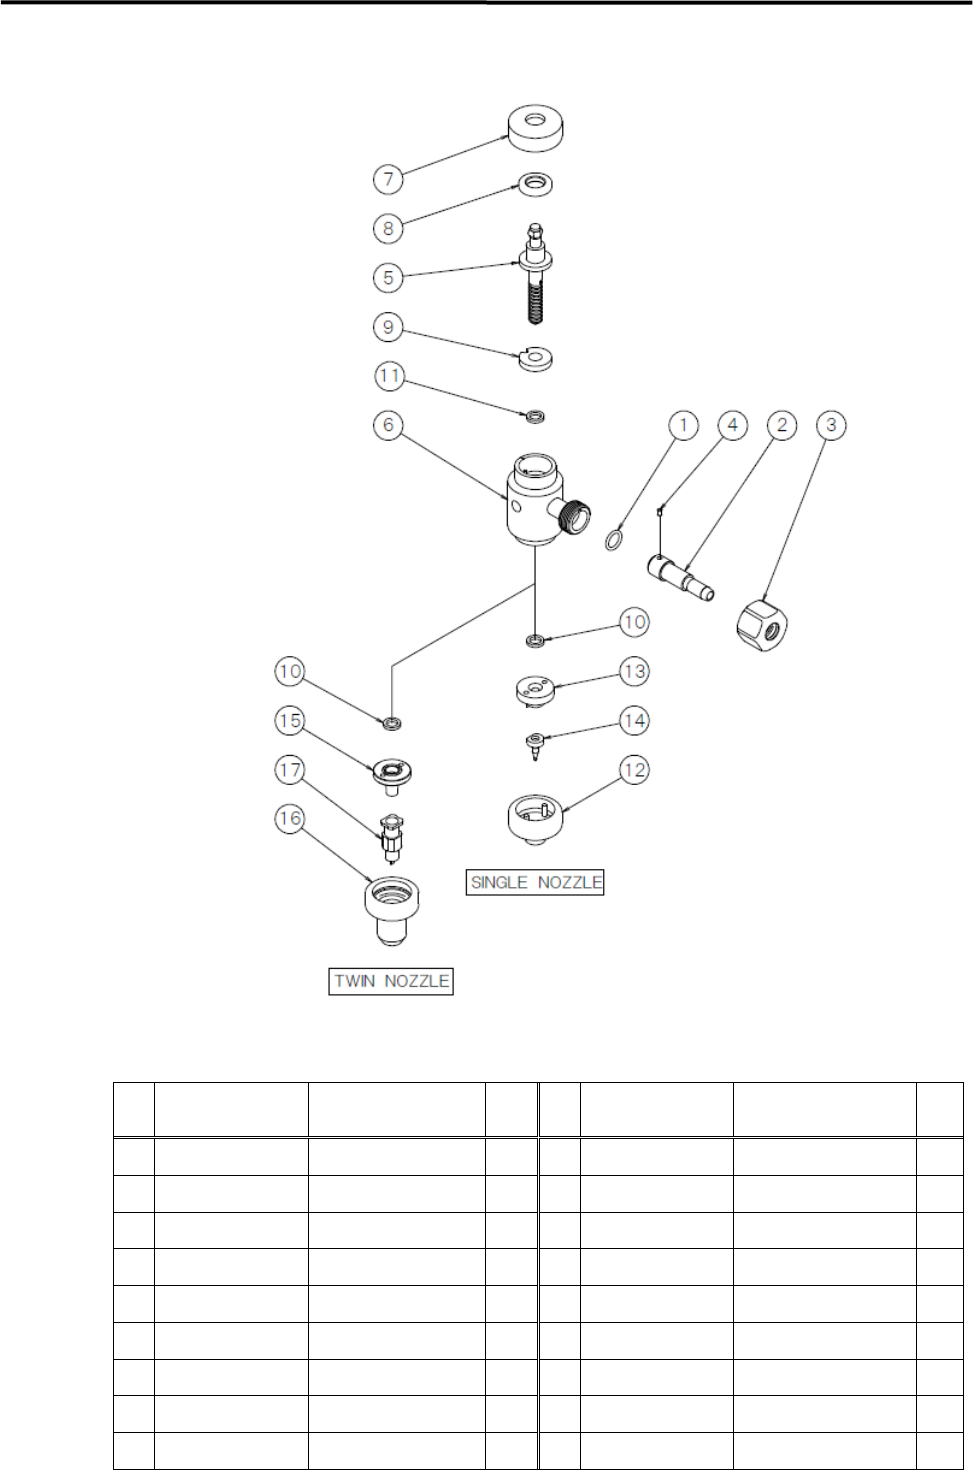
Assembly of Screw DP Head
PART LIST
No. PART NO. PART NAME Q’TY No. PART NO. PART NAME
Q’T
Y
1 LE6-M5F1E-00x O-RING 1 10 LE6-M5FL3-00x FACE SEAL 2
2 LE6-M5F59-02x PIPE, FITTING 1 11 LE6-M5FL4-00x O-RING (VITON) 1
3 LE6-M5F5C-01x NAT, CAP 1 12 LE6-M5FM0-00x CAP, BOTTOM 1
4 LE6-M5F5D-00x PIN, PARALLEL 1 13 LE6-M5FM1-00x ADAPTER PLATE 1
5 LE6-M5FJ0-00x SCREW 16-1-01 1 14 LE6-M5FN0-xxx SINGLE NOZZLE SEL 1
6 LE6-M5FK0-00x CARTRIDGE BODY 1 15 LE7-M5F61-00x ADAPTER 1
7 LE6-M5FK1-00x CAP, TOP 1 16 LE7-M5F62-00x CAP. LOCK 1
8 LE6-M5FL0-00x UPPER BEARING 1 17 LE7-M5F63-xxx TWIN NOZZLE SEL.
9 LE6-MFL1-00x LOWER BEARING 1
6.Additional Function
7
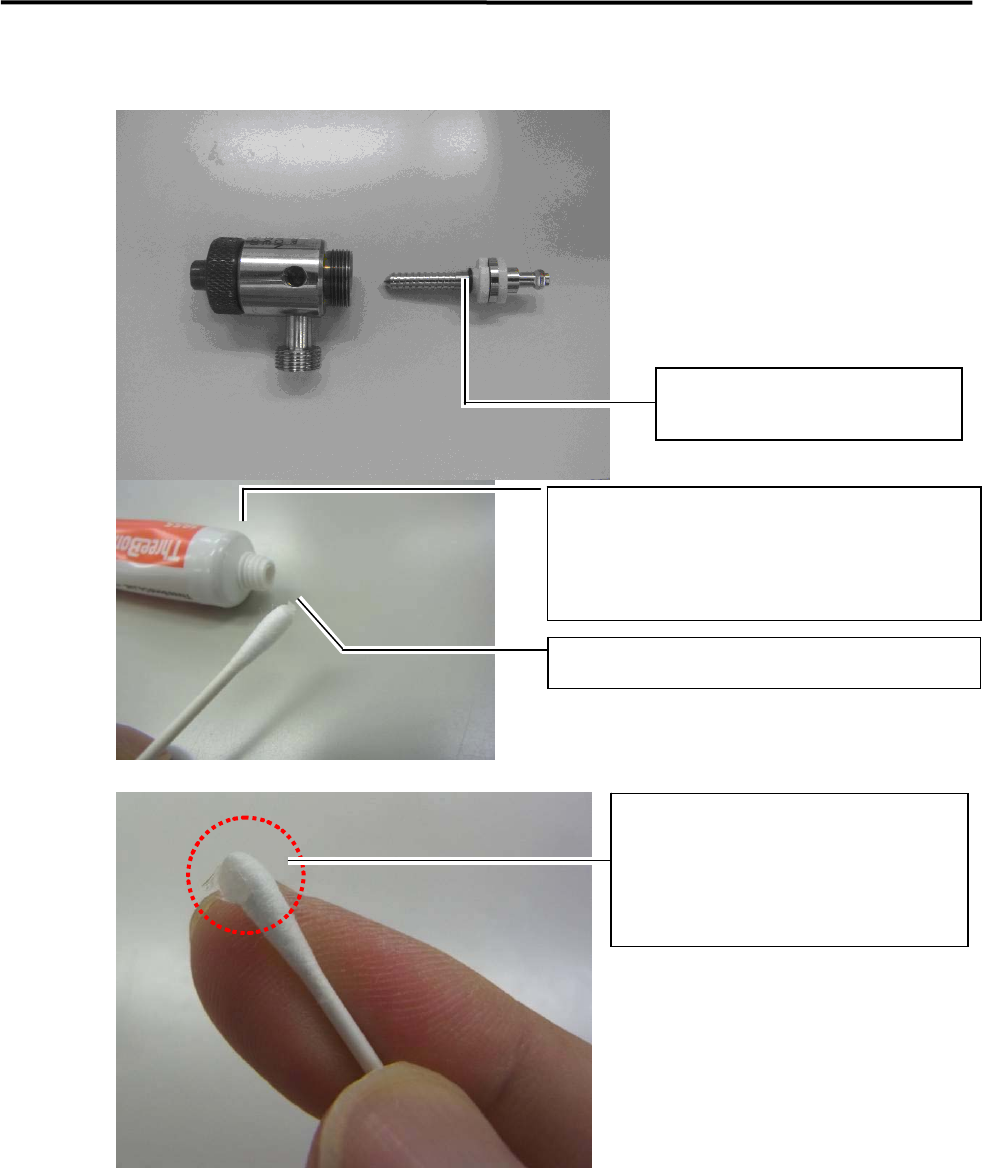
Placement of O-Ring to Screw Pump
Follow the instructions below and place the O-ring to the screw pump.
Apply the silicon grease.
Use the silicon grease which has been shipped
along with the machine.
LG0-M89AB-000 / GREASE SILICON
※Do not use any other silicon grease.
Apply the silicon grease to a cotton swab.
Small portion of the silicon grease is
sufficient. (As seen on the picture.)
※Do not apply too much of the silicon
grease.
O-RING
LE6-M5FL4-000 / O-RING
6.Additional Function
8
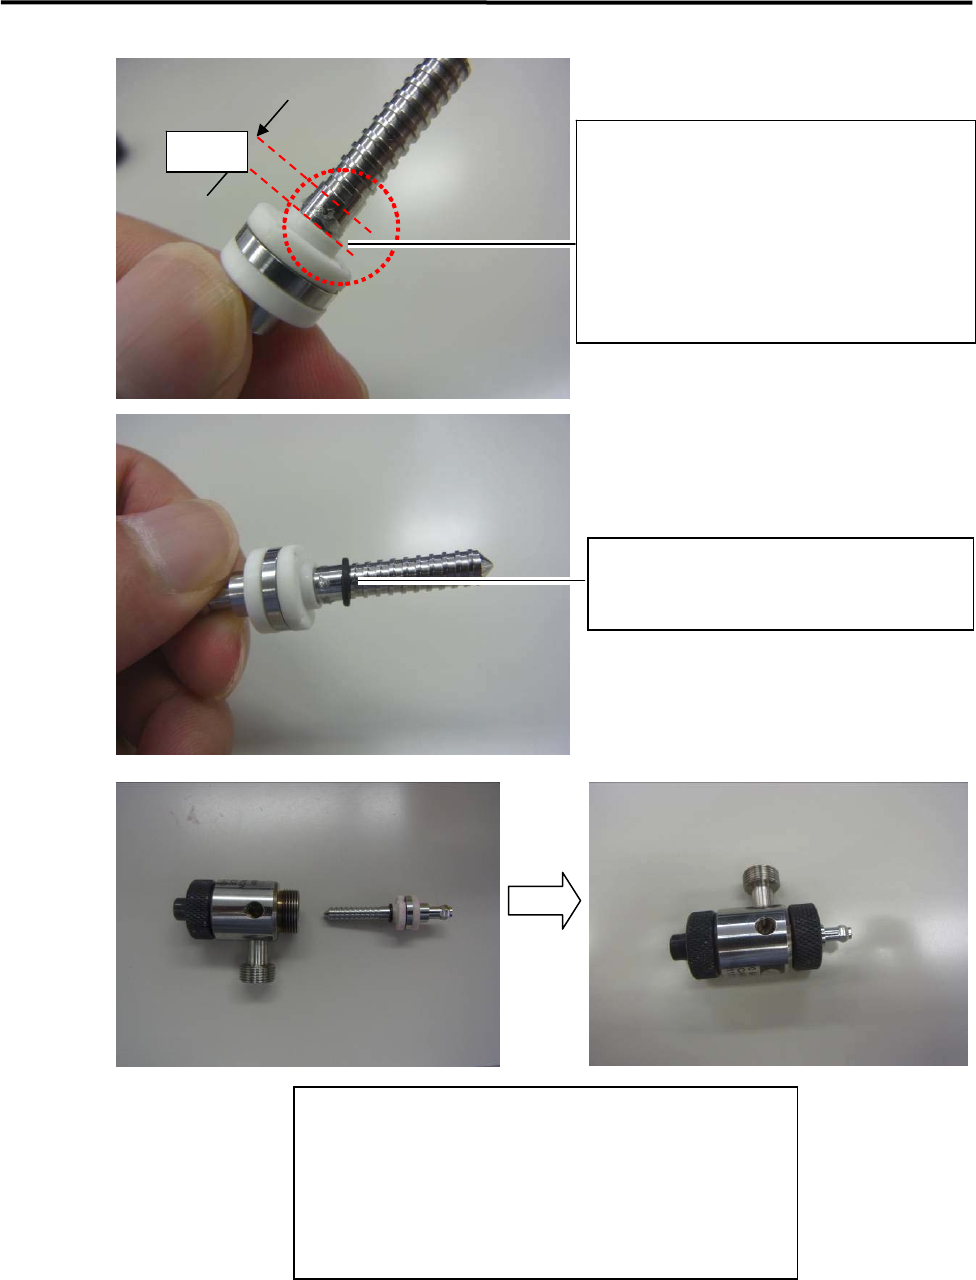
2mm
Apply the silicon grease to the screw axis with
the cotton swab.
(Up to approximately 2 mm from the lower
bearing.)
※Do not apply the silicon grease any wider
than 2 mm from the lower bearing.
Place the O-ring to the screw axis.
LE6-M5FL4-000 / O-RING (VITON)
Align the V-shape cut on the lower bearing to the projection
inside of the screw pump, and insert the screw axis to the
screw pump.
Insert the screw axis all the way to the end, and place and
secure the screw retainer cap.