c900773.R02_EN.pdf - 第61页
3 Mechanical Section 3-21 ■ Remarks for lubricat ion on X/Y axis ball screws NOTE: Insufficient amount of grease or remaining of old/dirty grease may cause axis damage or axis noise problem. It is recommended that lubric…
3 Mechanical Section
3-20
Y Axis Ball Screw
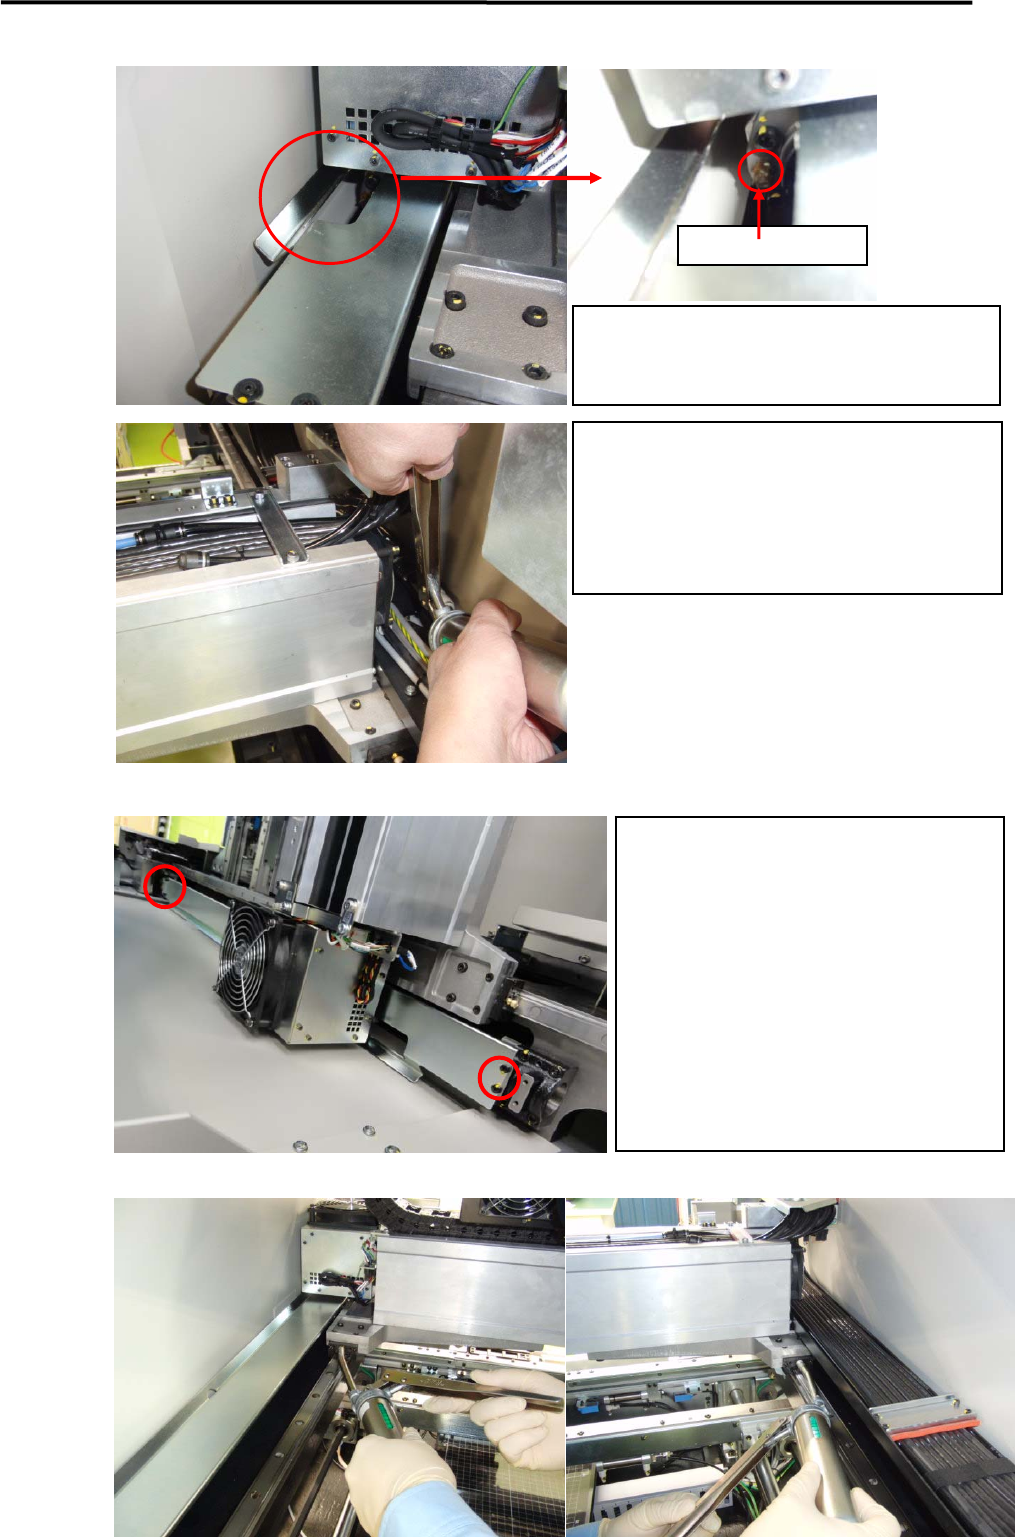
Y 軸ボールネジカバーを外す場合。
Removing the Y Axis Ball Screw Cover Plate
Y軸リニアガイド
Y Axis Linear Guide
Unscrew the bolts on both sides and remove
the ball screw cover plate
Move the X axis all the way to either front or
back.X.
Unscrew and remove 4 bolts (as shown in the
image )
Slightly lift the cover plate enough for the
nozzle of the grease gun to go through, and
lubricate the ball screw.
Grease Nipple
Move the X axis until the grease nipple on the Y
axis ball screw comes in sight through the slit of
the cover plate.
Lubricate the Y axis ball screws on both left and
right.
Firmly press the tip of the grease gun against the
grease nipple.
3 Mechanical Section
3-21
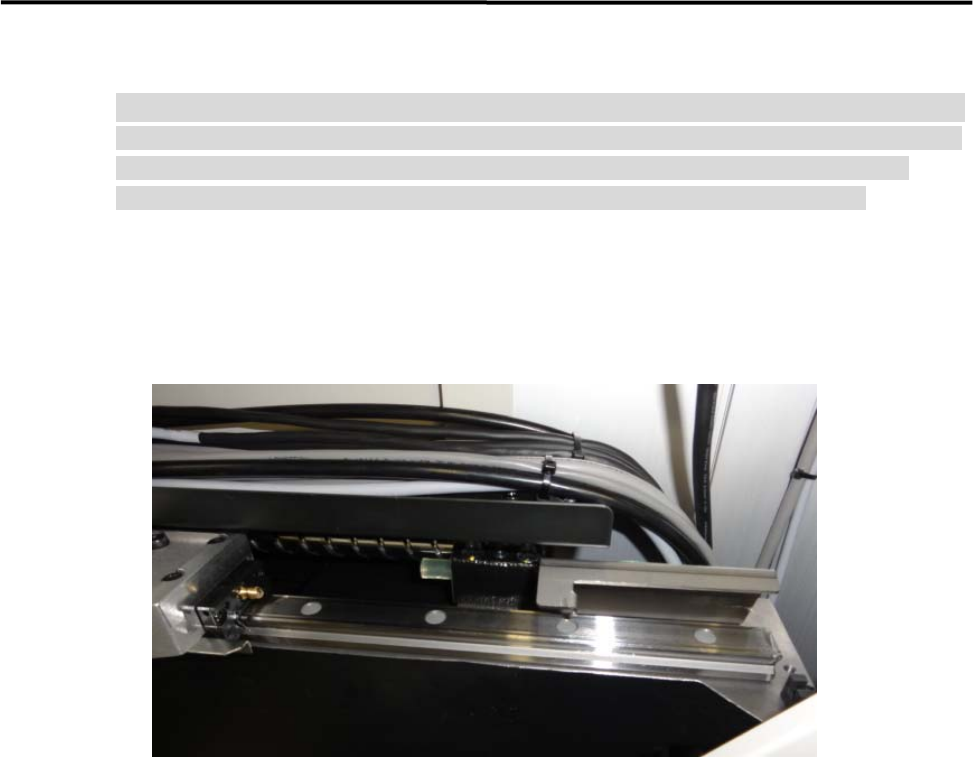
■ Remarks for lubrication on X/Y axis ball screws
NOTE: Insufficient amount of grease or remaining of old/dirty grease may cause axis damage or axis noise
problem. It is recommended that lubrication should be conducted every two weeks, but the grease
condition on the ball screws should be checked in proper intervals and lubrication should be
conducted more frequently depending on the machine’s running time and environment.
Follow the procedures below for lubrication.
■ Lubrication Points with Grease Nipples
ACTION:
① Use a nonwoven cloth and wipe off the dirty grease or adhered grease on the ball screw. Do not use a
cotton swab or woven cloth, which generate dust or waste threads.
② Press the nozzle tip of the grease gun against the grease nipple and apply grease into the ball screw
nut..
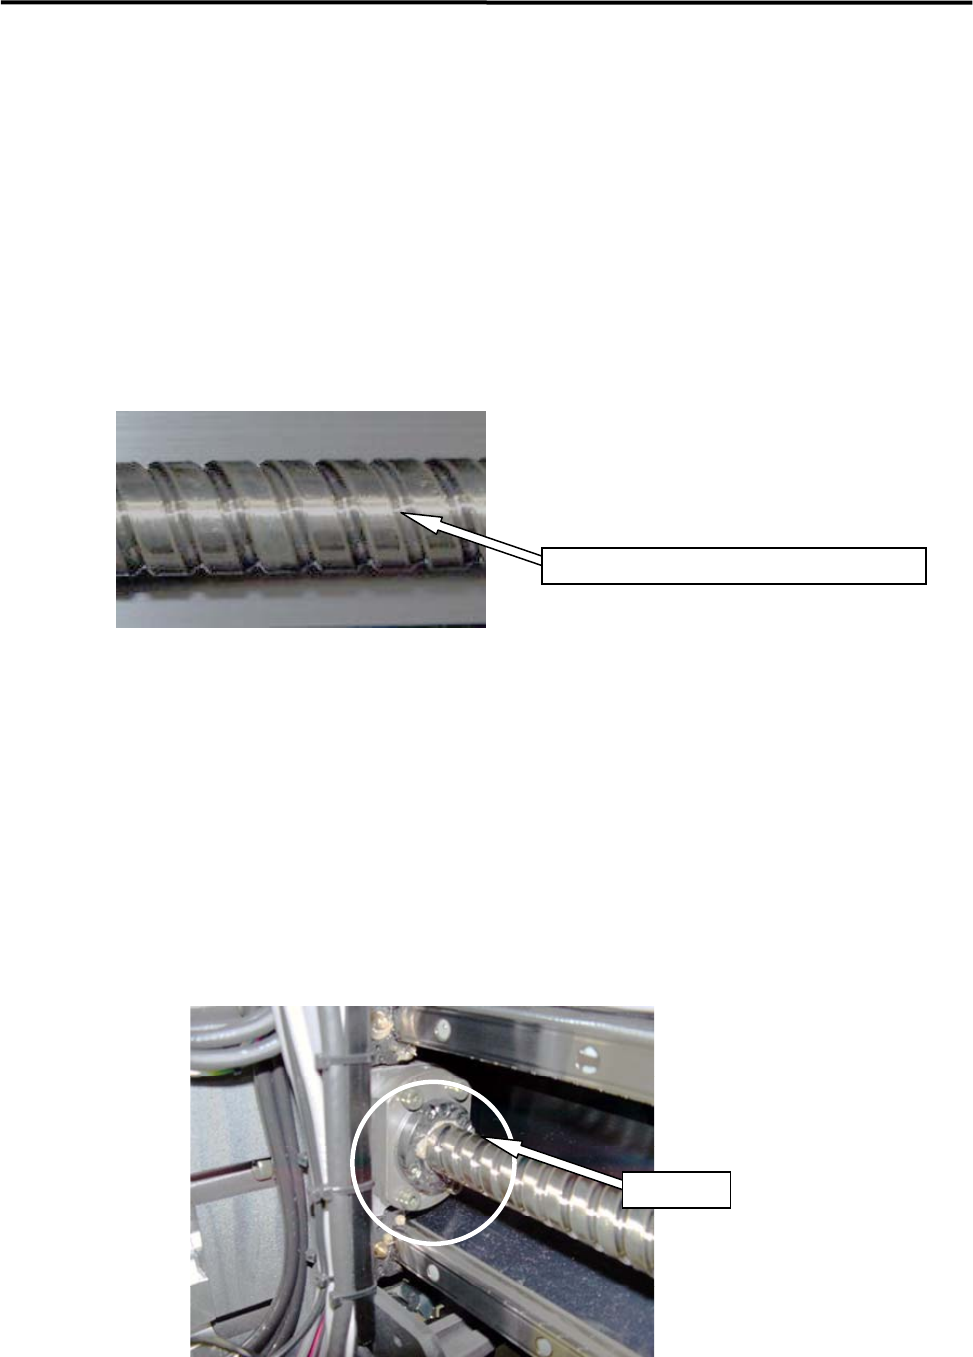
③ On the software, go to Manual > Warm Up, and conduct “Aging” at the speed of 20% for more than 10
minutes. In order to set the speed, click the “Setting” tab on the Warm-up & Self-diagnistics window
and slide the scroll bar under the “Axis Speed”.
④ Use a nonwoven cloth and wipe off the pushed-out dirty grease from the ball bearing, and apply new
grease into the ball screw nut once again.
⑤ Use a nonwoven cloth and remove excessive grease gathered on the ball screw nut or both ends of the
ball screw, and conduct “Aging” by increasing Axis Speed from low speed to high speed gradually.
⑥ Both front and rear end of the ball screws are out of the movable range of the ball screw nut and grease
are not spread to there even by moving axis all the way to its ±software limits. Apply grease to front
and rear end of the ball screws with a nonwoven cloth for rust prevention.
NOTE: Do not use a cotton-swab or a woven cloth to wipe off the dirty grease, otherwise waste threads of cloth
may be caught in the ball screw.
NOTE: Use proper grease for lubrication, specified as our standard. (See the “Specified Lubricants” list at the end
of this chapter.)
NOTE: Use a nonwoven cloth and wipe off excessive grease gathered on the ball screw nut or both ends of the ball
screws to avoid grease scattering.
3 Mechanical Section
3-22
■ Lubrication Points without Grease Nipples
ACTION:
① Go to Manual > Origin and conduct X/Y axis origin searching in order to move the head assy. To the
origin.
② Use a nonwoven cloth to wipe off the dirty grease or adhered grease on the ball screw thoroughly
within your reach. Do not use a cotton swab or woven cloth, otherwise it may generate dust or waste
threads.
③ Use a finger and apply new grease onto ditches of ball screw thoroughly by covering the ditches thin
and evenly with grease. Do not apply a large amount of grease.
④ Go to Manual > Axis and move the head assy. To its +end limit. Wipe off the dirty grease or adhered
grease and apply new grease on the rest of the ditches of the axis.
⑤ On the software, go to Manual > Warm Up, and conduct “Aging” at the speed of 20% for more than 10
minutes. In order to set the speed, click the “Setting” tab on the Warm-up & Self-diagnistics window
and slide the scroll bar under the “Axis Speed”.
⑥ Use a nonwoven cloth and wipe off the pushed-out dirty grease from the ball bearing. Apply new
grease into the ball screw nut with a finger once again afterwards.
⑦ Use a nonwoven cloth and remove excessive grease gathered on the ball screw nut or both ends of the
ball screw, and conduct “Aging” by increasing Axis Speed from low speed to high speed gradually.
Nut
⑧ Both front and rear end of the ball screws are out of the movable range of the ball screw nut and grease
are not spread to there even by moving axis all the way to its ±software limits. Apply grease to front
and rear end of the ball screws with a nonwoven cloth for rust prevention.
Apply grease onto the ditches of ball screw.