c900773.R02_EN.pdf - 第63页
3 Mechanical Section 3-23 NOTE: W hen too much grease is applied, excessi ve grease may scatt er around while m achine is running. Apply proper amount of grease so that thin coat of gr ease is m ade over the surface of t…
3 Mechanical Section
3-22
■ Lubrication Points without Grease Nipples
ACTION:
① Go to Manual > Origin and conduct X/Y axis origin searching in order to move the head assy. To the
origin.
② Use a nonwoven cloth to wipe off the dirty grease or adhered grease on the ball screw thoroughly
within your reach. Do not use a cotton swab or woven cloth, otherwise it may generate dust or waste
threads.
③ Use a finger and apply new grease onto ditches of ball screw thoroughly by covering the ditches thin
and evenly with grease. Do not apply a large amount of grease.
④ Go to Manual > Axis and move the head assy. To its +end limit. Wipe off the dirty grease or adhered
grease and apply new grease on the rest of the ditches of the axis.
⑤ On the software, go to Manual > Warm Up, and conduct “Aging” at the speed of 20% for more than 10
minutes. In order to set the speed, click the “Setting” tab on the Warm-up & Self-diagnistics window
and slide the scroll bar under the “Axis Speed”.
⑥ Use a nonwoven cloth and wipe off the pushed-out dirty grease from the ball bearing. Apply new
grease into the ball screw nut with a finger once again afterwards.
⑦ Use a nonwoven cloth and remove excessive grease gathered on the ball screw nut or both ends of the
ball screw, and conduct “Aging” by increasing Axis Speed from low speed to high speed gradually.
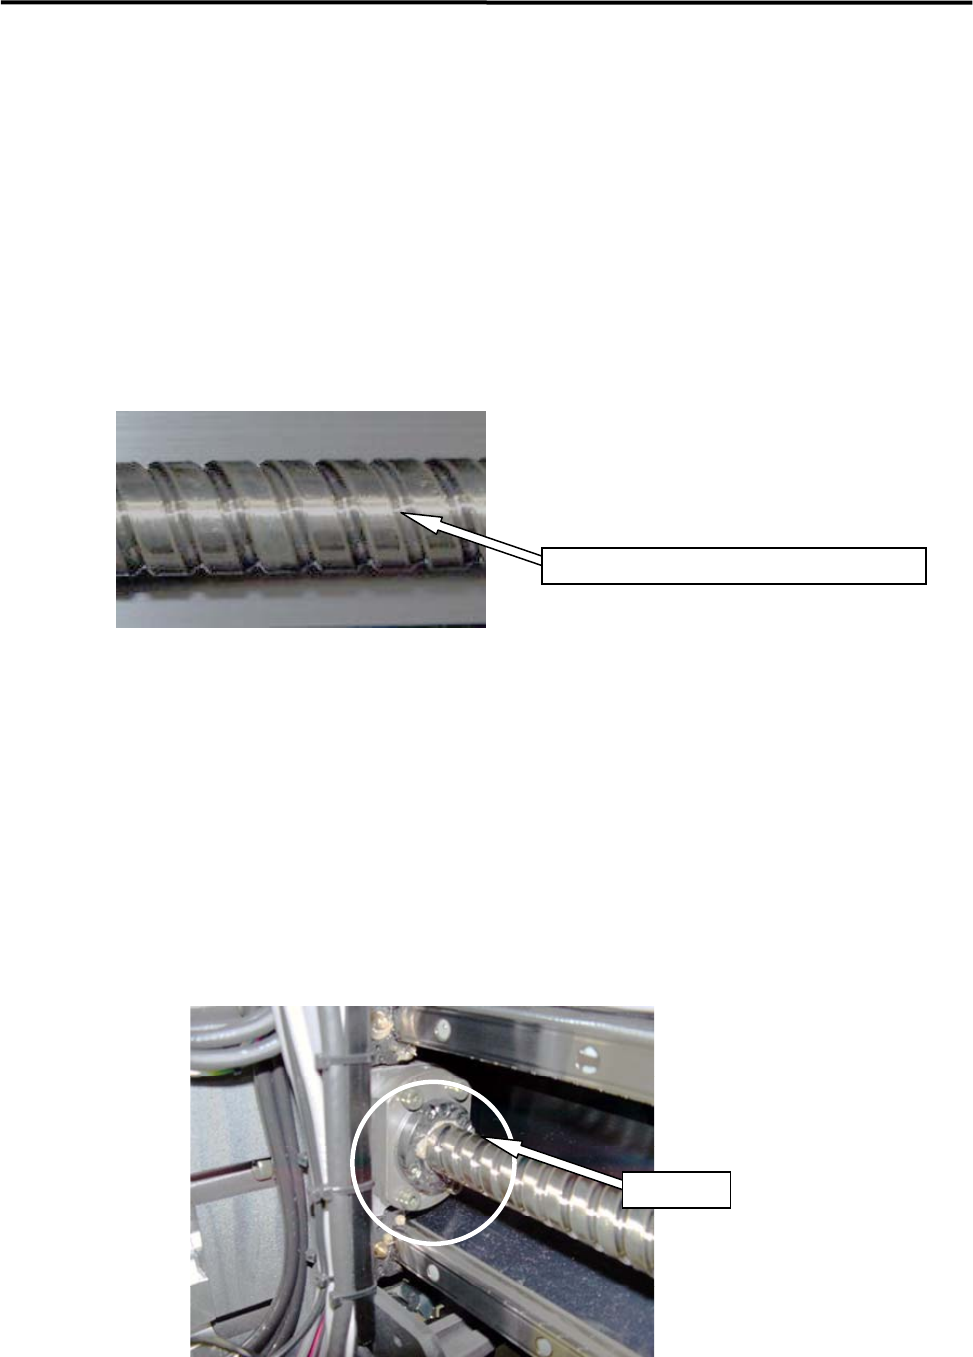
Nut
⑧ Both front and rear end of the ball screws are out of the movable range of the ball screw nut and grease
are not spread to there even by moving axis all the way to its ±software limits. Apply grease to front
and rear end of the ball screws with a nonwoven cloth for rust prevention.
Apply grease onto the ditches of ball screw.

3 Mechanical Section
3-23
NOTE: When too much grease is applied, excessive grease may scatter around while machine is running. Apply
proper amount of grease so that thin coat of grease is made over the surface of the ball screws.
NOTE: If grease is applied on the ball screw surface (out of ditches), the grease will be coming out and it will not
caught by the ball bearing inside. That may cause insufficient lubrication condition. Therefore, apply
grease onto the ditches of the ball screw.
■ Lubrication Points for Linear Guide
ACTION:
① Use a nonwoven cloth and wipe off the dirty grease or adhered grease on the linear guide. Do not use
a cotton swab or woven cloth, which may generate dust or waste threads.
② Press the tip of the nozzle of the grease gun against the grease nipple and insert grease into the linear
guide nut.
③ On the software, go to Manual > Warm Up, and conduct “Aging” at the speed of 20% for more than 10
minutes. In order to set the speed, click the “Setting” tab on the Warm-up & Self-diagnistics window
and slide the scroll bar under the “Axis Speed”.
④ Use a nonwoven cloth and wipe off the pushed-out dirty grease from the ball bearing. Apply new
grease into the linear guide nut once again afterwards.
⑤ Use a nonwoven cloth and remove excessive grease gathered on the linear guide nut or both ends of
the linear guide, and conduct “Aging” by increasing Axis Speed from low speed to high speed
gradually.
⑥ Both front and rear end of the linear guide are out of the movable range of the linear guide nut and
grease are not spread to there even by moving axis all the way to its ±software limits. Apply grease
to front and rear end of the linear guide with a nonwoven cloth for rust prevention.
NOTE: If a cotton-swab or a woven cloth is used to wipe off the dirty grease, waste threads of cloth may be caught
in the ball screw. Use a nonwoven cloth.
NOTE: Use proper grease for lubrication, specified as our standard. (See the “Specified Lubricants” list at the end
of this chapter.)
NOTE: Remove the excess grease gathered on the nut or both ends of the linear guide by wiping it off with a
nonwoven cloth to avoid grease scattering.

3 Mechanical Section
3-24
■ Lubrication Points for Z-axis Guide / R-axis Spline Shaft
■ Application of grease on a Nozzle Holder
ACTION:
① Use a dry cotton swab to clean the inside of the nozzle holder and remove old grease and dust.
② Use the head vacuum breaker to blow out the dust and fibers from a cotton swab.
NOTE: Go to Main menu > Manual > Actuator > On/Off tab and select “Head Vacuum Breaker, and then Turn on
the vacuum breaker on a target head.
③ Apply silicon grease evenly on the new cotton swab and rub the inside of the Nozzle Holder gently
and evenly.
④ After grease is applied to the nozzle holder , insert a nozzle and confirm that the nozzle escaping
works smoothly.
Ball screw
Linear guide