c900773.R02_EN.pdf - 第130页
6 . Additional Function 14 3. Manual > Dispense > Head Information 3-1. Right-click on a “DP Ty pe” cell and select “Air (Rot ation)”. 3-2. Right-click on a “Sy ringe” cell and select a desired code. Right-click on…
6.Additional Function
13
Program Creation
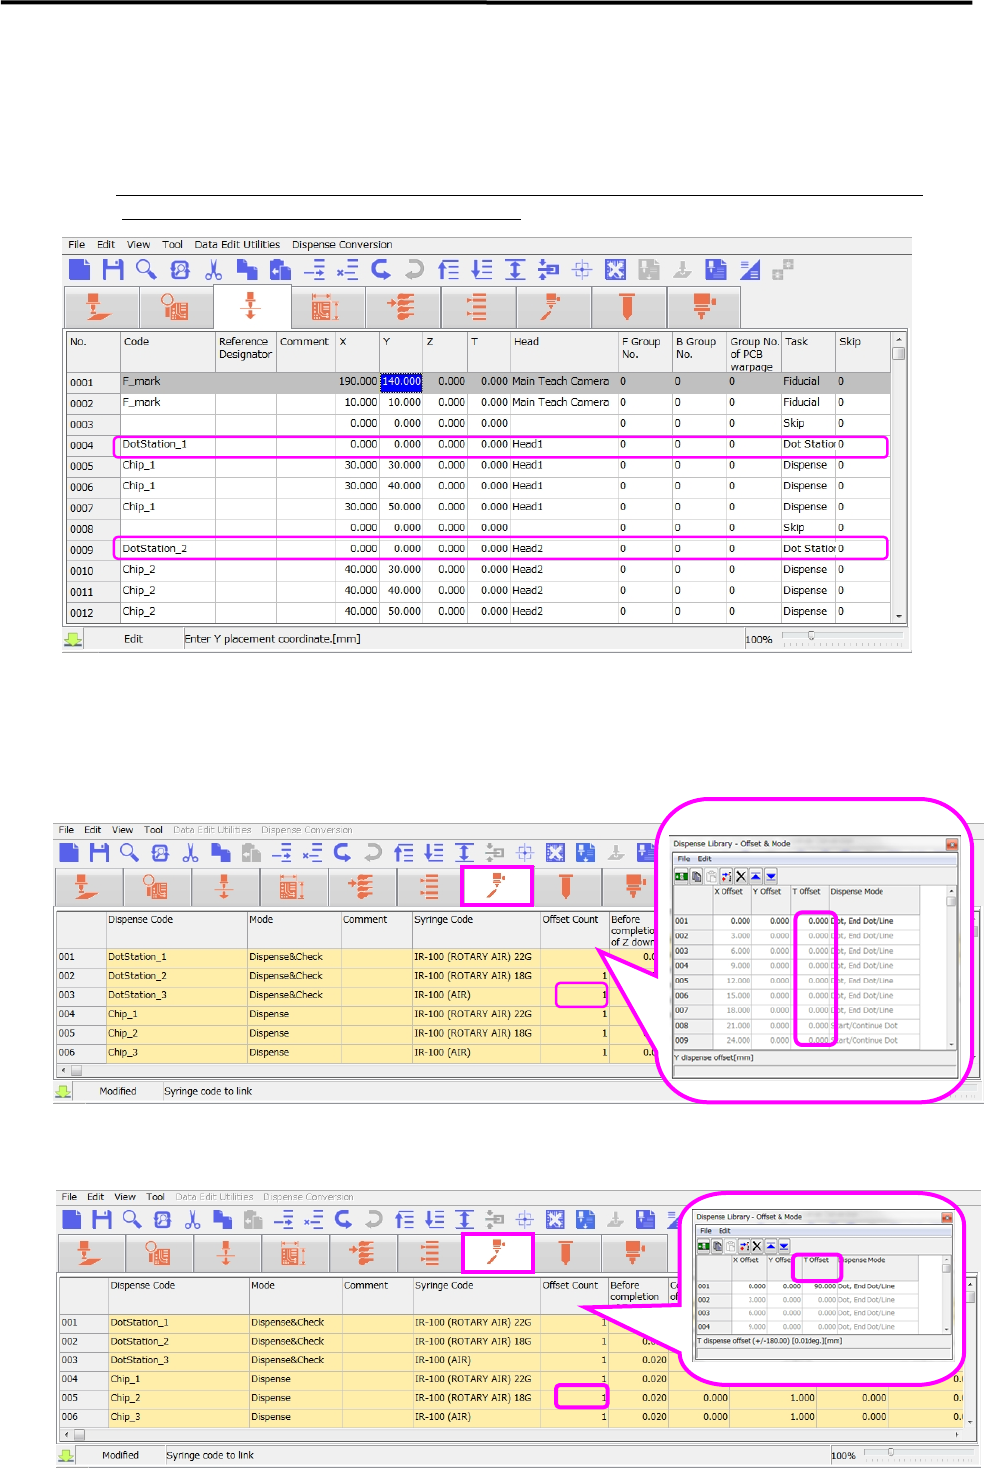
1. Editing PickUp Data
Create one “dot station” record for each dispense code of use (regardless of its rotation angle) and set its
θ coordinate to “0” degree.
※ At production, the rotation angle is automatically calculated according to the angle that the program
specifies, and it is compensated only if necessary.
2. Editing Dispense Data
2-1. Since no specific rotation angle needs to be specified in the “Dispense Offset Count” on a
“Dot Station” record, set “θ Offset” coordinate to “0” degree.
2-2. In order to change a dispensing angle without changing a rotation angle on the ”Placement & Mark”
data, go to the “Dispense” data and change the “θ Offset” value.
6.Additional Function
14
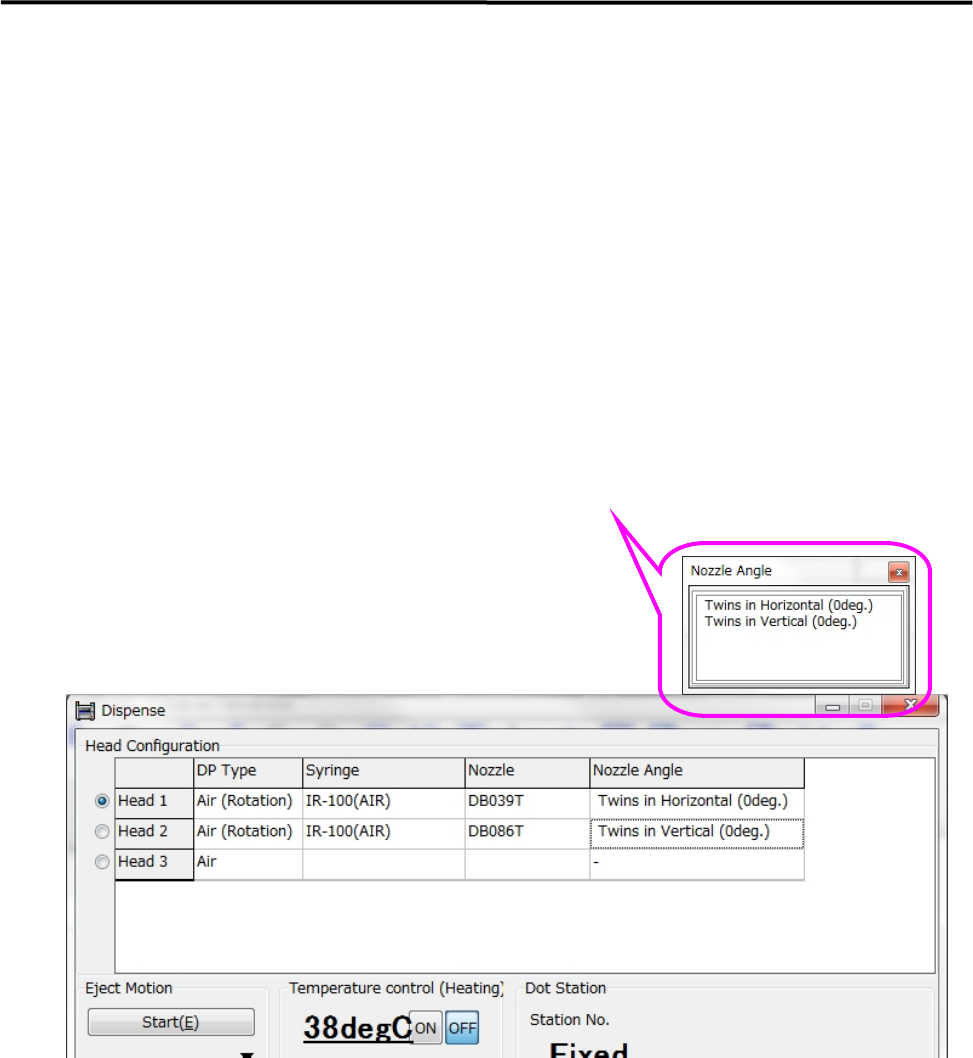
3. Manual > Dispense > Head Information
3-1. Right-click on a “DP Type” cell and select “Air (Rotation)”.
3-2. Right-click on a “Syringe” cell and select a desired code.
Right-click on a “Nozzle” cell and select a desired code.
Right-click on a “Nozzle Angle” cell and select either “Twins in Horizontal (0deg)” or
“Twins in Vertical (0deg)”.
Select the nozzle angle as if the sum of pickup data’s θaxis value and dispense data’s θoffset value
becomes “0” degree.
Since compensation is applied according to the orientation of nozzle, the orientation of nozzle does
not need to be specified when the nozzle is attached to the dispense head.
6.Additional Function
15
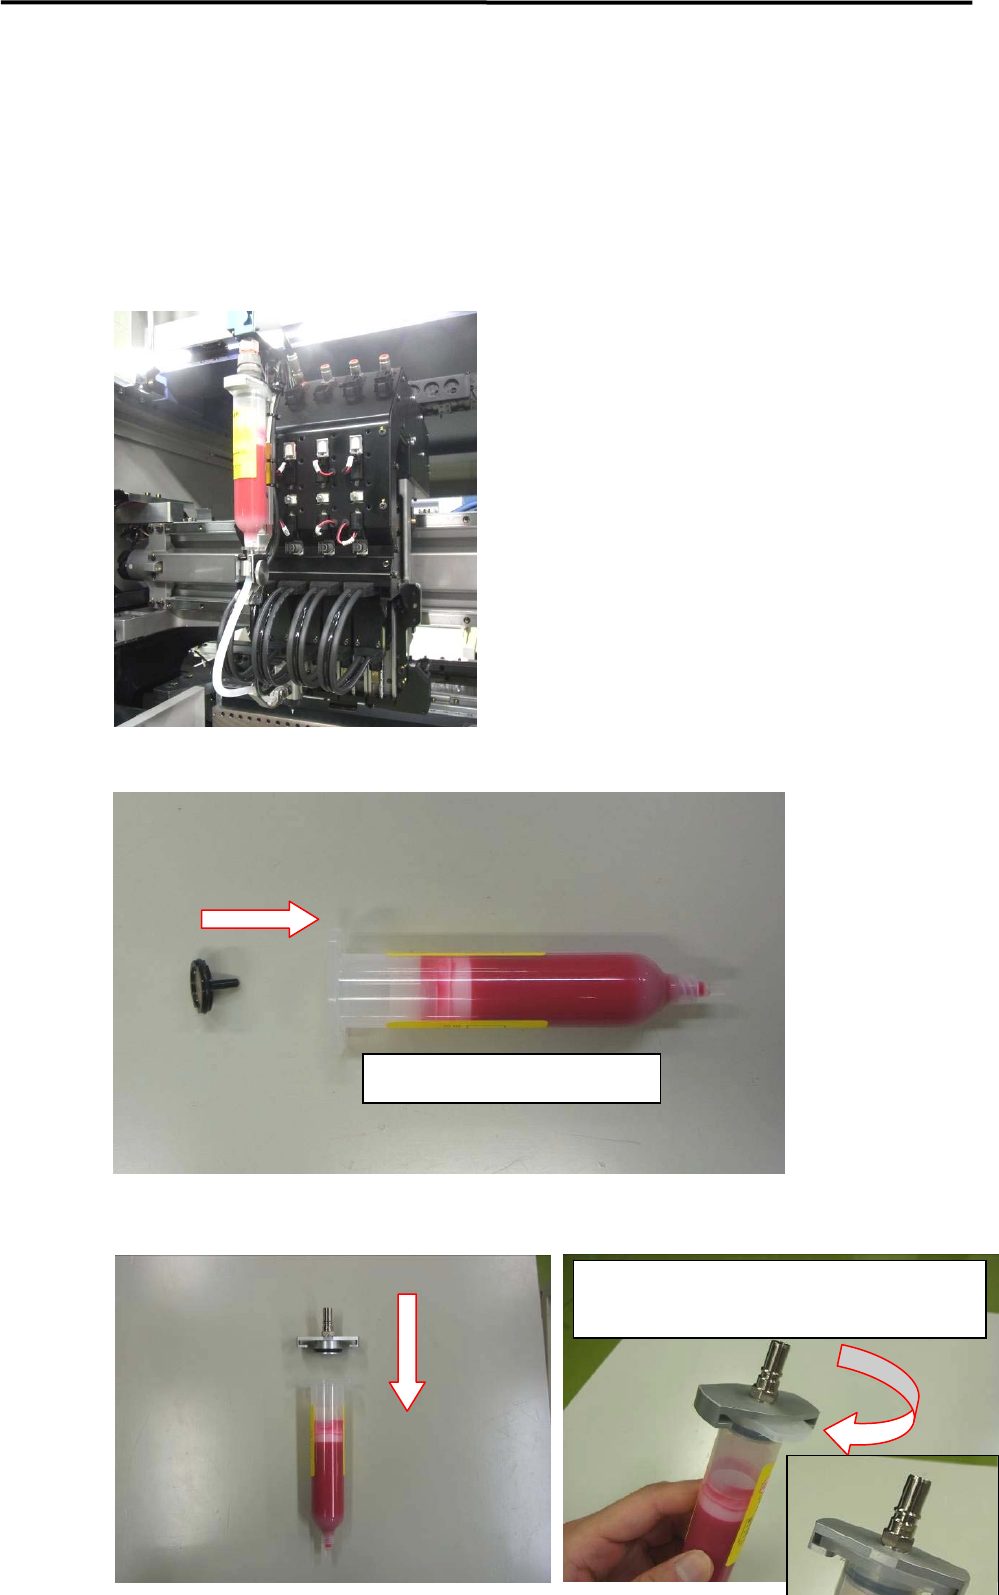
Placement of Dispense Head
Follow the instructions below and place the dispense head.
Insert the fluid shortage detection magnet ASSY to the plunger inside the syringe.
Place the syringe holder.
Insert the magnet into the plunger
Rotate the syringe holder until its collar meets the
color of the syringe.