DECAN_S1_Administrator′s_Guide(Eng_Ver1.5)_Print.pdf - 第162页
6-48 Next Generation, Multi-Functional Plac er DECAN S1 Administrator’s Guide When the Block PCB type is selected in the <T op / Bottom T ype> combo box If you click on the <T op / Btm Mark ...> button, a dia…
6-47
Board Definition
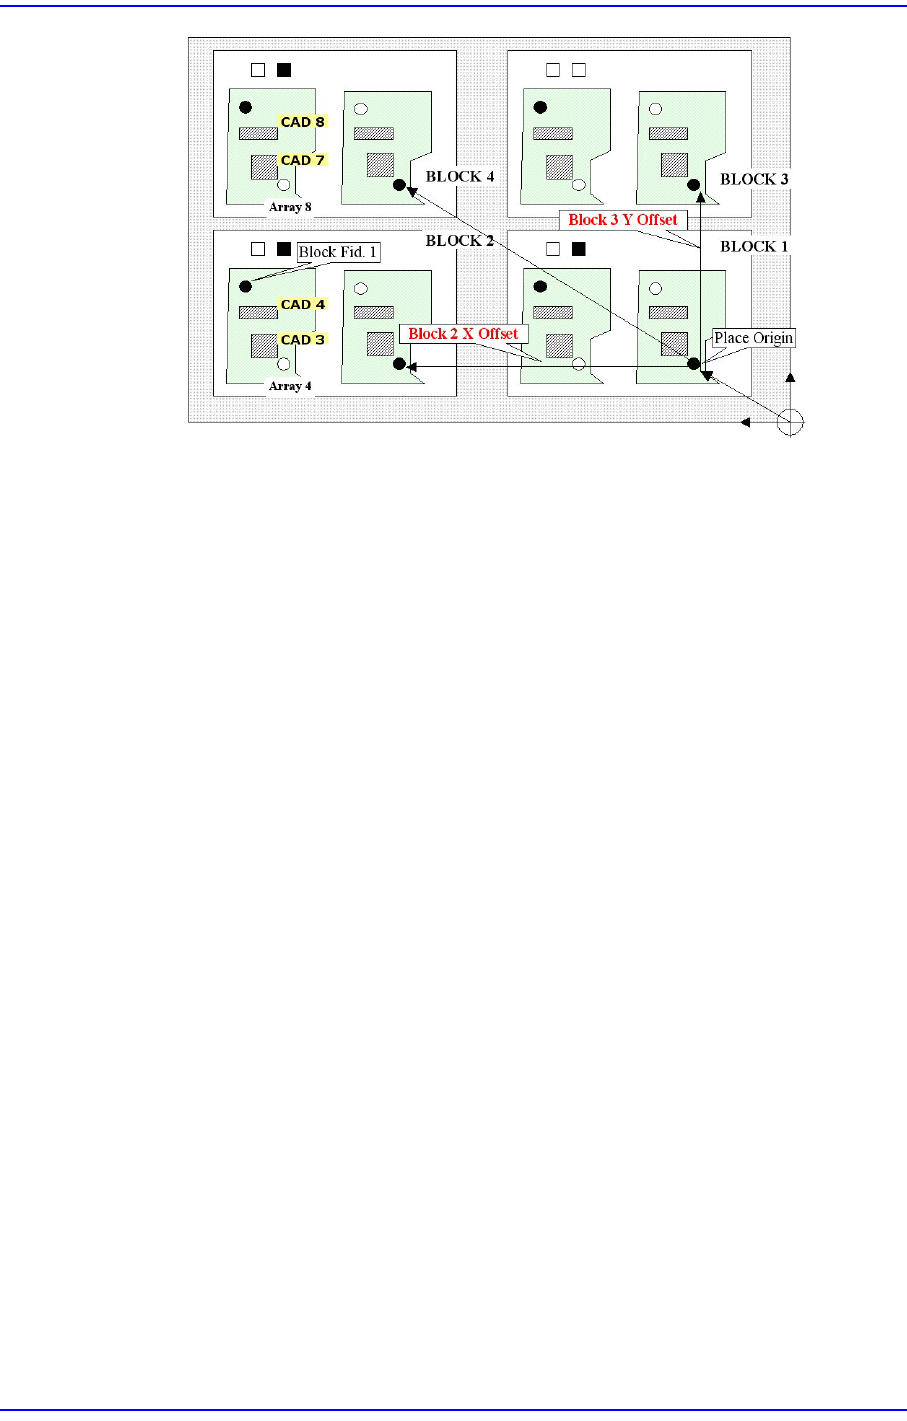
<4. Block Position> group
When Block PCB type is selected in the <Model Type> combo box;
The offset coordinate of the placement origin of each block is indicated. Select <Skip>
column when placement is not performed for the corresponding block.
The procedure to teach the placement origin offset of each block
Select the fiducial camera corresponding to the workstation to which the block
PCB is transferred.
Select the placement origin offset of the block in the <3. Model Position> group.
Click the <Move> button to move to the currently set position.
Click the <Get> button to input the current coordinate.
<Update> button
Saves the PCB model related setup data and closes the “PCB Model” dialog box.
<Cancel> button
Closes the “PCB Model” dialog box without saving the PCB model related setup data.
6-48
Next Generation, Multi-Functional Placer DECAN S1 Administrator’s Guide
When the Block PCB type is selected in the <Top / Bottom Type> combo box
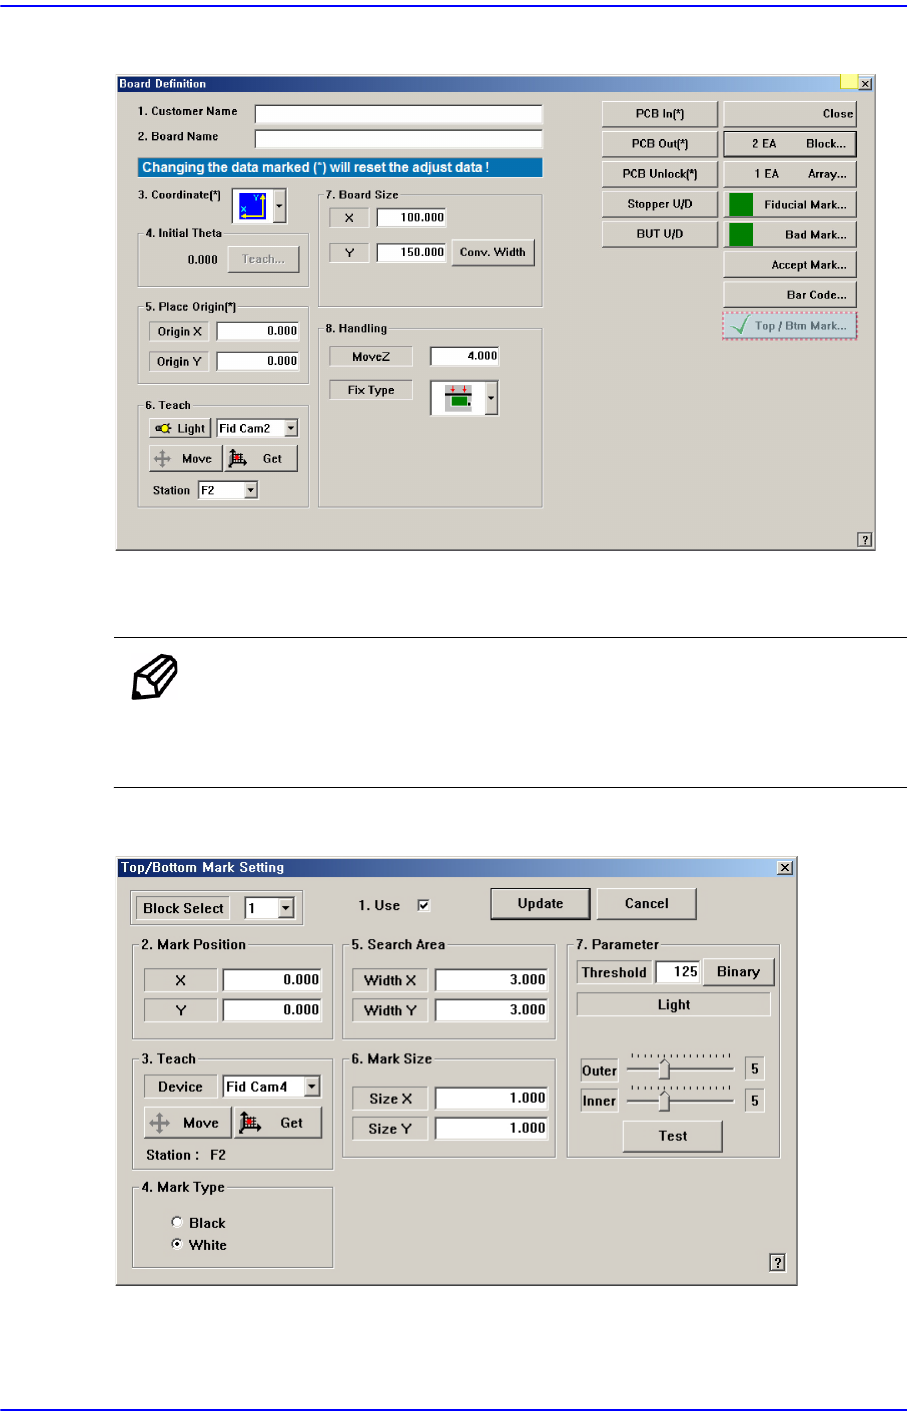
If you click on the <Top / Btm Mark ...> button, a dialog box similar to the following to set
the model type of PCB appears.
Memo In <3. Block Type> combo box of <PCB Block> dialog box, If you
select the Top / Bottom Type in the combo box, will enable the <Top /
Btm Mark ...> button.
Figure6.13 “Top / Bottom Mark Setting” dialog box
<Block Select> combo box
For a Multi PCB

6-49
Board Definition
The model selected from the “Board Definition” dialog box is selected
automatically and the corresponding combo box is disabled.
For a Block PCB
Select the model for which setup will be performed and set other items.
<1.Use> check box
Set whether to use the Accept Mark.
<2. Mark Position> group
The Accept Mark position teaching result is inputted.
<3. Teach> group
Teach the Accept Mark position.
Procedure to teach the Accept Mark
Select the fiducial camera corresponding to the workstation to which a PCB is
loaded.
Click the <<Move> button to move to the position of the currently set Accept
Mark.
Perform adjustments so that the Accept Mark center falls on the crosshair center in
the SMVision window.
Click the <Get> button to input the current coordinate.
<4. Mark Type> group
Select the color of Accept Mark. Available mad mark colors are as follows;
Black: the mark appears darker than the surrounding.
White: the mark appears brighter than the surrounding.
<5. Search Area> group
Set the area to test the Accept Mark. The purpose is to limit the testing area when
recognition is interfered due to a shape similar to the mark near the mark.
<Width X> edit box
Set the range to test in X axis direction. In general, set to 6mm.
<Width Y> edit box
Set the range to test in Y axis direction. In general, set to 6mm.
<6. Mark Size> group
Set the size of Top / Bottom mark in X direction.
<Size X> edit box
The X position value of the Top / Bottom Mark.
<Size Y> edit box
The Y position value of the Top / Bottom Mark.