DECAN_S1_Administrator′s_Guide(Eng_Ver1.5)_Print.pdf - 第408页
14-26 Next Generation, Multi-Functional Plac er DECAN S1 Administrator’s Guide The following shows how to calibrate the fiducial camera scale manually . 1. Click the <2. Ref. Fid. Camera Scale> button in the <Ca…
14-25
Machine Calibration
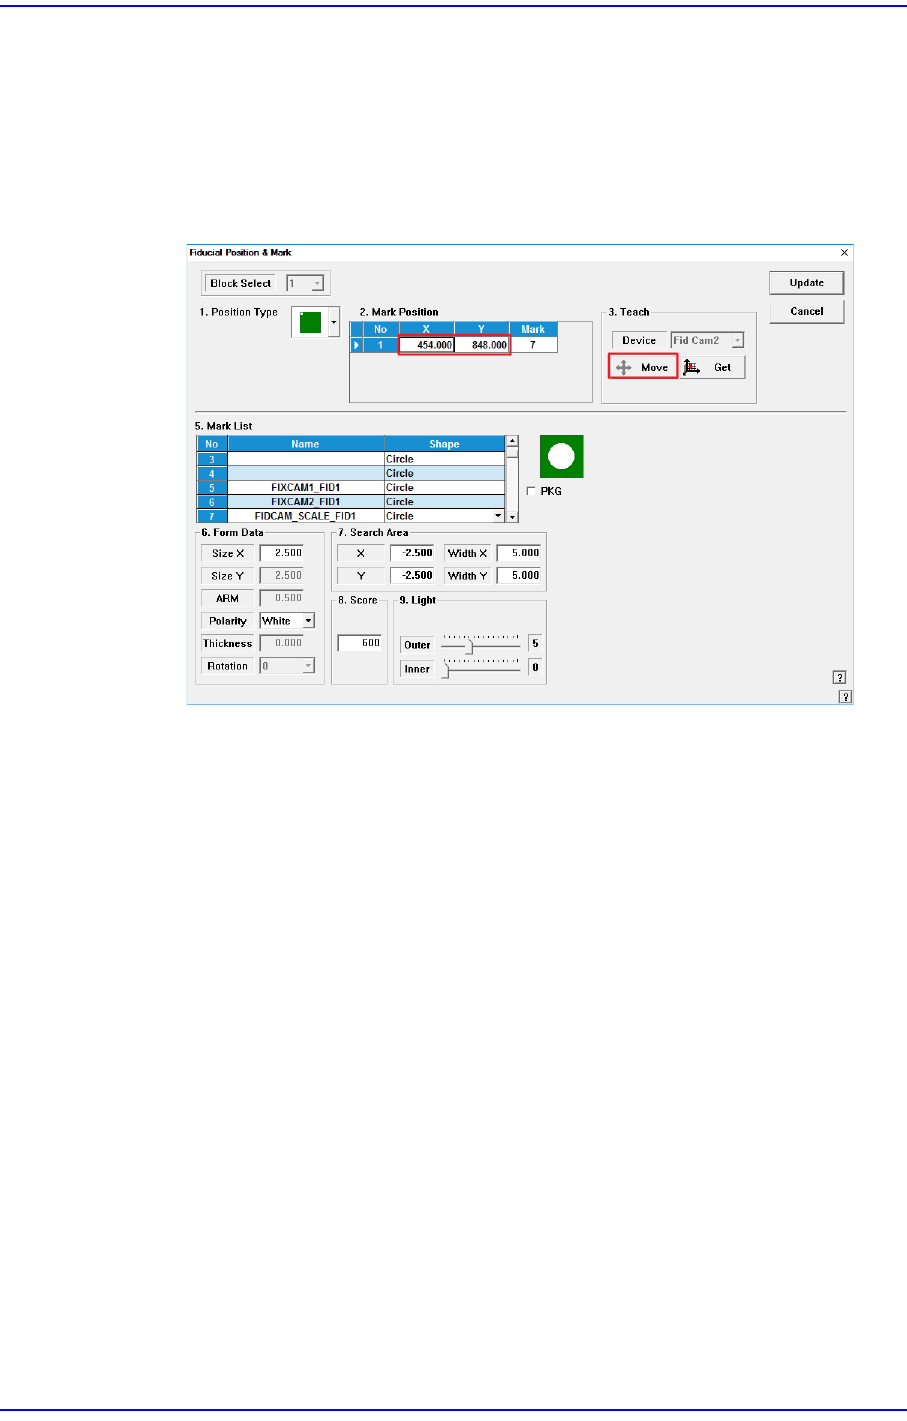
The process of teaching the Fiducial Mark of the ANC top surface using the fiducial
camera is as follows.
1. When performing the mark setup, select the gantry and click the <1. Fid. Scale
Mark Position> button. If the following screen appears, click the <Move> button
in the <Teach> group.
Then the fiducial camera moves to the corresponding position.
2. If the corresponding fiducial mark cannot be recognized correctly, teach the
position of the fiducial mark on the top surface of the ANC. (The size of the
Fiducial Mark is 2.5 mm)
3. If the fiducial mark position teaching is performed accurately, click the <Update>
button to apply the changed value.
<2. Ref. Fid. Camera Scale> button
There is no calibration required to be done in advance in order to calibrate the scale
(um/pixel) and rotation (deg) of the fiducial camera.
14-26
Next Generation, Multi-Functional Placer DECAN S1 Administrator’s Guide
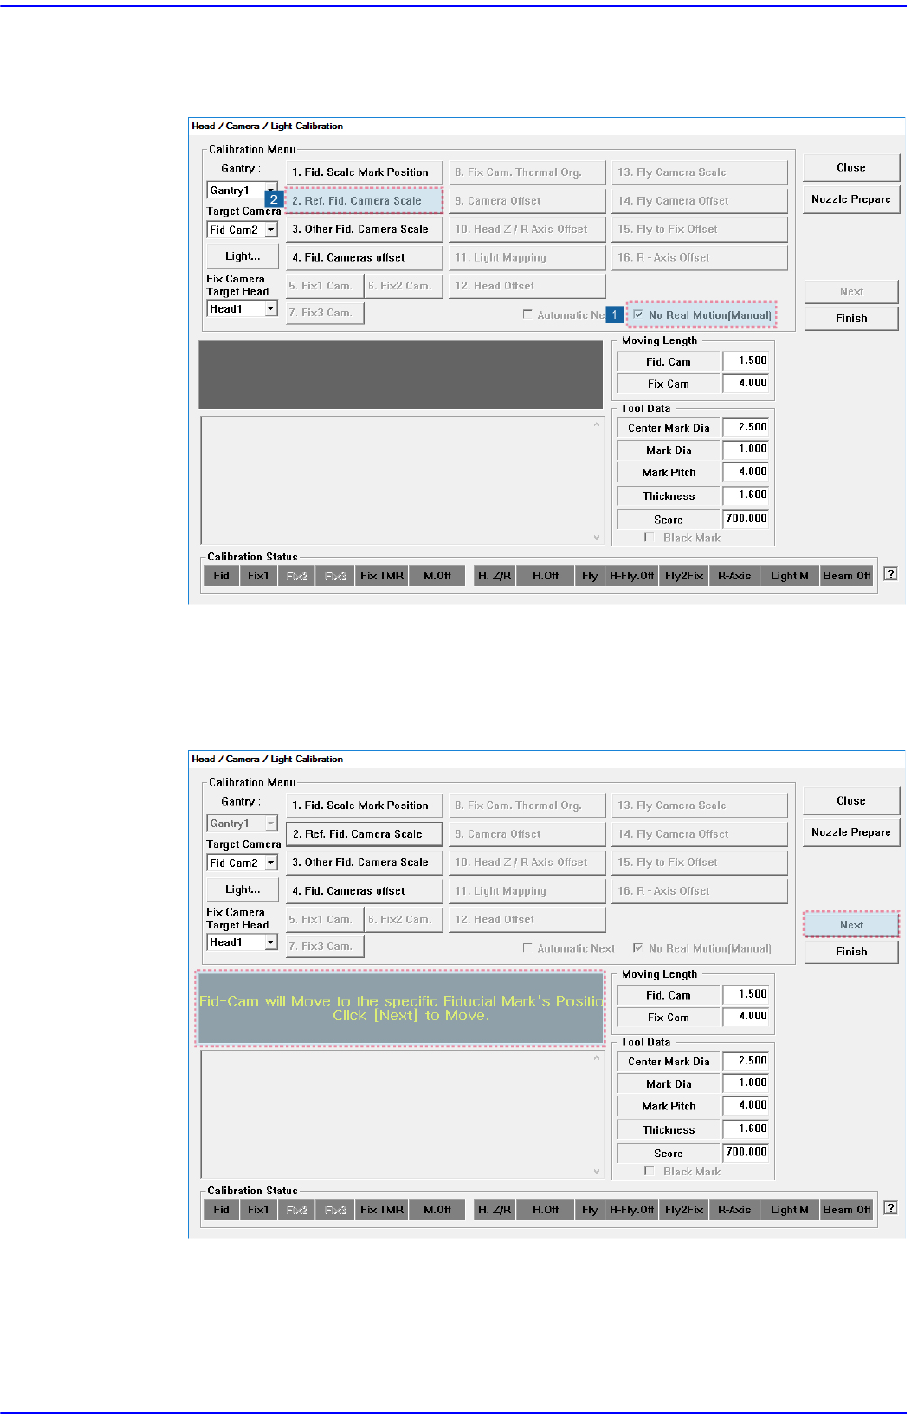
The following shows how to calibrate the fiducial camera scale manually.
1. Click the <2. Ref. Fid. Camera Scale> button in the <Calibration Menu> group.
2. If the <2. Ref. Fid. Camera Scale> button is clicked, a message “Fid-Cam will
Move to the specific Fiducial Mark’s position on ANC. Click [Next] to Move.”
appears in the message box. Click the <Next> button to move the fiducial camera
to the ANC's Fiducial Mark position.
14-27
Machine Calibration
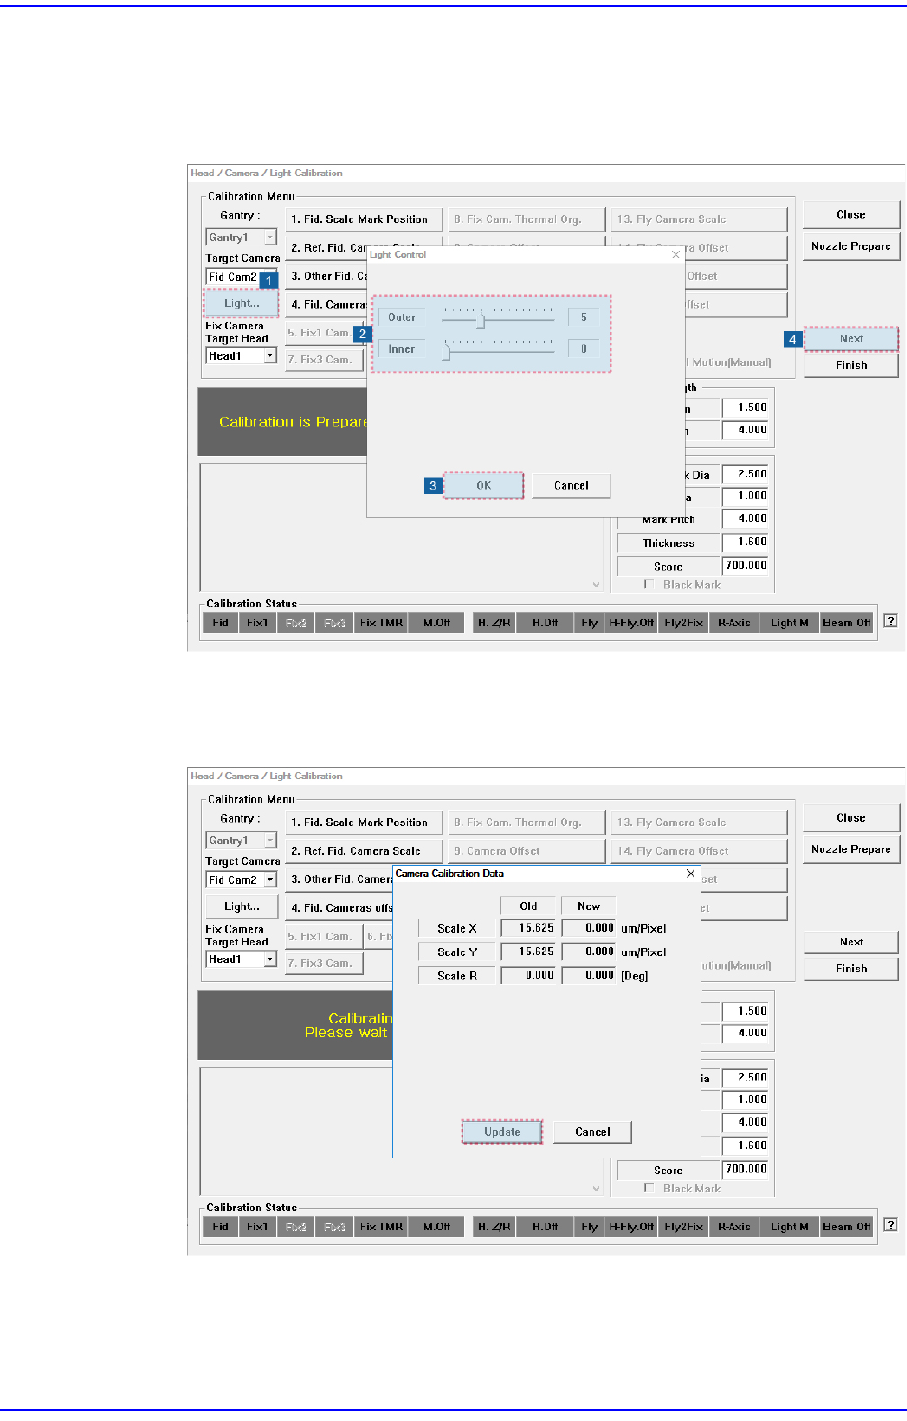
3. The message “Calibration is Prepared. To Calibrate, Click [Next]” appears. At this
time, click the <Light…> button and adjust the brightness of the light in the ‘Light
Control’ dialog box so that the fiducial mark that is seen in the ‘SMVision’
window can be seen clearly. Then click the <Next> button.
4. The calibration is performed automatically. If it is completed, the calibration result
is displayed as shown in the following figure. Click the <Update> button to apply
the new calibration value.