DECAN_S1_Administrator′s_Guide(Eng_Ver1.5)_Print.pdf - 第410页
14-28 Next Generation, Multi-Functional Plac er DECAN S1 Administrator’s Guide 5. When using two fiducial ca meras per gantry , press <3. Ot her Fid. Camera Scale> button to calibrate it in the same manner . Memo T…
14-27
Machine Calibration
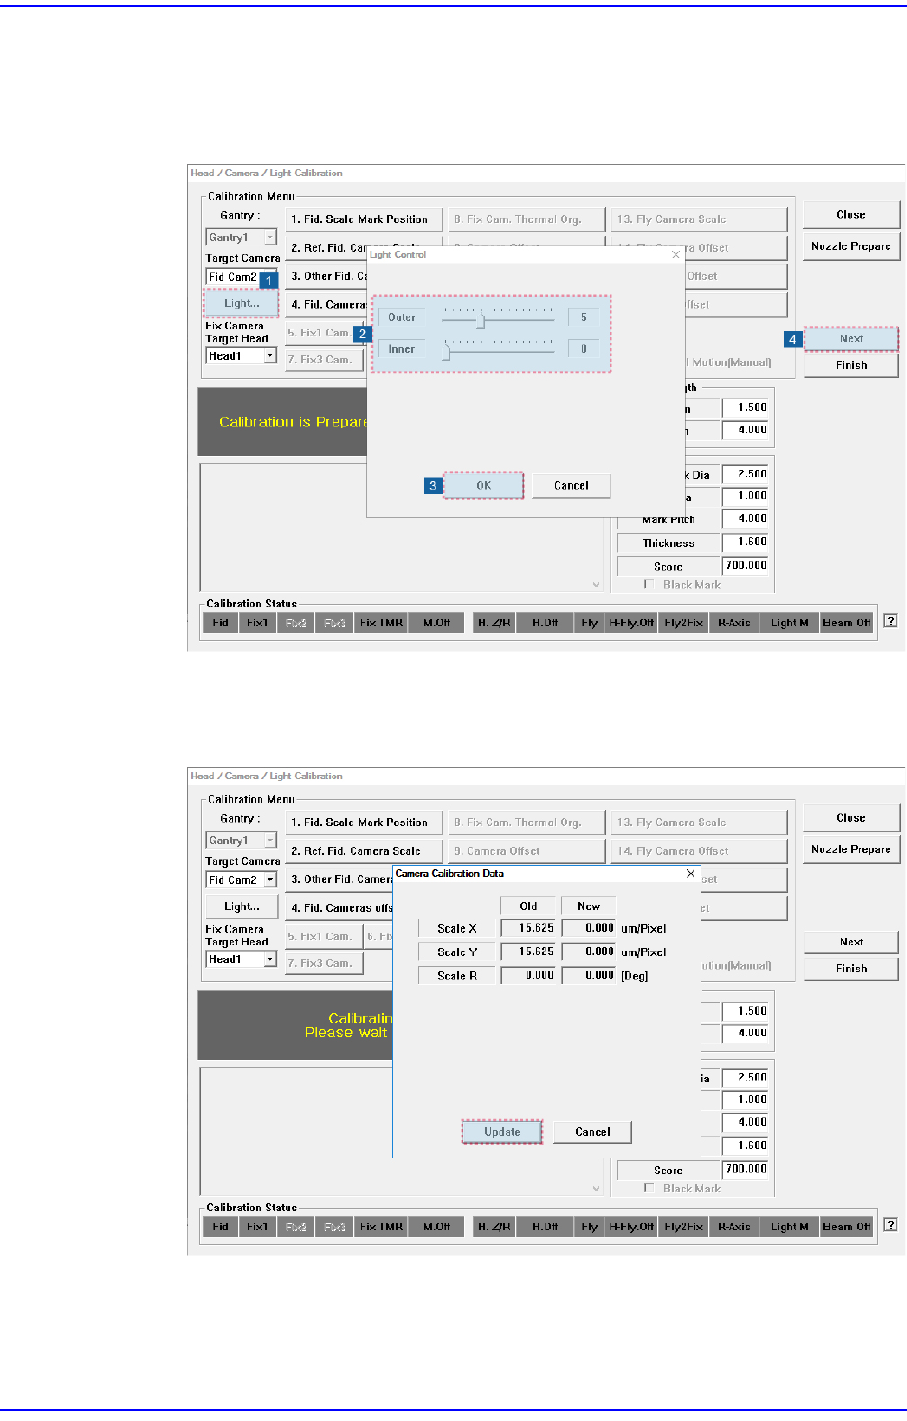
3. The message “Calibration is Prepared. To Calibrate, Click [Next]” appears. At this
time, click the <Light…> button and adjust the brightness of the light in the ‘Light
Control’ dialog box so that the fiducial mark that is seen in the ‘SMVision’
window can be seen clearly. Then click the <Next> button.
4. The calibration is performed automatically. If it is completed, the calibration result
is displayed as shown in the following figure. Click the <Update> button to apply
the new calibration value.
14-28
Next Generation, Multi-Functional Placer DECAN S1 Administrator’s Guide
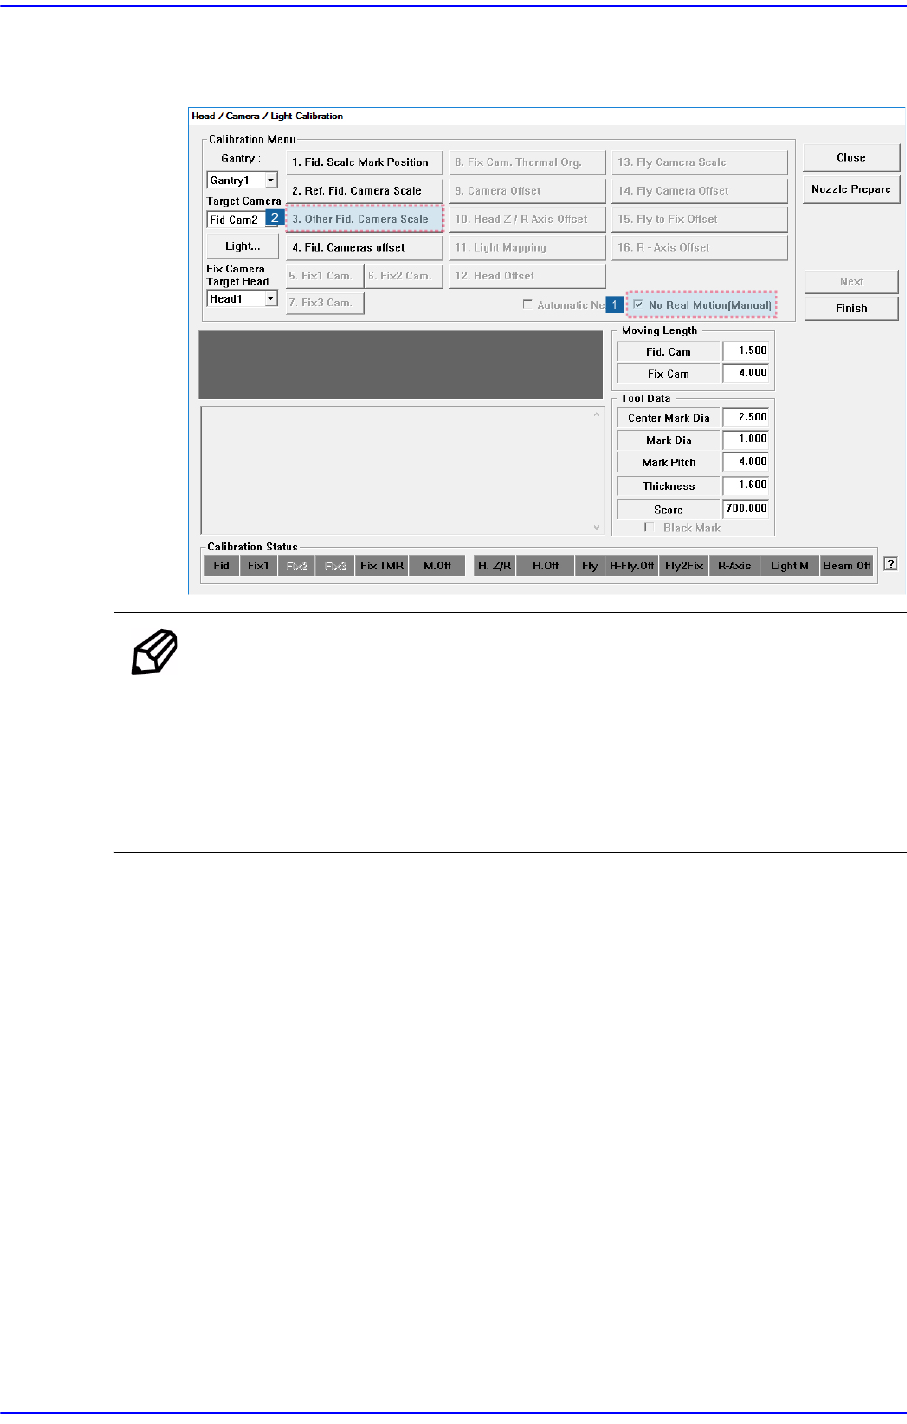
5. When using two fiducial cameras per gantry, press <3. Other Fid. Camera Scale>
button to calibrate it in the same manner.
Memo The reference values for the calibration of the (Ref. / Other) Fiducial
Camera (FOV7.5) is as follows.
ScaleX: 13.0 ~ 17.0 (μm/pixel)
ScaleY: 13.0 ~ 17.0 (μm/pixel)
ScaleR: -0.5 ~ 0.5 (deg)
14-29
Machine Calibration
14.3.4. Fiducial Cameras Offset Calibration
Measure the distance between the center of the gantry's Ref. Fiducial Camera and that of
the Other Fiducial Cameras.
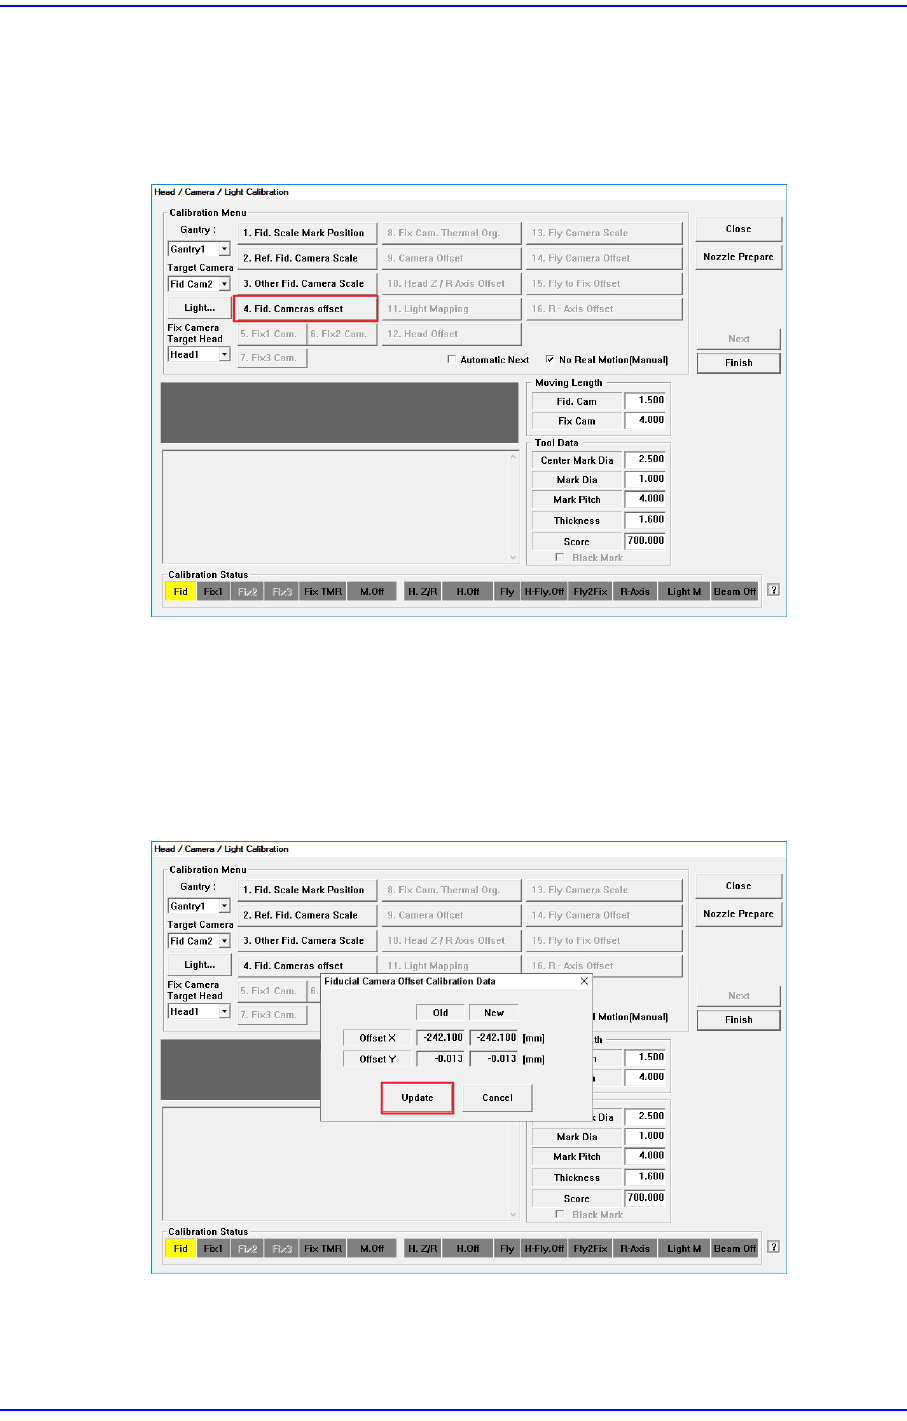
1) Click the <4. Fid. Cameras Offset> button in the <Calibration Menu> group.
Move the Ref. Fiducial Camera to the Mark position set in the Fiducial Camera Scale
Calibration to measure the center position of the Mark.
Next, move the Other Fiducial Camera to the Mark position to measure the center
position of the Mark.
2) Once calibration is completed, the calibration result is displayed as shown in the
following figure. Click the <Update> button to apply the calibration value.
The measurement result can be confirmed in the Head Offset dialog box.