DECAN_S1_Administrator′s_Guide(Eng_Ver1.5)_Print.pdf - 第239页
7-75 Part Registration <Gap1 Start> column Set the first empty lead in the lead group. There are no leads after the lead on the starting number . <Gap1 Miss> column Set the first empty lead in the lead gr…
7-74
Next Generation, Multi-Functional Placer DECAN S1 Administrator’s Guide
7.1.4.2. Lead Group
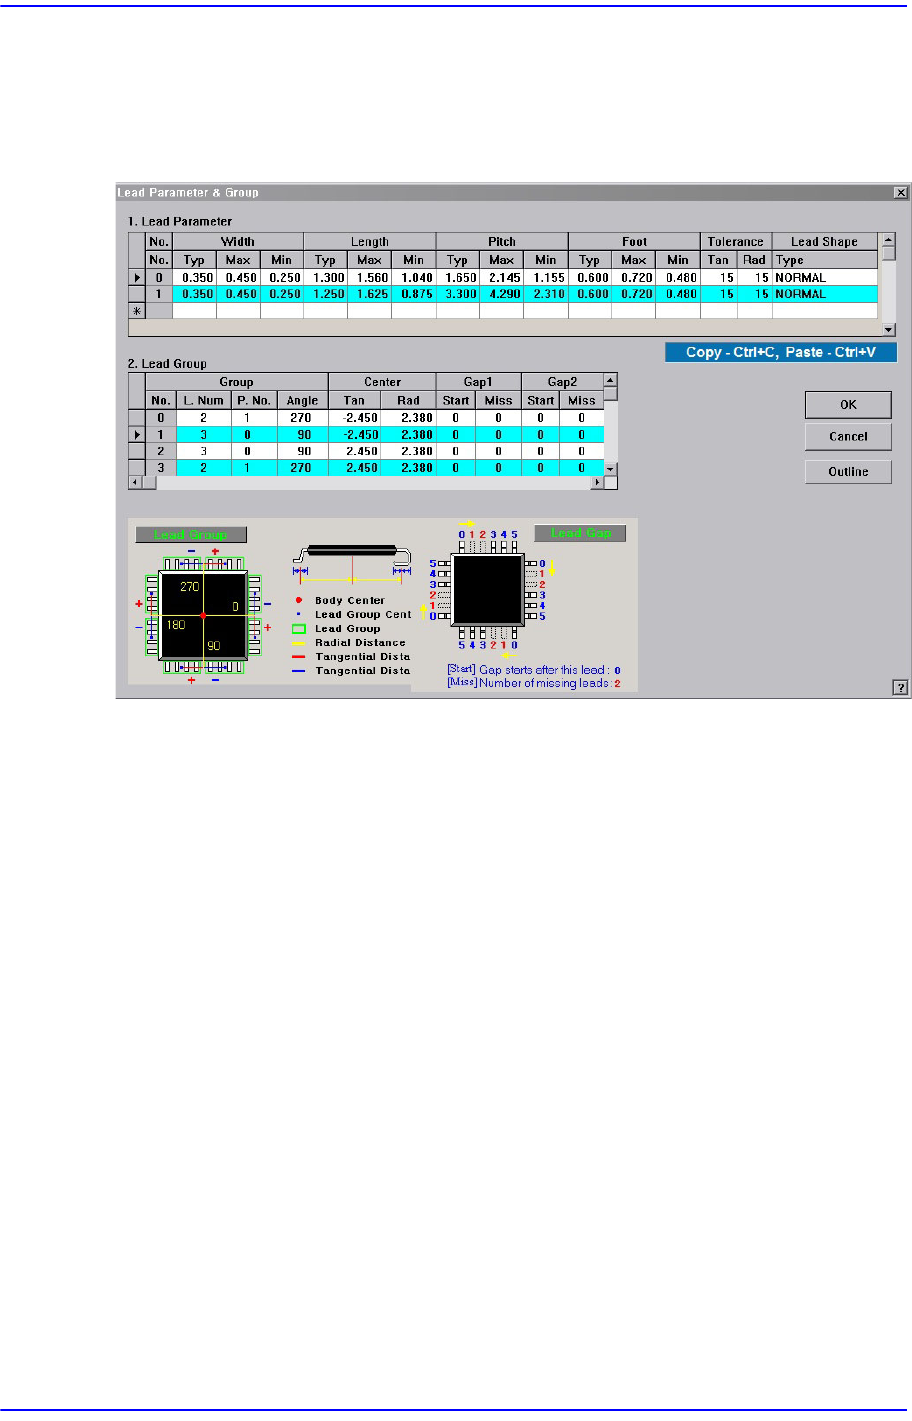
Set the lead group for User IC. Up to 16 lead groups can be set.
Figure7.26 Screen showing “Lead Group” setting in the dialog box for “User IC Lead Parameter
& Group”
<Lead Group> group
Set the lead group.
<Group No.> column
Displays the lead group number. Applicable range is 0 –15.
<Group L. Num> column
Set the number of leads the lead group has.
<Group P. No.> column
Set the lead parameter number referenced by the lead group. Applicable range is 0
–7.
<Group Angle> column
Set on which side of the component the lead group exists. 0, 90, 180, and 270 in
the above figure denotes the angles.
<Center Tan> column
Set the distance from the component origin point (component center in general) to
the center of the lead group along the tangential line.
<Center Rad> column
Set the distance from the component origin point (component center in general) to
the center of the lead group along the tangential line.

7-75
Part Registration
<Gap1 Start> column
Set the first empty lead in the lead group.
There are no leads after the lead on the starting number.
<Gap1 Miss> column
Set the first empty lead in the lead group.
As many leads as the number of miss are missing.
<Gap2 Start> column
Set the second empty lead in the lead group.
There are no leads after the lead on the starting number.
<Gap2 Miss> column
Set the second empty lead in the lead group.
As many leads as the number of miss are missing.
<Gap3 Start> column
Set the third empty lead in the lead group.
Set the third empty lead in the lead group.
<Gap3 Miss> column
Set the third empty lead in the lead group.
As many leads as the number of miss are missing.
<Gap4 Start> column
Set the fourth empty lead in the lead group.
There are no leads after the lead on the starting number.
<Gap4 Miss> column
Set the fourth empty lead in the lead group.
As many leads as the number of miss are missing.
7-76
Next Generation, Multi-Functional Placer DECAN S1 Administrator’s Guide
7.1.4.3. Placing HDMI Connector
When placing the HDMI Connector, register the part data and teach the placement point of
the corresponding part. It cannot be used for the equipment without the fix camera.
Part Data Registration
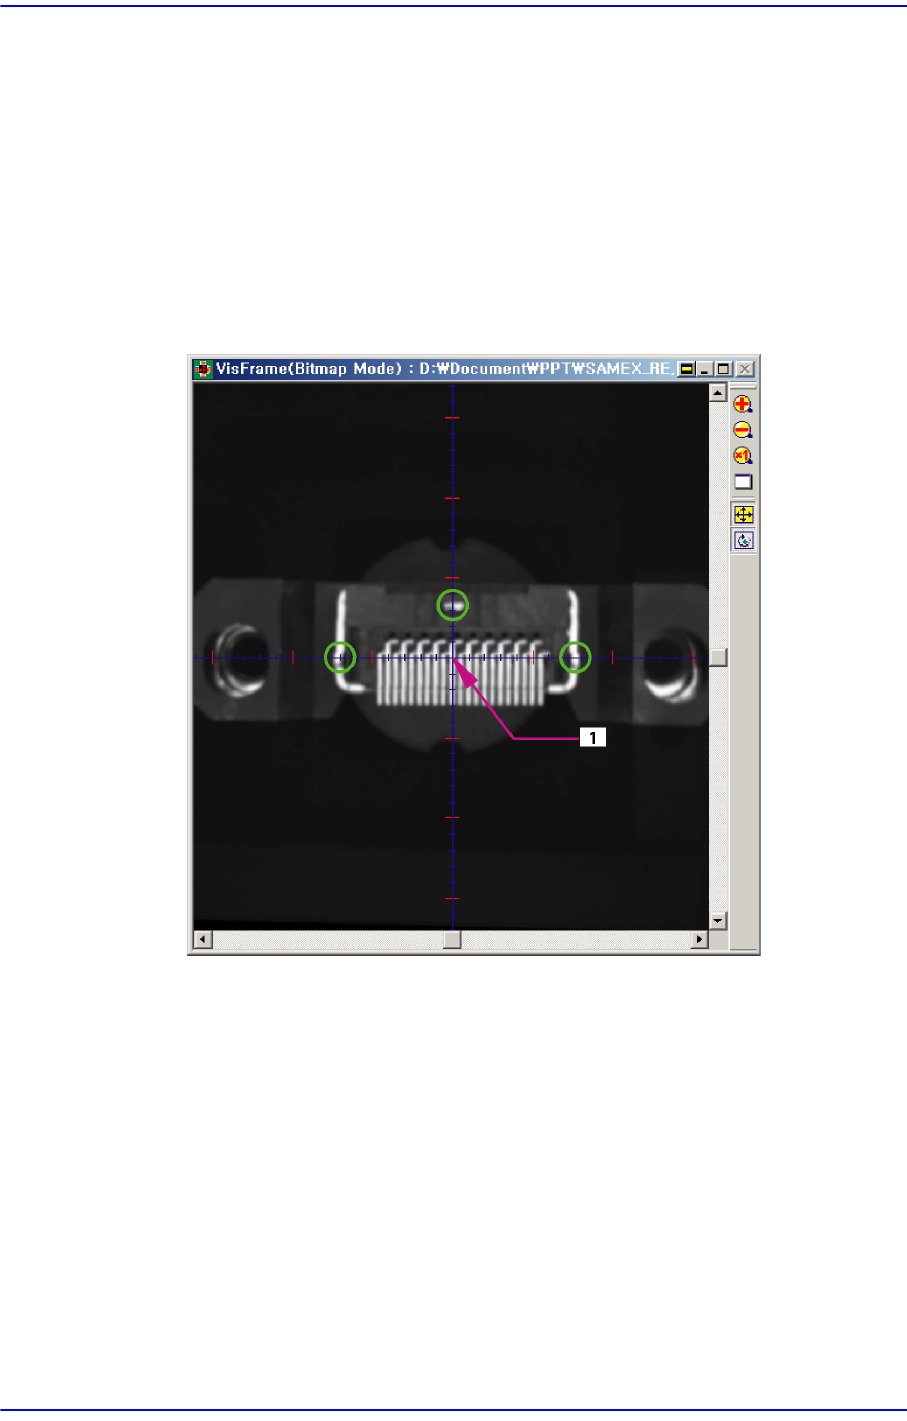
Move the head that picked up the part to the center of the fix camera using the
teaching box as shown in the following figure.
Move the gantry so that the pin position into which the part is inserted can be
placed on the cross hair of the SMVision window. Set the accurately taught
position to the center of the part.
1: Part Center
Click the <Lead Parameter & Group> button and change the Rad and Tan values
of the lead center among the lead parameters. At this time, perform adjustment so
that the lead end does not get placed on the horizontal line in parallel to the bright
area of the part.