DECAN_S1_Administrator′s_Guide(Eng_Ver1.5)_Print.pdf - 第519页
15-53 System Setup <Update> Button Saves the setup and closes the dialog box. <Cancel> Button Neglects the setup and closes the dialog box. <Default> Button Recovers the setup to the default (reco…

15-52
Next Generation, Multi-Functional Placer DECAN S1 Administrator’s Guide
<Option Slave> group.
<Option(Master / Slave Mode)> group
<Bad Mark Info> check box
In order to transmit bad mark information to the next machine, select this
check box. Once this information has been transmitted to the next machine,
the next machine performs work without recognizing the bad marks.
<Fiducial Info> check box
For array PCBs, select this check box in order to transmit fiducial mark
information on each array to the next machine. Once this information has been
transmitted to the next machine, the next machine performs work recognizing
only the global fiducial mark of the array PCB.
<Height Info> check box
If there is a height sensor, it is possible to measure the height of the upper
surface of the PCB. Select this box in order to transmit information regarding
the height of the upper surface of the PCB to the next machine.
<1D Barcode Info with worktable> check box
Select this to transfer 1D barcode information from the system that uses the
1D scanner installed on the worktable to the next system. It interworks with an
external MES system such as the iTAC program. For more details regarding
this, contact us.
<1D Barcode Info with internal scanner> check box
Select this to transfer 1D barcode information from the machine that uses the
1D scanner installed on the machine to the next machine. It interworks with an
external MES system such as the iTAC program. For more details regarding
this, contact us.
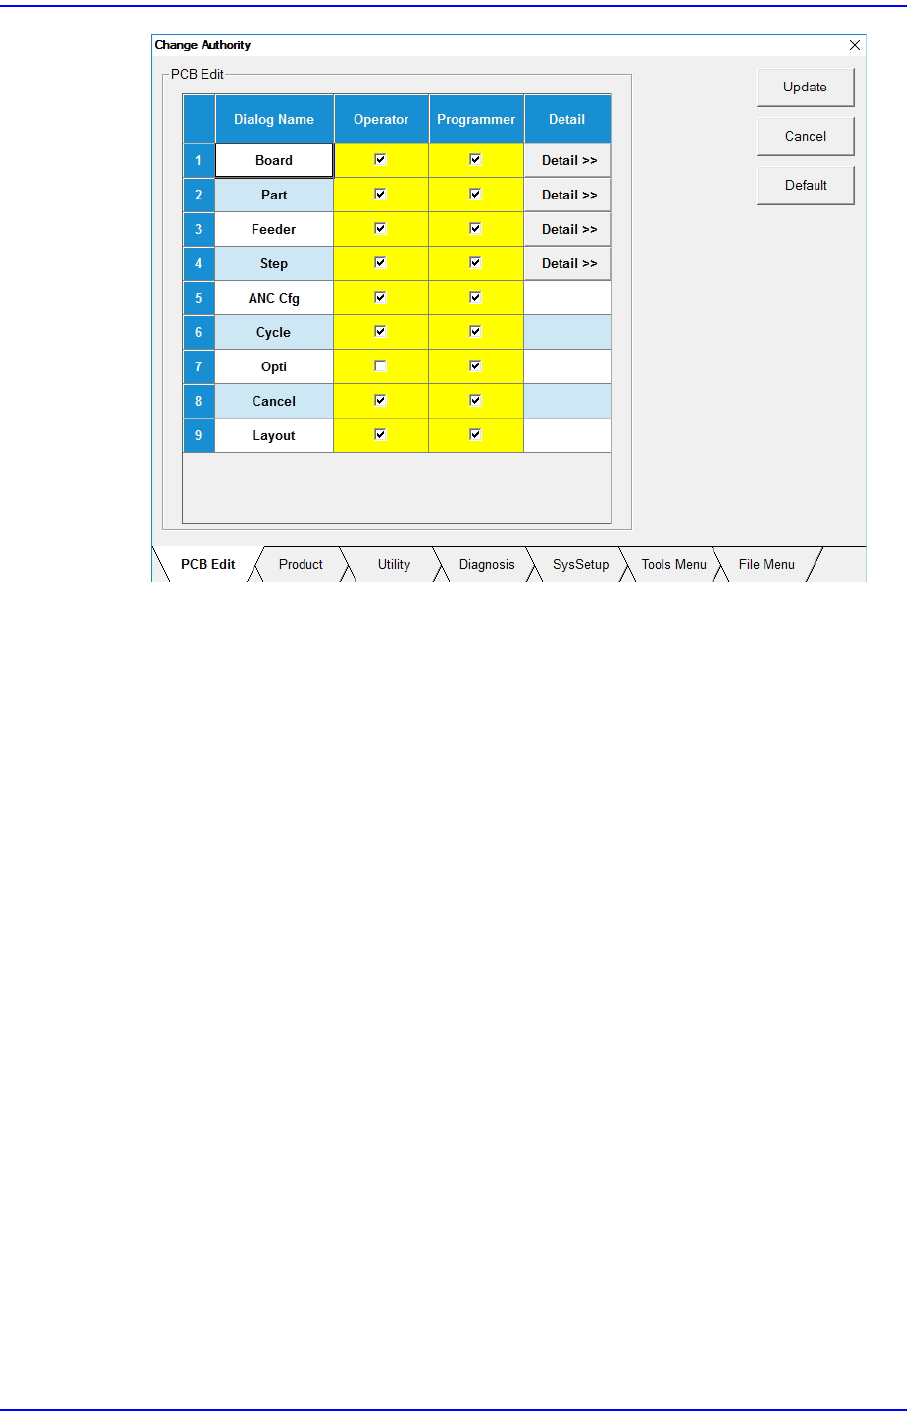
<Change Authority> Button
Sets the authorization level of a user. The currently applied authorization level setup
function is used by default. However, if an operator plays the role of a programmer, it
is possible to perform setup to allow the operator to use some functions used with the
authorization level of the programmer.
15-53
System Setup
<Update> Button
Saves the setup and closes the dialog box.
<Cancel> Button
Neglects the setup and closes the dialog box.
<Default> Button
Recovers the setup to the default (recommended) setup in the machine.
<PCB Edit> Tab
Sets the authorization level for the submenus of the <PCB Edit> menu.
<Product> Tab
Sets the authorization level for the submenus of <Product> menu.
<Utility> Tab
Sets the authorization level for the submenus of <Utility> menu.
<Diagnosis> Tab
Sets the authorization level for the submenus of the <Diagnosis> menu.
<SysSetup> Tab
Sets the authorization level for the submenus of <Sys.Setup> menu..
<Tools Menu> Tab
Sets the authorization level for the submenus of <Tools Menu> menu.
15-54
Next Generation, Multi-Functional Placer DECAN S1 Administrator’s Guide
<File Menu> Tab
Sets the authorization level for the submenus of <File Menu> menu.
The authorization setup can be used only for the Service mode or higher. It is set up by
checking or releasing the check of the check box for the corresponding item in the
Setup screen..
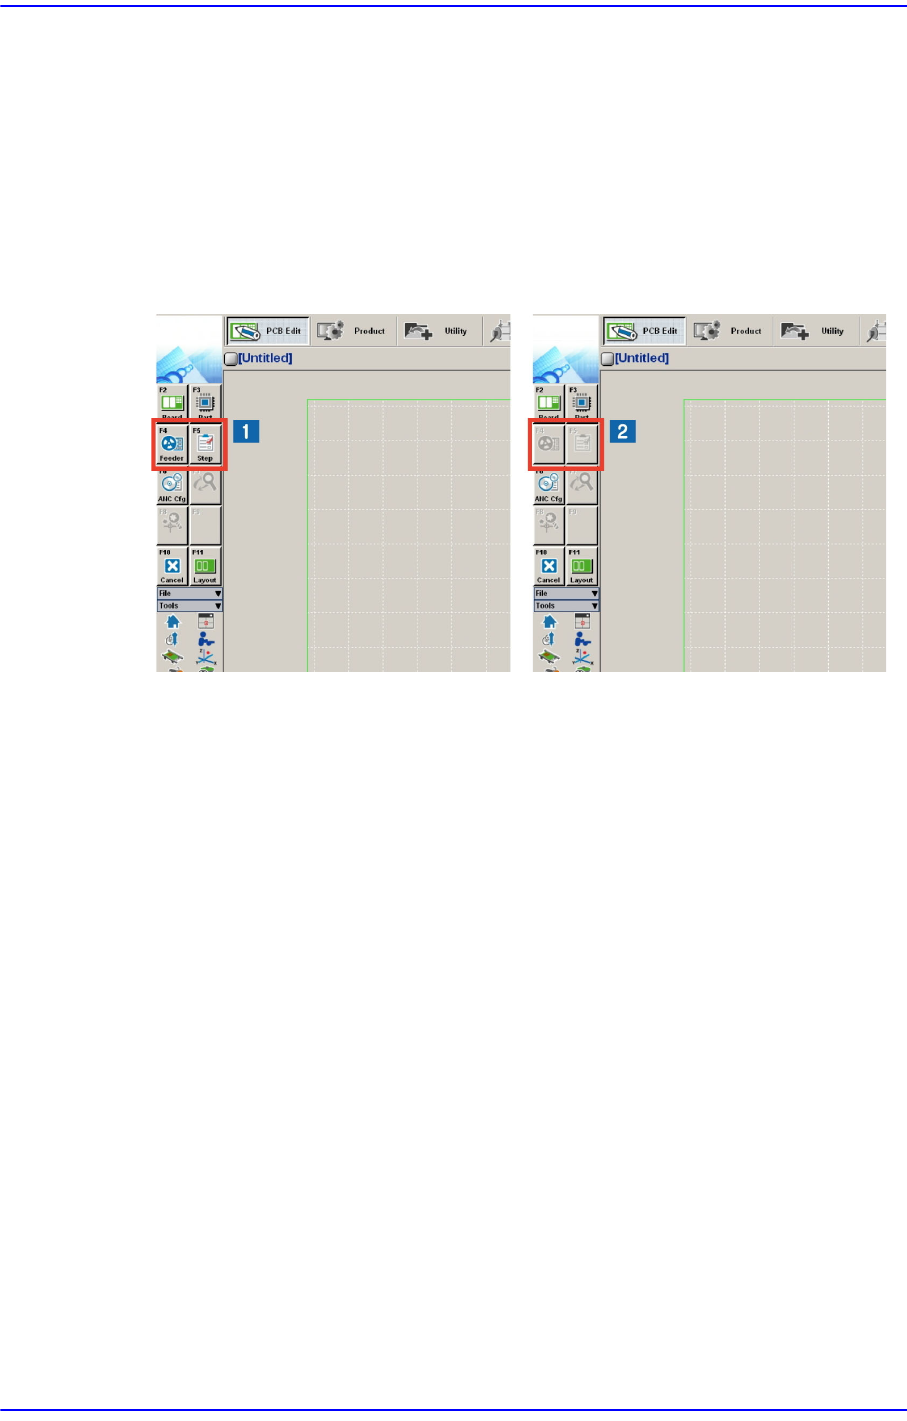
Submenus of the corresponding menu are enabled or disabled as shown below
according to the setup performed in the Setup menu. The disabled menu cannot be
used.
1:User authorization level setup menu
2:User authorization level release menu
<Telemetry Auto Save> Check Box
Selecting this check box will allow the Telemetry Log file to be saved automatically
when an emergency condition occurs. The name of the folder and file for default
saving is “C:SmartSM\Log\Machine Type_SW Version_Machine Unit
Information_Time of Occurrence(_E-Error Code).tmr”.
The basic concept for saving a log file is as follows:
1st Stage
1.Clicking the Stop button (<Up Load> button) will:
In the Start state: Upload and save the file automatically.
In the Stop state: Save the uploaded information in the file automatically.
2.Clicking the Start button will:
In the Start state: Change the state to the Stop state and save the file
automatically. The state is then changed to the Start state.
In the Stop state: Delete the uploaded information and change the state to the
Start state.
3.Define the rule for naming files when using automatic saving.