Service Manual HS60.pdf - 第268页
7 DL M2 Co llec t &P lace Head H S-6 0 S erv ic e Manu al 7. 5 R ep la cing th e c o lle c t&p la ce h ead / DLM 2 ( 0 0367 77 0-0 1) 03/ 2 003 U S I ss ue 266 Æ Und o the four hex agon s ocket-head sc r e ws (M …
HS-60 Service Manual 7 DLM2 Collect&Place Head
03/2003 US Issue 7.5 Replacing the collect&place head / DLM2 (00367770-01)
265
7
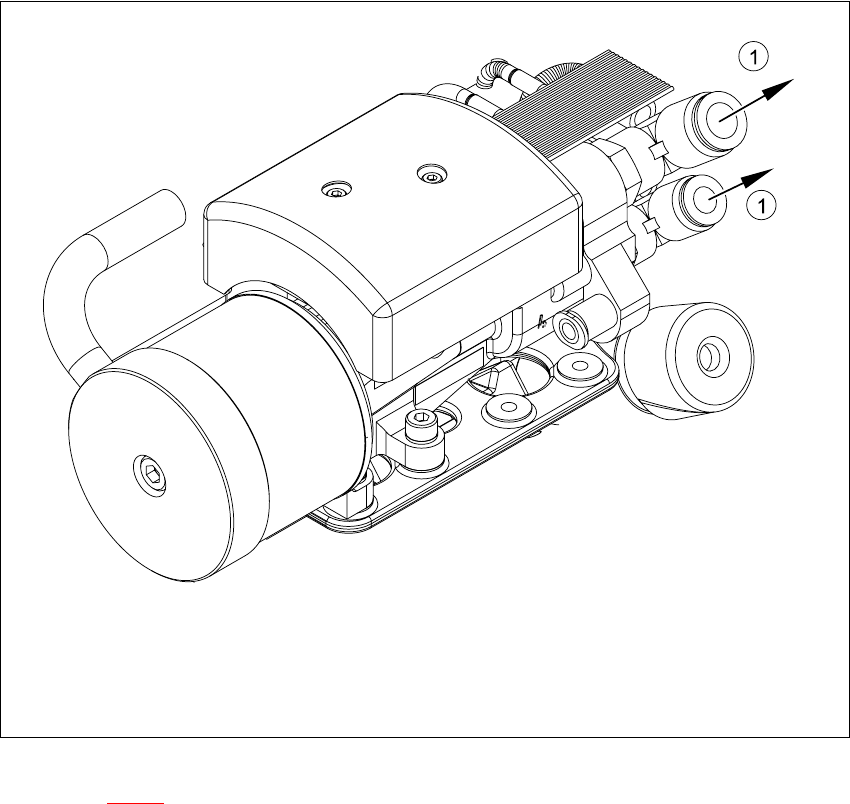
Fig. 7.5 - 2 Collect&place head - compressed air connections
Key to Fig. 7.5 - 2
(1) Compressed air connections
7
Æ Remove the black compressed air hose (1) from the compressed air connector.
7 DLM2 Collect&Place Head HS-60 Service Manual
7.5 Replacing the collect&place head / DLM2 (00367770-01) 03/2003 US Issue
266
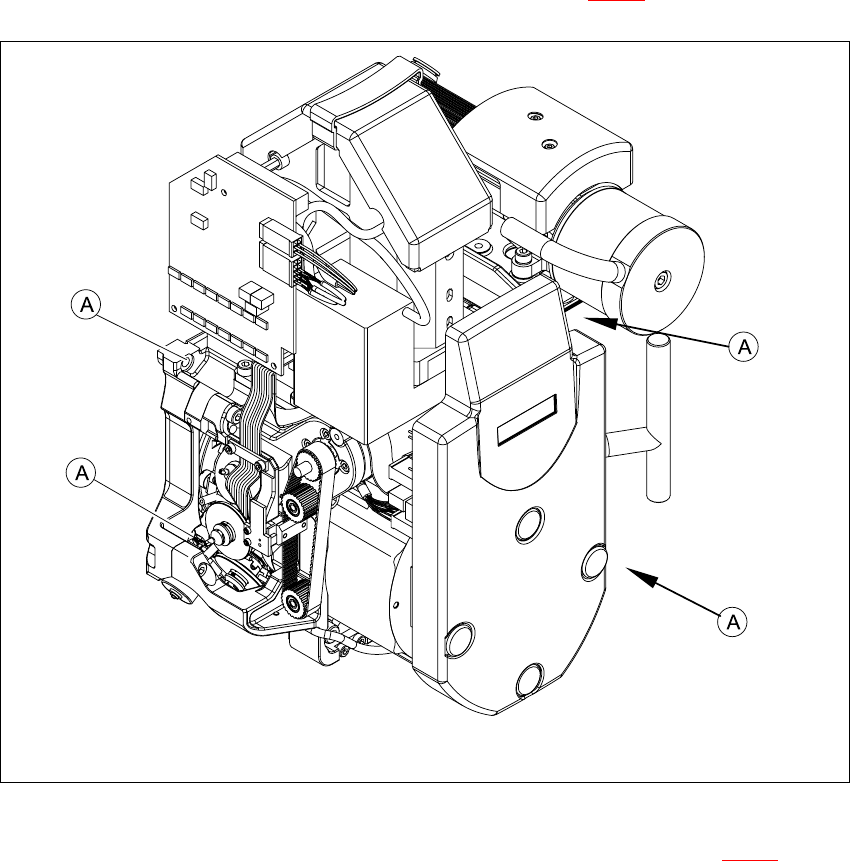
Æ Undo the four hexagon socket-head screws (M4x16) (item A in 7.5 - 3).
7
Fig. 7.5 - 3 Fixing the collect&place head on the head mount
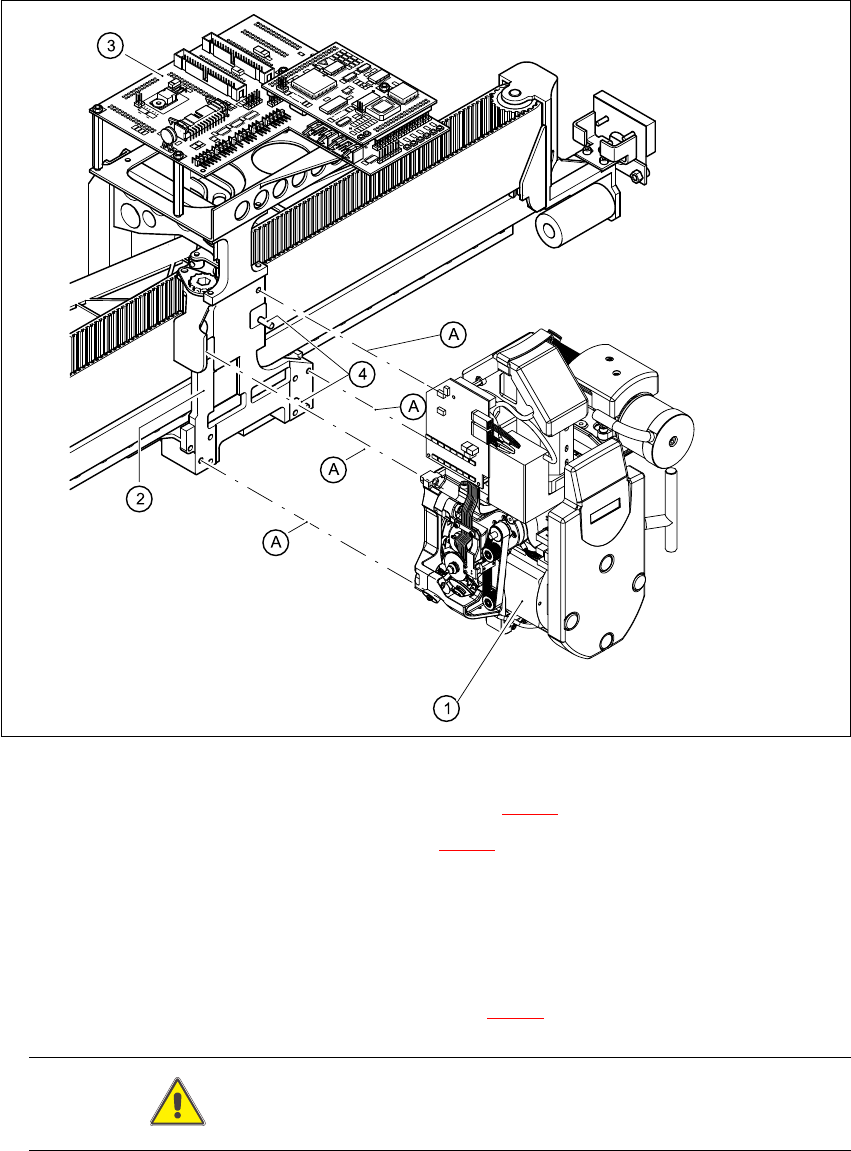
Æ Carefully pull the collect&place head away from the parallel pins (Item 4 in Fig. 7.5 - 4) on the
head mount and remove it from the placement system.
HS-60 Service Manual 7 DLM2 Collect&Place Head
03/2003 US Issue 7.5 Replacing the collect&place head / DLM2 (00367770-01)
267
7.5.4 Fitting the collect&place head on the head mount
7
Fig. 7.5 - 4 Fitting the collect&place head
Æ Carefully move the collect&place head (item 1 in Fig. 7.5 - 4) onto the head mount (2).
Æ Make sure that the parallel pins (item 4 in Fig. 7.5 - 4) on the head mount slide into the holes
in the back part of the collect&place head.
Æ Carefully push the collect&place head towards the head mount until it is lying flat.
Æ Use four M4x16 hexagon socket-head screws to fix the collect&place head (A).
Æ Connect the plugs for the collect&place head to the head board.
The plug positions and assignment is shown in Fig. 7.5 - 1
.
CAUTION Check the polarity of the plugs before connecting. 7