a3369b.pdf - 第134页
Communication Interfaces VTK - TR -BA- 171e - 1 - User Manua l MDS 3080 -V 125 Outside the adjust r ange, the adjust can only be i nterrupted by sen ding a long trigger signal (110 ms – 200 ms) to t he control uni t vi a…
Communication Interfaces
124
VTK-TR-BA-171e-1 - User Manual MDS 3080-V
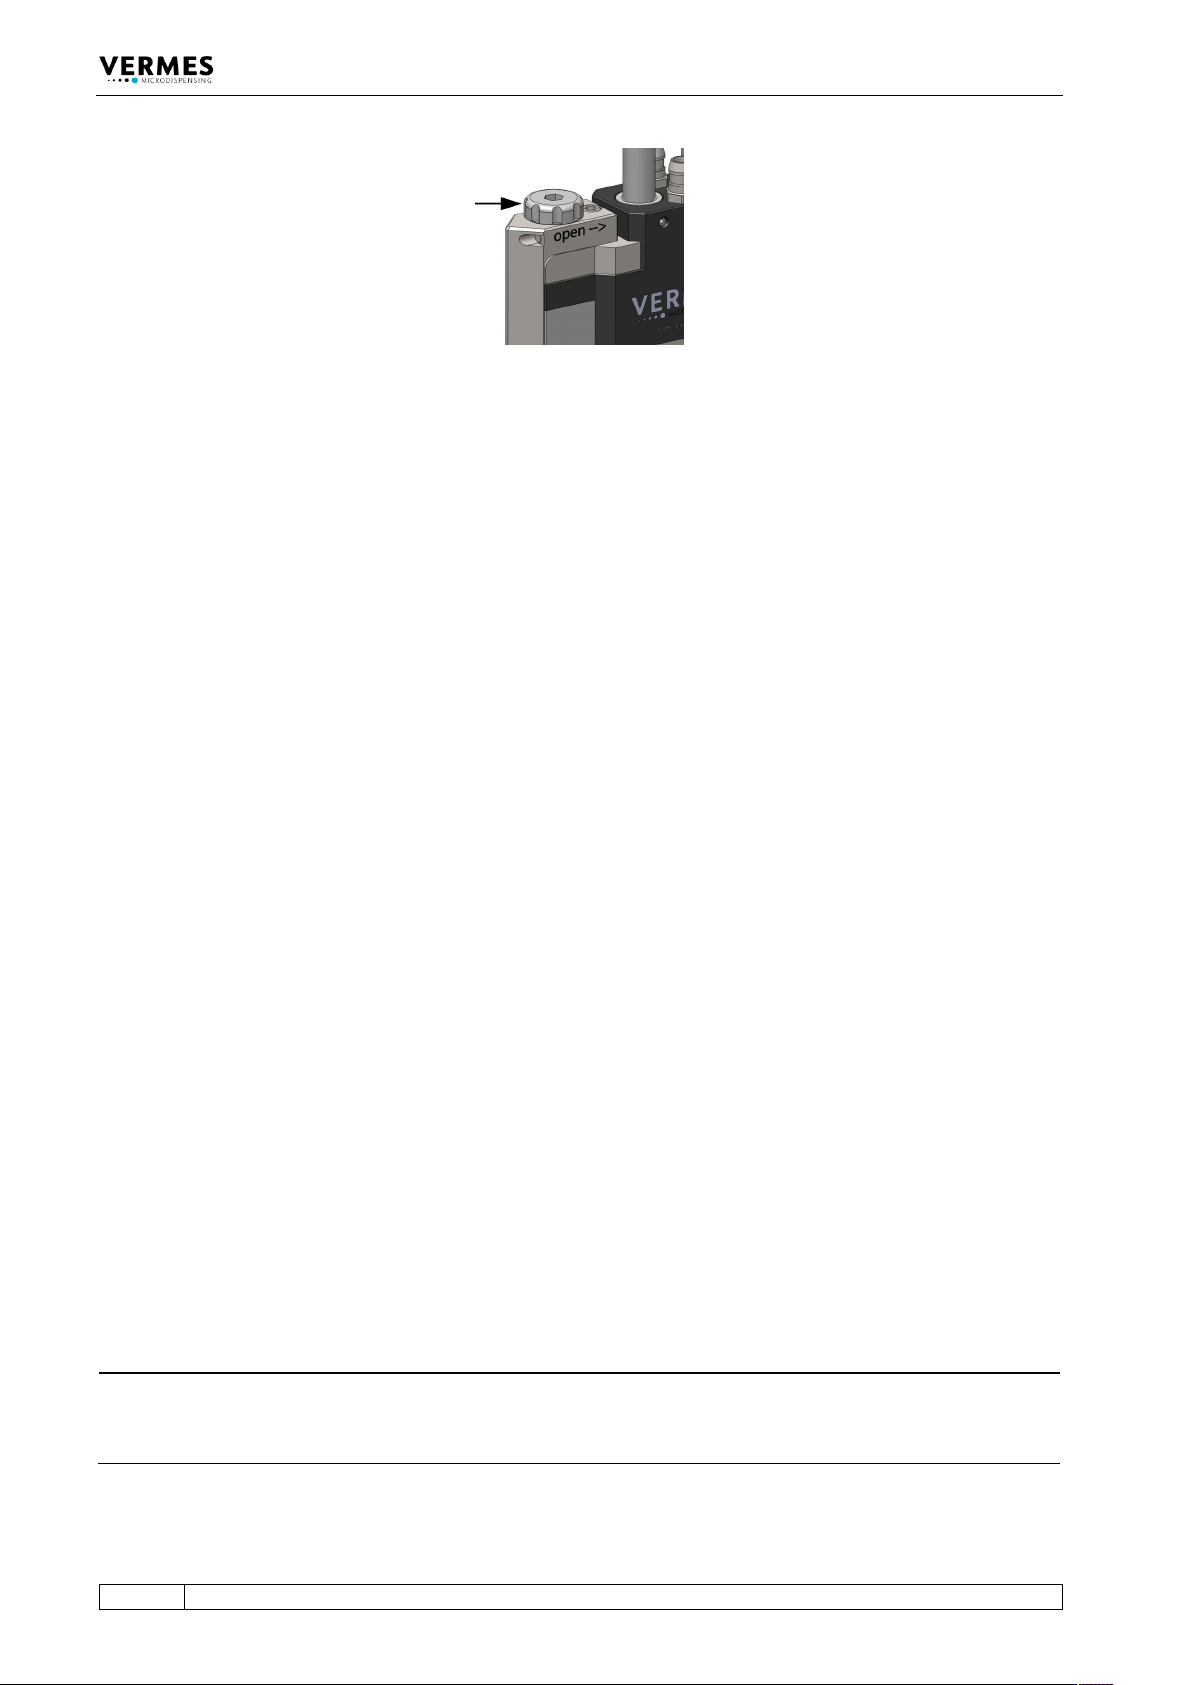
Fig. 38: Screw open the adjust screw completely
2. Send the command “ADJUST:START” to the control unit via RS-232C. The system returns the
message “Release NU Attention fluid!!!!!“.
3. In order to confirm step 2, send a short trigger signal (500μs – 80 ms) to the control unit via
PLC interface.
4. The next message from the system is “Enter for 500 Shots”. Send a short trigger signal via PLC-
interface as confirmation.
5. The system then dispenses 500 shots, to clear the valve for the adjust. The next message
“Calibration Please Wait” appears. The calibration will take a few moments, before it is
finished. In case there is a problem with the calibration, the message “Adjust failed” appears.
6. If the calibration is successful and the valve is okay, move on to step 7. If the performance of
the valve is below 100 %, the message “max. Needle Lift = xx %” is returned. You should
exchange the valve and send it in for maintenance. Confirm the message with a short trigger
signal.
7. At first the message “Enter if Green” is send. This message is followed by the current adjust
value (e.g. -26 µm) and either:
1 (value too low, i.e. below 0 µm)
2 (value ok, i.e. between 0 µm and 4 µm)
3 (value too high, i.e. above 4 µm)
Adjust value and adjust answer are repeated in short intervals while you slowly screw the
adjust screw in the direction “close” by using the MDT 327, e.g.:
Enter if Green
-26 µm
1
-15 µm
1
0 µm
2
8. In order to confirm step 7, send a short trigger signal (500μs – 80 ms) to the control unit via
PLC-interface. This will only be accepted, if the value is okay. After the confirmation, the
system then returns the following response via RS-232C:
“Adjust LED Green”
The adjust has been completed successfully and the green LED is lit.
INFORMATION
Values out of range cannot be confirmed
Beyond the tolerance range of 0–4 µm (resp. 0–50 µm in fixed adjust mode) it is impossible to
confirm the values.
Communication Interfaces
VTK-TR-BA-171e-1 - User Manual MDS 3080-V
125
Outside the adjust range, the adjust can only be interrupted by sending a long trigger signal
(110 ms – 200 ms) to the control unit via PLC- interface. The system returns the message “adjust
failed” to the PC.
Communication Interfaces
126
VTK-TR-BA-171e-1 - User Manual MDS 3080-V
8.2.4 Remote First Drop
Performing the first drop adjust (see paragraph 7.11, page 71) is also possible remotely via the
RS-232C serial interface. In this chapter, the necessary steps are explained.
IMPORTANT NOTE
Display, cancelling the first drop adjust
• During the remote first drop adjust the message “Remote FirstDrop is running” is shown in
the display.
• You can cancel the remote first drop by sending the command “KEY:ESC”, unless the system
is working at that moment (e.g. during dispensing the 1000 shots).
Step Explanation Result
Send the command
“SYSTEM:FIRSTDROP:ON
”.
To perform the first drop adjust, you switch the
system into first drop mode.
Response of the system:
“OK”
The red first drop LED is
ON.
Send the command
“SYSTEM:FIRSTDROP:AD
JUST:<value>”. For
“value” use the starting
value, e.g. 15 %.
With this command you start the first drop adjust.
The starting value for the first drop has to be
between 2 % and 50 %. From this value, you will
slowly increase the needle lift to find the exact
position at which the first drop of the medium
appears.
For watery fluids, the value usually lies between
20 % and 35 %. You should not start with a too
high value, since if there is a drop visible right
away, then you will have to repeat the first drop
adjust from the beginning with a lower starting
value.
Make sure you have inserted a filled cartridge with
your dispensing medium. Set the dispensing
pressure at 0.5 – 1.0 bar (depending on medium).
Response of the system:
“Fill up with
Medium!!!!!!”
The display shows:
“Remote FirstDrop is
running!”
Confirm the message
with the command
“KEY:ENTER”.
Now 1000 shots have to be dispensed. This will
prepare the valve.
Place a container of sufficient size be-low the valve
to capture the dispended medium.
Response of the system:
“Press Enter for 1000
Shots”
Confirm the message
with the command
“KEY:ENTER”.
After the 1000 shots have been dispensed, you
have to clean the nozzle. Use a lintless rag. Make
sure the lower surface is dry and that no drop
appears after cleaning.
Response of the system:
“OK”
“Clean Nozzle”
Confirm the message
with the command
“KEY:ENTER”.
With this command, you confirm that you have
cleaned the nozzle.
Check, if there is a drop visible at the nozzle.
Yes: You have to repeat the first drop adjust with a
lower starting value.
No: Move on to the next step.
Response of the system:
“OK”
“Drop Visible”
“15 %”
Send the command
“KEY:ADJUST”.
With this command, you increase the needle lift by
1 %.
Check again, if there is now a drop visible at the
nozzle.
Yes: Move on to the next step.
No: Repeat this step and send the command
“KEY:ADJUST” again.
Response of the system:
“OK”
“Drop Visible?”
“16 %”