a3369b.pdf - 第149页
Cleaning 140 VTK - TR -BA- 171e - 1 - User Man u al MDS 3080 -V Step 4 ( tappe t cen teri ng scr ew ) Push t he flui dic br ush throu gh the b ore of t he tappet cen tering scre w fir st. Keep usi ng the f luidic brush t…
Cleaning
VTK-TR-BA-171e-1 - User Manual MDS 3080-V
139
cleaning, please clean it with MDT 316 - Nozzle Insert Cleaning Tool. For operating the MDT 316
please refer to the “Quick Reference Guide – MDT 316 - Nozzle Insert Cleaning Tool”.
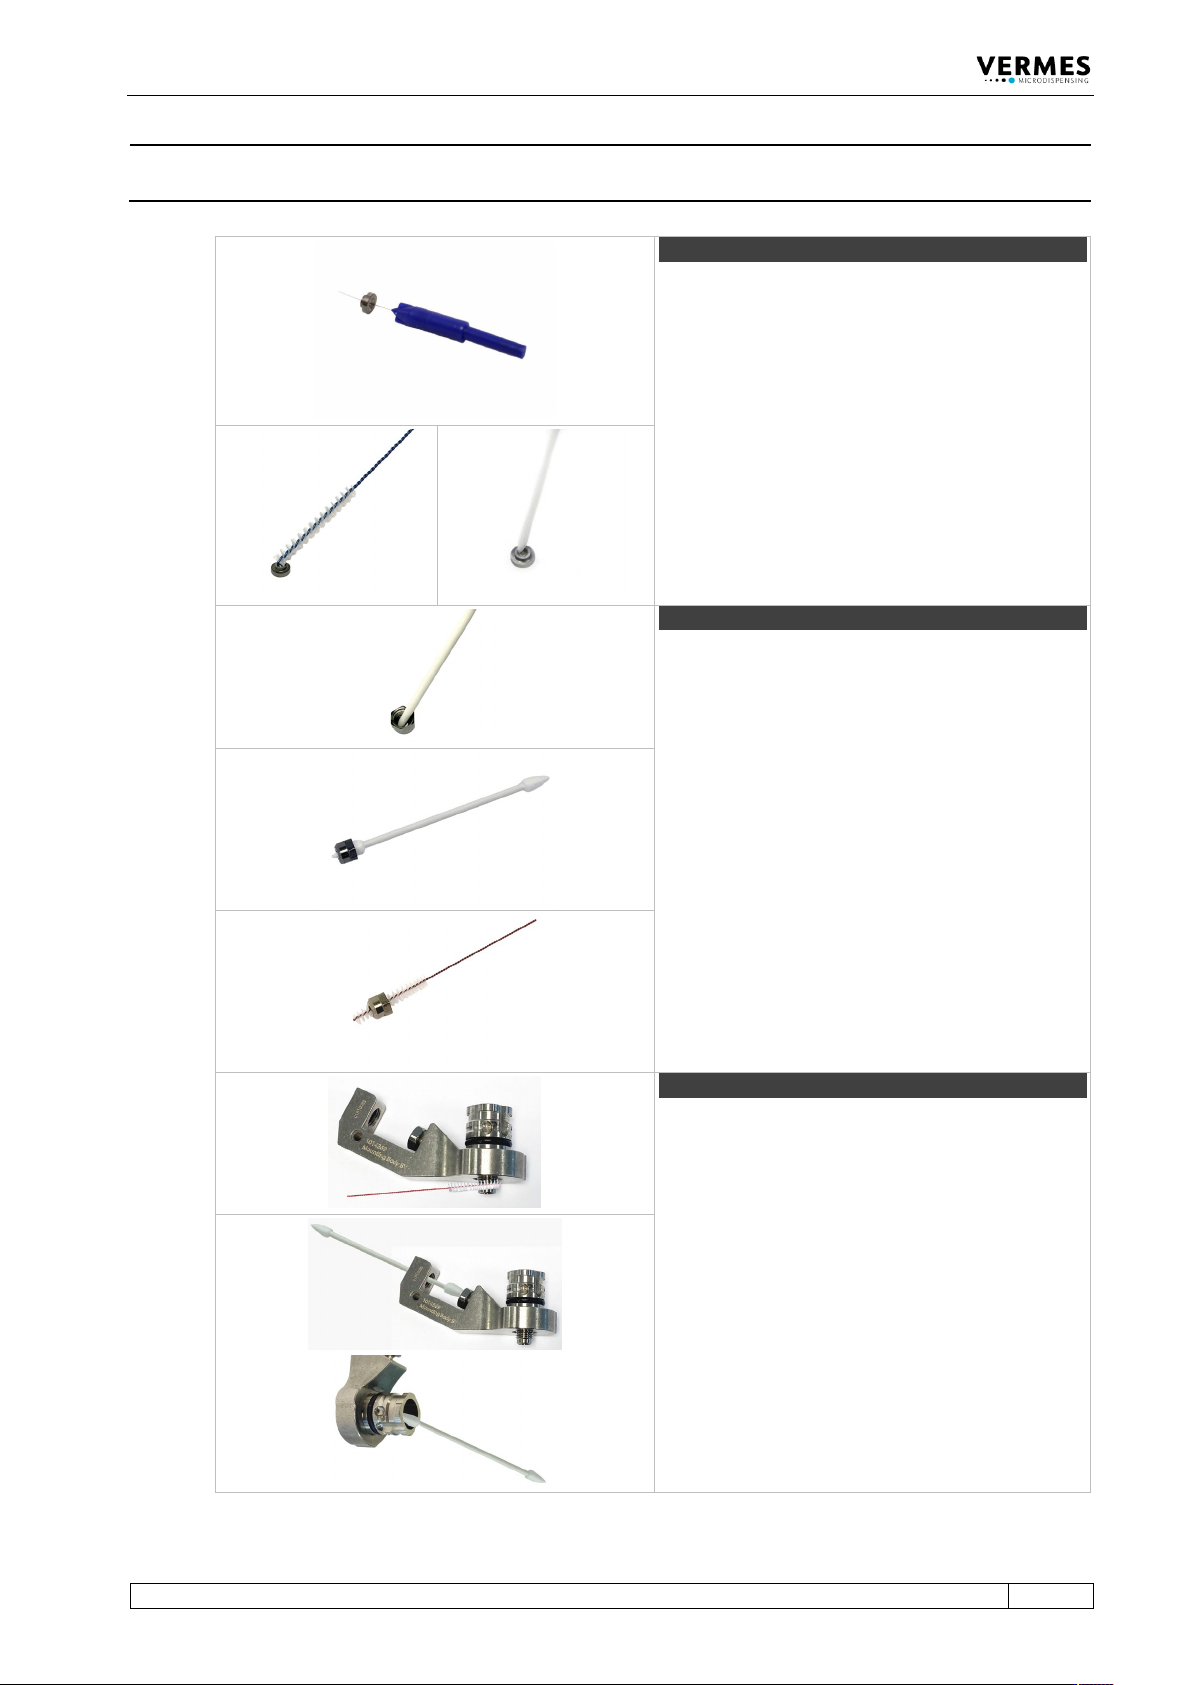
Step 1 (nozzle insert)
Start with the nozzle insert. For the bore use a
nozzle insert cleaning wire. These come with
different sizes. They are not part of the cleaning
toolkit CTK and have to be ordered separately.
Important Note!
Use the MDT 324 - Nozzle Insert Cleaning Holder
with all Vermes nozzle inserts. With it, you can
safely keep the nozzle insert in place during
cleaning and drying with compressed air.
Clean the surface of the inner channel using a
fluidic brush. Clean it thoroughly from above and
below with a cleaning rod.
Step 2 (nozzle fixation nut)
Clean the nozzle fixation nut. Use a cleaning rod to
clean the inside/outside of the nozzle fixation nut.
Pay special attention to sharp corners and edges.
Push a fluid box cleaner through the opening of
the nozzle fixation nut to remove persistent
residues.
Clean the bore of the nozzle fixation nut using a
fluidic brush.
Step 3 (fluid box body)
With the fluid box, clean all bores and threads with
a fluidic brush first.
Afterwards, use a fluid box cleaner. Check all bores
as well and then clean the rest of the fluid box
body.
Cleaning
140
VTK-TR-BA-171e-1 - User Manual MDS 3080-V
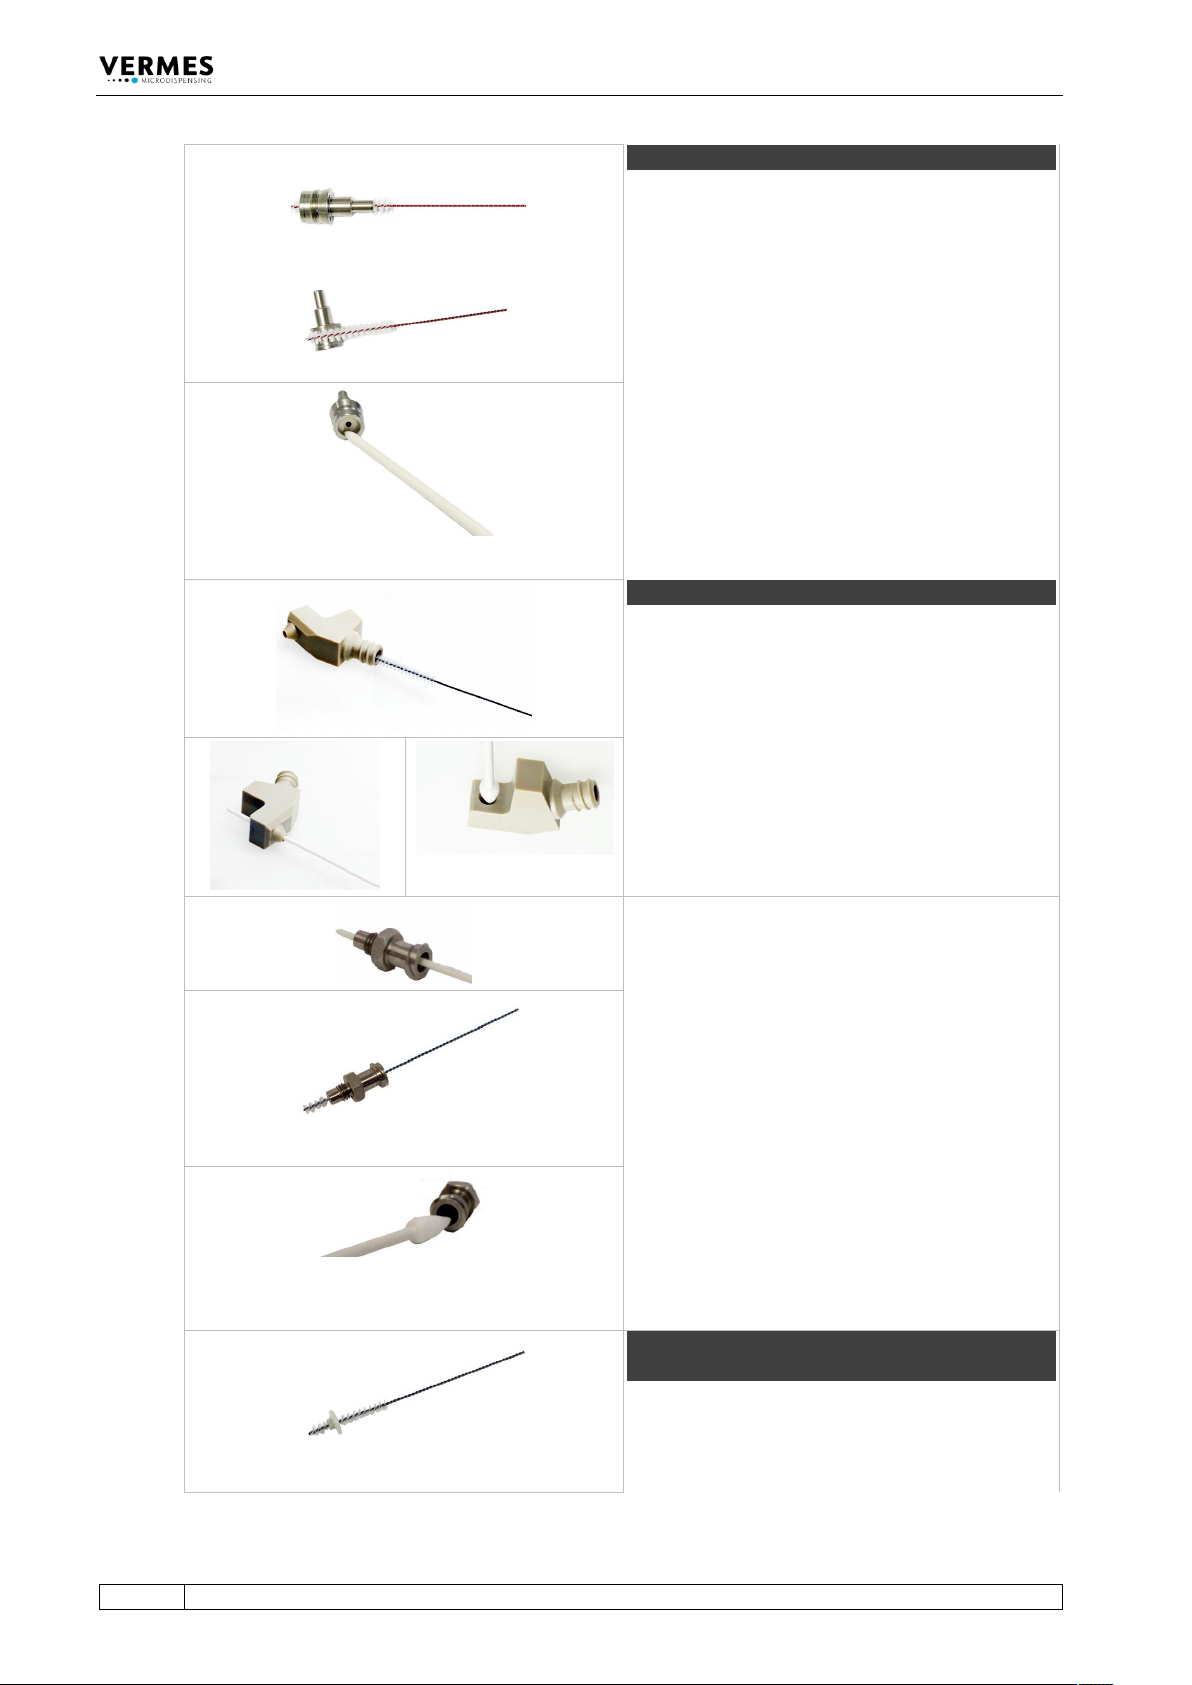
Step 4 (tappet centering screw)
Push the fluidic brush through the bore of the
tappet centering screw first.
Keep using the fluidic brush to clean the threads
of the tappet centering screw.
Afterwards, use a cleaning rod to clean the inner
rim of the tappet centering screw.
Important note!
You need to perform a two finger seesaw test (see
Tab. 31, page 142), to check if the tappet rod runs
smoothly through the tappet centering screw.
Otherwise, the parts have to be cleaned again.
Step 5 (cartridge base)
For the cartridge base, start with the fluidic brush
to clean all bores and openings of the cartridge
base.
Next clear the bore with a cleaning rod.
Finally use a fluid box cleaner to clean the wide
opening of the bore.
Important Note!
There are two types of cartridge bases: Cartridge
Base CH (without integrated luer lock) and
Cartridge Base CHI (with integrated luer lock). If
you use a cartridge base CH, you need to clean the
Fluid Box Connector Luer Lock as follows.
Otherwise, you can continue with the next step.
Push a cleaning rod through the bore of the Fluid
Box Connector Luer Lock several times to remove
any residues of the medium.
Clean the center bore of the Fluid Box Connector
Luer Lock using a fluidic brush.
Cleaning the openings and thread of the Fluid Box
Connector Luer Lock using a fluid box cleaner. Use
it for the outside and the end of the bore.
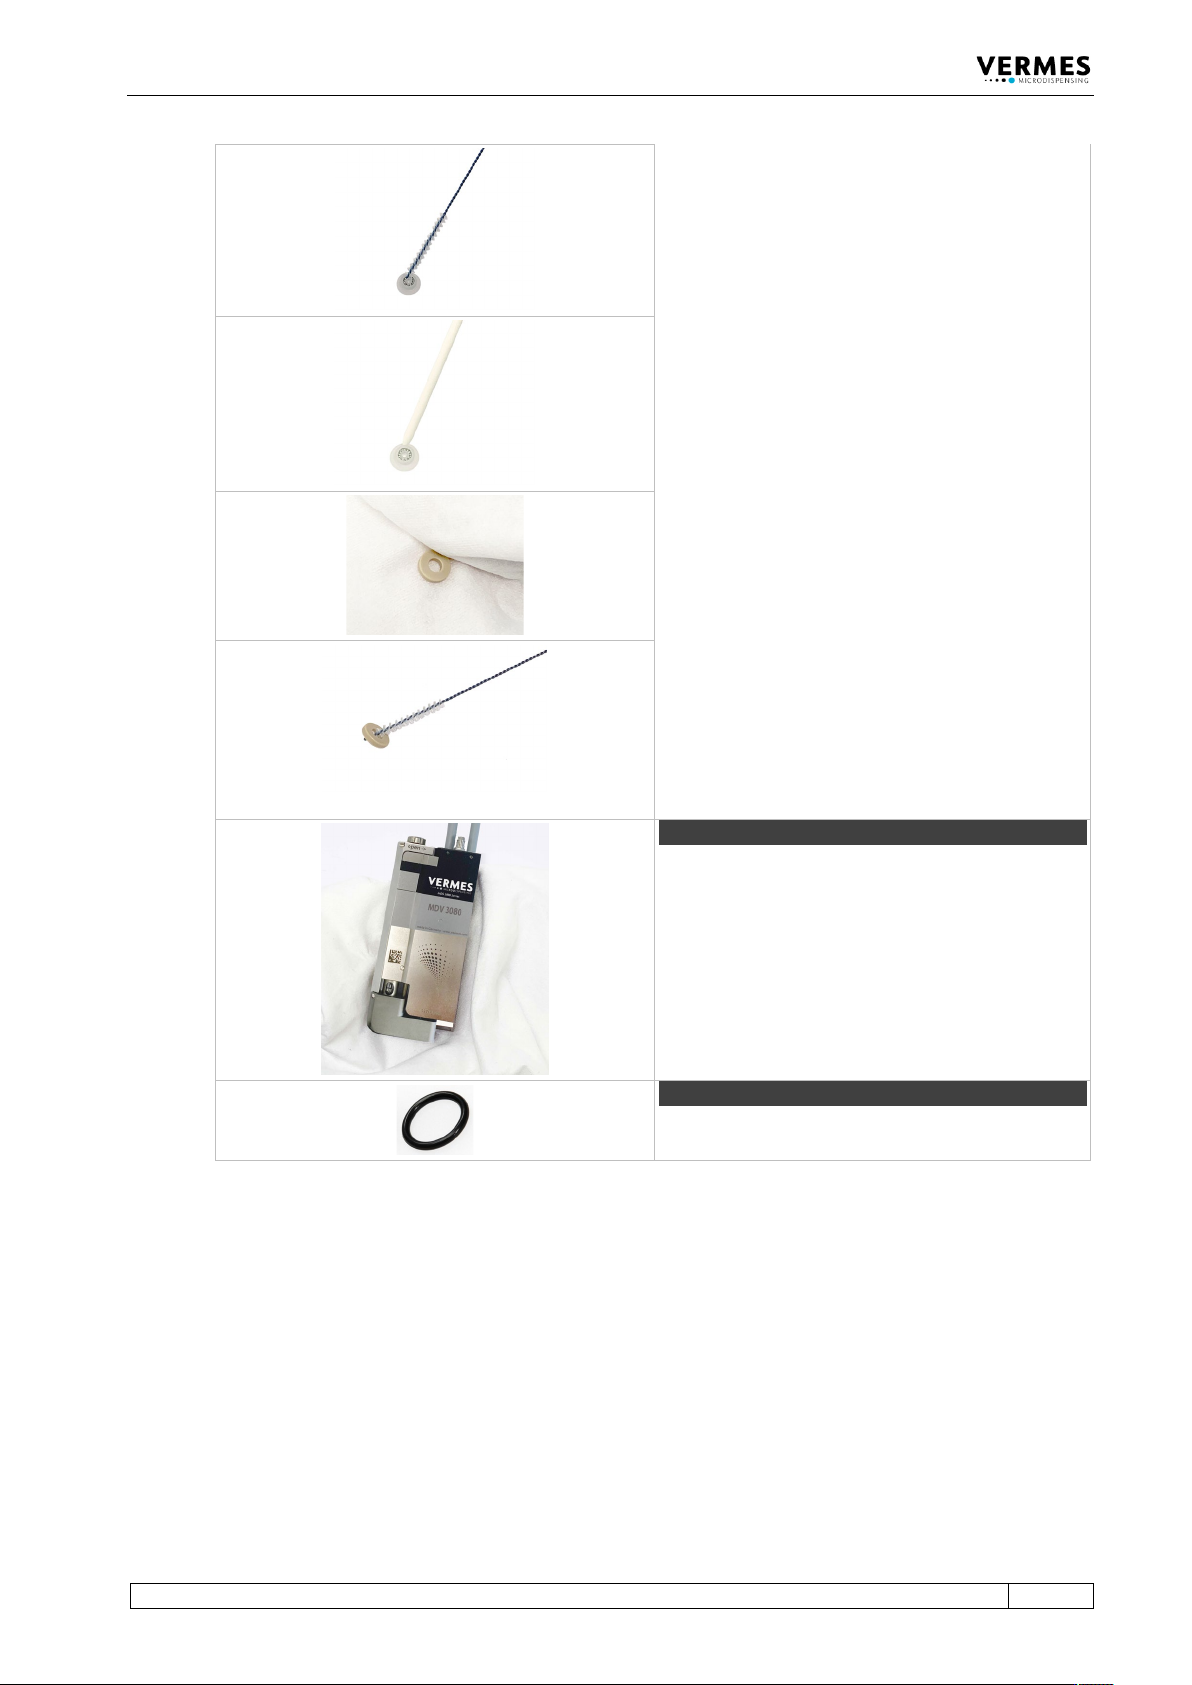
Step 6 (tappet sealing and tappet centering
piece)
For the tappet sealing, clean the bore of the
tappet sealing carefully with a fluidic brush.
Cleaning
VTK-TR-BA-171e-1 - User Manual MDS 3080-V
141
Afterwards, clean the outside of the tappet
sealing. Keep using the fluidic brush, especially for
the outer edge.
Then clean the inner rim of the tappet sealing with
a cleaning rod.
Clean the outside of the tappet centering piece
first with a lint-free cloth.
Use a fluidic brush for the bore of the tappet
centering piece.
Important Note!
There is no tappet centering piece, if you use a 2G
tappet rod.
Step 7 (valve body)
Clean the valve with a lint-free cloth.
Step 8 (O-ring)
Clean all O-rings with a lint-free cloth.
Tab. 30: Clean all components by hand
– Dry all the components in the air or with compressed air. For nozzle inserts, we recommend
to use the MDT 324 Nozzle Insert Cleaning Holder.
– A two finger seesaw test is necessary to check if the tappet rod runs smoothly through the
Tappet Centering Screw BY. Otherwise, the parts have to be cleaned again. The table explains
how to perform a two finger seesaw test.