a3369b.pdf - 第148页
Cleaning VTK - TR -BA- 171e - 1 - User Manua l MDS 3080 -V 139 cleani ng, plea se clean i t with MDT 316 - Nozz le Insert Cleaning T ool. For op erat ing the MD T 316 please ref er to the “Q uick Refer ence Gui de – MDT …
Cleaning
138
VTK-TR-BA-171e-1 - User Manual MDS 3080-V
CAUTION
Damage of O-ring/tappet sealing
Unless the compatibility between the O-ring/tappet sealing and the solvent is excellent, do not
insert the O-ring/tappet sealing into the solvent.
CAUTION
Damage of components
Place tipped nozzle inserts (e.g. J-, C-, N27-type) in a separate beaker. To avoid damage, do not
place tipped nozzle inserts together with other components in one beaker.
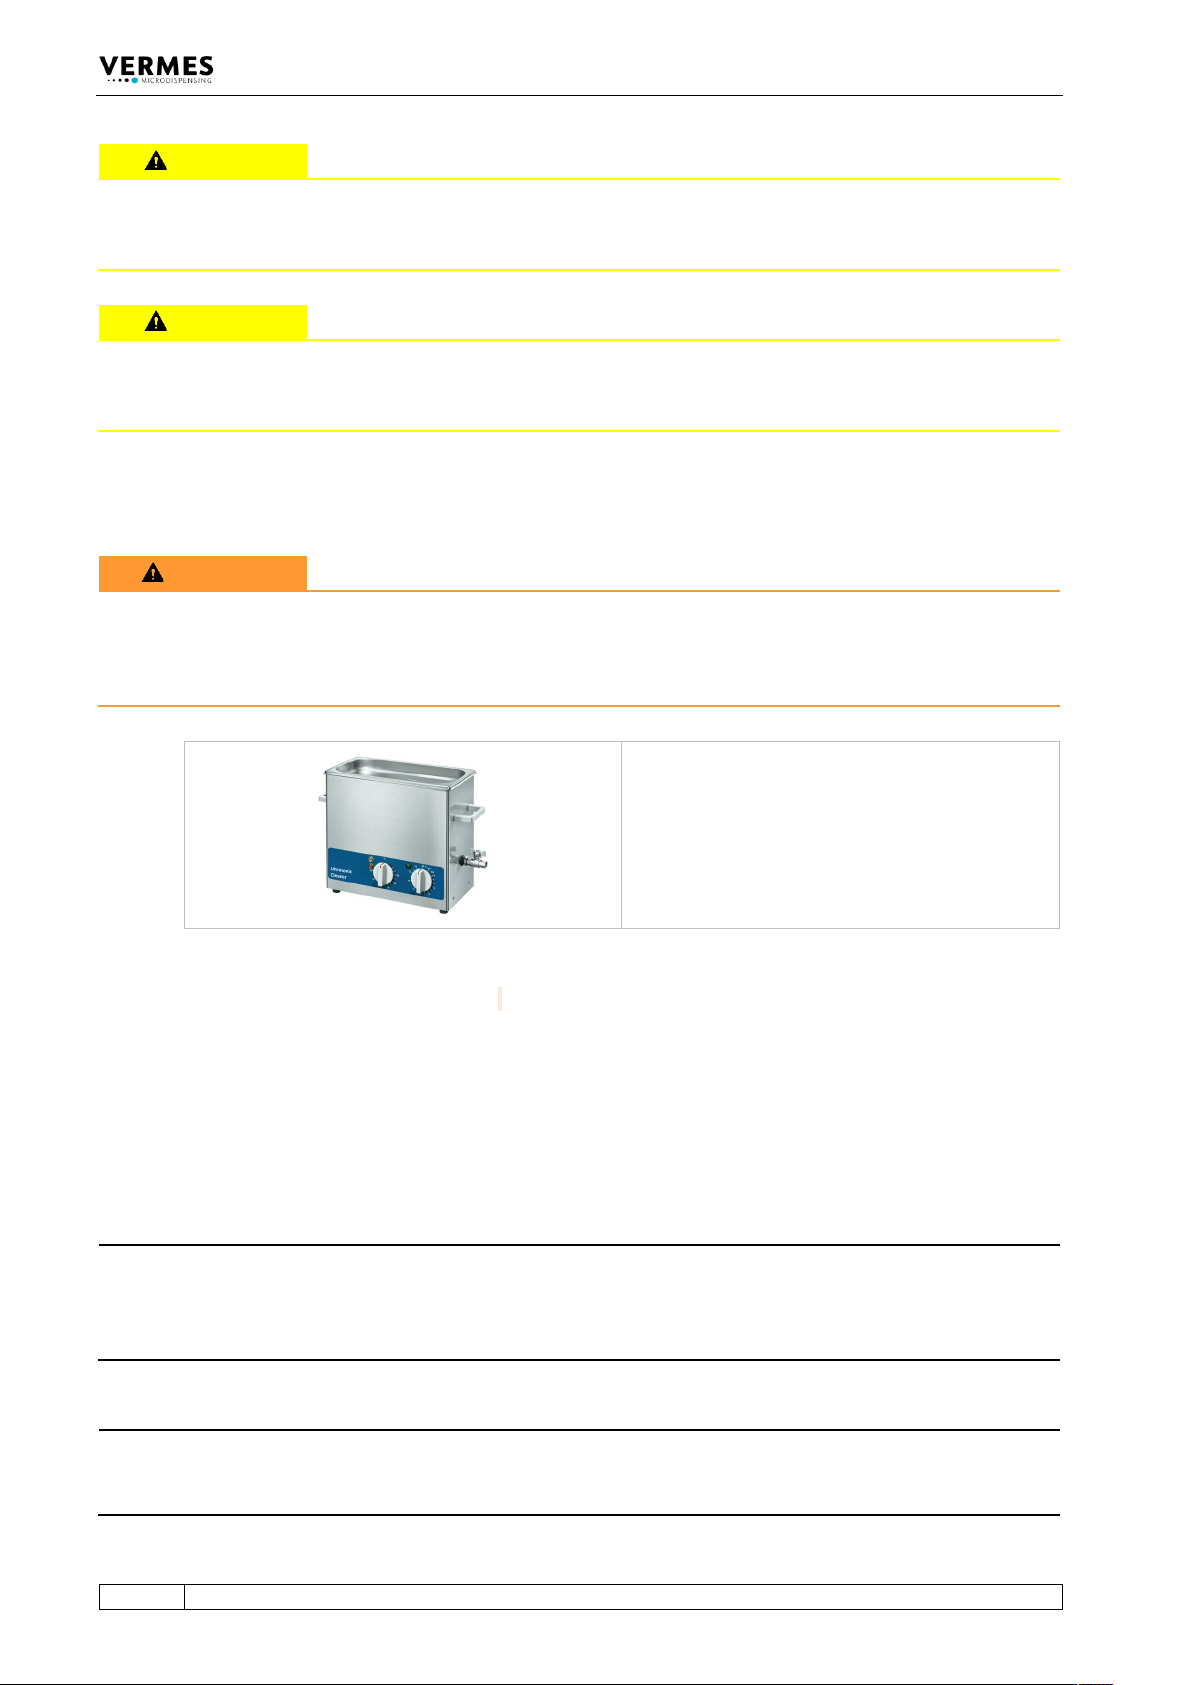
– Fill the beaker with an appropriate solvent (e.g. Isopropanol), until all of the parts are covered.
– Leave the components for ca. 15 min inside.
WARNING
High temperature, danger of burns
Be aware of your dispensing medium when setting the temperature, if the dispensing medium is
inflammable. Otherwise, with too high temperatures deflagration might occur. Set the
temperature as low as possible within the effective range.
– Take the beaker with the components out of the ultrasonic bath. Then use tweezers to take
the components out of the beaker.
Next, clean all components by hand.
– For fine purification, you have to clean all components by hand. In general, you should take
special care about those places, which get in contact with the medium or where two different
parts fit together. First, you should clean the nozzle insert, since hardening would cause most
problems here.
INFORMATION
Simpler cleaning
For some uncomplicated media it is possible to clean the parts just by using a fluid like ethanol
and compressed air, which can simplify the cleaning process. Before you try it, you should always
contact our Technical Support.
INFORMATION
Nozzle inserts with small inner channel
If a nozzle insert with inner channel smaller than 100 µm (except for nozzle inserts with long
dispensing channels, namely J-/C-series, N-27 and N-28) happens to be still clogged after
Cleaning
VTK-TR-BA-171e-1 - User Manual MDS 3080-V
139
cleaning, please clean it with MDT 316 - Nozzle Insert Cleaning Tool. For operating the MDT 316
please refer to the “Quick Reference Guide – MDT 316 - Nozzle Insert Cleaning Tool”.
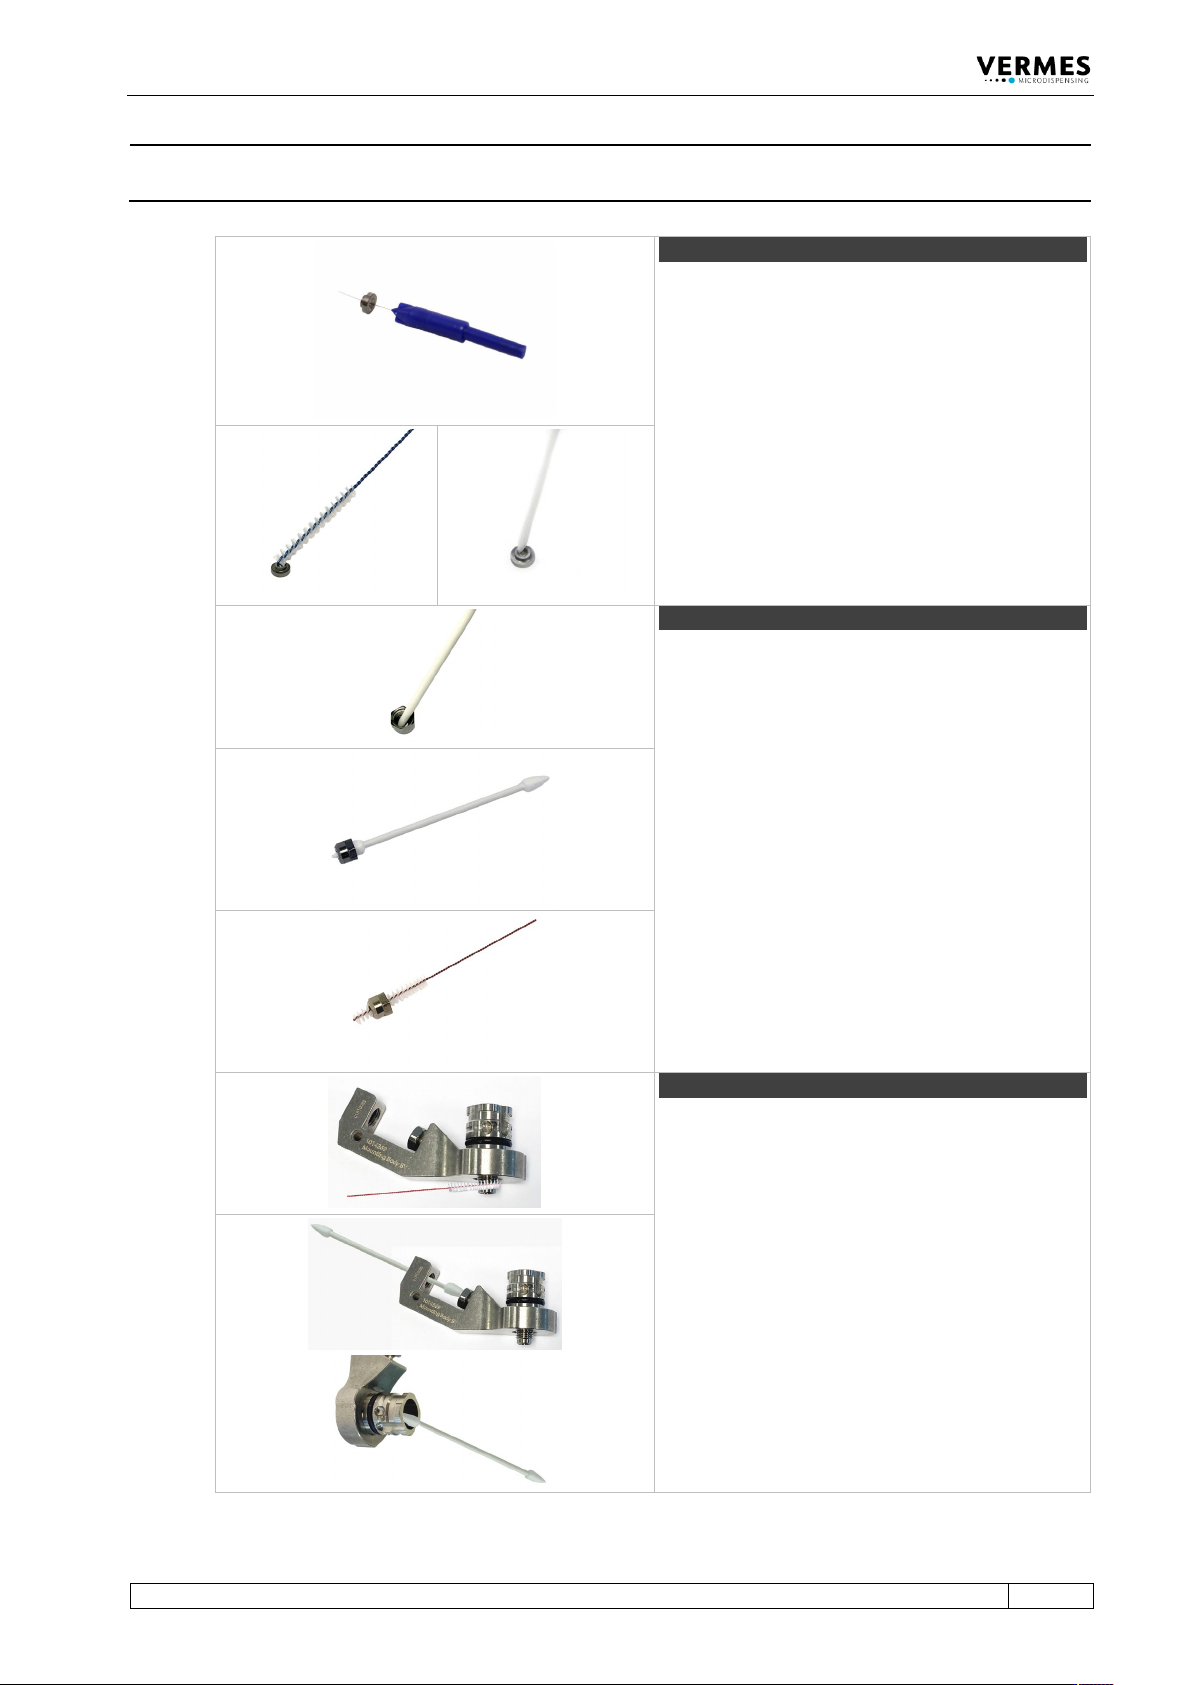
Step 1 (nozzle insert)
Start with the nozzle insert. For the bore use a
nozzle insert cleaning wire. These come with
different sizes. They are not part of the cleaning
toolkit CTK and have to be ordered separately.
Important Note!
Use the MDT 324 - Nozzle Insert Cleaning Holder
with all Vermes nozzle inserts. With it, you can
safely keep the nozzle insert in place during
cleaning and drying with compressed air.
Clean the surface of the inner channel using a
fluidic brush. Clean it thoroughly from above and
below with a cleaning rod.
Step 2 (nozzle fixation nut)
Clean the nozzle fixation nut. Use a cleaning rod to
clean the inside/outside of the nozzle fixation nut.
Pay special attention to sharp corners and edges.
Push a fluid box cleaner through the opening of
the nozzle fixation nut to remove persistent
residues.
Clean the bore of the nozzle fixation nut using a
fluidic brush.
Step 3 (fluid box body)
With the fluid box, clean all bores and threads with
a fluidic brush first.
Afterwards, use a fluid box cleaner. Check all bores
as well and then clean the rest of the fluid box
body.
Cleaning
140
VTK-TR-BA-171e-1 - User Manual MDS 3080-V
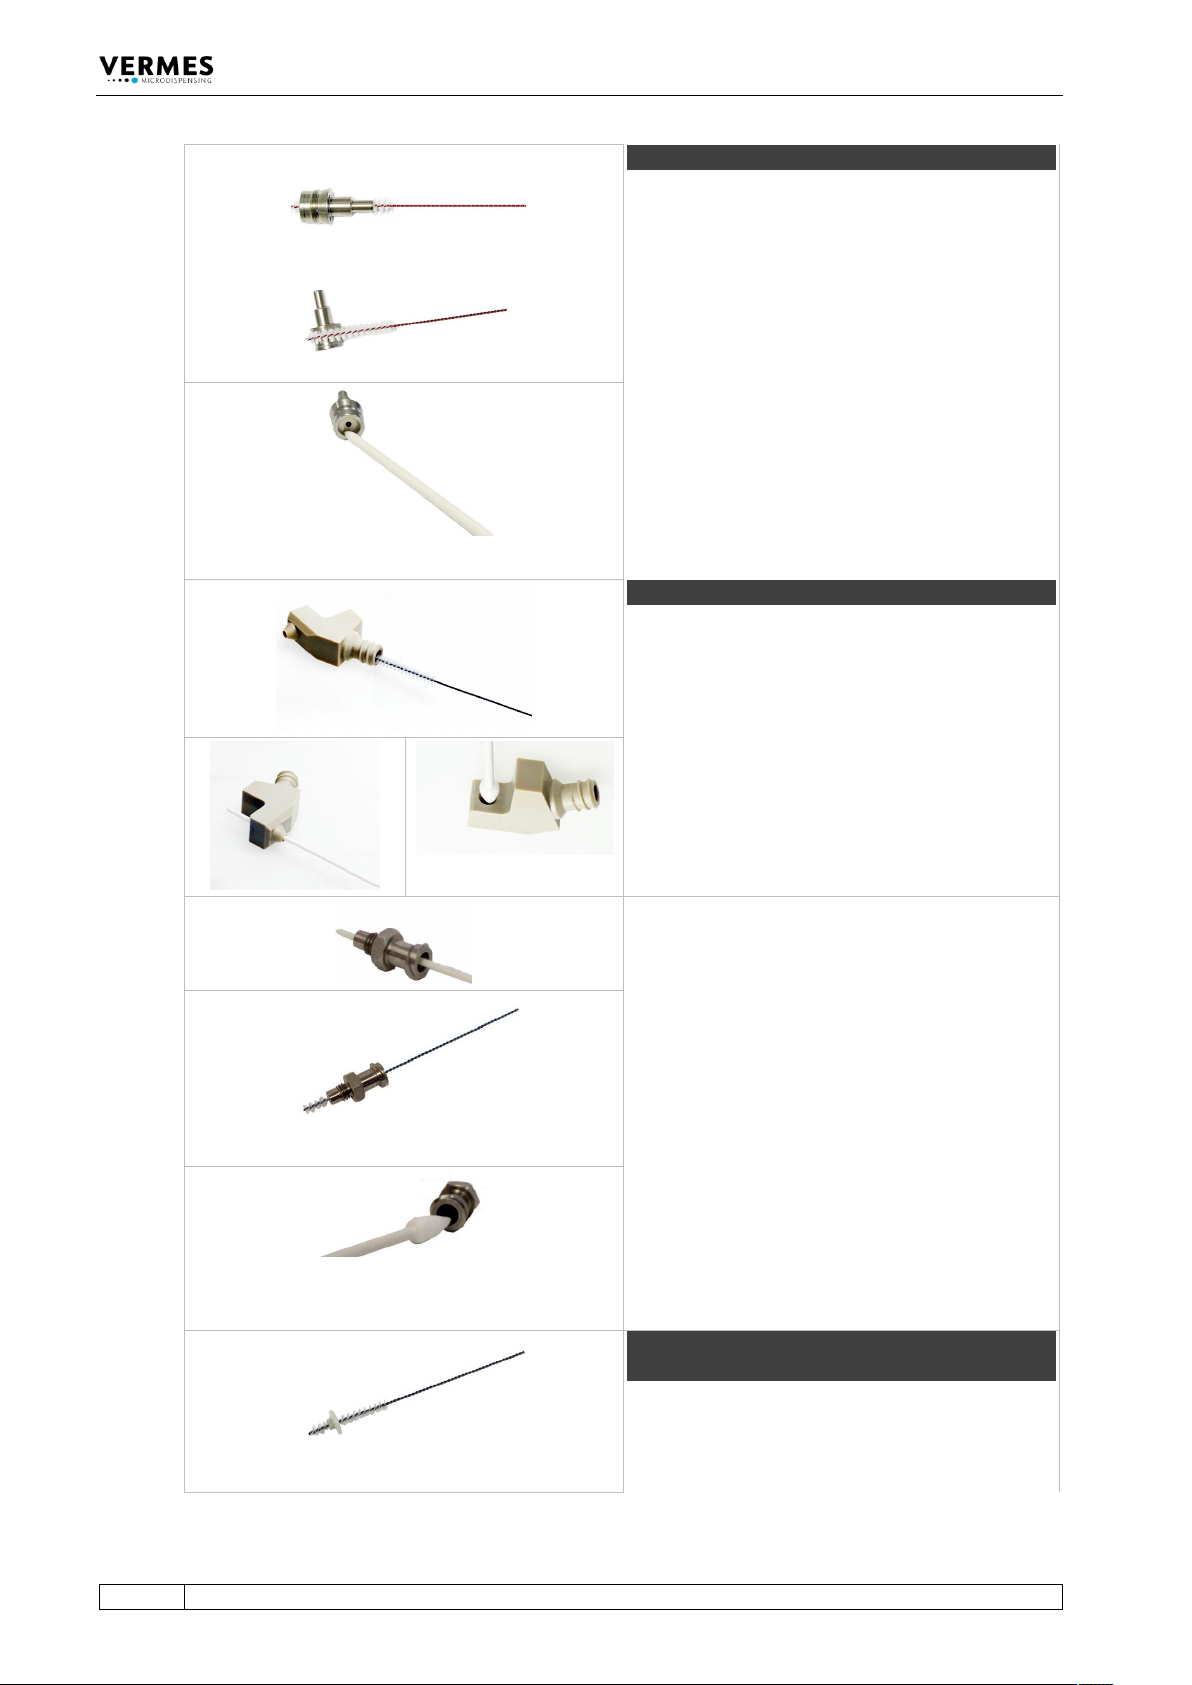
Step 4 (tappet centering screw)
Push the fluidic brush through the bore of the
tappet centering screw first.
Keep using the fluidic brush to clean the threads
of the tappet centering screw.
Afterwards, use a cleaning rod to clean the inner
rim of the tappet centering screw.
Important note!
You need to perform a two finger seesaw test (see
Tab. 31, page 142), to check if the tappet rod runs
smoothly through the tappet centering screw.
Otherwise, the parts have to be cleaned again.
Step 5 (cartridge base)
For the cartridge base, start with the fluidic brush
to clean all bores and openings of the cartridge
base.
Next clear the bore with a cleaning rod.
Finally use a fluid box cleaner to clean the wide
opening of the bore.
Important Note!
There are two types of cartridge bases: Cartridge
Base CH (without integrated luer lock) and
Cartridge Base CHI (with integrated luer lock). If
you use a cartridge base CH, you need to clean the
Fluid Box Connector Luer Lock as follows.
Otherwise, you can continue with the next step.
Push a cleaning rod through the bore of the Fluid
Box Connector Luer Lock several times to remove
any residues of the medium.
Clean the center bore of the Fluid Box Connector
Luer Lock using a fluidic brush.
Cleaning the openings and thread of the Fluid Box
Connector Luer Lock using a fluid box cleaner. Use
it for the outside and the end of the bore.
Step 6 (tappet sealing and tappet centering
piece)
For the tappet sealing, clean the bore of the
tappet sealing carefully with a fluidic brush.