a3369b.pdf - 第154页
Cleaning VTK - TR -BA- 171e - 1 - User Manua l MDS 3080 -V 145 S traigh ten t he f luid b ox unt il it l atche s in. Optional posit ions The ba yonet f luid box has three locki ng positi ons (1: - 90°, 2: 0°, 3: + 90°) i…
Cleaning
144
VTK-TR-BA-171e-1 - User Manual MDS 3080-V
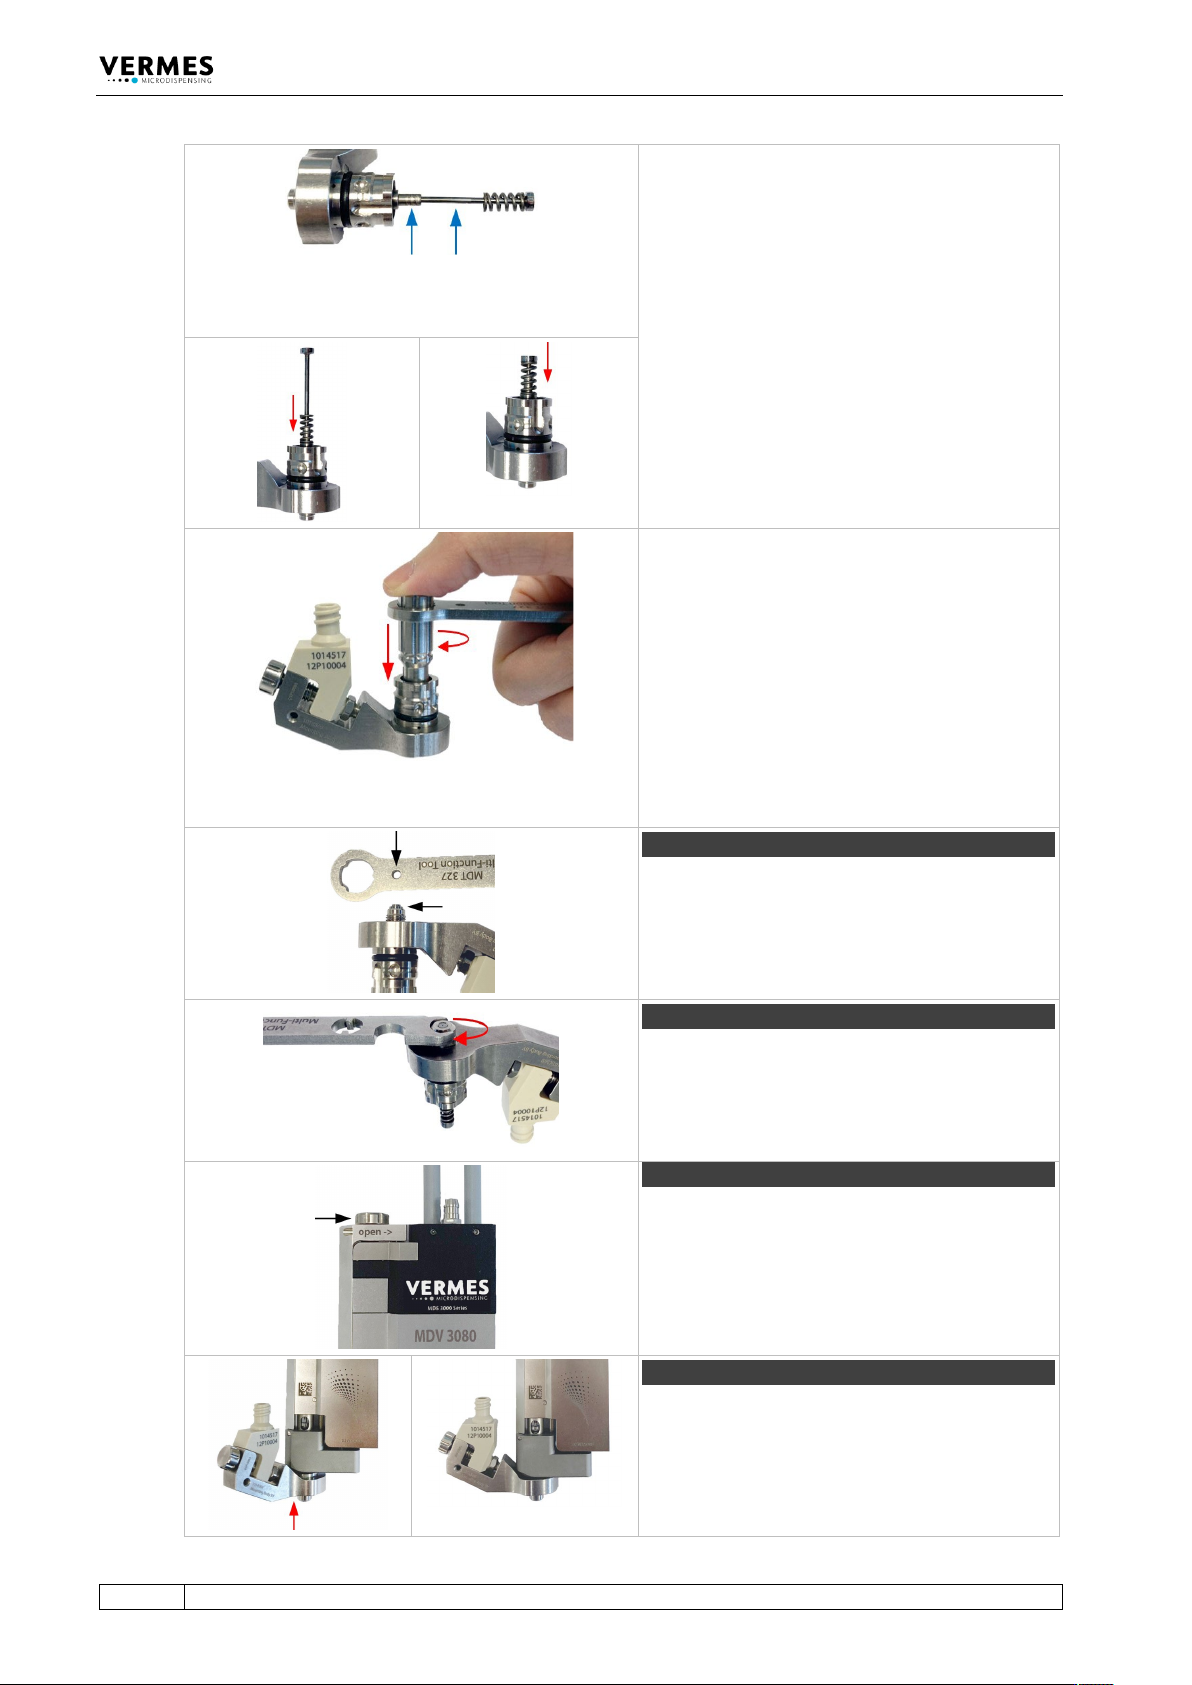
Push the tappet rod with the tappet spring
slightly into the tappet centering screw. Place a
small droplet of Tappet Grease TF (order no.
1014637; droplet size ca. 2 mm) on the tappet
and another on the tappet centering screw (for
placing see blue arrows in the picture). Make
sure that the tappet tip is free of grease. Rotate
the tappet and pull it in and out for three times
to spread the grease.
Push the tappet spring onto the Tappet
Centering Screw BY.
Push the tappet rod through the tappet spring
into the fluid box. Make sure the tappet goes
through the tappet sealing.
Screw the Tappet Centering Screw BY
completely into the fluid box (torque 100 – 140
cN.m). Use MDT 303 - Nozzle Insert Changing
Tool.
The three small pins of MDT 303 have to fit
exactly into the three holes of the Tappet
Centering Screw BY. Turn the MDT 303 clockwise
while pressing it down slightly to the fluid box.
Combine the MDT 303 with MDT 327 for a better
leverage.
Alternatively, you can use the MDT 306 with
BitVM-B.
Step 6 (nozzle insert)
Pick up the nozzle insert with tweezers, clip it
into the fluid box. Use the small hole of MDT 327
to press the nozzle insert to make sure that it sits
flat.
Step 7 (nozzle fixation nut)
Screw the nozzle fixation nut clockwise onto the
fluid box. Use the MDT 327 - Multi-Function Tool.
Alternatively, use the MDT 306 - Torque Wrench
Tool VM with Bit Hexagon Socket (torque 150 –
180 cN.m).
Step 8 (adjust screw)
Turn the adjust screw completely in the
direction “open” using the MDT 327.
Step 9 (fluid box)
Push the fluid box carefully in a 45° angle onto
the valve. Make sure that the fluid box sits
correctly inside the valve and touches the frame.
There will be a resistance due to a spring inside
the valve.
Cleaning
VTK-TR-BA-171e-1 - User Manual MDS 3080-V
145
Straighten the fluid box until it latches in.
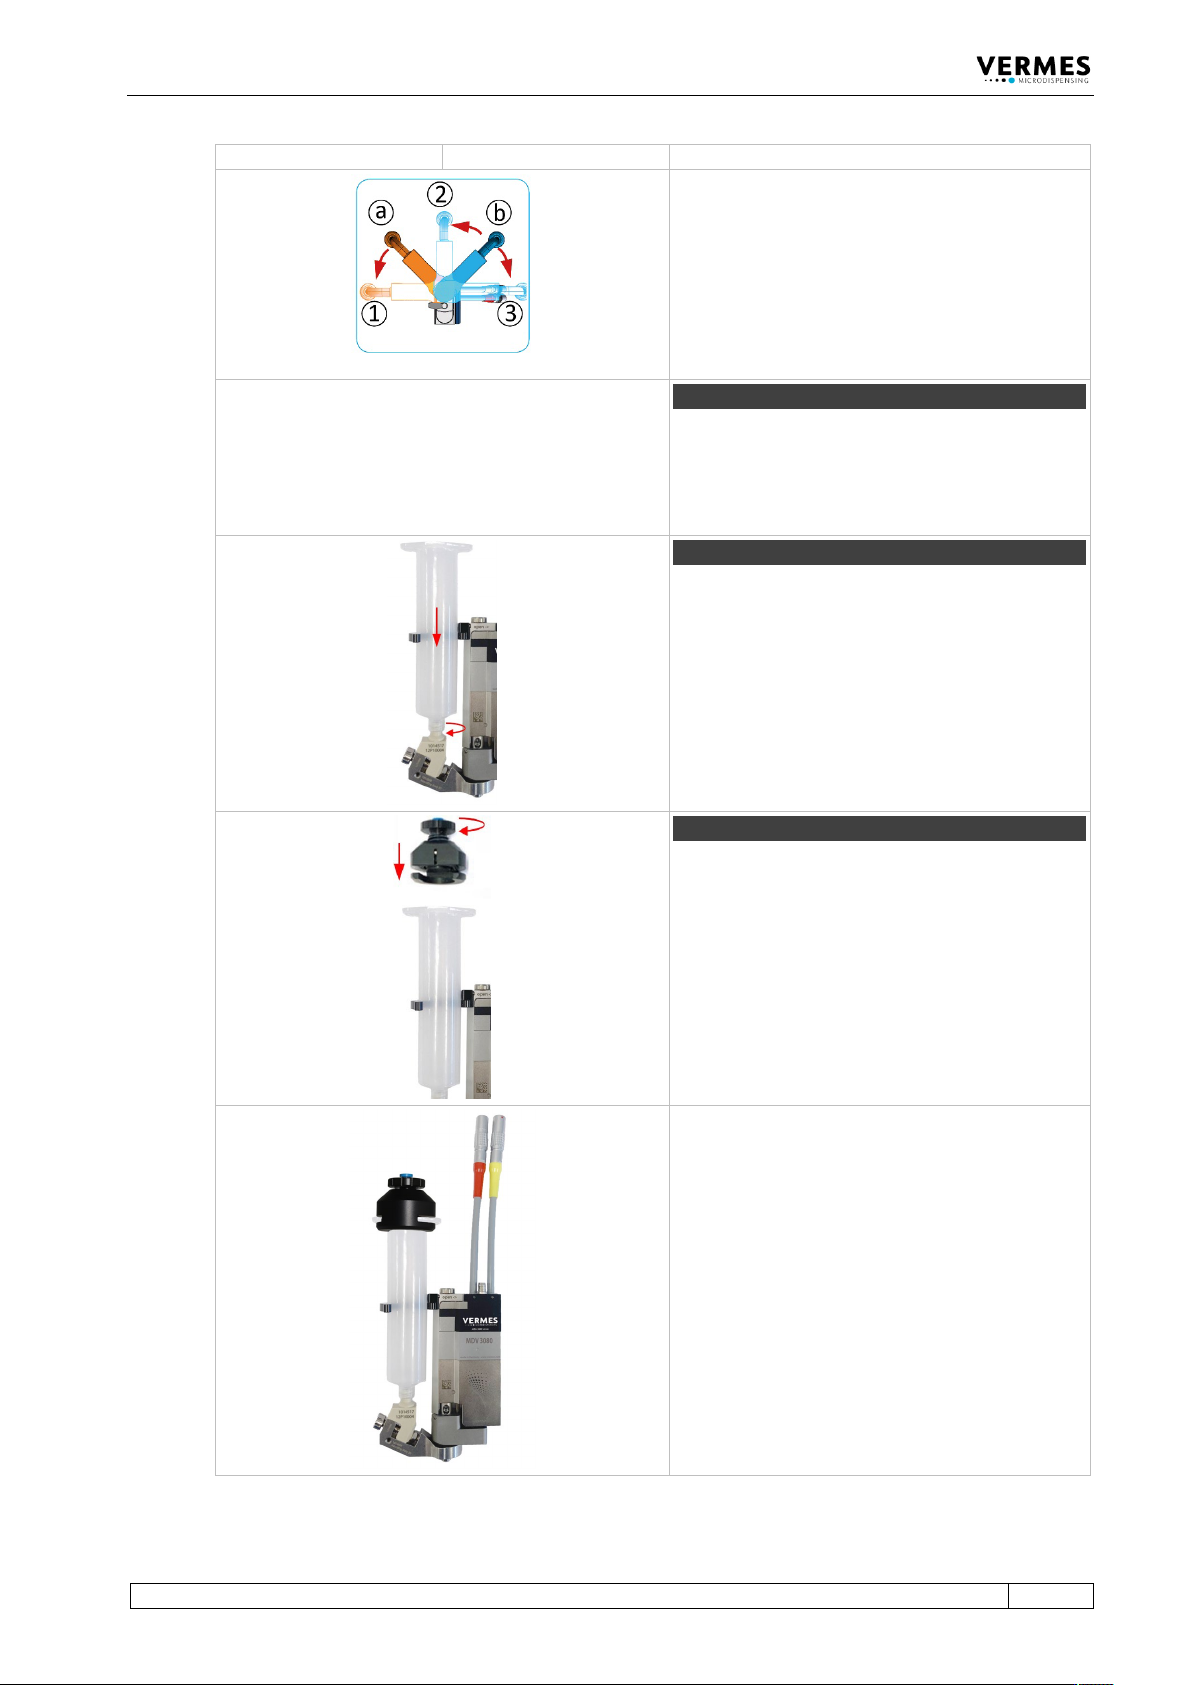
Optional positions
The bayonet fluid box has three locking
positions (1: -90°, 2: 0°, 3: +90°) in which the
valve can be operated. To fix in locking position
1, mount the fluid box at position a. To fix in
locking position 2 or 3, mount the fluid box at
position b. Currently, no cartridge holder is
available for locking position 1 and 3.
Perform the adjust
You need to perform the adjust now. For details
of the adjust process, see paragraph 6.5,
page 52.
After the adjust is successfully completed,
continue with the following steps.
Step 10 (cartridge)
Push the cartridge into the cartridge holder and
screw it onto the fluid box (clockwise).
Step 11 (Adapter for compressed air)
Screw the Adapter for Compressed Air onto the
cartridge (clockwise). Make sure it sits tight.
Assembling completed
The completely assembled valve with the fluid
box in straight position.
Tab. 32: Re-assembling of the valve