a3369b.pdf - 第151页
Cleaning 142 VTK - TR -BA- 171e - 1 - User Man u al MDS 3080 -V Step 1: Push t he Tapp et Center ing Screw BY ont o the t a ppet. Step 2: Hold th e tapp e t with t he Tappet Centeri ng Screw BY between t he in dex finger…
Cleaning
VTK-TR-BA-171e-1 - User Manual MDS 3080-V
141
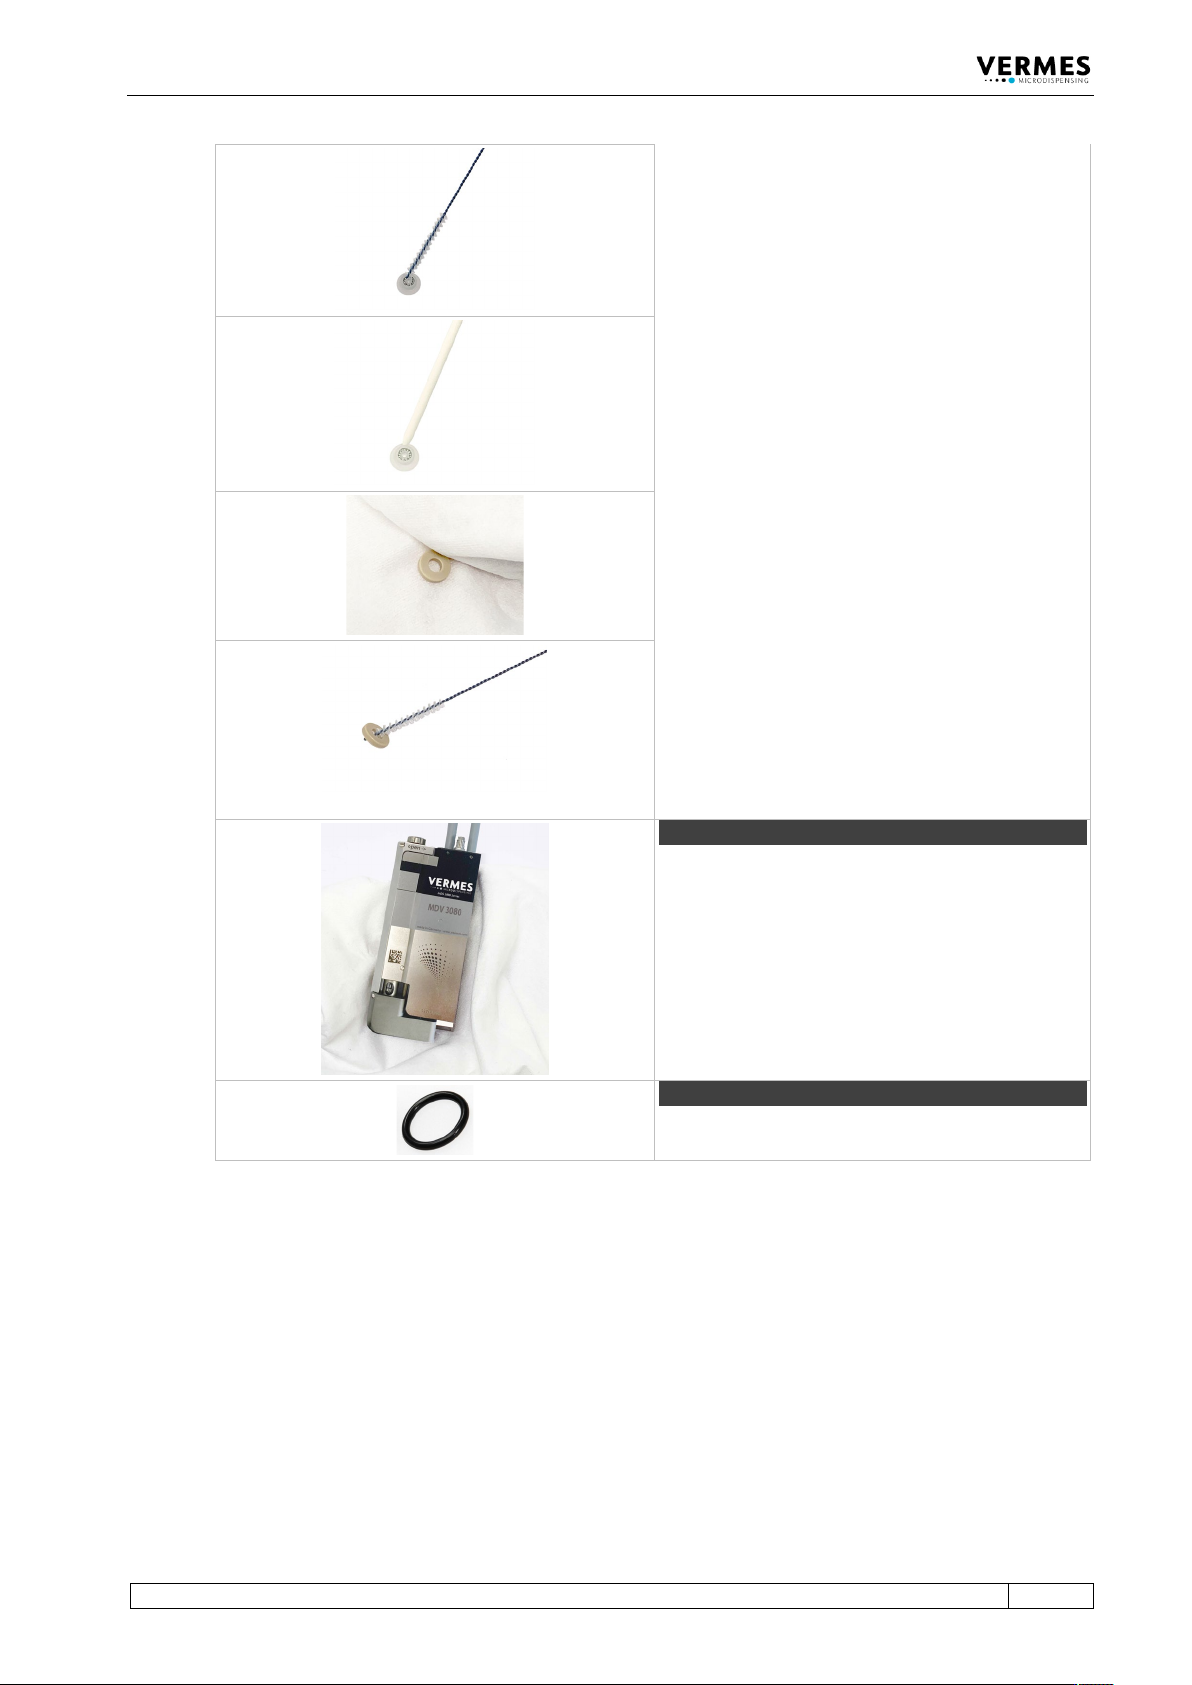
Afterwards, clean the outside of the tappet
sealing. Keep using the fluidic brush, especially for
the outer edge.
Then clean the inner rim of the tappet sealing with
a cleaning rod.
Clean the outside of the tappet centering piece
first with a lint-free cloth.
Use a fluidic brush for the bore of the tappet
centering piece.
Important Note!
There is no tappet centering piece, if you use a 2G
tappet rod.
Step 7 (valve body)
Clean the valve with a lint-free cloth.
Step 8 (O-ring)
Clean all O-rings with a lint-free cloth.
Tab. 30: Clean all components by hand
– Dry all the components in the air or with compressed air. For nozzle inserts, we recommend
to use the MDT 324 Nozzle Insert Cleaning Holder.
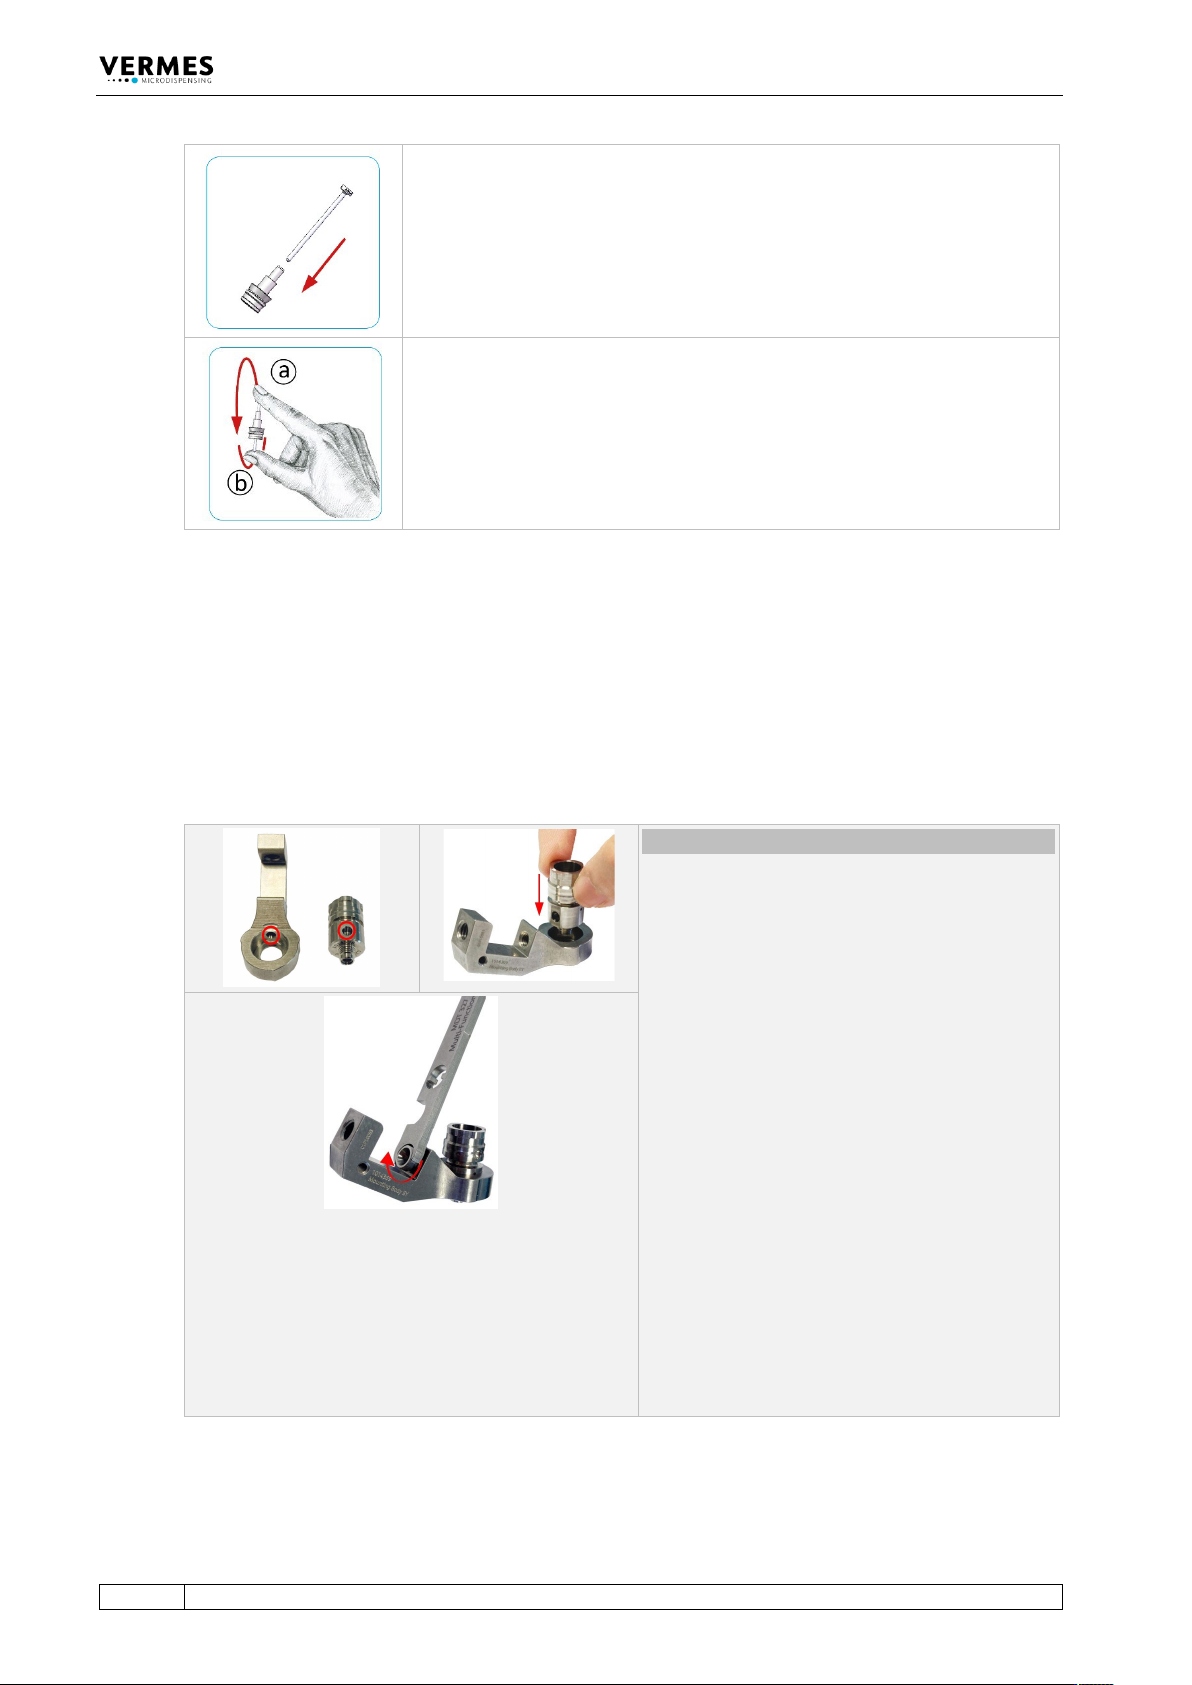
– A two finger seesaw test is necessary to check if the tappet rod runs smoothly through the
Tappet Centering Screw BY. Otherwise, the parts have to be cleaned again. The table explains
how to perform a two finger seesaw test.
Cleaning
142
VTK-TR-BA-171e-1 - User Manual MDS 3080-V
Step 1:
Push the Tappet Centering Screw BY onto the tappet.
Step 2:
Hold the tappet with the Tappet Centering Screw BY between the index
finger and the thumb. Swivel the tappet half-circularly between a and b. The
Tappet Centering Screw BY must slide smoothly on the tappet in between
the ends.
Remove the Tappet Centering Screw BY from the tappet after the test.
Tab. 31: Two-Finger-Seesaw-Test
In case you still have parts, which are not completely clean after the fine purification, repeat the
corresponding cleaning steps for those components several times, if necessary. If that is still not
helping, contact our Technical Support.
9.4.5 Assembling of the Valve
Re-assemble the valve and its components as follows.
Unusual (connector BY)
In the exceptional case that you removed the
connector BY as well, you have to mount it first.
Place the fluid box body on the receptacle of the
mounting body. Align the bore on the fluid box
body with the bore on the mounting body (see
circles). The fluid box body will fit into the
mounting body, if the mounting direction is
correct.
Push the Connector BY through the mounting
body into the bore of the fluid box body. Screw
the Connector BY tight (clockwise) by using an
MDT 327 (for newer revisions of the Connector
BY you can also use a hexagon key 2.5 or the
Torque Wrench Tool VM with the Bit Hexagon
Key 2.5). Torques are depending on the material
of the mounting body (stainless steel 120 – 140
cN.m, PEEK 70 – 80 cN.m).
Important Note!
Do not press the fluid box body while fastening
the Connector BY, otherwise, it cannot correctly
grip into the fluid box body.
Cleaning
VTK-TR-BA-171e-1 - User Manual MDS 3080-V
143
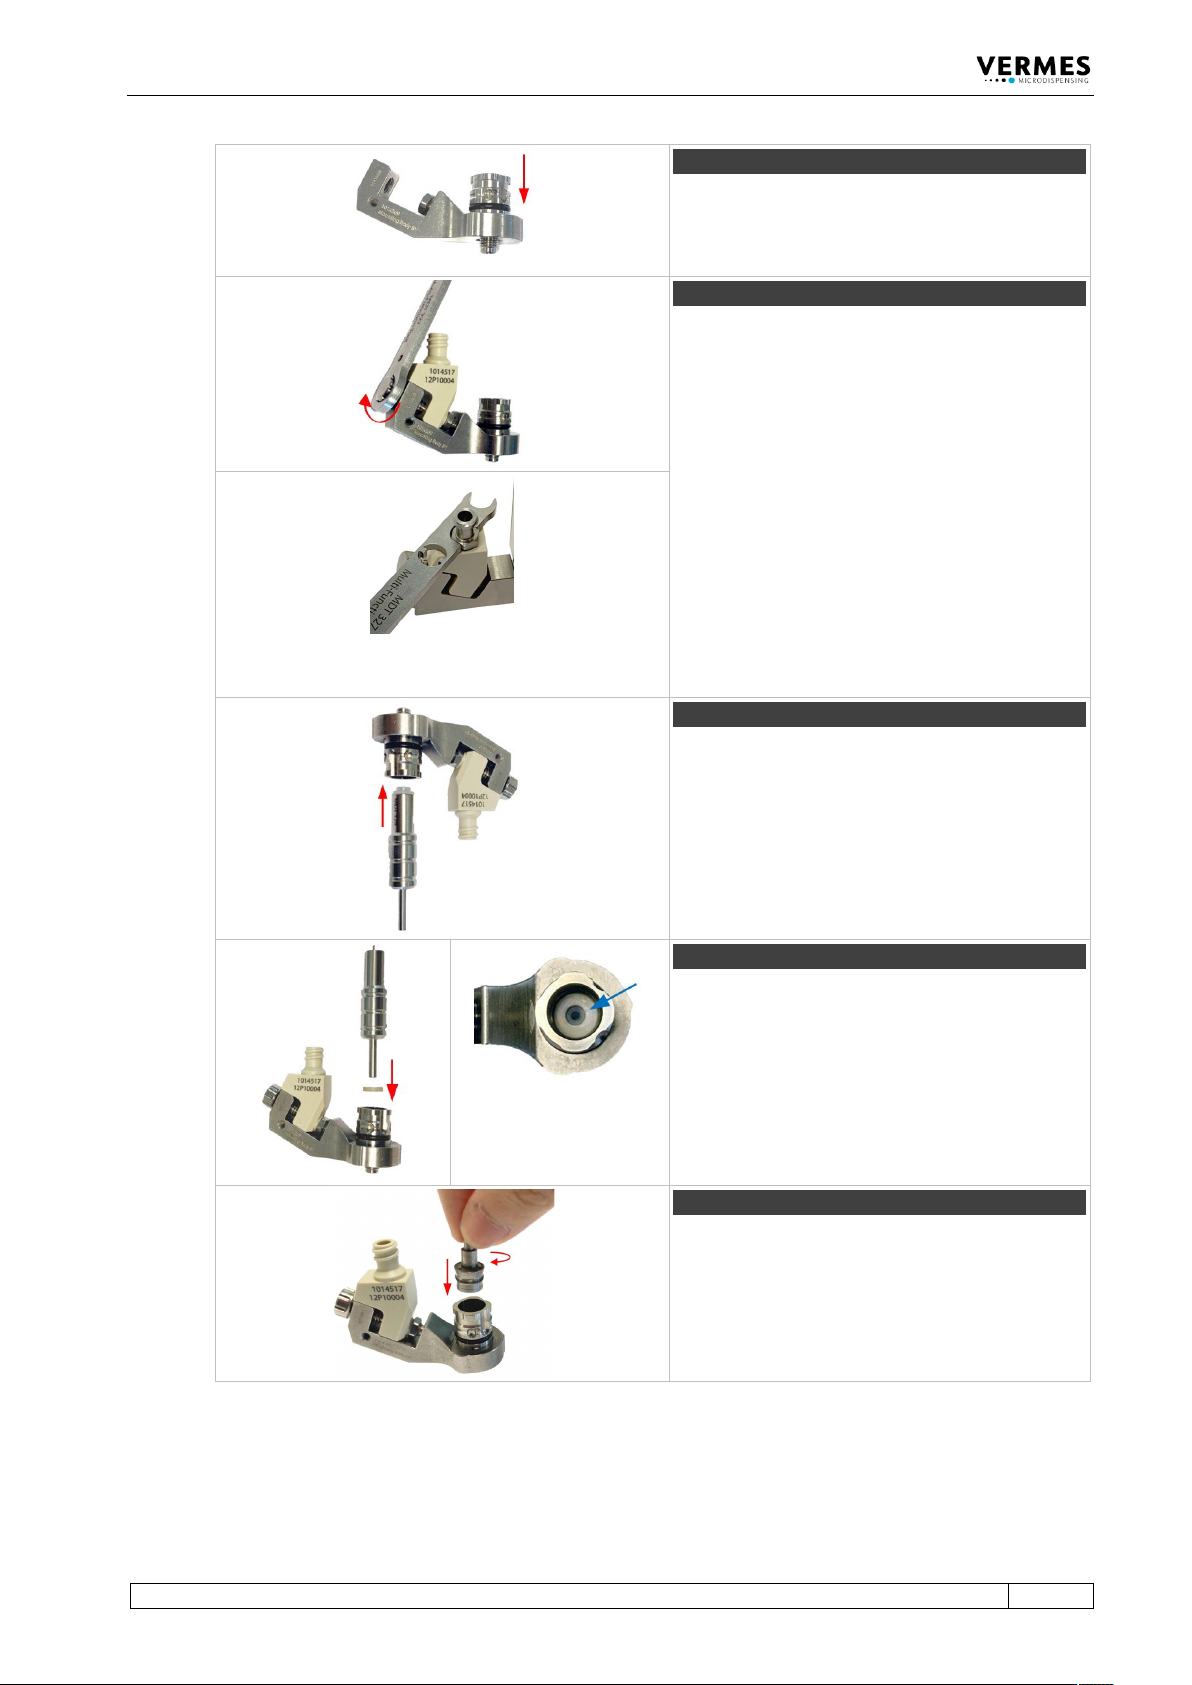
Step 1 (O-ring)
In case that you removed the O-ring, you have to
mount it onto the fluid box body.
Pull the O-Ring-BY over the fluid box body with a
pair of tweezers.
Step 2 (cartridge base)
Mount the cartridge base onto the fluid box. Use
MDT 327 or the MDT 306 - Torque Wrench Tool
VM with BitVM-A (torque 110 – 120 cN.m) to fix
the cartridge base with the tightening screw by
screwing clockwise.
Important Note!
There are two types of cartridge bases: Cartridge
Base CH (without integrated luer lock) and
Cartridge Base CHI (with integrated luer lock). If
you use a cartridge base without integrated luer
lock, you need to screw the Fluid Box Connector
Luer Lock into the top bore of the cartridge base.
Use the open-ended wrench of the MDT 327
(hexagon screw size M8, torque stainless steel
100 – 120 cN.m, PEEK 40 – 60 cN.m).
Step 3 (tappet sealing)
Push the Tappet Sealing PE/PTFE/HT with the
wider side down onto the pin of an MDT 328 -
Tappet Sealing Changing Tool. Push the MDT
328 with the tappet sealing straight into the
fluid box. When the tappet sealing sits tight, you
will hear a light noise.
Step 4 (tappet centering piece)
Press the tappet centering piece into the fluid
box body. Use the MDT 328 to make sure the
tappet centering piece rests flat on the tappet
sealing.
Important Note!
When using a 2G Tappet rod, you do not need a
tappet centering piece.
Step 5 (tappet and tappet centering screw)
Screw the Tappet Centering Screw BY into the
fluid box. Do not screw it tight yet. Screw it only
for two rotations.