a3369b.pdf - 第89页
Operation 80 VTK - TR -BA- 171e - 1 - User Man u al MDS 3080 -V IMPORTANT NOTE Confir min g adj ust w hile gr een LED is O N Confirming the successful adjust by p ressing [enter] is only possi ble, i f the gr een LED is …
Operation
VTK-TR-BA-171e-1 - User Manual MDS 3080-V
79
Information!
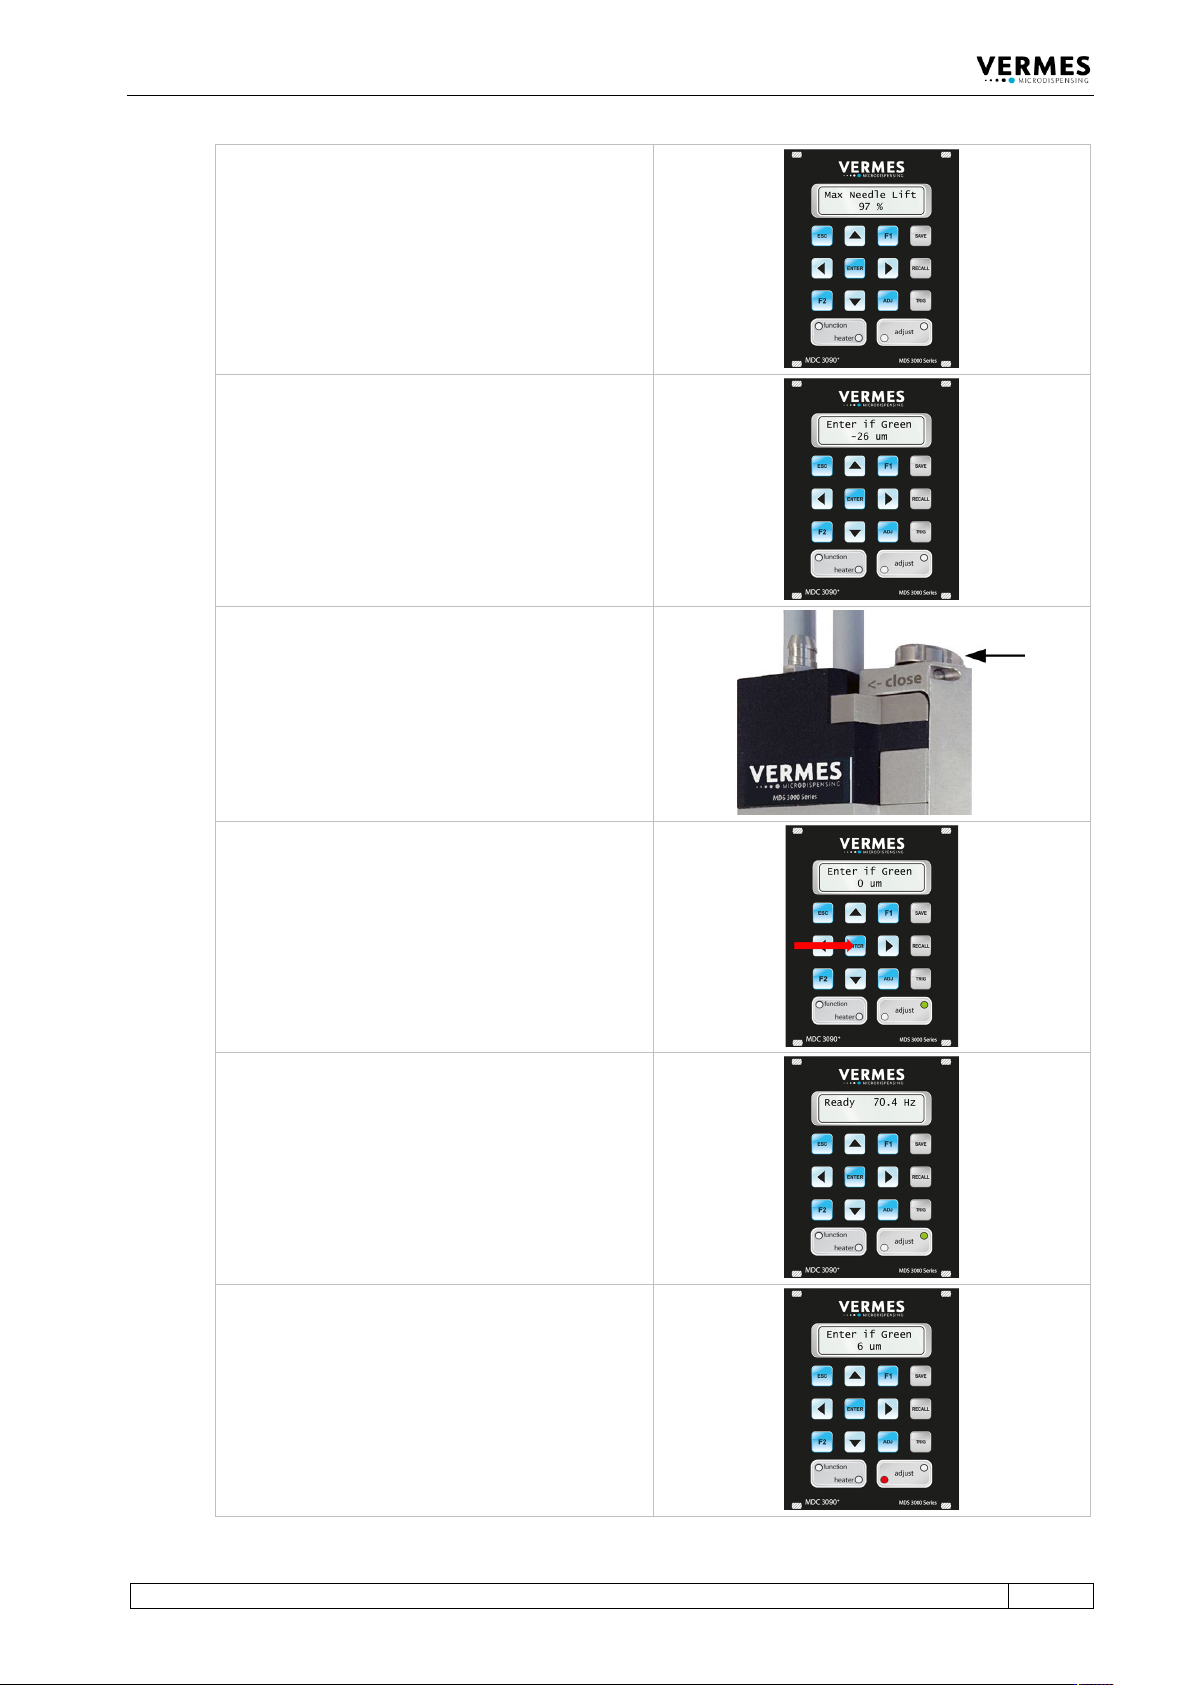
If the performance of the valve is unsatisfactory. In
the display, the message “Max Needle Lift” is
shown together with a percentage value in the
display. Once the message changes to “Press
Enter”, press the [enter]-key. In this case, you
should send the valve to VERMES Microdispensing
GmbH for maintenance.
Step 2 (turn in the adjust screw)
The display shows the starting value of the adjust.
Now turn the adjust screw with the help of tool
MDT 327 slowly in the direction “close”, until the
green adjust LED is ON. The adjust is possible
between 0 µm and 4 µm. (In fixed adjust mode, the
adjust is possible between 0 µm and 50 µm.)
Step 3 (Find adjust value and confirm it)
Press the [enter]-key, if the green adjust LED is ON.
Once you have completed the adjust successfully,
the display returns to the message “3090+ xx Hz”.
You are again in the main menu of the MDC. The
system is now ready to be filled with the
dispensing medium.
Information!
If you screw in the adjust screw too far (5 µm or
more shown), then the red adjust LED will be ON.
Screw back a little bit. An adjust can only be
confirmed as successful with [enter], while the
green adjust LED is ON.

Operation
80
VTK-TR-BA-171e-1 - User Manual MDS 3080-V
IMPORTANT NOTE
Confirming adjust while green LED is ON
Confirming the successful adjust by pressing [enter] is only possible, if the green LED is on.
INFORMATION
Further adjust information
• You can always leave the adjust by pressing the [esc]-key.
• After the successful adjust, the green LED will go off after approx. 3 s.

Operation
VTK-TR-BA-171e-1 - User Manual MDS 3080-V
81
7.15 Switching OFF the Microdispensing System
– Step 1: The current dispensing cycle must be completed, so that the valve is in home position.
– Step 2: Lower the supply pressure to atmospheric pressure (because in initial position, the
valve is still opened). Disengage the pneumatic supply. If required, close the cartridge by
using locking pin MDT 309.
– Step 3: Switch OFF the control unit (ON/OFF button at the rear end). After switching OFF the
control unit, please wait a few seconds.
– Step 4: Disconnect the valve from fluid supply.
– Step 5: Remove all cables from the valve.
– Step 6: Unscrew the screws used for fixing the valve in place.
After working with self-curing substances, immediate cleaning is advisable in order to avoid
clogging. This concerns the valve itself and all parts in contact with the fluid. The valve and its
subcomponents have to be dismantled and cleaned (see chapter 9, page 129).