00198783-01_AI_Kit_TwinVHF_Gantry_SXV3_de_en.pdf - 第141页
4 Dismantling a Gantry 4.2 Performing Calibration Assembly Instructions / Montageanleitung SIPLACE SX1/SX2 V3 Reconfiguration Kit Twin VHF mit Portal Reconfiguration Kit Twin VHF with Gantry 06/2020 141 4.2 Performing Ca…
4 Dismantling a Gantry
4.1 Final work on the machine
140 Assembly Instructions / Montageanleitung SIPLACE SX1/SX2 V3 Reconfiguration Kit Twin VHF mit Portal
Reconfiguration Kit Twin VHF with Gantry 06/2020
4.1 Final work on the machine
► At location 2 only: fit the long end position buffer if the gantry has been removed. Use a
torque wrench to tighten to 14Nm. Take a look at the buffer monitoring function! The safety
switch for buffer monitoring function must engage in the Schmersal switch.
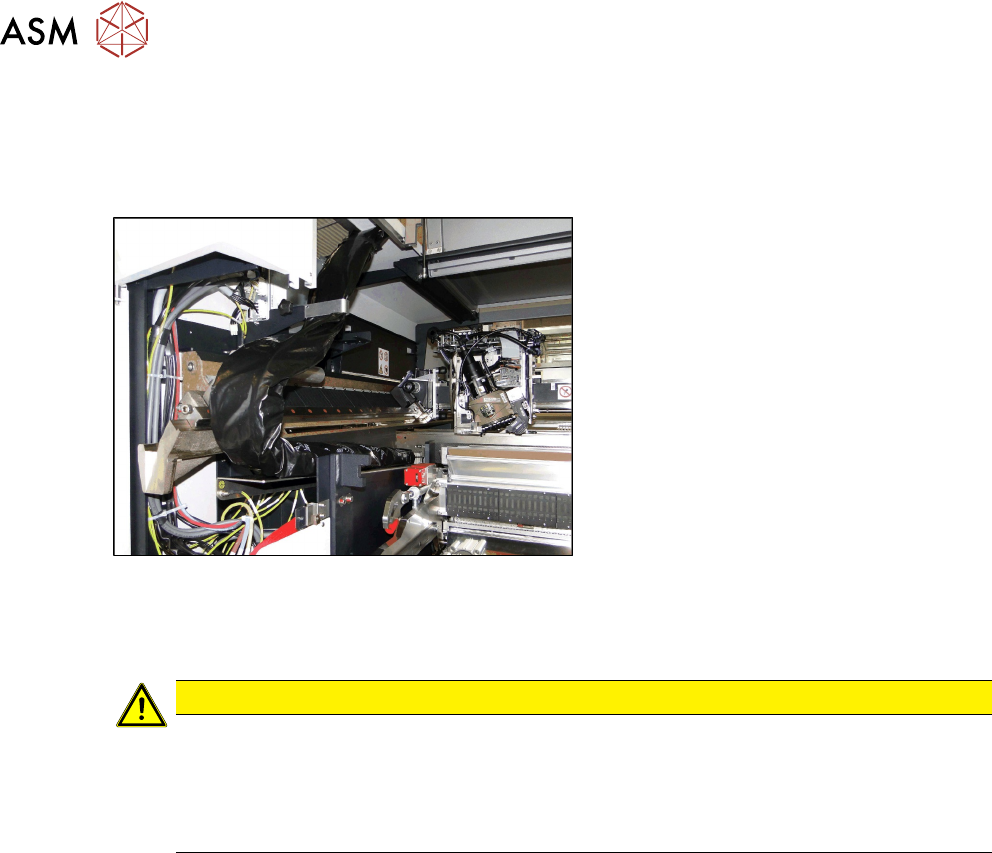
Fig.77: Trailing cable on bracketcable
► Fit the trailing cable to the holder next
to the MGCU.
► Close the two side doors again.
► Calibrate (see below)
CAUTION
Check, stationary camera, nozzle changer
► Check whether gantry 1 can move to location 2 unhindered and whether it can also
reach the table pickup position.
► In certain configurations, you need to dismantle the stationary camera and the second
nozzle changer row and then move the table from the outer to the inner position.
4 Dismantling a Gantry
4.2 Performing Calibration
Assembly Instructions / Montageanleitung SIPLACE SX1/SX2 V3 Reconfiguration Kit Twin VHF mit Portal
Reconfiguration Kit Twin VHF with Gantry 06/2020
141
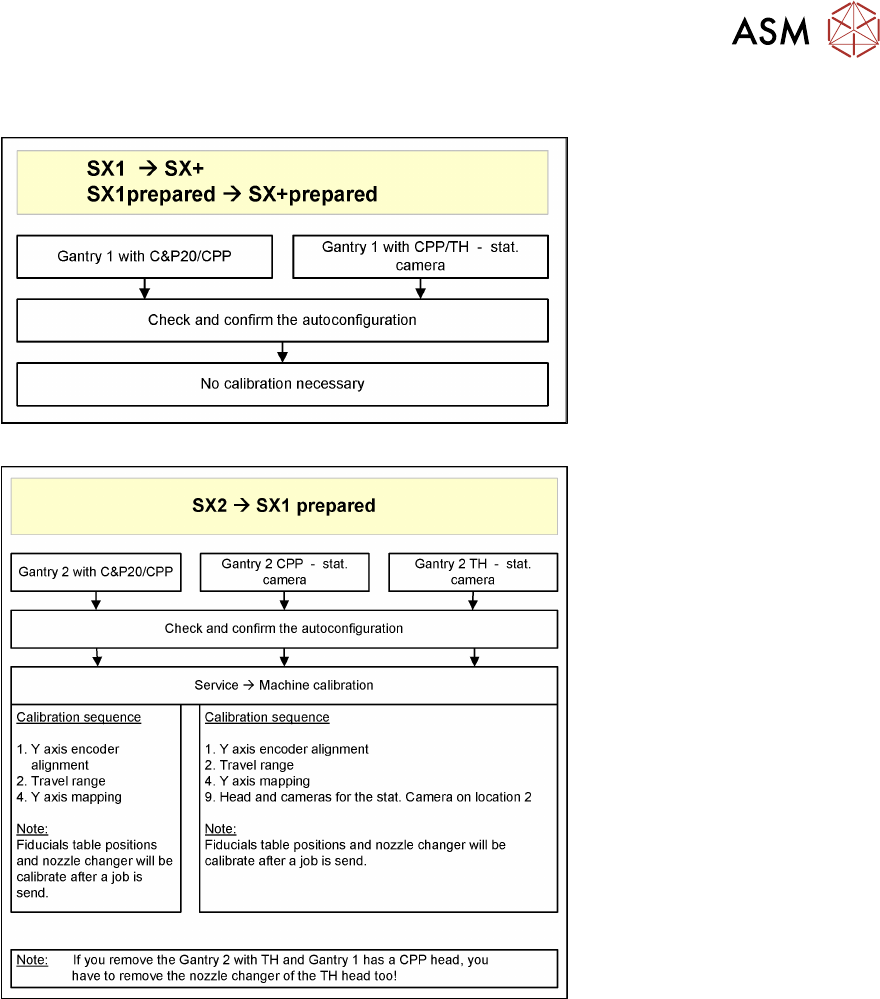
4.2 Performing Calibration
Fig.78: No Calibration
Fig.79: Overall calibration
See also
2 3.7.8 "Performing Calibration" [}130]
4 Dismantling a Gantry
4.2 Performing Calibration
142 Assembly Instructions / Montageanleitung SIPLACE SX1/SX2 V3 Reconfiguration Kit Twin VHF mit Portal
Reconfiguration Kit Twin VHF with Gantry 06/2020
4.2.1 eSW Download (SW 70x)
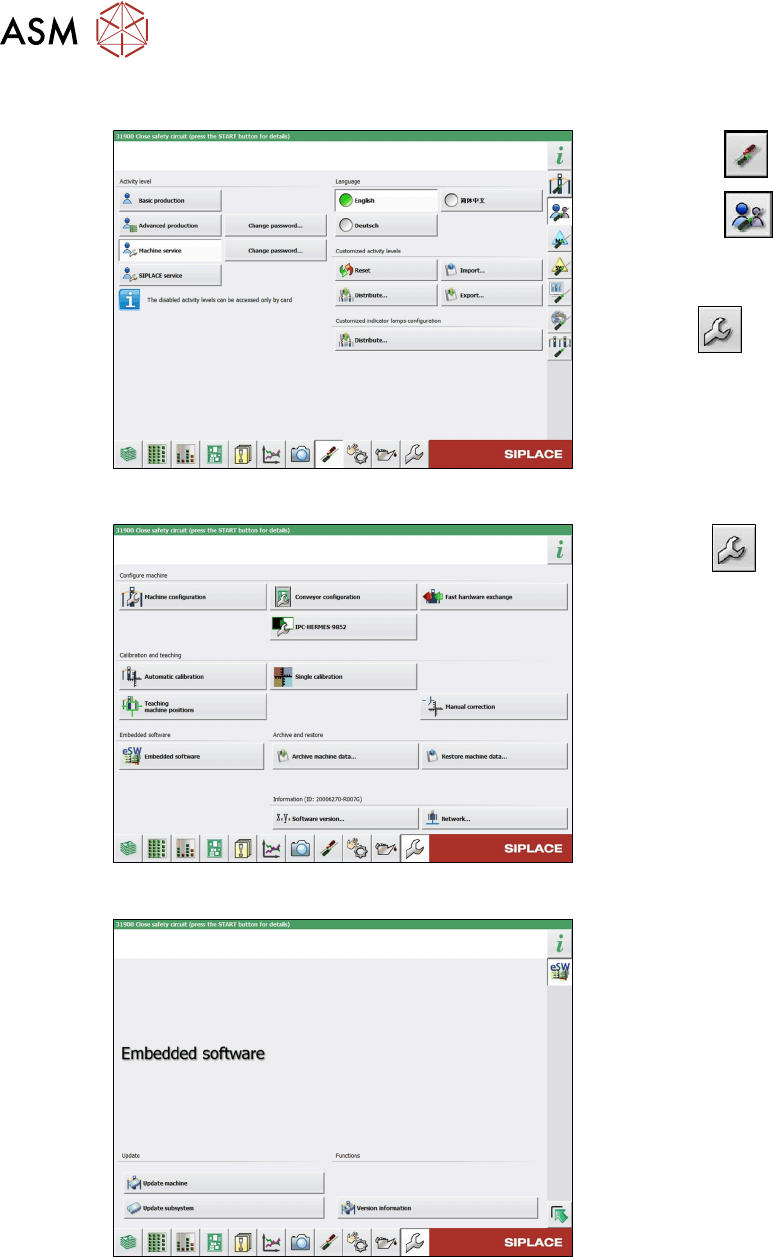
Fig.80: Select operator level
► Select the button.
► Select the button.
► Switch over to the operator level Ma-
chine service.
ð The button will be shown.
Fig.81: Service menu
► Click the button to enter the Ser-
vice menu.
► Click on the Embedded software but-
ton.
Fig.82: Embedded software menu
Select the required function:
► Click on Update machine… to check
the entire machine and to perform an
eSW download for multiple subsystems
(see next picture).
► Click on Update subsystem… to se-
lect one subsystem, check and to per-
form an eSW download.
► Click on the button Version informa-
tion…, to view all versions of the sub-
systems, BIOS, application 1/2/3/5.