00197973-10_SM_MaterialTower.pdf - 第196页
Portal 00197 973 - 10 / 02 , 2016 8- 32 © ASM SIPLACE Mat. Tower St ora ge Ser vice Manu al From below, insert t he load cell. Screw in and tight en the four f ixing screws (see picture). Re - mount the Meas uring Pla te…
00197973-10 / 02 , 2016 Portal
SIPLACE Mat. Tower Storage Service Manual © ASM 8-31
Mount the new load cell
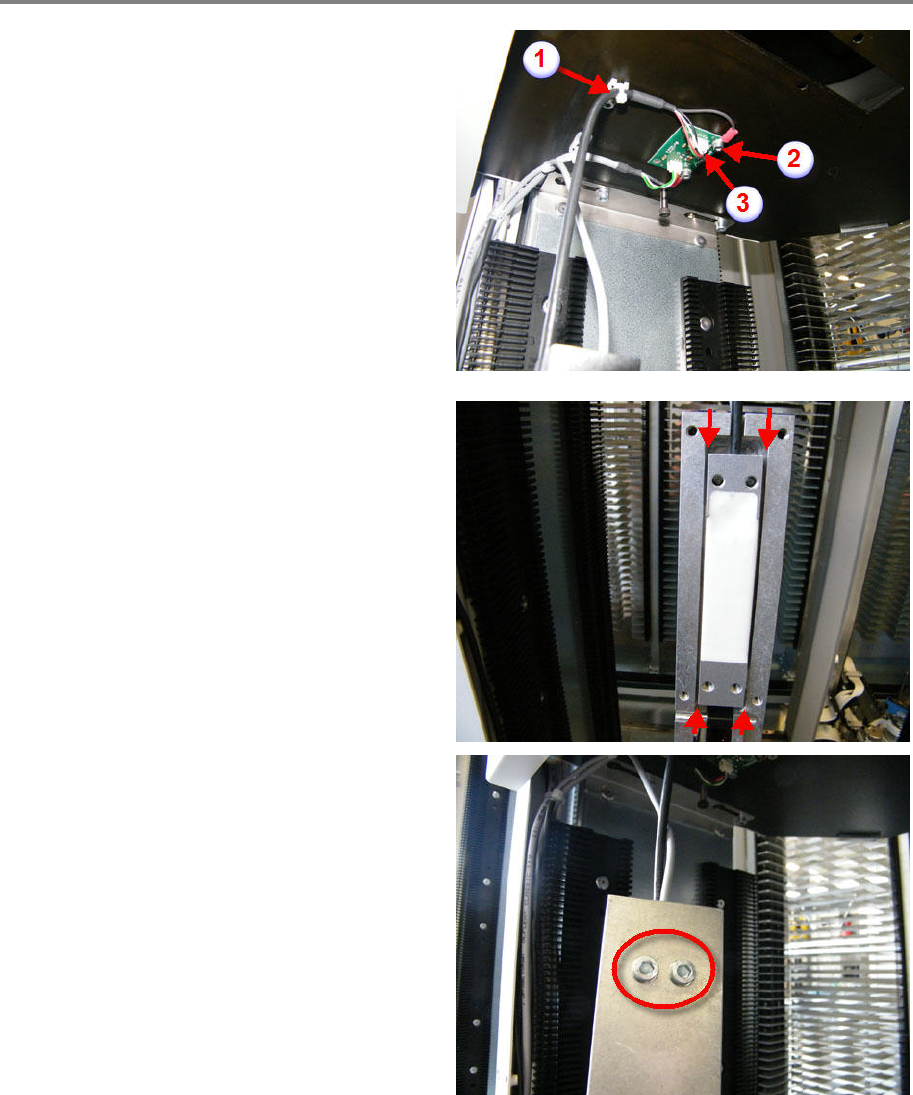
Fix the cable by using the cable tie (1).
Let the load cell hang down very carefully,
without damaging the cable.
Fix the ground cable by using the ground screw
(2).
Plug in the data cables (3).
Mount the load cell to the load cell fixture
Make sure the load cell is positioned in the
middle of the fixture and in parallel to it (see
pictur
e).
Tighten the both screws as shown on picture.

Portal 00197973-10 / 02 , 2016
8-32 © ASM SIPLACE Mat. Tower Storage Service Manual
From below, insert the load cell.
Screw in and tighten the four fixing screws (see
picture).
Re-mount the Measuring Plate
Inser
t the spacer block.
Apply the measuring plate on top of the spacer
block.
Screw in the two fixing screws (1) but do not
tighten them.

00197973-10 / 02 , 2016 Portal
SIPLACE Mat. Tower Storage Service Manual © ASM 8-33
Loosen and remove the two mounting shoulder
screws (1)
Screw in the two mounting shoulder screws to
bring the measuring plate into the correct
position.
Tighten the two fixing s
crews (1)
Remove the two mounting shoulder screws.
Return the two mounting shoulder screws to
their origin position.