00197973-10_SM_MaterialTower.pdf - 第94页
Z Axis 001 97973 - 10 / 02 , 20 16 6- 12 © ASM SIPLACE Mat. Tower St ora ge Ser vice Manu al Step 3 Remove the belt tens i oner screw. D uring loosening hold the l ower part in y our hand to prevent it from fal ling down…
00197973-10 / 02 , 2016 Z Axis
SIPLACE Mat. Tower Storage Service Manual © ASM 6-11
Machine loading:
• All stored items must be unloaded in advance.
Machine operating
condition:
• Shut down
Main electrical
power:
• Equipment disconnected from power supply system. The Main Switch
(switched off) locked by means of a padlock to secure the main switch
against unintentional switching on.
Compressed air /
Nitrogen (if used):
• Equipment disconnected from compressed air or nitrogen supply.
Access:
• Open both doors of the machine.
• Pull the Z axis towards you.
• Pull the gripper up (is a bit hard because the Z motor has a break) so
you have better access.
6.2.4 Exchange steps
Step 1
Note:
To prevent the Y axis from falling down,
securely hold it during removal of the
screws. It is recommended to move the Y
axis completely to the bottom before
loosening and removing the screws to
prevent it from falling down.
Remove the 8 screws that connect the whole Y
axis to the Z belt.
Lay the whole Y axis carefully down (if not
already done).
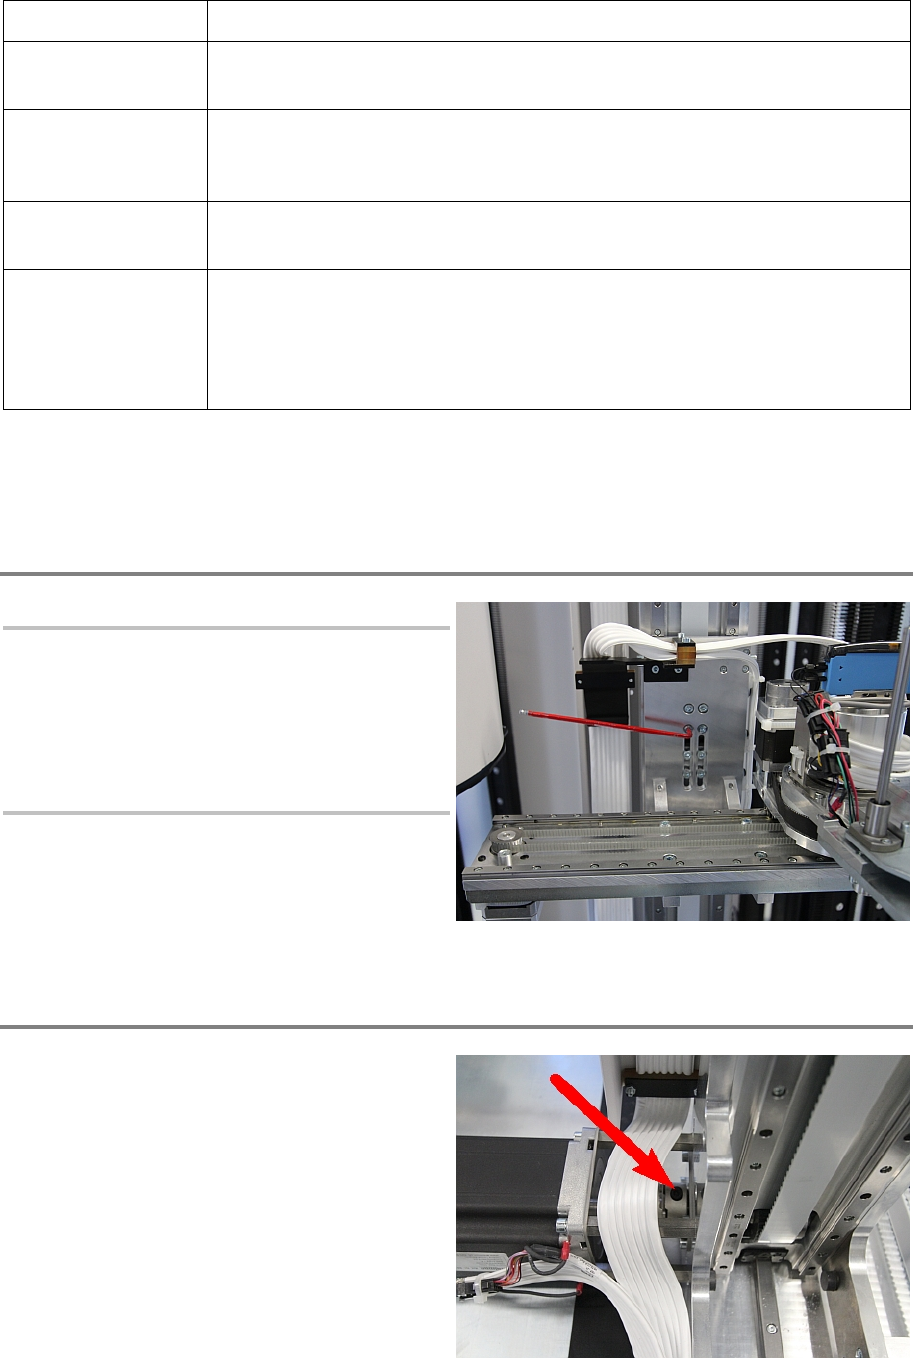
Step 2
Pull the
Z belt until the screw of the coupling is
visible.
Loosen the screw of the coupling. Now, the Z
belt should be easily movable by hand and the
coupling should not turn with this movement.

Z Axis 00197973-10 / 02 , 2016
6-12 © ASM SIPLACE Mat. Tower Storage Service Manual
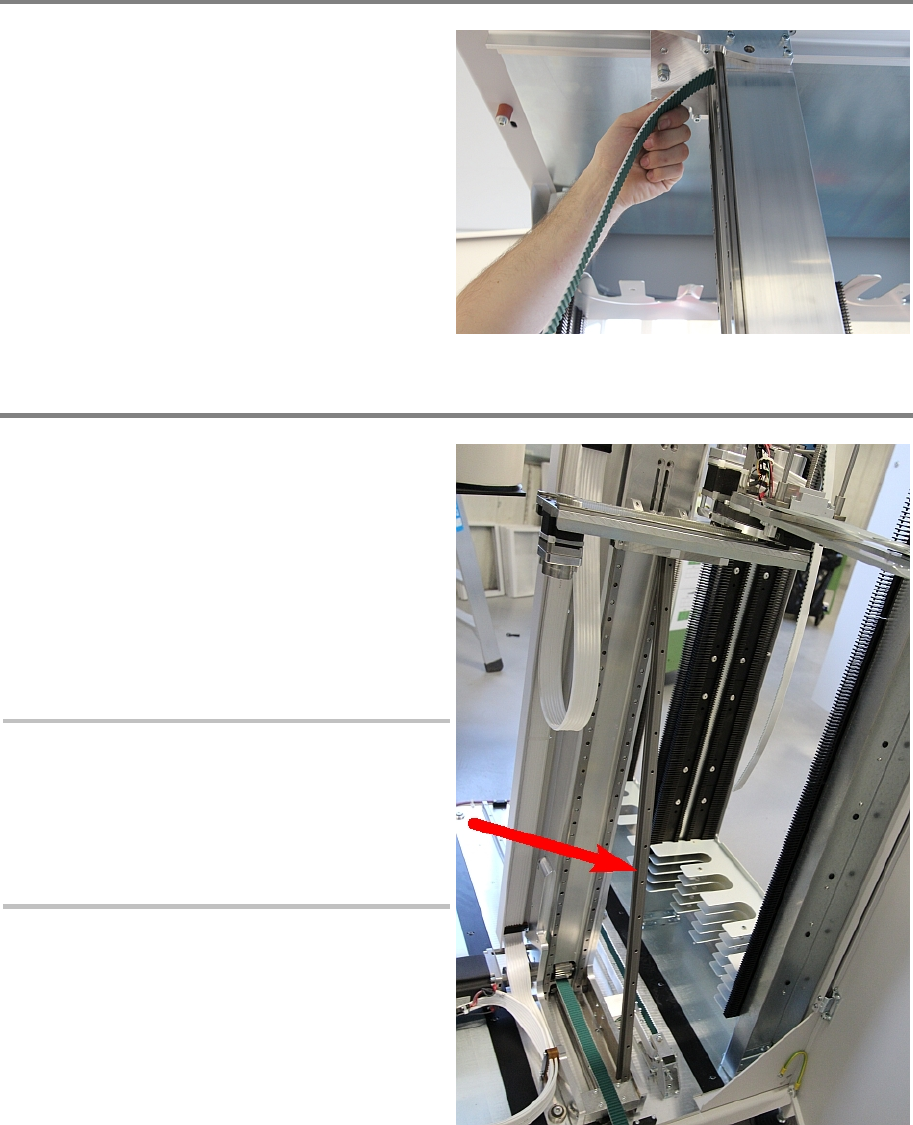
Step 3
Remove the belt tensioner screw. During
loosening hold the lower part in your hand to
prevent it from falling down on the Y axis.
Loosen the four screws on both belt holdings as
far as the belt can be pulled out.
Now it is possible to remove the whole belt by
pulling on t
he upper end.
Step 4
Remove the deflection pulley by removing the
four screws at the back of the Z axis.
00197973-10 / 02 , 2016 Z Axis
SIPLACE Mat. Tower Storage Service Manual © ASM 6-13
Step 5
Check the length of the new belt which must be
4453 mm ± 2 mm
.
Push the belt over the upper pulley and down
inside the back of the Z axis until it does not go
furthe
r.
Step 6
For the next step it is required to have access to
the bottom pulley. Therefore, the whole Y axis
must be lifted and secured. Put a piece of wood
or steel below the axis to hold it securely into
place. Do not put force on the gripper itself.
Instead, secur
e the spacer below the Y axis.
Another possibility is to fasten a clamping set
around the Z axis. Be careful not to damage or
scratch the linear bearings.
Note:
The spacer has to be securely placed as
work will be done right below the Y axis.
If the Y ax
is falls down it could cause
injury and damage to the machine. In
case of doubt, only lift the axis for a short
distance.