00197446-02_UM_JTF_S_JTF-M_ X-Serie_S_de_en.pdf - 第144页
Tasks for SIPLACE JTF-S, SIPLACE JTF-M Task: Operating the Feeder 144 JEDEC Tray Feeder ► On the host s ystem, lin k the components / tray code to the slot number of the magazine. Load the magazine into the feeder base ►…
Tasks for SIPLACE JTF-S, SIPLACE JTF-M
Task: Operating the Feeder
JEDEC Tray Feeder 143
5
5 Tasks for SIPLACE JTF-S, SIPLACE JTF-M
Tasks for SIPLACE JTF-S, SIPLACE JTF-M
This chapter contains a number of subjects that are intended to help you during your daily work on a
SIPLACE line. For example, you are provided with preventative measures that you can take to minimize
the down time on the machine, to obtain the highest possible level of efficiency for the SIPLACE line dur-
ing production.
5.1
5.1 Task: Operating the Feeder
Task: Operating the Feeder
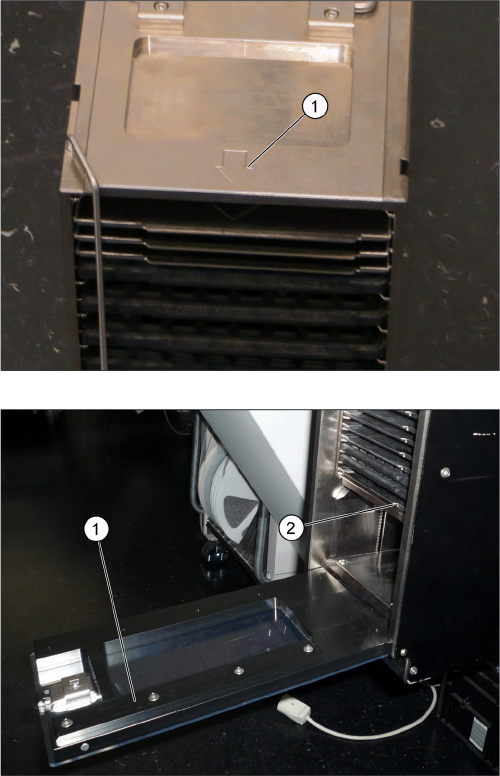
Loading the trays
► Place the magazine down on a stabile surface.
► Observe the arrow (1) on the magazine, which shows
the direction of loading for the magazine (example of
a magazine for SIPLACE JTF-M shown here).
► Observe the direction of loading for the trays and the
orientation. The encoding (1) on the door must corre-
spond to the tray orientation(2). The door can only be
closed if both correspond to one another.
Tasks for SIPLACE JTF-S, SIPLACE JTF-M
Task: Operating the Feeder
144 JEDEC Tray Feeder
► On the host system, link the components / tray code to the slot number of the magazine.
Load the magazine into the feeder base
► Make sure that the safety springs are open.
► Open the door.
► Always keep the magazine horizontal when lifting and holding.
► Load the magazine into the feeder base, following the direction of the arrow.
► Close the door.
If the changeover of individual trays is not planned for your operation, you do not need to open the rear
safety spring.
Removing the magazine
► (Let the host machine send the End-of-Lot (EOL) command to the feeders.)
► Open the door once the lift has reached the bottom.
► Grip under the magazine and pull it out until you can lift the first swivel handle on top of the magazine.
► Pull the magazine out farther, still holding it.
► Hold the magazine with one hand on each of the two swiveling handles.
► Lift it out, hold it horizontal and place it down on a stabile surface.
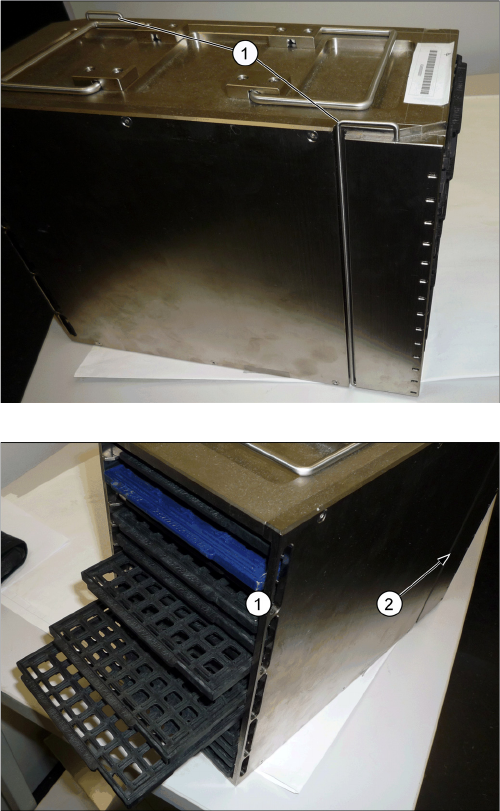
Removing the tray
► You can pull the trays for the slot out. If only one safety spring is open, you can also open the second
one.
► Open the two safety springs (1), which prevent the
tray from falling out.
1. Doors
2. Direction of supply
► Load the trays. Observe the orientation while doing
so.
Tasks for SIPLACE JTF-S, SIPLACE JTF-M
5.1.1 Setting the JEDEC Tray Delay Task: Operating the Feeder
JEDEC Tray Feeder 145
5.1.1
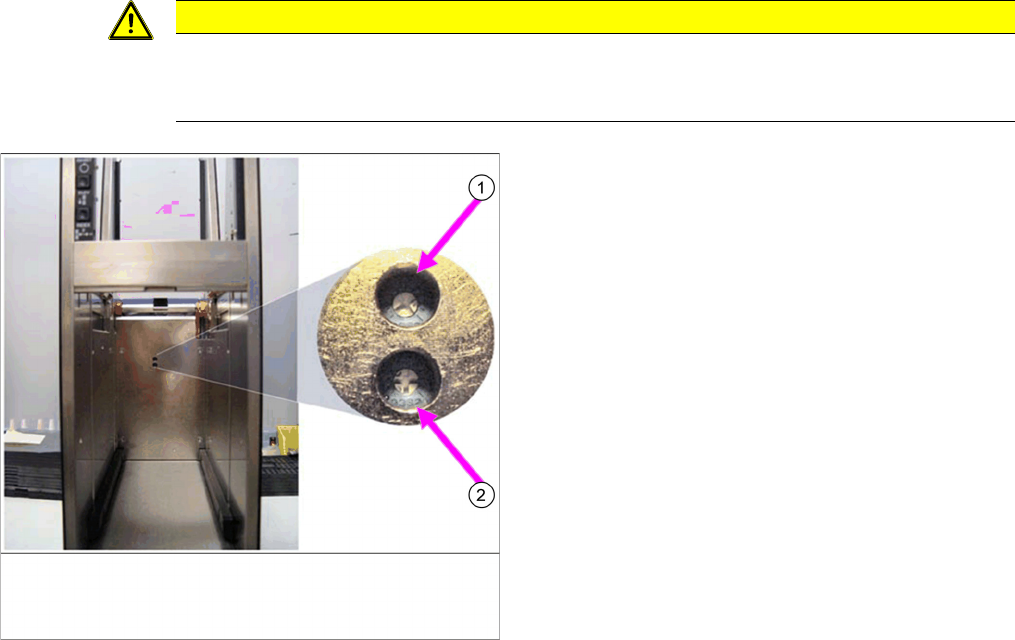
5.1.1 Setting the JEDEC Tray Delay
Setting the JEDEC Tray Delay
▪ Potentiometer delay (1):
Return slow down sensor
Clockwise: the conveyor ramp down delay is adjusted so that the tray arrives at the back more quick-
ly.
▪ Potentiometer delay (2):
Forward slow down sensor
Clockwise: the conveyor ramp down delay is adjusted so that the tray arrives at the front more quick-
ly.
See also the software manual for SIPLACE JEDEC tray feeder, [00197543-01]
CAUTION
Overrotating the potentiometer
These settings should be performed with care. If you overturn the potentiometer, you may need
to replace the entire control PCB.
To ensure that the JEDEC tray does not approach the
pick position too abruptly, a delay mechanism has been
fitted.
When the slow down sensors are passed, the delay be-
gins after the set time. This time can be set with the po-
tentiometer.
After the sensors have been passed, the controller con-
tinuously reduces the scanning degree of the motor con-
trol until the tray reaches the stop sensor. The speed of
the belt is also reduced.
If the tray moves forward, it passes the light barrier, the
forward slow down sensor. When moving backwards, it
passes the light sensor, the return slow down sensor.
The diagram shows the potentiometer and the setting for
it. This setting should only be made by trained personnel.