CP40 service manual.pdf - 第116页
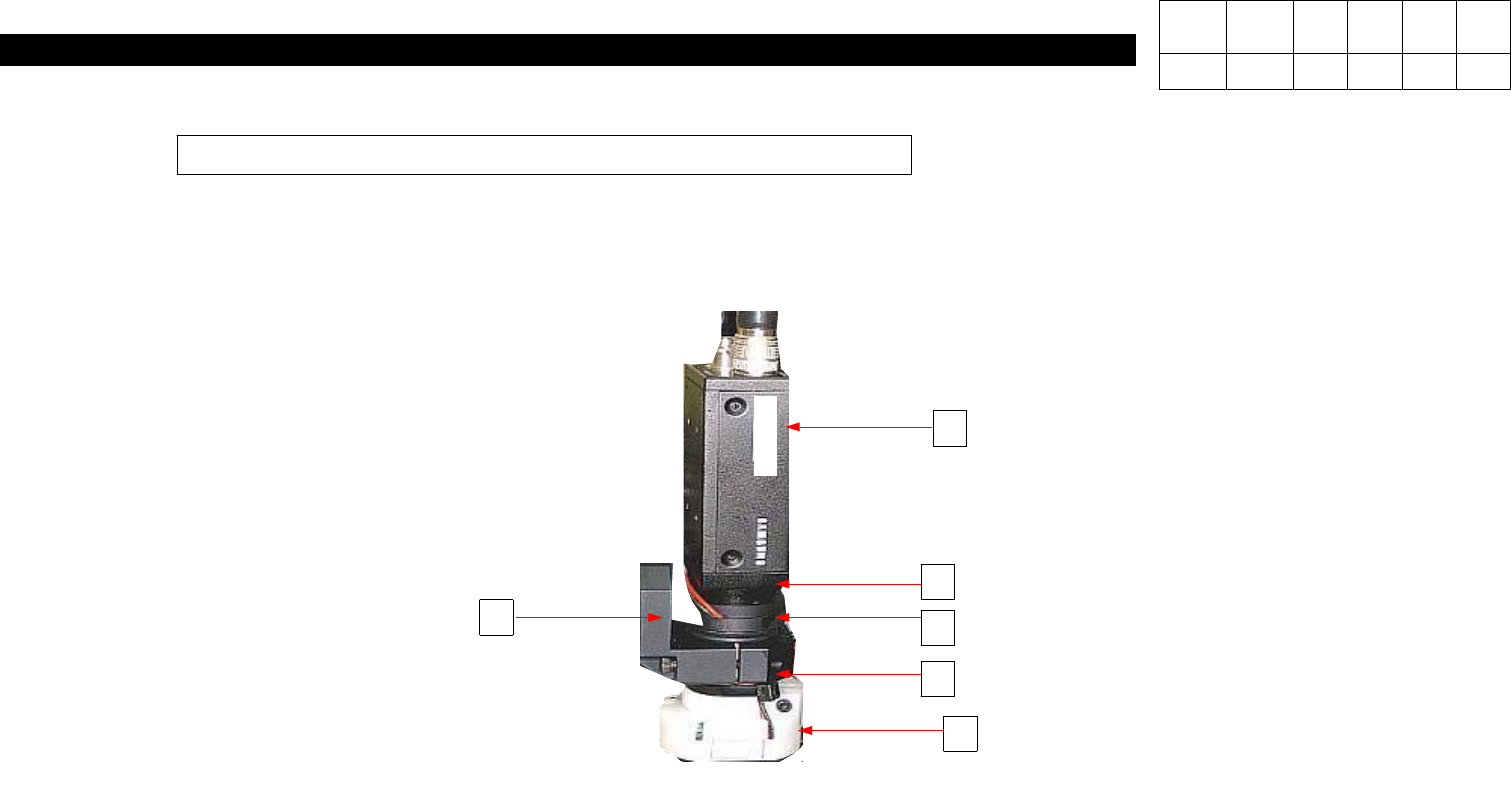
3. X-Y PART (CP-40) 1 4 5 6 J6751013A J9059083A J6304008A J7255027A J9060102B J7155259A CCD CAMERA XC-ST50 Materials by Each Part Version Date WA QA CA Note 00 Nov04 O O O 3 2
3. X-Y PART
(CP-40)
3. Preparation
4.
Move Camera Replacement
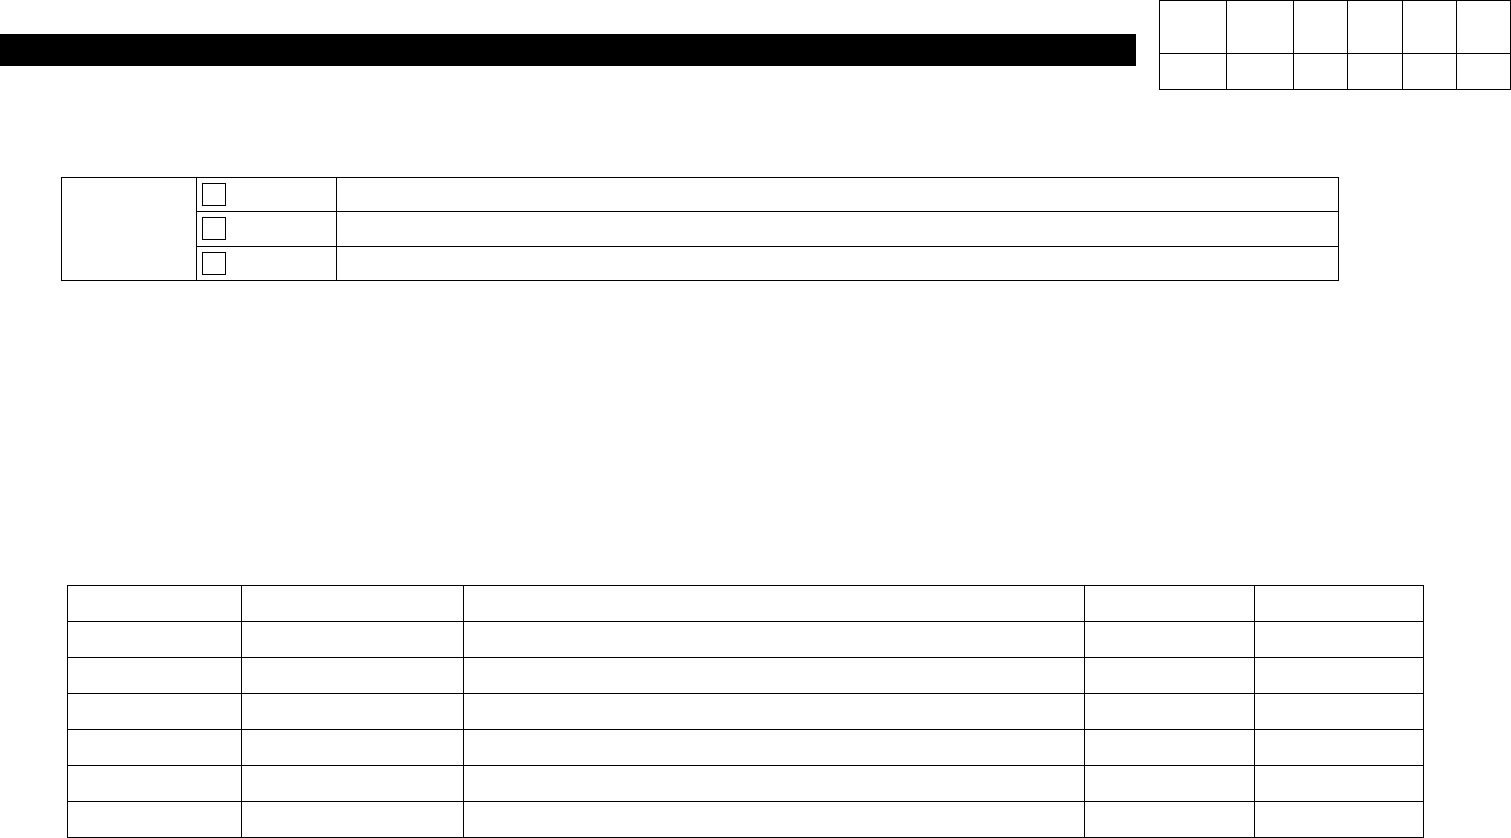
4-1. Prepare Required Materials.
Classification Material No. Nomenclature Qty. Remarks
1 J6751013A CCD CAMERA[XC-ST50] 1EA Changed
2 J9059083A NEW FIDUCIAL CAMERA BARREL ASS'Y 1EA Changed
3 J6304008A O-RING [G25] 2EA
4 J7255027A CAMERA ISOLATOR2 [J7255027A] 1EA
5 J9060102B NEW FIDUCIAL OUTER LED BOARD ASS'Y 1EA
6 J7155259A FIDUCIAL CAMERA BRACKET [A6061-T6] 1EA
Preparation
Material
Prepare Required Materials in the below Procedures.
S/W
Tool
Wrench set, Calibration Fixture
Version Date WA QA CA Note
00 Nov04 O O O
3. X-Y PART
(CP-40)
1
4
5
6
J6751013A
J9059083A
J6304008A
J7255027A
J9060102B
J7155259A
CCD CAMERA XC-ST50 Materials by Each Part
Version Date WA QA CA Note
00 Nov04 O O O
3
2
3. X-Y PART
(CP-40)
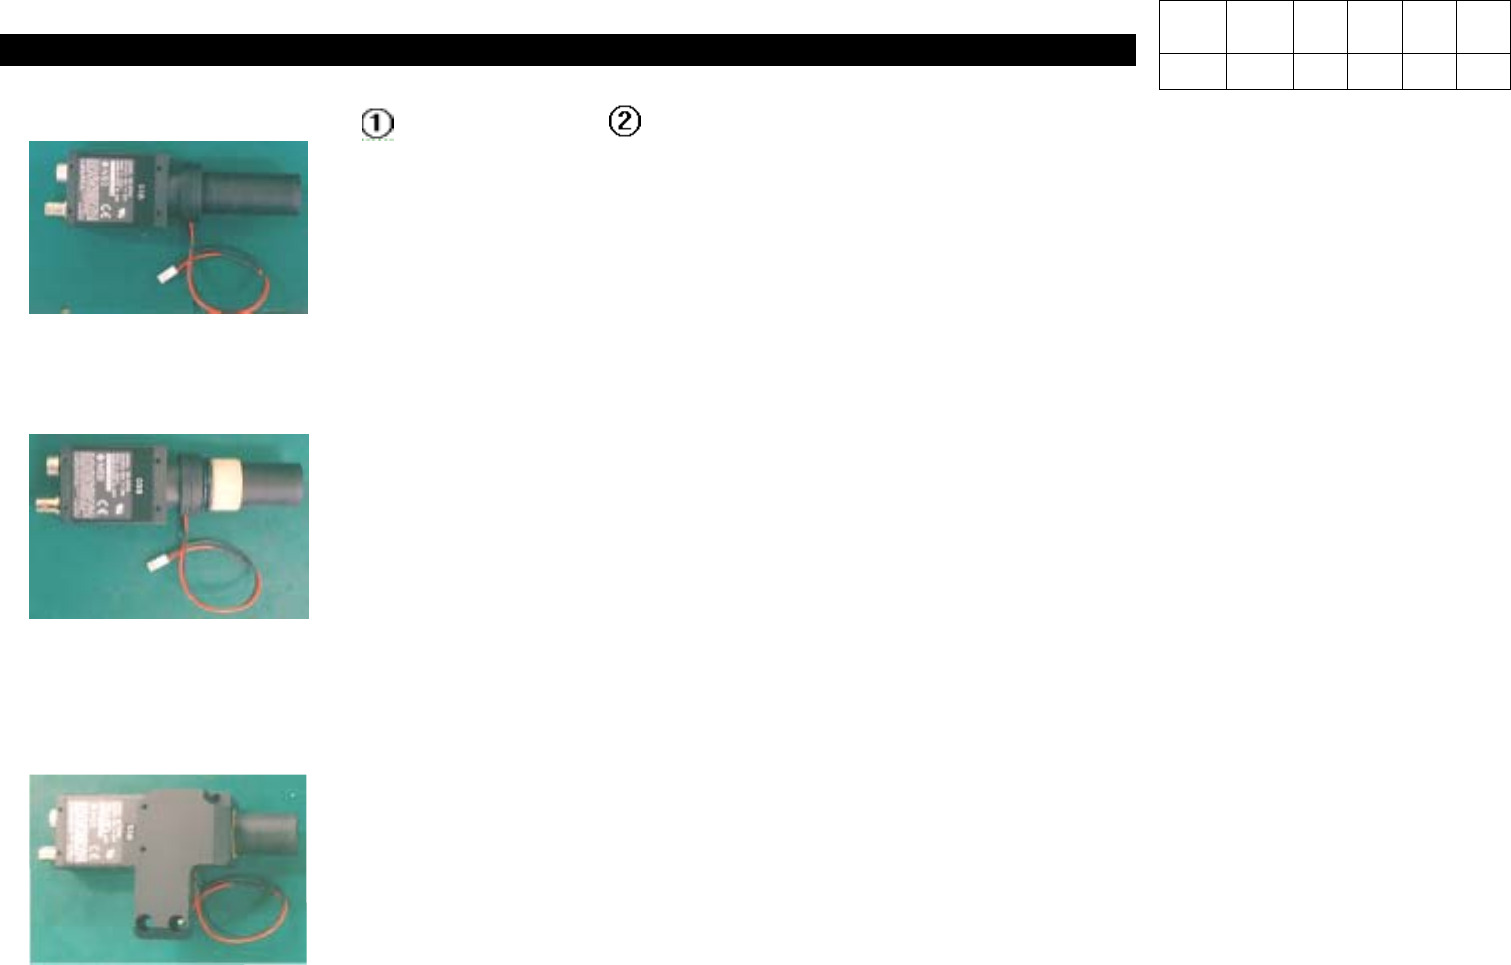
4-2. Assemble CCD Camera( ) and Barrel Ass'y( ).
4-3. Assemble [O-ring] and Camera Isolator.
Note) After Inserting Two O-rings into Barrel Ass'y, Insert Isolator to Stick to the End.
4-4. Assemble [Fiducial Camera Bracket].
Note) -.Insert O-ring Closely.
-.Assemble Camera Taking Care of the Direction of the Side with Label.
Version Date WA QA CA Note
00 Nov04 O O O