CP40 service manual.pdf - 第121页
3. X-Y PART (CP-40) 3-3-3. Tension Adjustment aft er X-Axis Motor Replacement 1. Loosen Four M5*20 Hexagon Wrench Bolts f or Securing until Motor Moves Freely. Do not Loosen them Completely. Caution) Verify that Motor M …

3. X-Y PART
(CP-40)
f.In MMI Menu, Select View and Click Position Display.
(Position Window is Displayed on Screen.)
g.Using Jog Box, Move Slowly to X-Direction.
On Screen, Read Value in X-Axis Immediately before Error(Limit Error).
h.Press Ready Switch and Execute Homing.
i.Using Jog Box, Move Slowly to X+ Direction.
On Screen, Read Value in X-Axis Immediately before Error(Limit Error).
Value of G will be (-) Value and that of J will be (+) Value.
j.Input Values of (G+2) and (I-2) into D.
k.Click OK and Close to Finish.
2.Feeder Origin Setting
(After Recording the Existing Data)
a.In MMI Menu, Click Setup and then System Setup.
b.Input Password and Press OK.
c.Select the Second(Origins) from the Top and Click Edit.
d.Install Feeder with Parts on No.11 Feeder.
e.Using Jox Box, Align Camera with No.11 Feeder Pick Up Point.
f.Specify Teaching Device on Right-hand Center as Camera and Click Data in Front First Item of Feeder.
g.Press Get Pos on the Right.
h.Input Values of (Existing Value - 150) into X Value of Front First Data and the Existing Value into Y Value(X Value will be (-)
Value(Normal)).
i.Perform Identical Procedures For Rear.
j.Remember Difference of Data.
Version Date WA QA CA Note
00 Nov04 O O O
3. X-Y PART
(CP-40)
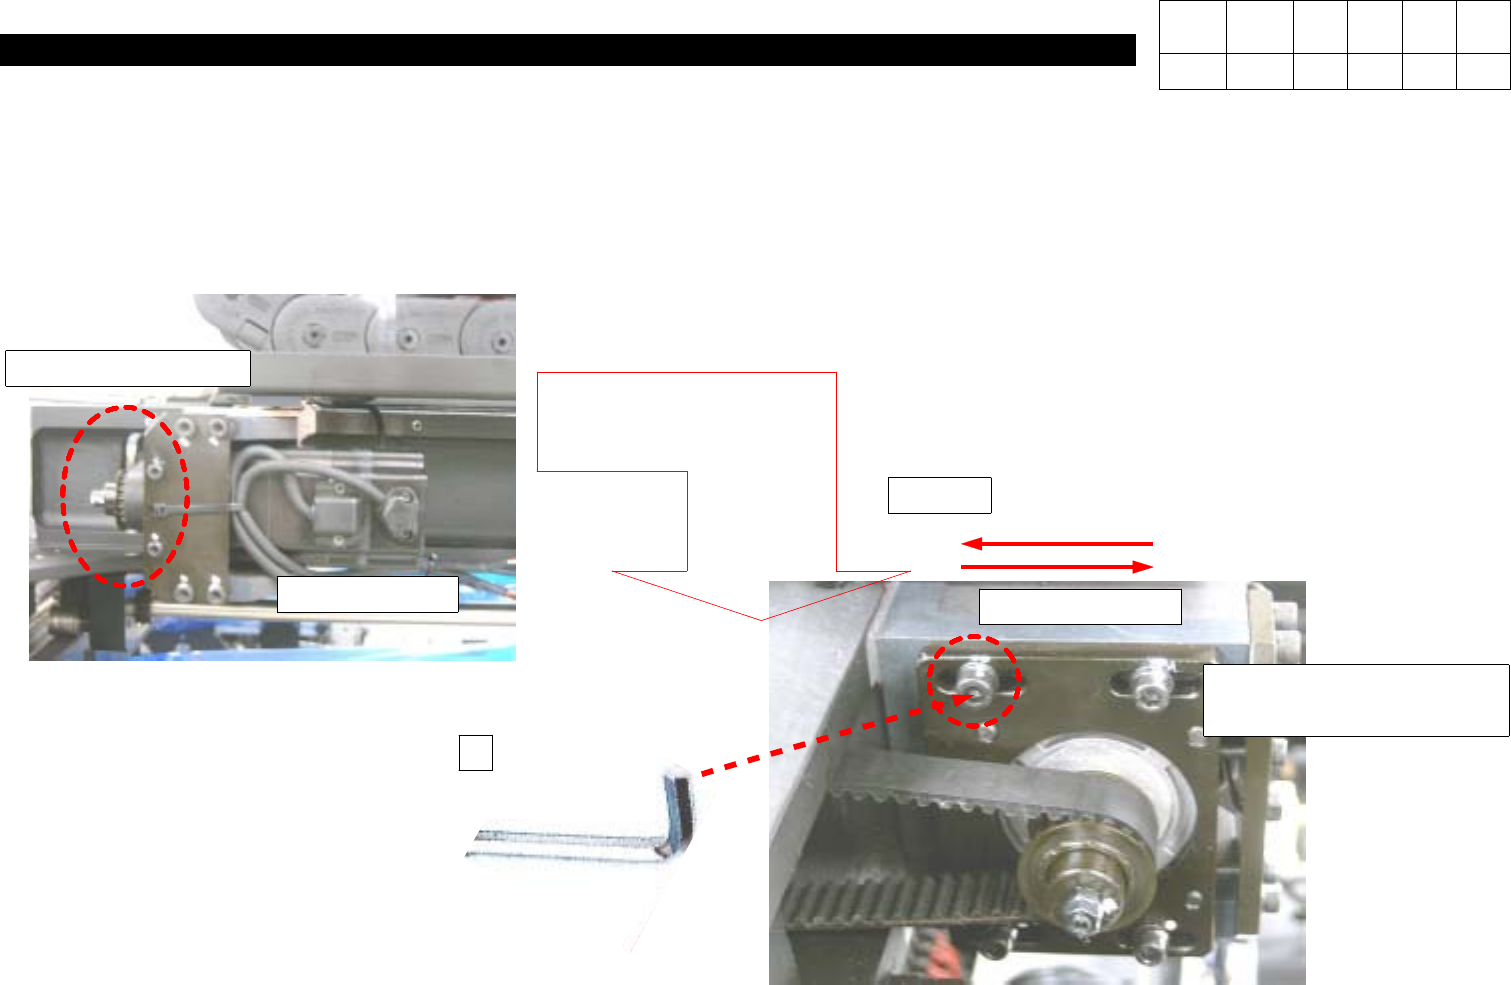
3-3-3. Tension Adjustment after X-Axis Motor Replacement
1. Loosen Four M5*20 Hexagon Wrench Bolts for Securing until Motor Moves Freely. Do not Loosen them Completely.
Caution) Verify that Motor Moves Gently from Side to Side Motor.
M4 Hexagon Wrench
M5*20 Hexagon Wrench
Bolt*4ea
X-Axis Motor
1
Using M4 Hexagon Wrench, Loosen
Until X-Axis Motor can Move.
Verify Motor Moves Gently from
Side to Side.
Caution
X-Axis Motor
=> Adjustment Part
Version Date WA QA CA Note
00 Nov04 O O O
3. X-Y PART
(CP-40)
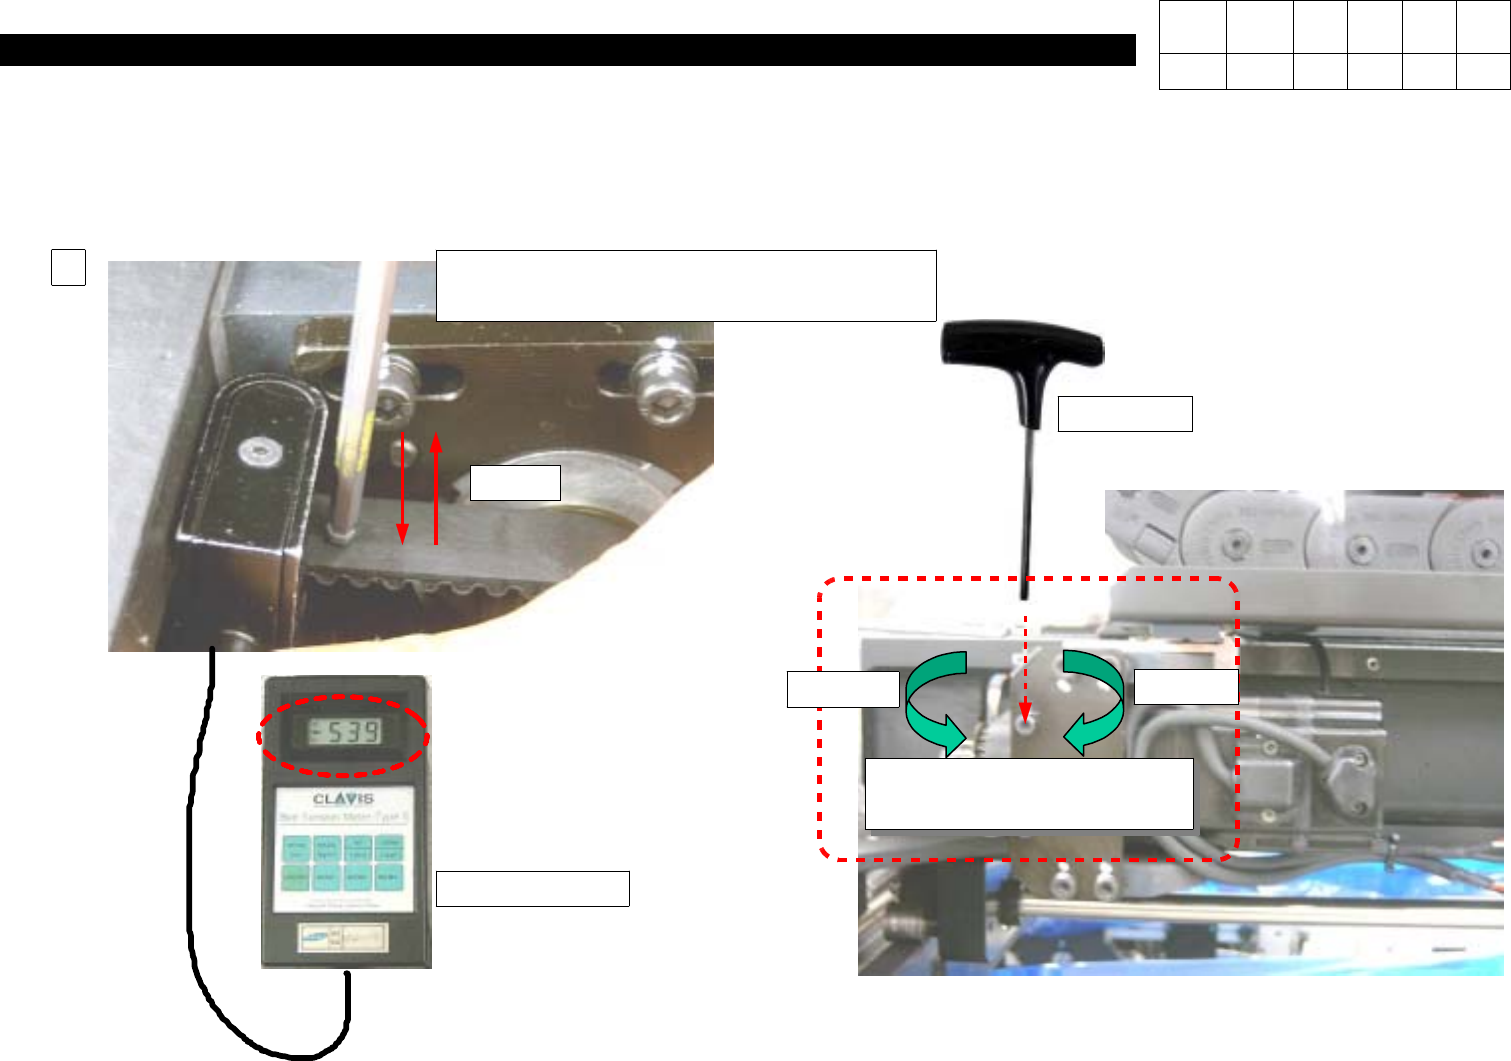
2.
WhileTurningTwoM4*20HexagonWrench Bolts and Tapping them, Adjust Level Value of Tension Gage to 184 +- 20.
Caution) Turing Clockwise Strengthens Tension while Turning Counterclockwise Weakens Tension.
Tension Gage
L-Wrench
(Using Other Wrench will Do no Harm)
Belt
2
M4*20 Hexagon Wrench
Bolt*2EA
Decrease
Increase
T-Wrench
=> Adjust Level Value of
Tension Gage to184 +- 20.
Version Date WA QA CA Note
00 Nov04 O O O