CP40 service manual.pdf - 第122页
3. X-Y PART (CP-40) 2. W h i l eT u r n i n gT w oM 4 * 2 0H e x a g o nW r e n c h Bolts and Tapping them, Adjust Level Value of Tension Gage to 184 +- 20. Caution) Turing Clockwise Strengthens T ension while Turning Co…
3. X-Y PART
(CP-40)
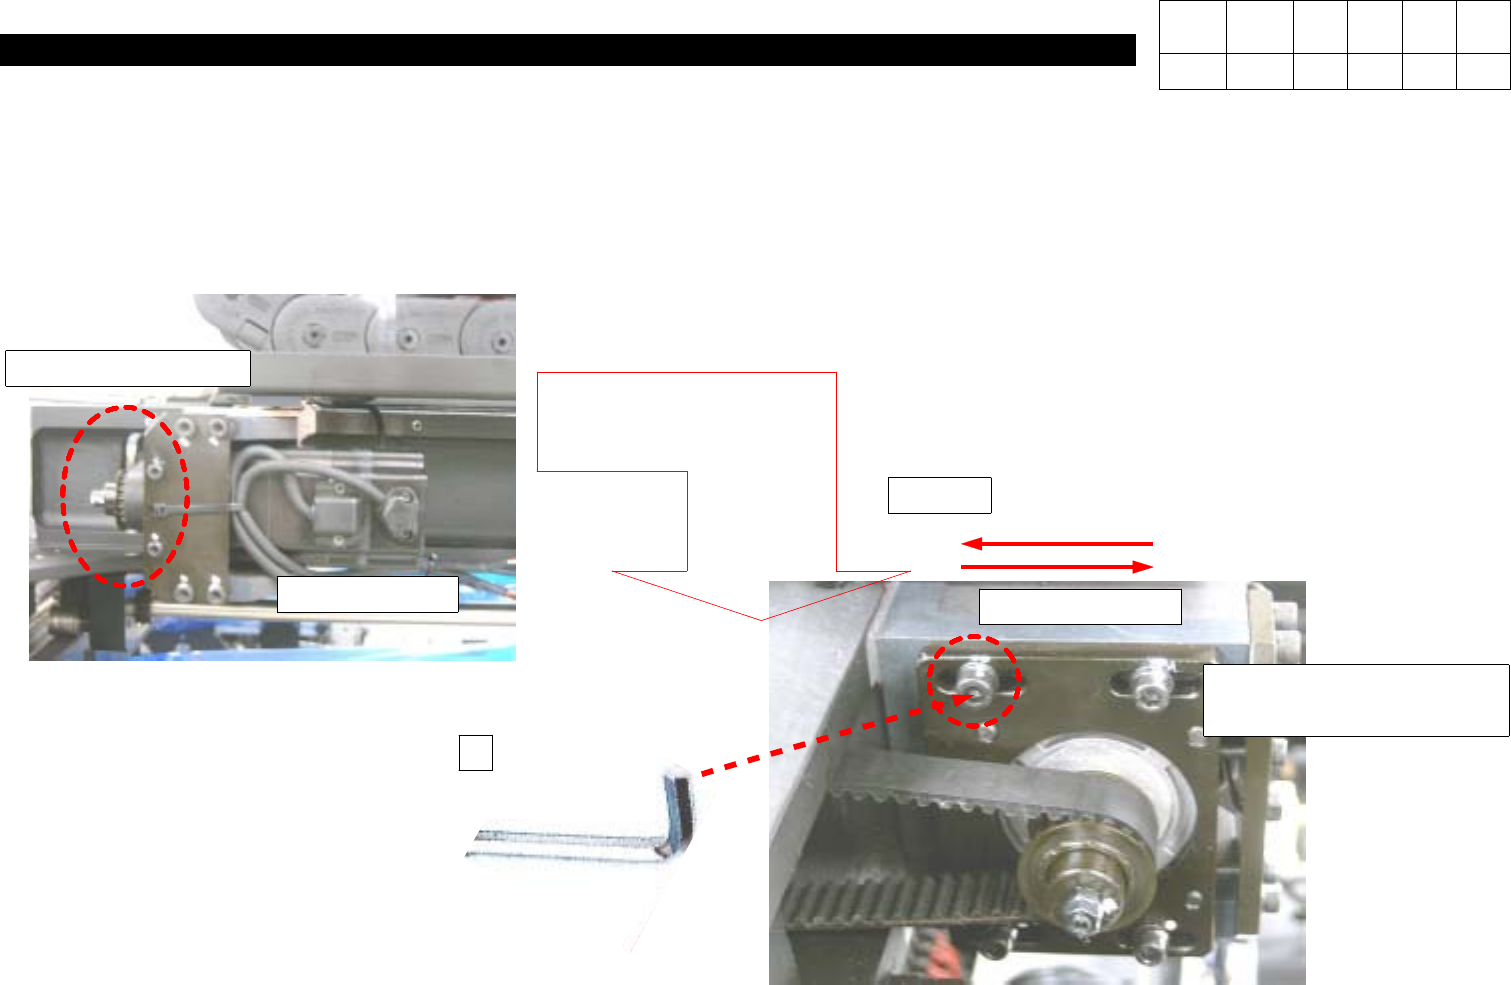
3-3-3. Tension Adjustment after X-Axis Motor Replacement
1. Loosen Four M5*20 Hexagon Wrench Bolts for Securing until Motor Moves Freely. Do not Loosen them Completely.
Caution) Verify that Motor Moves Gently from Side to Side Motor.
M4 Hexagon Wrench
M5*20 Hexagon Wrench
Bolt*4ea
X-Axis Motor
1
Using M4 Hexagon Wrench, Loosen
Until X-Axis Motor can Move.
Verify Motor Moves Gently from
Side to Side.
Caution
X-Axis Motor
=> Adjustment Part
Version Date WA QA CA Note
00 Nov04 O O O
3. X-Y PART
(CP-40)
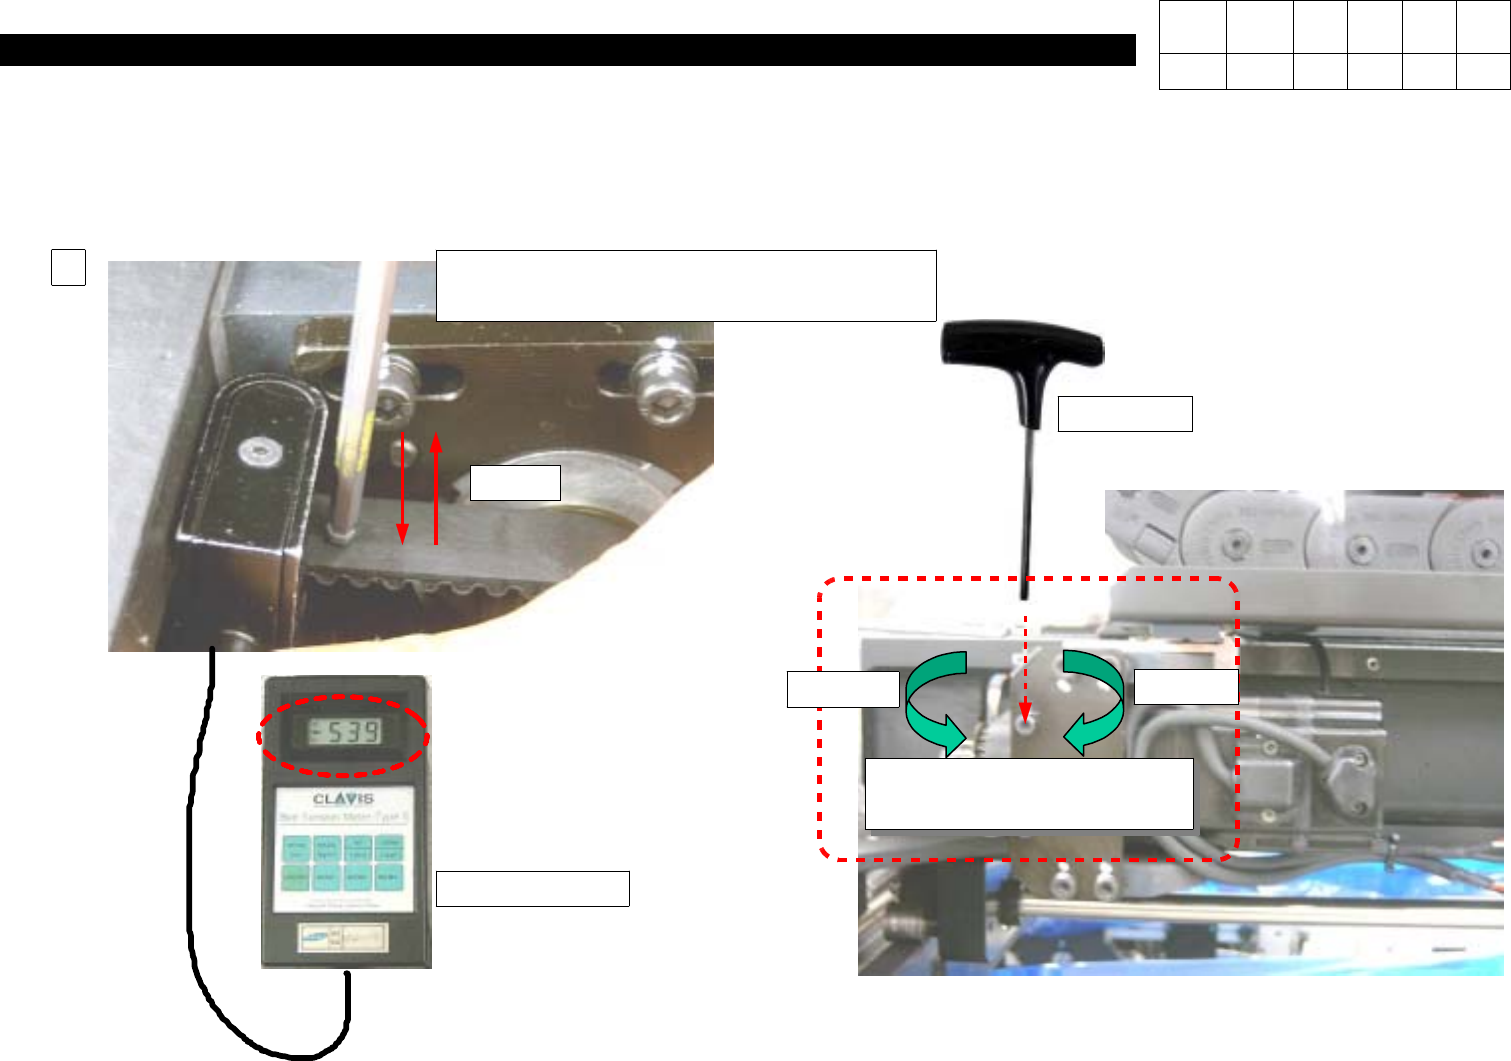
2.
WhileTurningTwoM4*20HexagonWrench Bolts and Tapping them, Adjust Level Value of Tension Gage to 184 +- 20.
Caution) Turing Clockwise Strengthens Tension while Turning Counterclockwise Weakens Tension.
Tension Gage
L-Wrench
(Using Other Wrench will Do no Harm)
Belt
2
M4*20 Hexagon Wrench
Bolt*2EA
Decrease
Increase
T-Wrench
=> Adjust Level Value of
Tension Gage to184 +- 20.
Version Date WA QA CA Note
00 Nov04 O O O
3. X-Y PART
(CP-40)
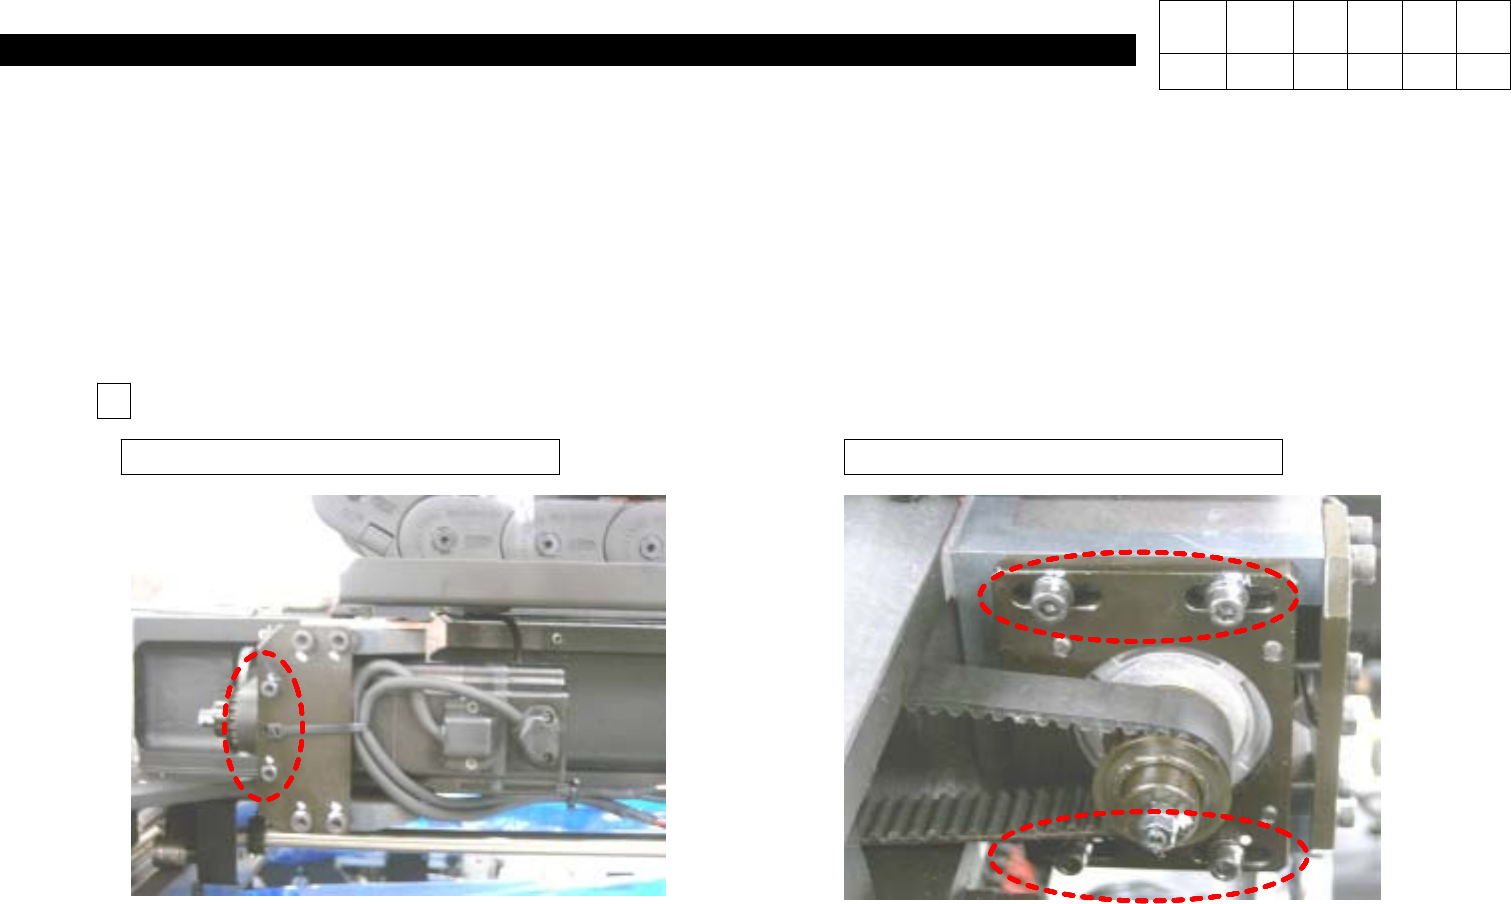
3. Secure M5*20 Hexagon Wrench Bolts.
4. While Moving Head from Side to Side, Check Gage.
5. Using Loctite, Perform Bonding of Four M5*20 Bolts and Two M4*20 Bolts.
M5*20 Hexagon Wrench Bolt * 4eaM4*20 Hexagon Wrench Bolt * 2ea
5
Version Date WA QA CA Note
00 Nov04 O O O