UV-9+Cure+Module+7269348_B+Manual.pdf - 第104页
6.5.4 Chain Te nsioning To determine if the co nveyor chains need tensioning : NOTE The tensioning a djustme nt device is l ocated on the le ft side for a left to right f low conveyor and on the right side for a ri ght…
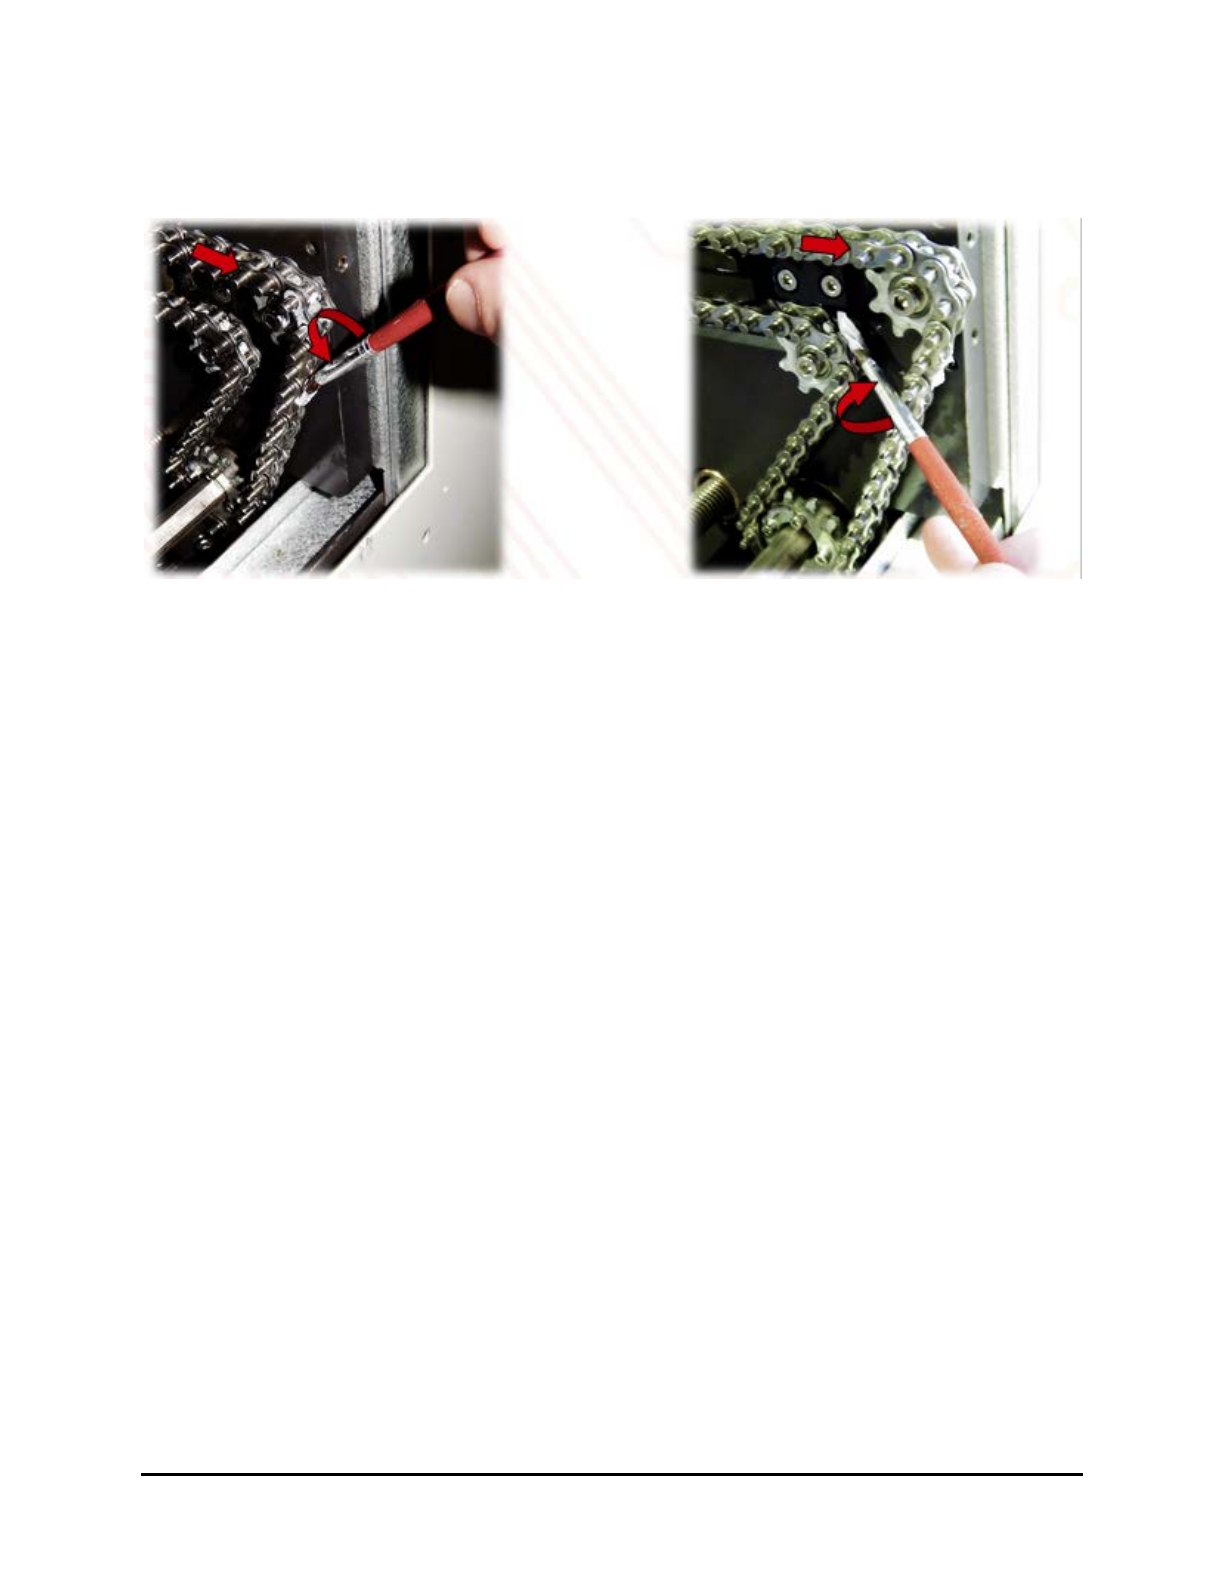
8. Once the conveyor is running, use a brush to apply the lubricant on the chain as shown in
Figure 6-11.
The lubricant should cover the entire length of the chain.
Figure 6-11 Apply the Lubricant
NOTE The Stabigrease lubricant does not migrate. DO NOT apply lubricant to the pins. If
lubricant gets on the pins, remove it immediately with a cloth.
9. After the lubricant is applied, turn the UV-9 Cure Module off to stop the conveyor.
10. Mount the magnetic target on the front top cover.
11. Replace the tunnel cover.
Maintenance 6-9
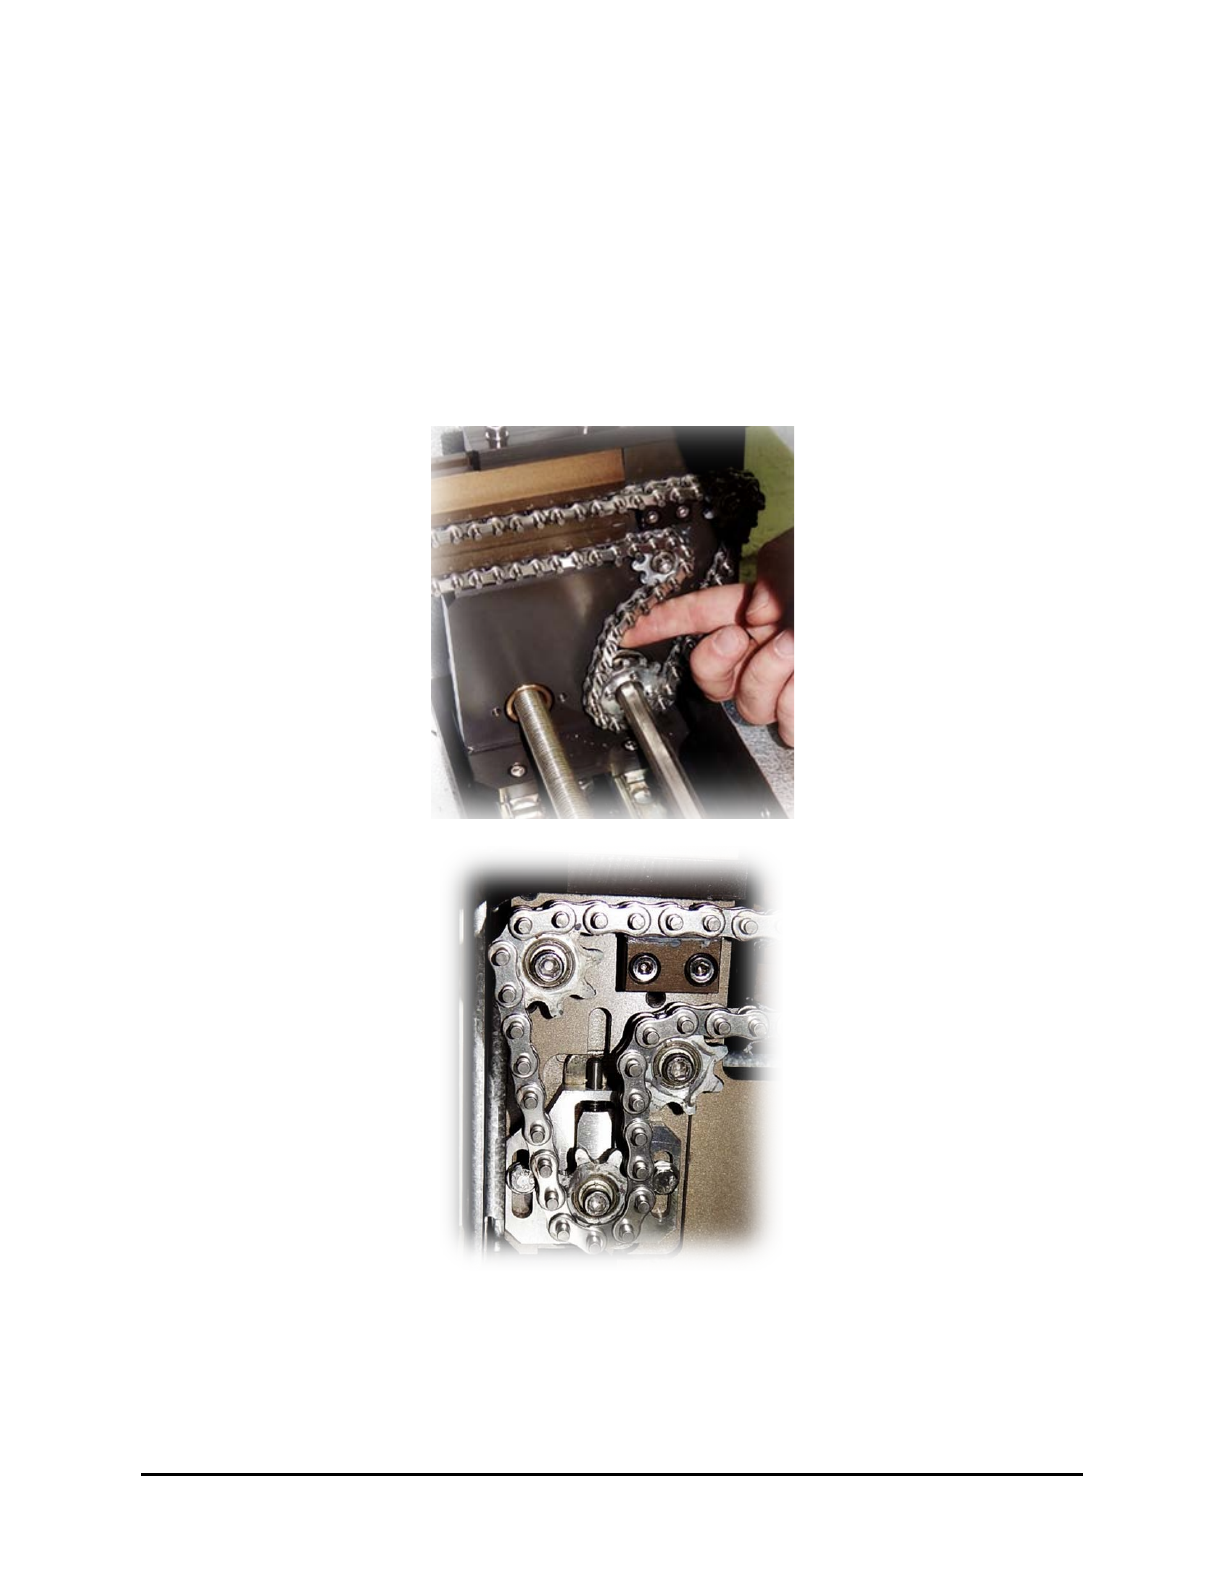
6.5.4 Chain Tensioning
To determine if the conveyor chains need tensioning:
NOTE The tensioning adjustment device is located on the left side for a left to right flow
conveyor and on the right side for a right to left flow conveyor.
1. Make sure the chain is not loose at the exit side.
When you push the chain, it should come back as shown Figure 6-12.
2. If not, tension the chains as described in 6.5.4.1 Front Rail Chain Tension Adjustment and
6.5.4.2 Rear Rail Chain Tension Adjustment.
Figure 6-12 Conveyor Chain Tensioning
6-10 Maintenance
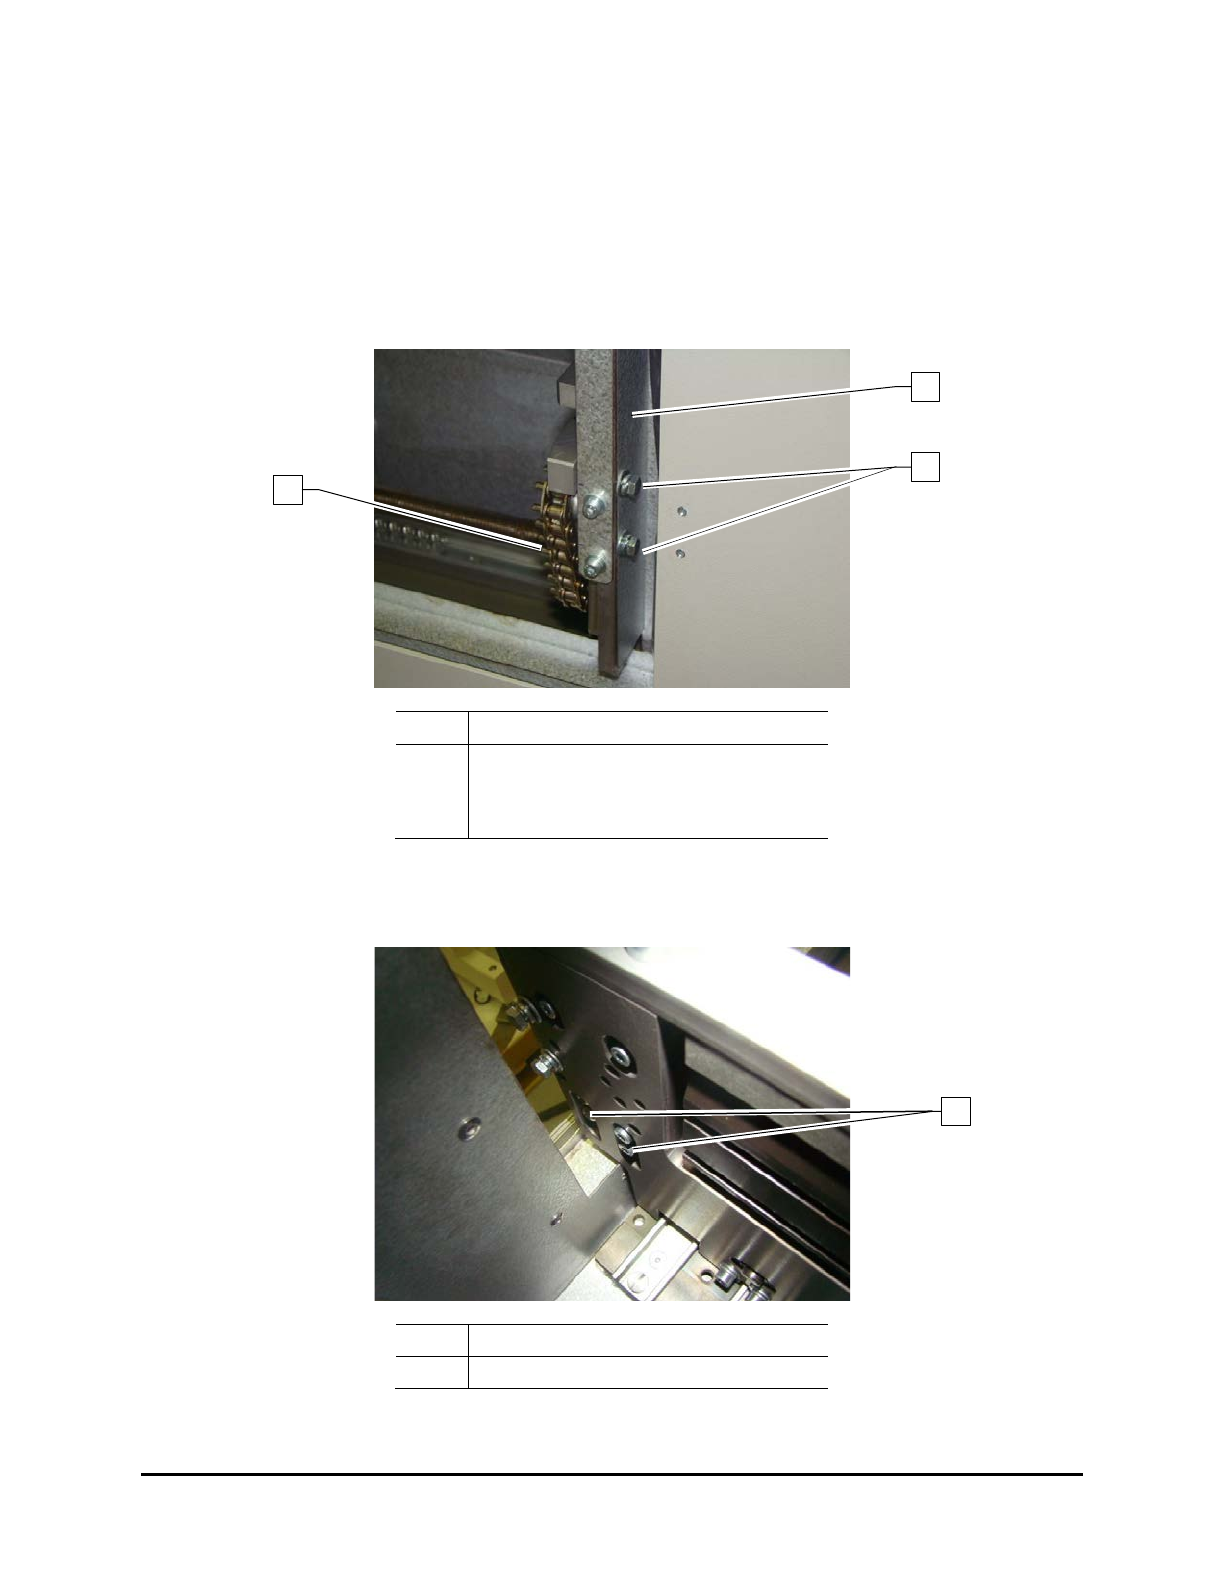
6.5.4.1 Front Rail Chain Tension Adjustment (UV-9 Version 1 Only)
To adjust the front rail chain tension:
1. Open the hood.
2. Remove the left-side UV radiation trap (Figure 4-5).
3. Loosen the 2 screws that secure the side cover to the front rail (Figure 6-13) and remove the
side cover.
Item
Description
1 Side Cover
2 Screws
3 Front Rail Chain
Figure 6-13 Front Rail Side Cover
4. From the front, loosen the 4 screws securing the chain tensioner (Figure 6-14).
Item Description
1 Chain Tensioner Screws
Figure 6-14 Front Rail Chain Tension Adjustment
1
3
2
1
Maintenance 6-11