UV-9+Cure+Module+7269348_B+Manual.pdf - 第106页
5. From outside , tighten the s crew underne ath the tensi oner ( Figure 6- 15 ). Item Description 1 Sprocket 2 Chain 3 Tensioner Screw Figure 6- 15 Front Rail Chain Tensioner 6. Push the sprocke t down and tighten t he …
6.5.4.1 Front Rail Chain Tension Adjustment (UV-9 Version 1 Only)
To adjust the front rail chain tension:
1. Open the hood.
2. Remove the left-side UV radiation trap (Figure 4-5).
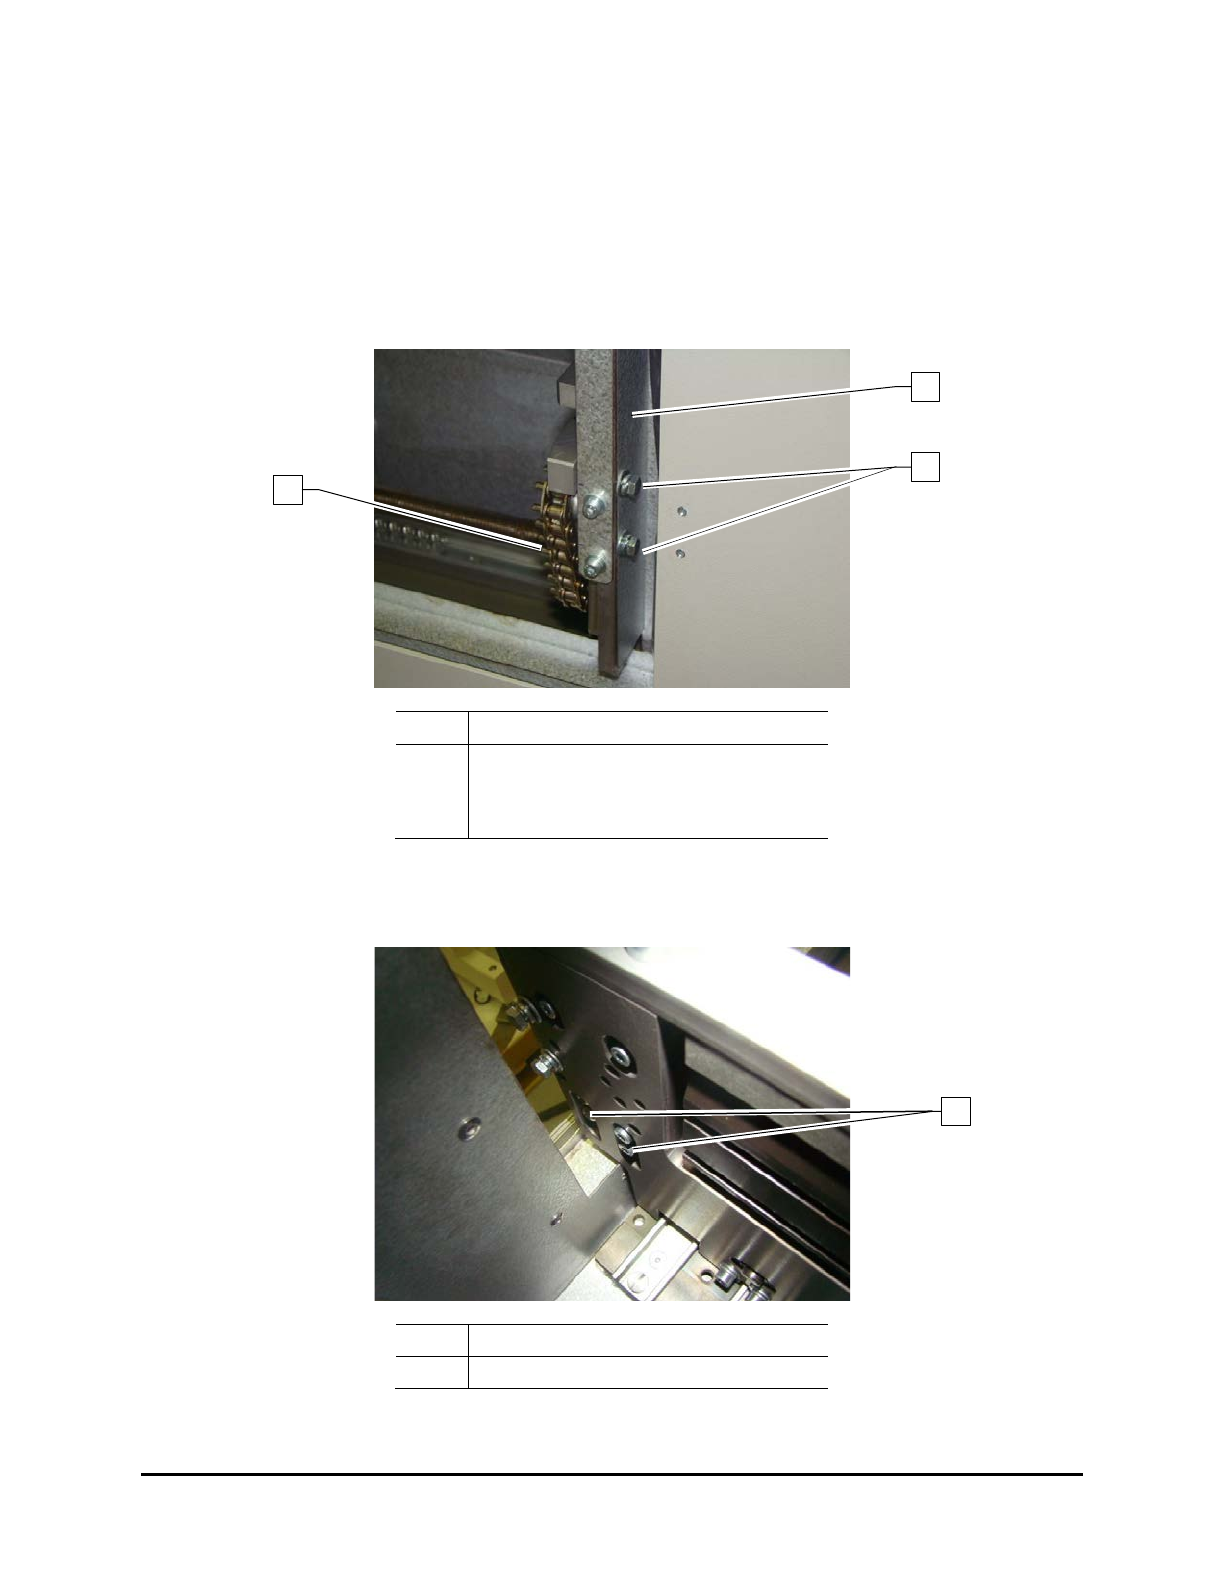
3. Loosen the 2 screws that secure the side cover to the front rail (Figure 6-13) and remove the
side cover.
Item
Description
1 Side Cover
2 Screws
3 Front Rail Chain
Figure 6-13 Front Rail Side Cover
4. From the front, loosen the 4 screws securing the chain tensioner (Figure 6-14).
Item Description
1 Chain Tensioner Screws
Figure 6-14 Front Rail Chain Tension Adjustment
1
3
2
1
Maintenance 6-11
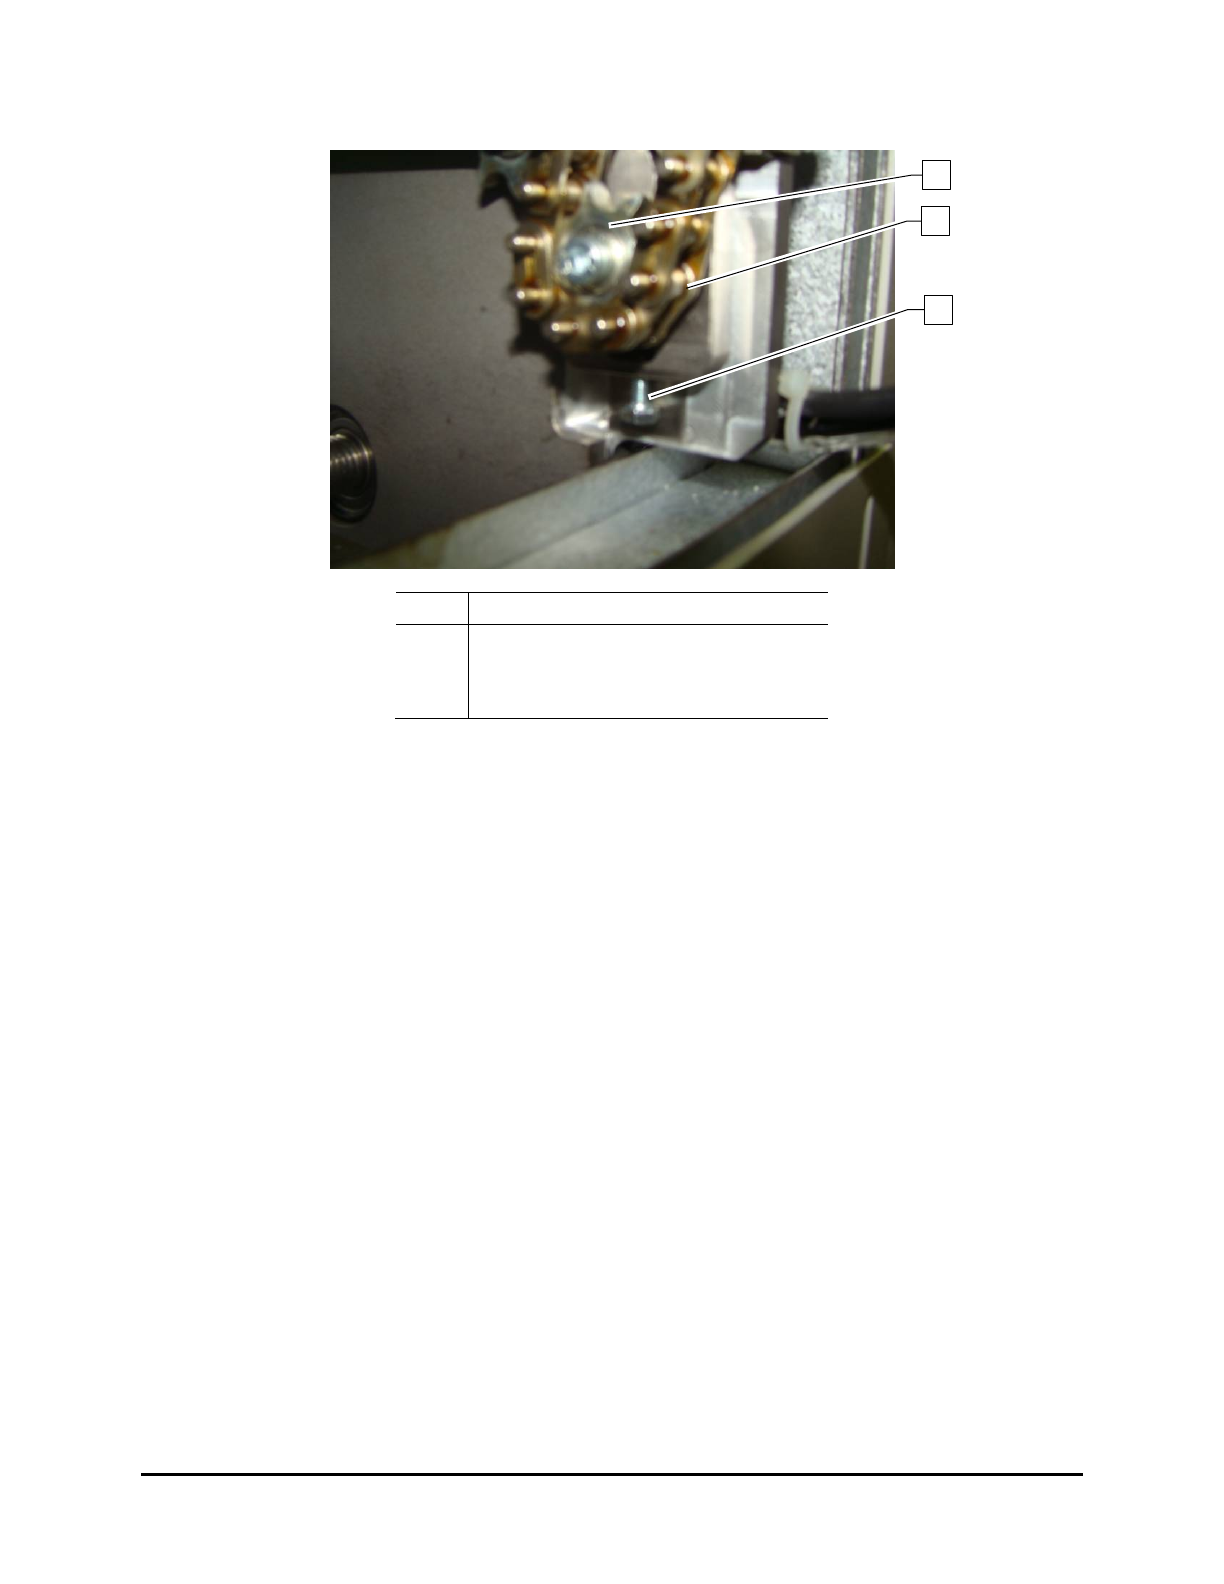
5. From outside, tighten the screw underneath the tensioner (Figure 6-15).
Item Description
1
Sprocket
2 Chain
3 Tensioner Screw
Figure 6-15 Front Rail Chain Tensioner
6. Push the sprocket down and tighten the four (4) screws to secure the tensioner.
7. Loosen the screw underneath the tensioner so the tensioner spring can work (Figure 6-15).
8. Fit the side cover on the front rail and tighten the screws.
9. Replace the left-side UV radiation trap and close the hood.
3
2
1
6-12 Maintenance
6.5.4.2 Rear Rail Chain Tension Adjustment (UV-9 Version 1 Only)
To adjust the rear rail chain tension:
1. Open the upper rear cover.
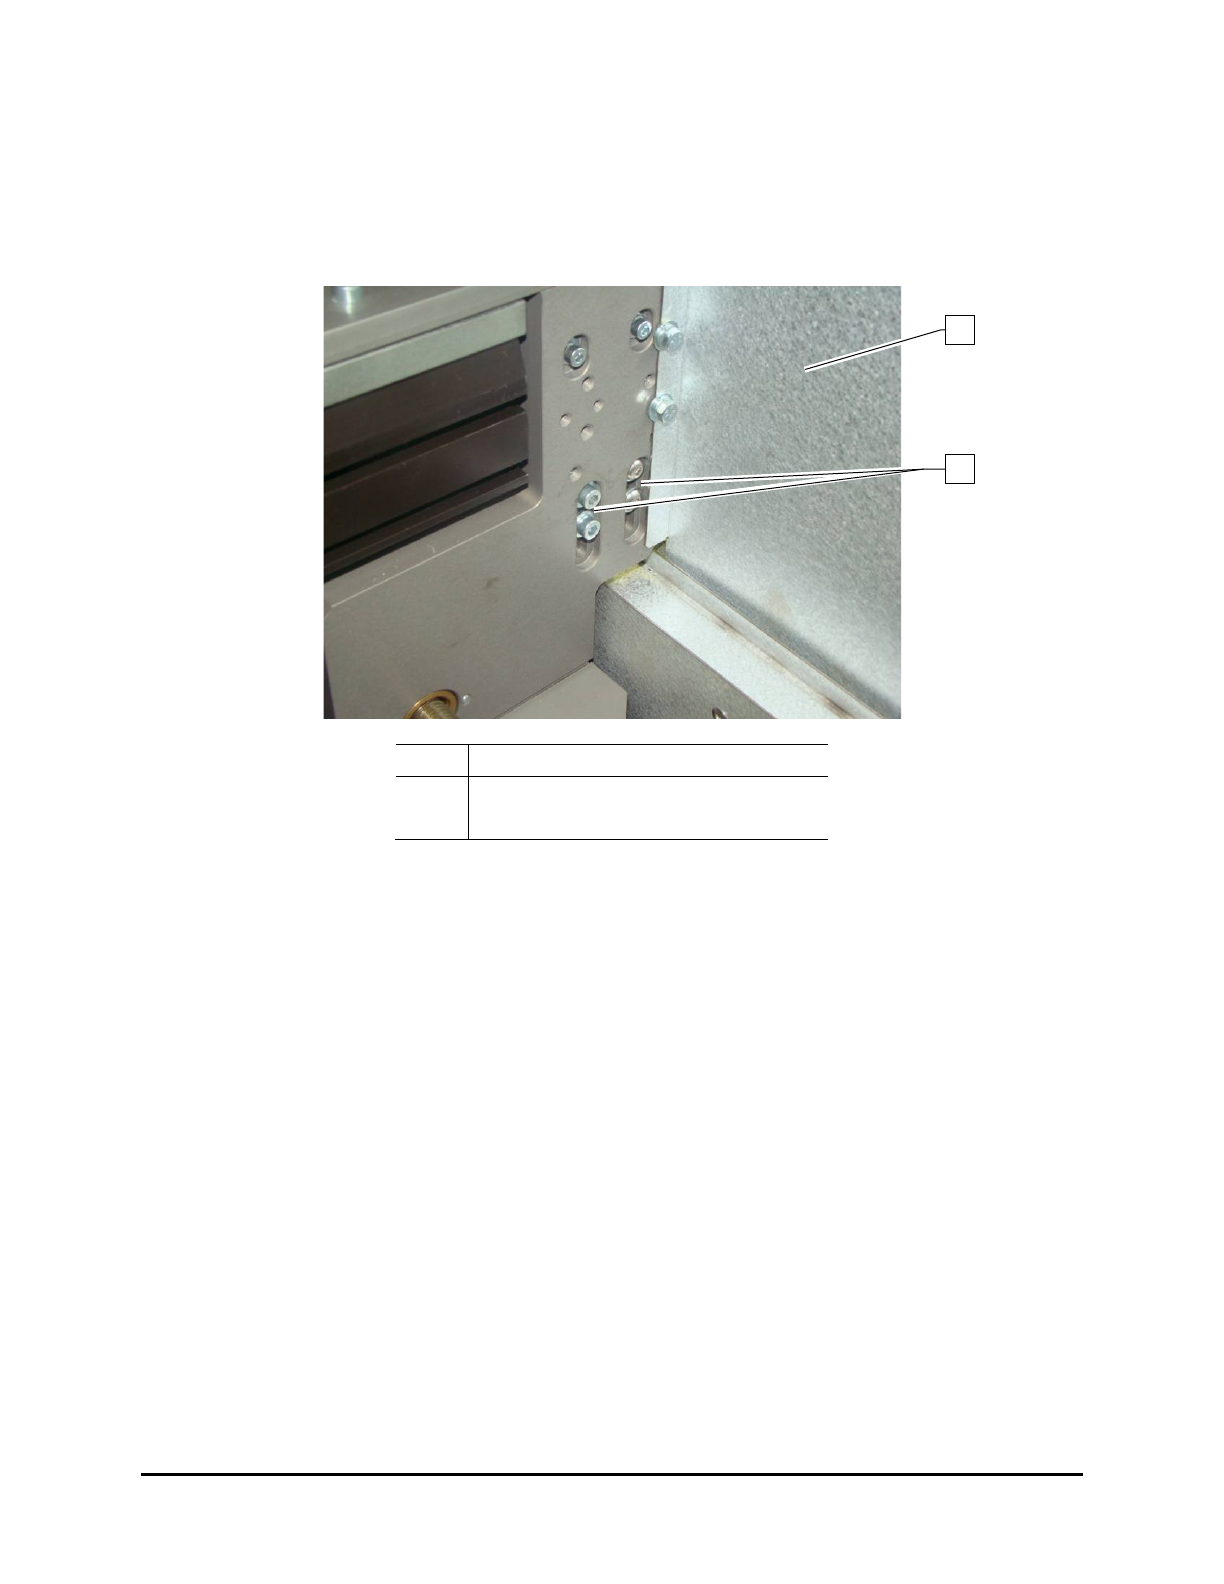
2. Remove the left UV radiation trap (Figure 4-5).
Item Description
1 Sliding Shutter
2 Chain Tensioner Screws
Figure 6-16 Rear Rail Chain Tension Adjustment
NOTE Do not remove the sliding shutter.
3. From the back, loosen the four (4) screws securing the chain tensioner (Figure 6-16).
4. From outside, tighten the screw underneath the tensioner (Figure 6-15).
5. Push the sprocket down and tighten the four (4) screws to secure the tensioner.
6. Loosen the screw underneath the tensioner so the tensioner spring can work.
7. Replace the left-side UV radiation trap and close the upper rear cover.
1
2
Maintenance 6-13