UV-9+Cure+Module+7269348_B+Manual.pdf - 第64页
5.4 System Startup If necessary, see the Figures in Section 1 - Introduction to ident ify system components. To start the system: NOTE Fo r a UV -9 Cure Module that has been powered of f with all power co rds disconnec…

5 Operation
5.1 Overview
Before operating your UV-9 Cure Module, it may be helpful to familiarize yourself with the basics of
how the system works. This section covers the following topics:
• Theory of Operation
• System Startup
• Running Production
• Software Description
• System Shutdown
NOTE In this section, typical UV-9 Cure Module configurations are considered. However,
operational details may vary with the configuration of your system.
5.2 Safety First
Before operating the UV-9 Cure Module, please review the information presented in Section 2 – Safety.
5.3 Theory of Operation
The heart of the UV-9 Cure Module is in the arc lamp technology with adjustable UV intensity combined
with a unique ventilation design that dissipates heat generated from the UV lamp. This combination keeps
the temperature and rate of rise at acceptable levels while maximizing production and lamp lifetime as the
lamps run cooler.
A closed loop feature insures process reliability and compensates for the eventual lamp degradation by
measuring and adjusting power levels for Ultraviolet A (UVA) radiation. Therefore, the desired profile is
maintained within +/- 5% of the programmed specifications. Other options and lamp types are also
available to further insure the oven meets customer specific needs while maintaining high performance.
Additionally a standard SMEMA-compatible chain conveyor with 5 mm pins enables the processing of
boards and is easily integrated with any dispensing system. The conveyor can be configured for either
left-to-right or right-to-left flow with electrical width adjustment.
UV-9 Cure Module electronics typically perform the following functions:
• Coordinate conveyor motion with upstream machines
• Control conveyor speed and UV lamp operation
• Sense workpiece progress through the UV-9 Cure Module
• Move the dispensed workpiece toward the downstream end of the conveyor
• Coordinate the motions of the conveyor with downstream machines
Operation 5-1

5.4 System Startup
If necessary, see the Figures in Section 1 - Introduction to identify system components.
To start the system:
NOTE For a UV-9 Cure Module that has been powered off with all power cords disconnected,
see 3.15 Initial Startup.
WARNING! Only authorized service technicians or process engineers should connect power
cables to the power source. Operators should not attempt to make electrical
connections.
1. If the UV-9 Cure Module was locked out for servicing, make sure that any locks and any
tags have been removed.
2. Turn the Main Power Switch (at the rear of the oven) to the ON position (I).
3. If the control software is installed on the upstream equipment PC, start the software.
When the equipment is powered on, the PLC is automatically initialized and the control
software is started.
4. Press the
ON button (green button at the left side of the front panel).
NOTE Pressing the green ON button does not turn on the oven. You must press the
black
Start/Stop button for one (1) second to turn on the oven. You can also
start the oven through the software. See 5.5.2 Starting the Oven.
The main screen is displayed (Figure 5-1).
Figure 5-1 Main Screen
NOTE The software version of the PLC and PC software are shown in the top right corner of
the screen.
5-2 Operation
5. If this is the first time starting the system, select the appropriate language (French, English
or German) by clicking on the flag corresponding to the language.
At the next start up, the most recently selected language will automatically display.
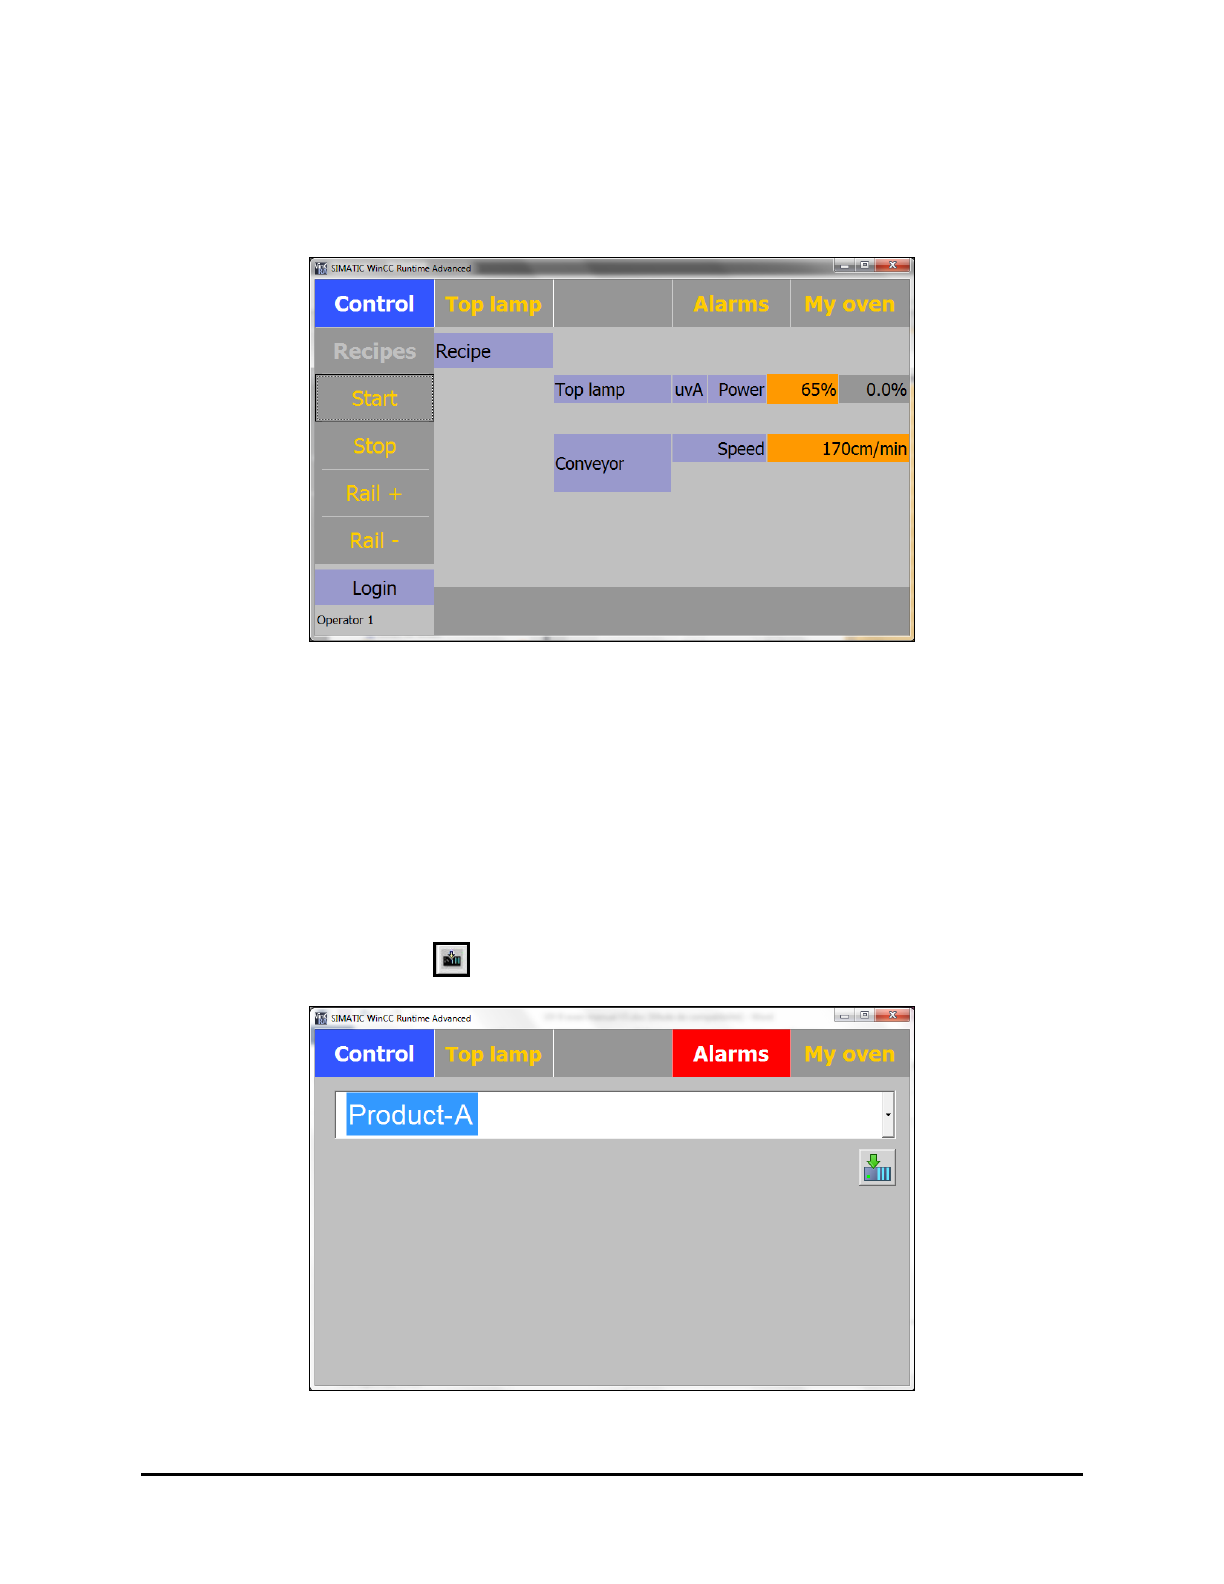
The Control Menu is displayed (Figure 5-2).
Figure 5-2 Control Menu
5.5 Running Production
5.5.1 Loading the Recipe
1. Select the Recipes button on the Control Menu (Figure 5-2). See 5.7.1.1 Recipes Menu for
details on loading a recipe.
2. Select the access level (Operator or Process).
3. Select the desired recipe (Figure 5-3).
4. Click on the
Load button to load the recipe.
Figure 5-3 Loading a Recipe
Operation 5-3