UV-9+Cure+Module+7269348_B+Manual.pdf - 第65页
5. If this is the first time starting the s ystem, select the appropriat e language ( French , English or German ) by clicking on the fl ag correspondi ng to the language . At the next start up, the most recently selec…

5.4 System Startup
If necessary, see the Figures in Section 1 - Introduction to identify system components.
To start the system:
NOTE For a UV-9 Cure Module that has been powered off with all power cords disconnected,
see 3.15 Initial Startup.
WARNING! Only authorized service technicians or process engineers should connect power
cables to the power source. Operators should not attempt to make electrical
connections.
1. If the UV-9 Cure Module was locked out for servicing, make sure that any locks and any
tags have been removed.
2. Turn the Main Power Switch (at the rear of the oven) to the ON position (I).
3. If the control software is installed on the upstream equipment PC, start the software.
When the equipment is powered on, the PLC is automatically initialized and the control
software is started.
4. Press the
ON button (green button at the left side of the front panel).
NOTE Pressing the green ON button does not turn on the oven. You must press the
black
Start/Stop button for one (1) second to turn on the oven. You can also
start the oven through the software. See 5.5.2 Starting the Oven.
The main screen is displayed (Figure 5-1).
Figure 5-1 Main Screen
NOTE The software version of the PLC and PC software are shown in the top right corner of
the screen.
5-2 Operation
5. If this is the first time starting the system, select the appropriate language (French, English
or German) by clicking on the flag corresponding to the language.
At the next start up, the most recently selected language will automatically display.
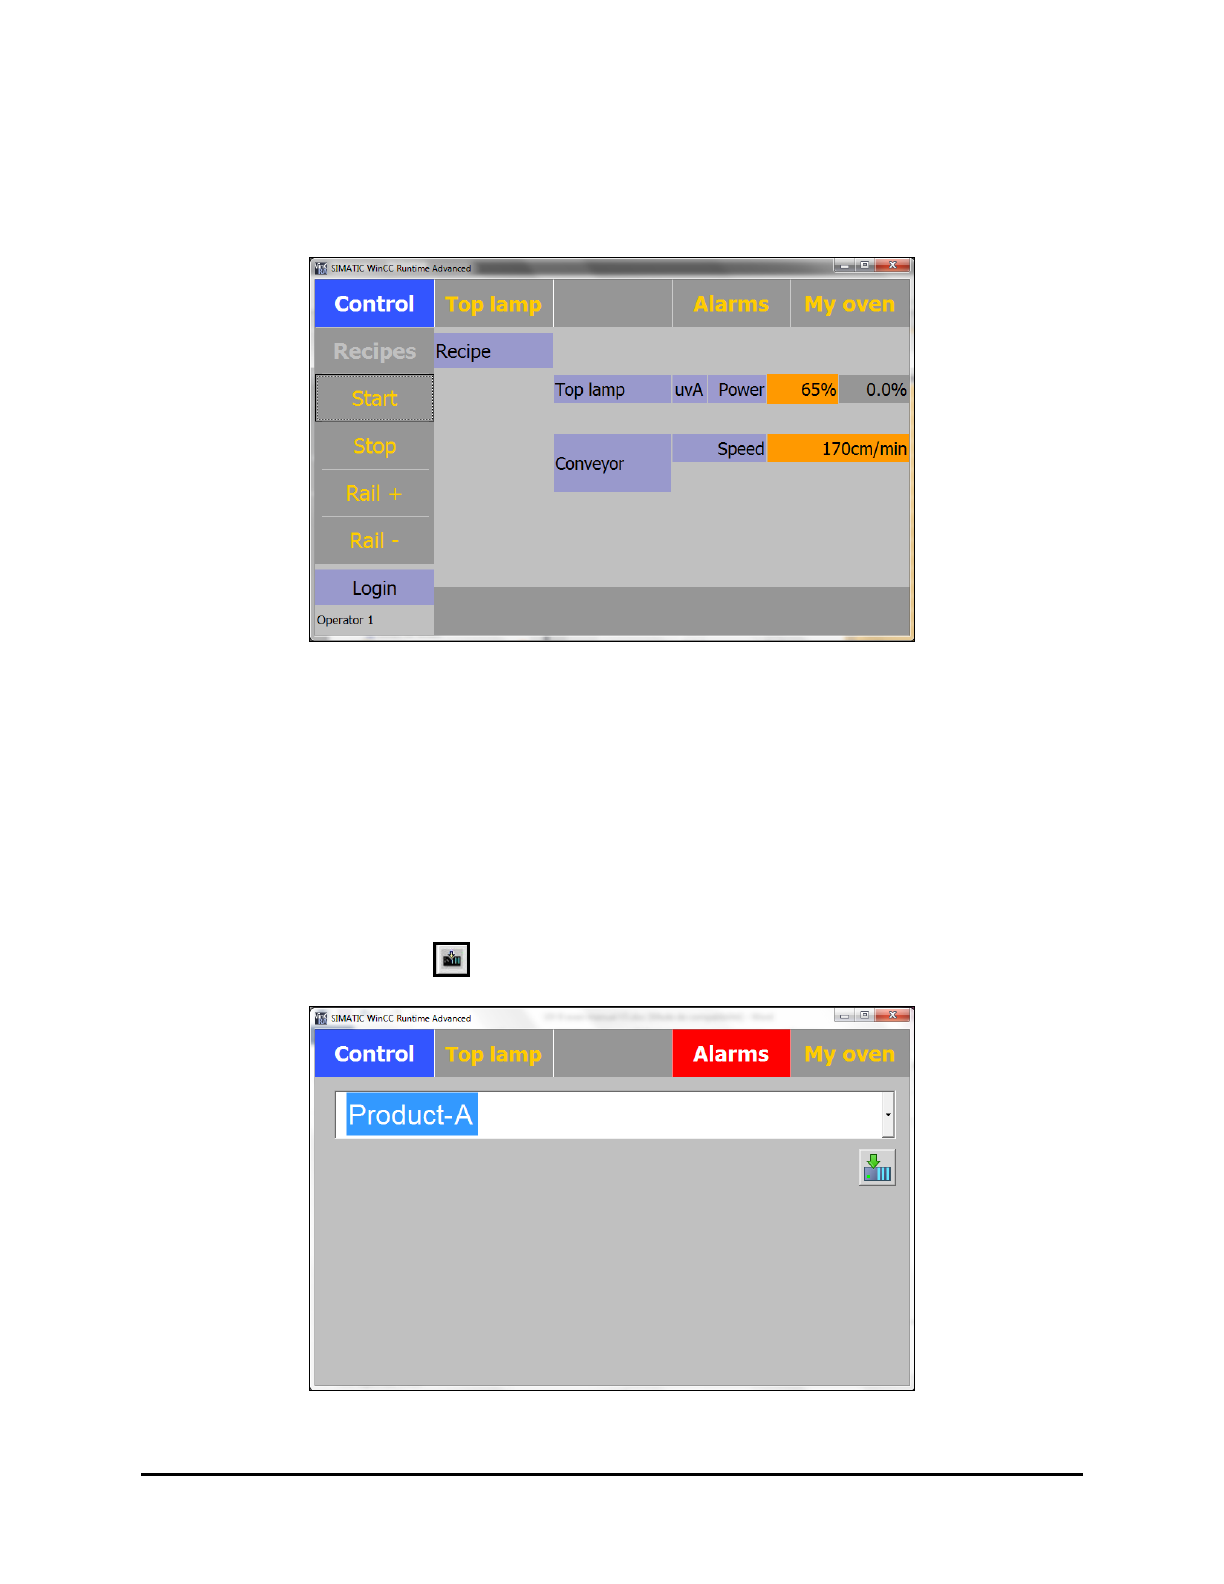
The Control Menu is displayed (Figure 5-2).
Figure 5-2 Control Menu
5.5 Running Production
5.5.1 Loading the Recipe
1. Select the Recipes button on the Control Menu (Figure 5-2). See 5.7.1.1 Recipes Menu for
details on loading a recipe.
2. Select the access level (Operator or Process).
3. Select the desired recipe (Figure 5-3).
4. Click on the
Load button to load the recipe.
Figure 5-3 Loading a Recipe
Operation 5-3

5.5.2 Starting the Oven
1. After the recipe has been loaded, press the Start button on the Control Menu (Figure 5-2).
The Start Oven confirmation screen is displayed (Figure 5-4).
Figure 5-4 Start Oven Confirmation Screen
2. Click on Yes to start the oven.
NOTE The life of the UV lamp decreases by 2 hours each time the lamp is turned off
and back on.
The UV lamp and the conveyor are simultaneously started.
The
Start button becomes yellow.
The conveyor increases speed up to the set value and the UV lamps are preheated for 80
seconds minimum at 80% of the maximum power.
Once the lamp has sufficient power (350 V), the exhaust system starts.
The oven is ready for production; the UV lamp is on stand-by at 30% of maximum
power. The orange light of the beacon is blinking.
- When the oven is ready, it is waiting for the AVAILABLE signal from the
upstream equipment and the READY signal from the downstream machine.
- When the two signals are received, the UV lamp is powered to the set value and the
shutters are opened. The oven sends a READY signal to the upstream equipment
when the setpoint value is reached.
- After an adjustable delay, if there are no boards in the oven, the shutters of the UV
lamp are shut and the power of the UV lamp decreases to the stand-by setpoint
value (default: 30%).
NOTE If the down-stream conveyor is not ready, the oven does not send the ready signal in
order to avoid leaving a product under UV radiation.
5-4 Operation