UV-9+Cure+Module+7269348_B+Manual.pdf - 第105页
6.5.4.1 Fr ont Rail Chain Tension Adjustment ( UV - 9 V ersion 1 Only) To adjust the front rail chain tension: 1. Open the hood. 2. Remove the left - side UV rad iation trap ( Figu re 4-5). 3. Loosen the 2 screws that se…
6.5.4 Chain Tensioning
To determine if the conveyor chains need tensioning:
NOTE The tensioning adjustment device is located on the left side for a left to right flow
conveyor and on the right side for a right to left flow conveyor.
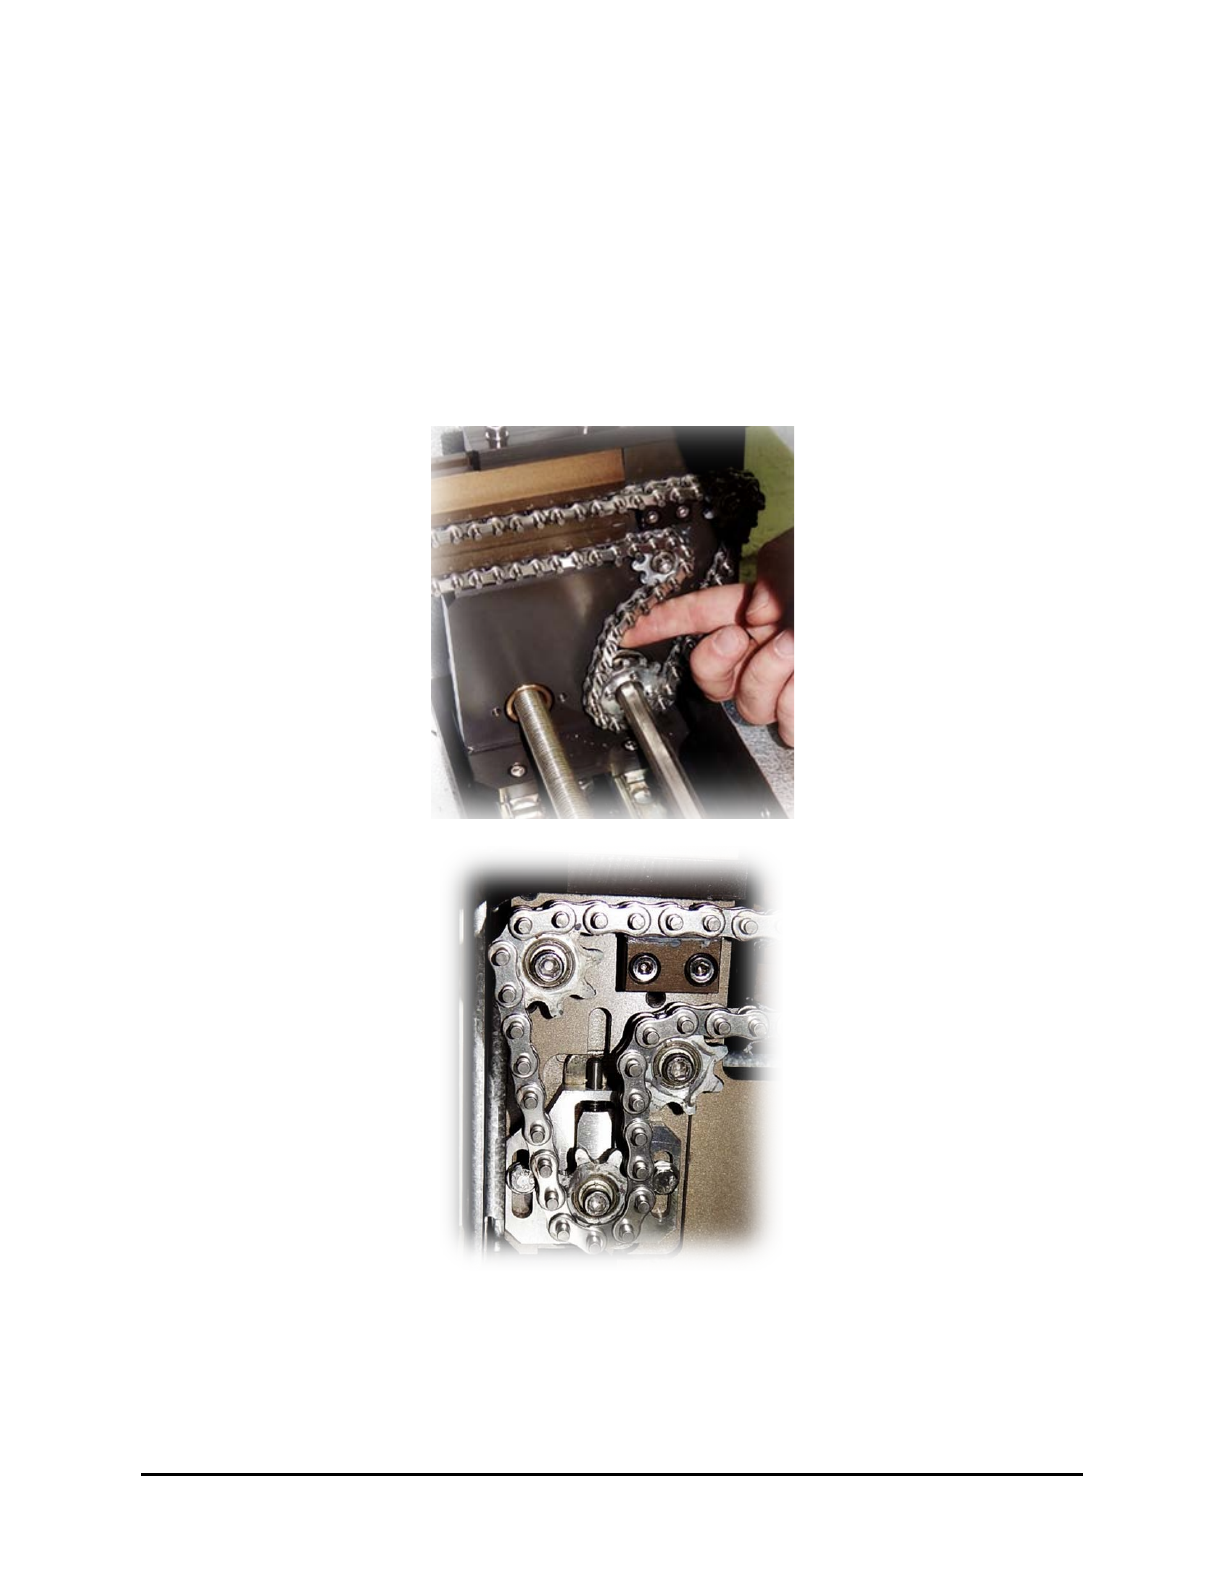
1. Make sure the chain is not loose at the exit side.
When you push the chain, it should come back as shown Figure 6-12.
2. If not, tension the chains as described in 6.5.4.1 Front Rail Chain Tension Adjustment and
6.5.4.2 Rear Rail Chain Tension Adjustment.
Figure 6-12 Conveyor Chain Tensioning
6-10 Maintenance
6.5.4.1 Front Rail Chain Tension Adjustment (UV-9 Version 1 Only)
To adjust the front rail chain tension:
1. Open the hood.
2. Remove the left-side UV radiation trap (Figure 4-5).
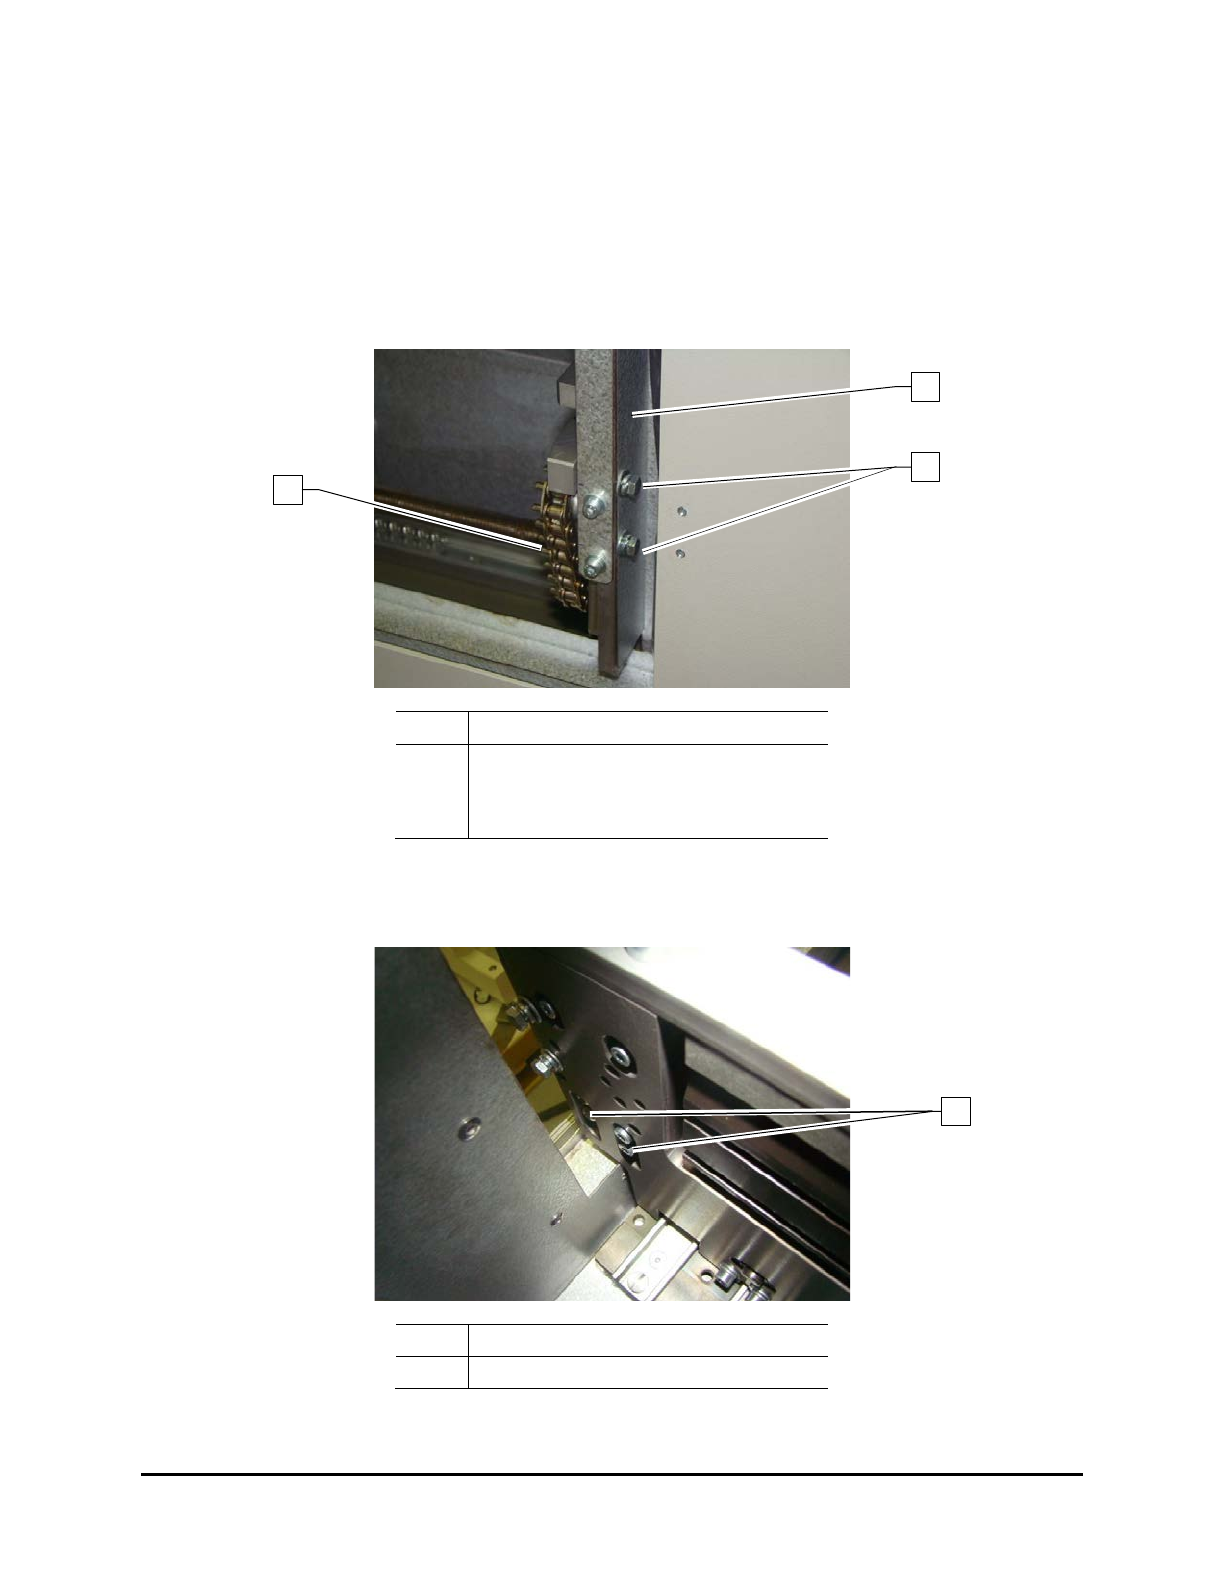
3. Loosen the 2 screws that secure the side cover to the front rail (Figure 6-13) and remove the
side cover.
Item
Description
1 Side Cover
2 Screws
3 Front Rail Chain
Figure 6-13 Front Rail Side Cover
4. From the front, loosen the 4 screws securing the chain tensioner (Figure 6-14).
Item Description
1 Chain Tensioner Screws
Figure 6-14 Front Rail Chain Tension Adjustment
1
3
2
1
Maintenance 6-11
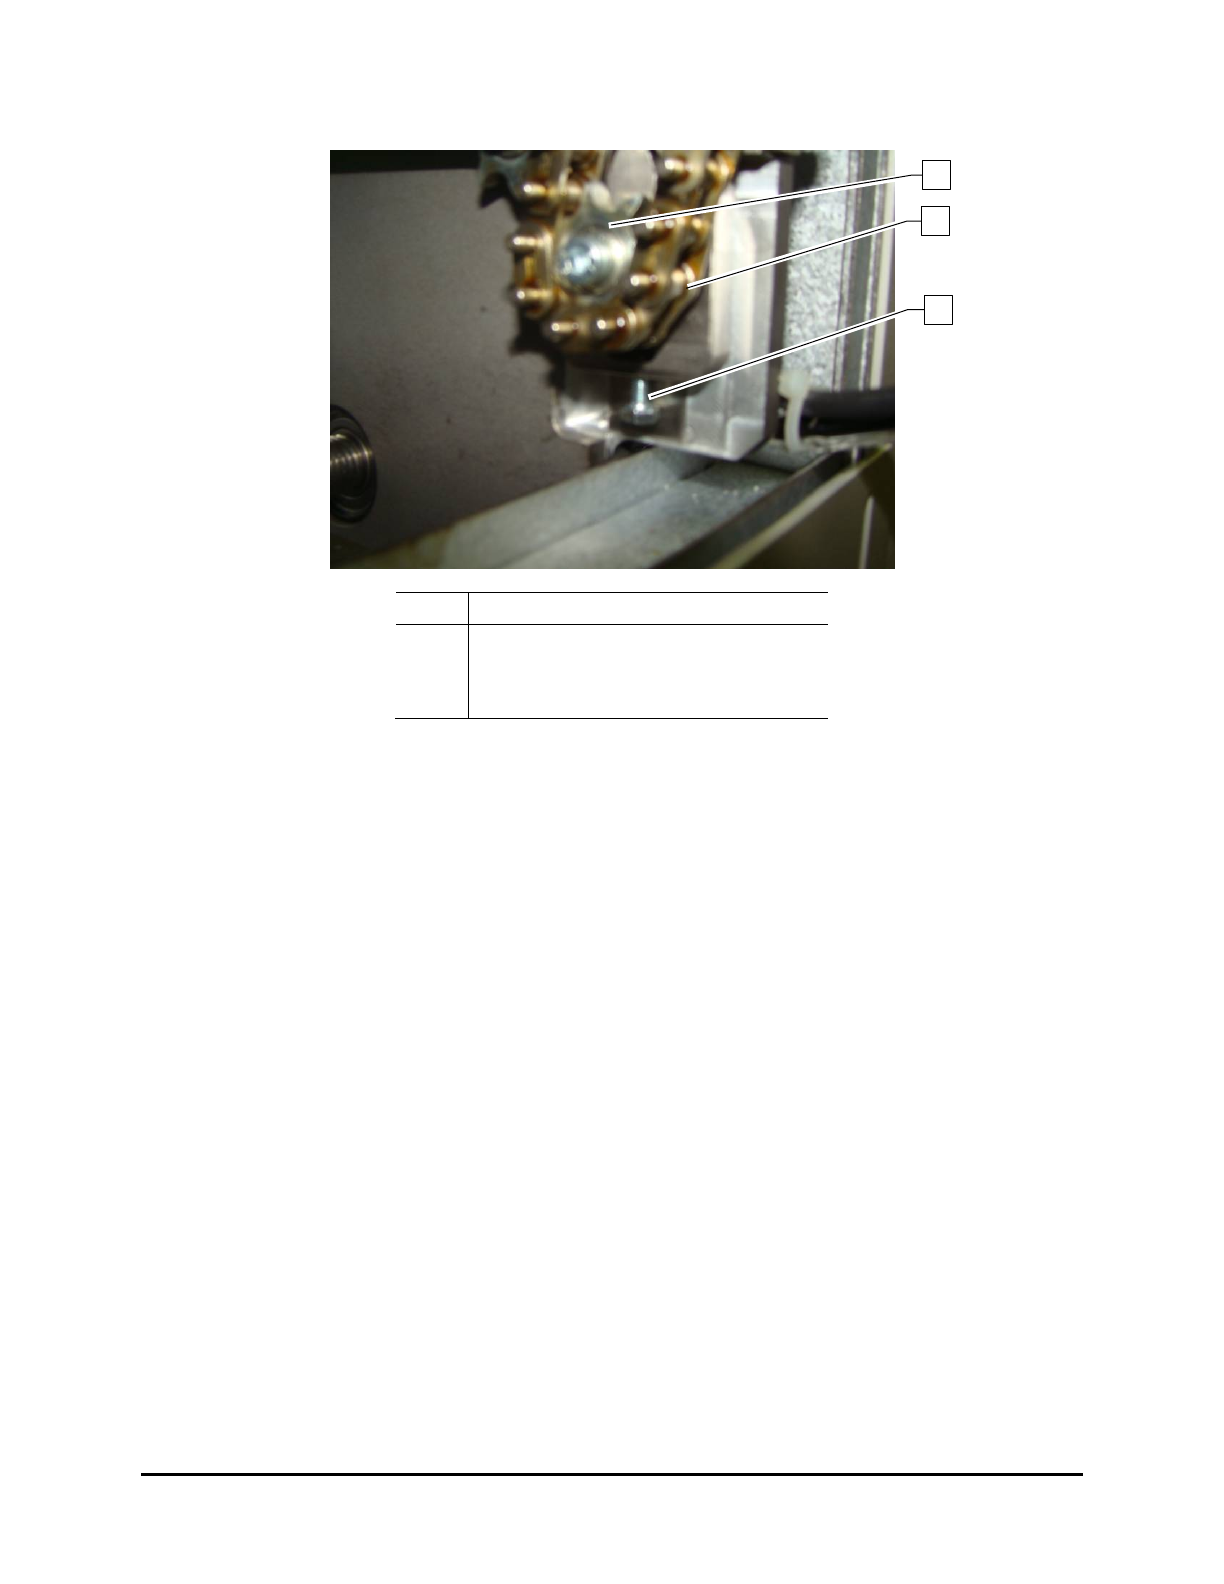
5. From outside, tighten the screw underneath the tensioner (Figure 6-15).
Item Description
1
Sprocket
2 Chain
3 Tensioner Screw
Figure 6-15 Front Rail Chain Tensioner
6. Push the sprocket down and tighten the four (4) screws to secure the tensioner.
7. Loosen the screw underneath the tensioner so the tensioner spring can work (Figure 6-15).
8. Fit the side cover on the front rail and tighten the screws.
9. Replace the left-side UV radiation trap and close the hood.
3
2
1
6-12 Maintenance