UV-9+Cure+Module+7269348_B+Manual.pdf - 第54页
To disable the automatic width adjustment: 1. Click on the Control button on the Main Menu. 2. Select Auto Width . The Auto Width m enu opens ( Figure 4-4). 3. Click on Disable . Figure 4-4 Auto Width Disabled 4.5 UV M…
4.4.1 Automatic Conveyor Width Adjustment (Option)
If the oven is configured with the automatic width adjustment option, you have the option of enabling or
disabling this feature:
To set the automatic width adjustment:
1. Click on the
Control button on the Main Menu.
Figure 4-2 Control Menu
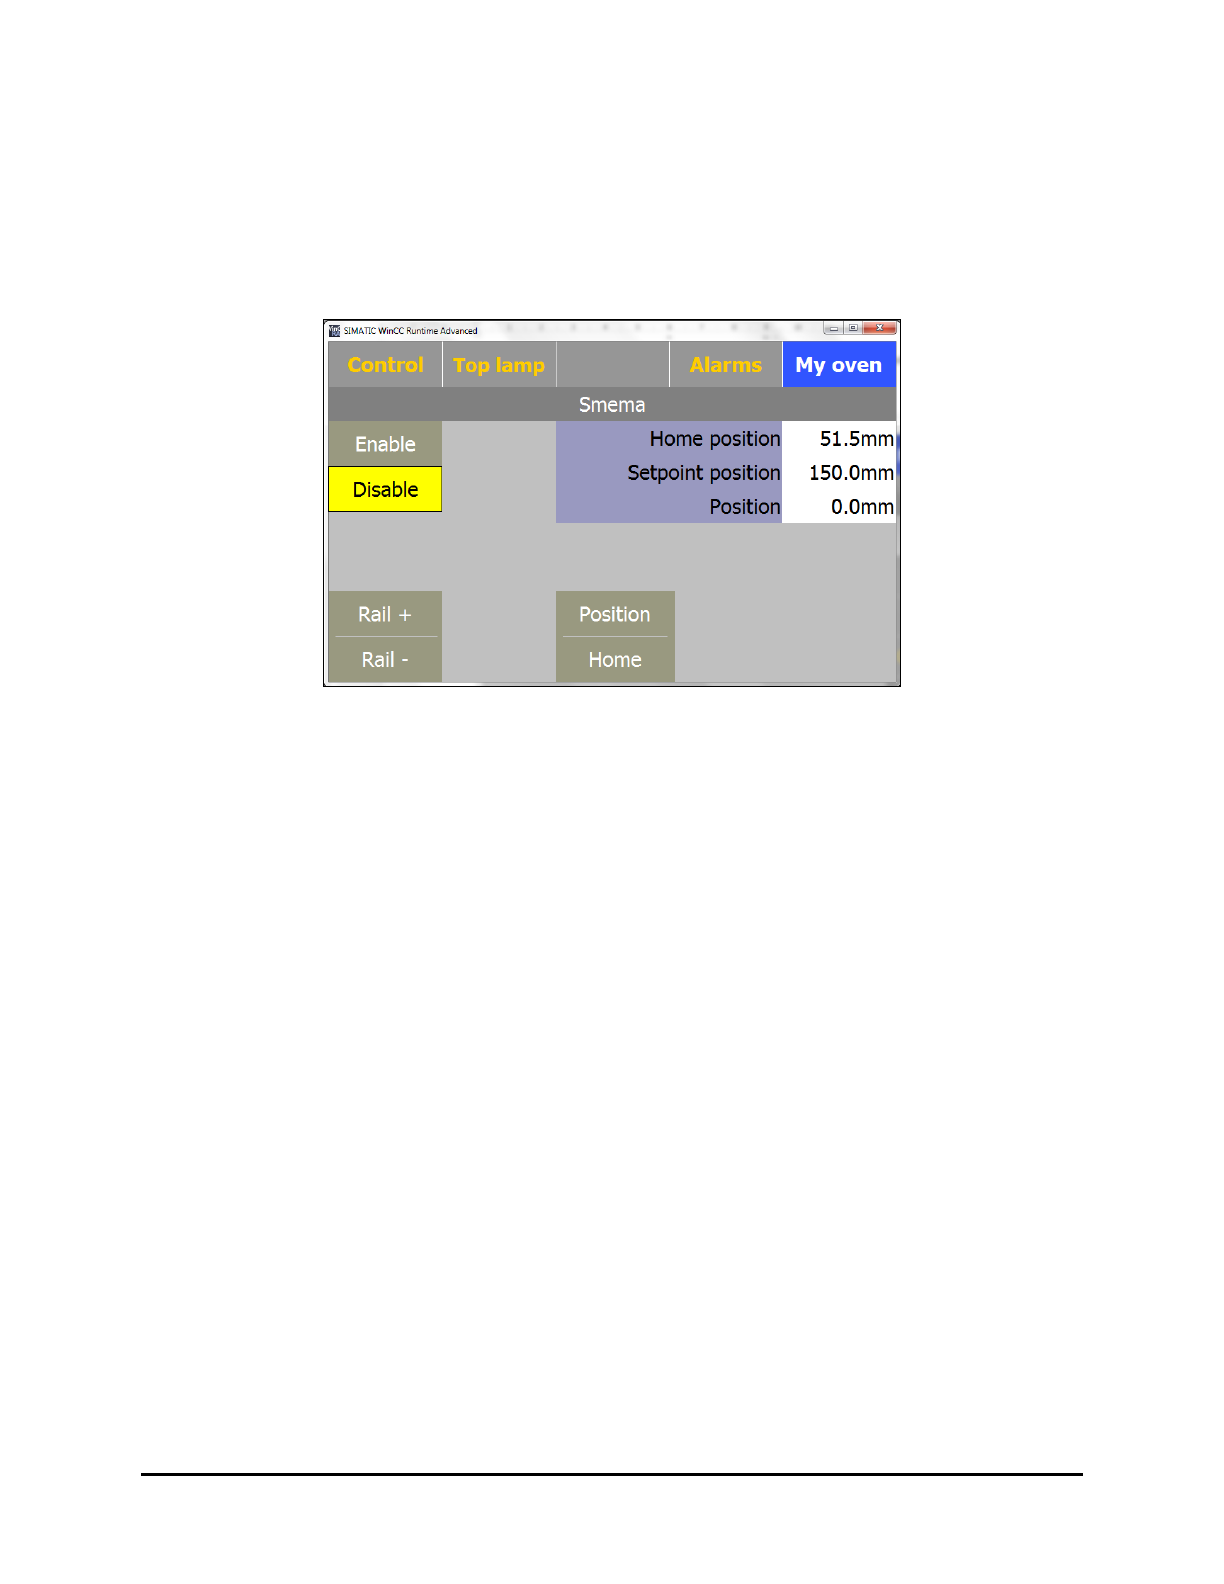
2. Select Auto Width.
The Auto Width menu opens (Figure 4-3).
Figure 4-3 Auto Width Enabled
3. Select Enable to enable the Automatic Width feature.
4. Click on
Home.
The conveyor will move to its home position (approximately 50mm).
5. After the conveyor has moved to the home position, measure the conveyor width and enter
the value into the
Home Position textbox.
Adjustments 4-3
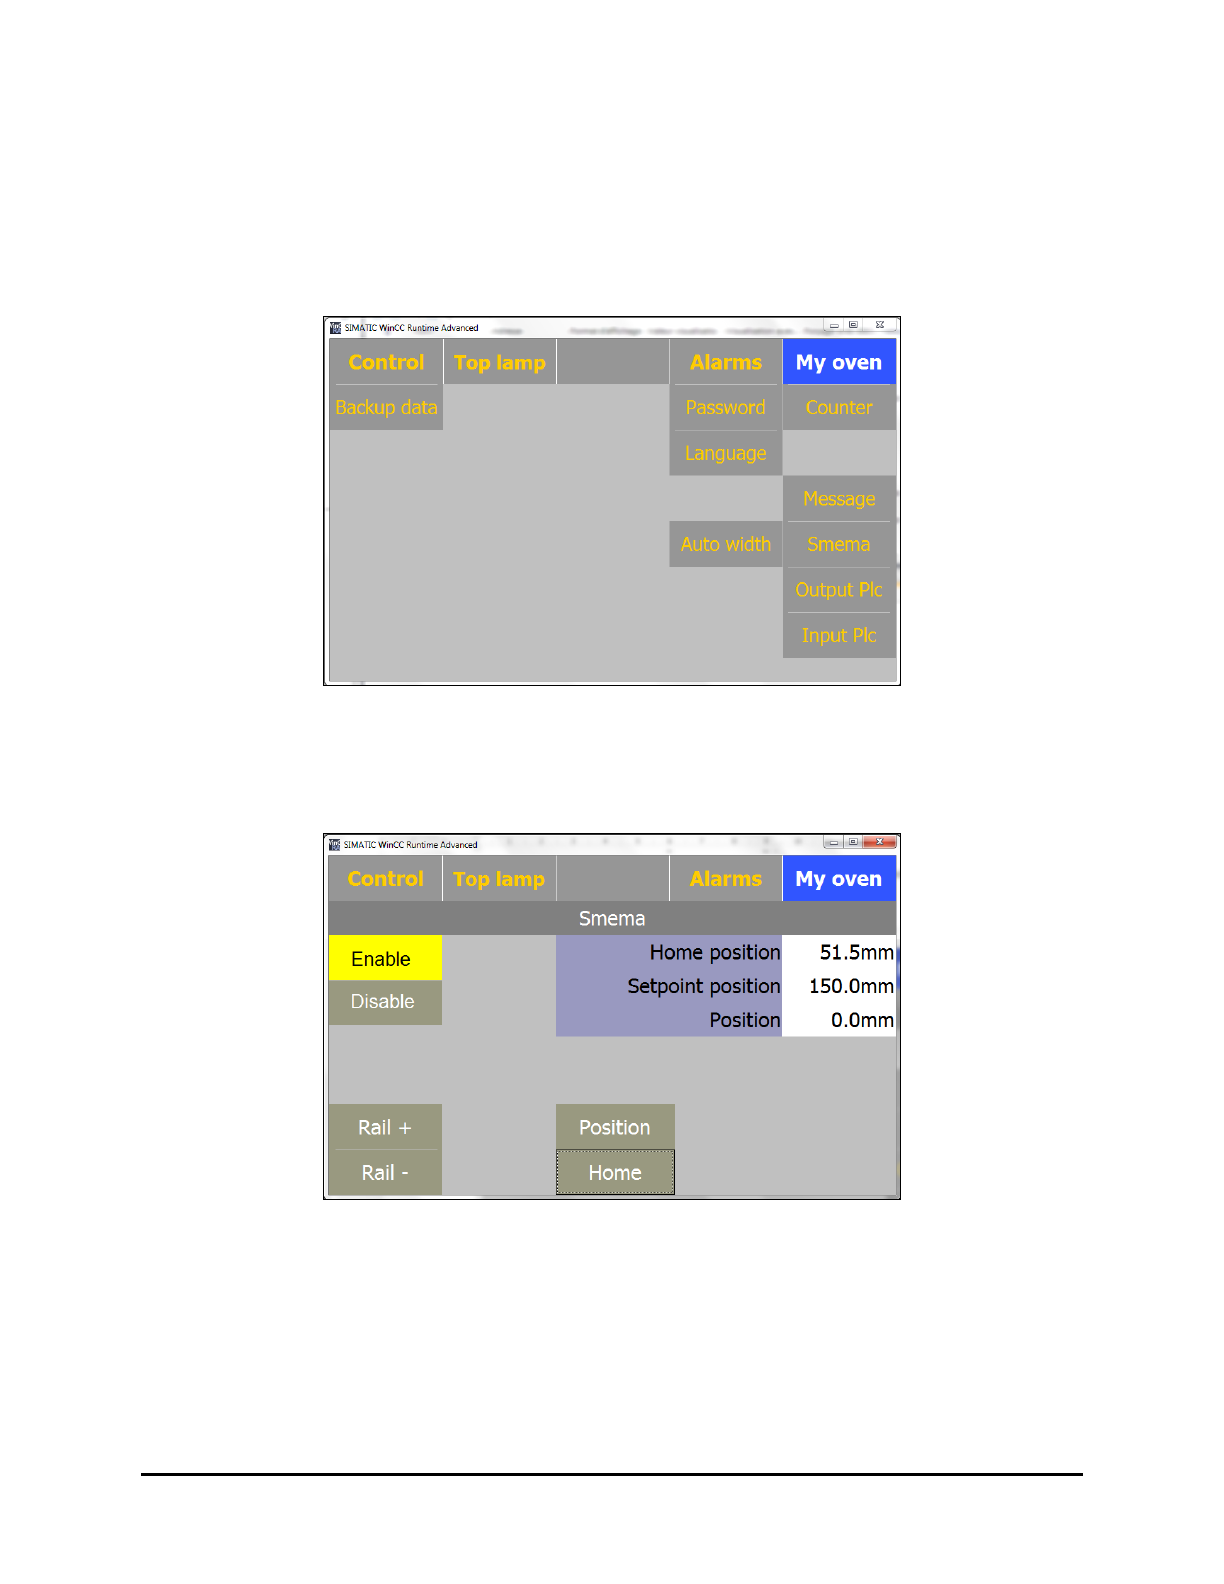
To disable the automatic width adjustment:
1. Click on the
Control button on the Main Menu.
2. Select
Auto Width.
The Auto Width menu opens (Figure 4-4).
3. Click on
Disable.
Figure 4-4 Auto Width Disabled
4.5 UV Module Height Adjustment
There are three possible heights for the top module on the UV-9 Cure Module.
• 75 mm (from conveyor to UV module)
• 110 mm (from conveyor to UV module)
• 140 mm (from conveyor to UV module)
The different settings allow for variations in the irradiance range.
4-4 Adjustments
4.6 Internal UV Radiation Trap Flap Height Adjustment
The height of the radiation trap flaps can be adjusted to accommodate the height of components on the
top of the board. Radiation trap flaps restrict the UV light from radiating towards the outside of the oven.
To set the Internal UV Radiation Trap Flap Height:
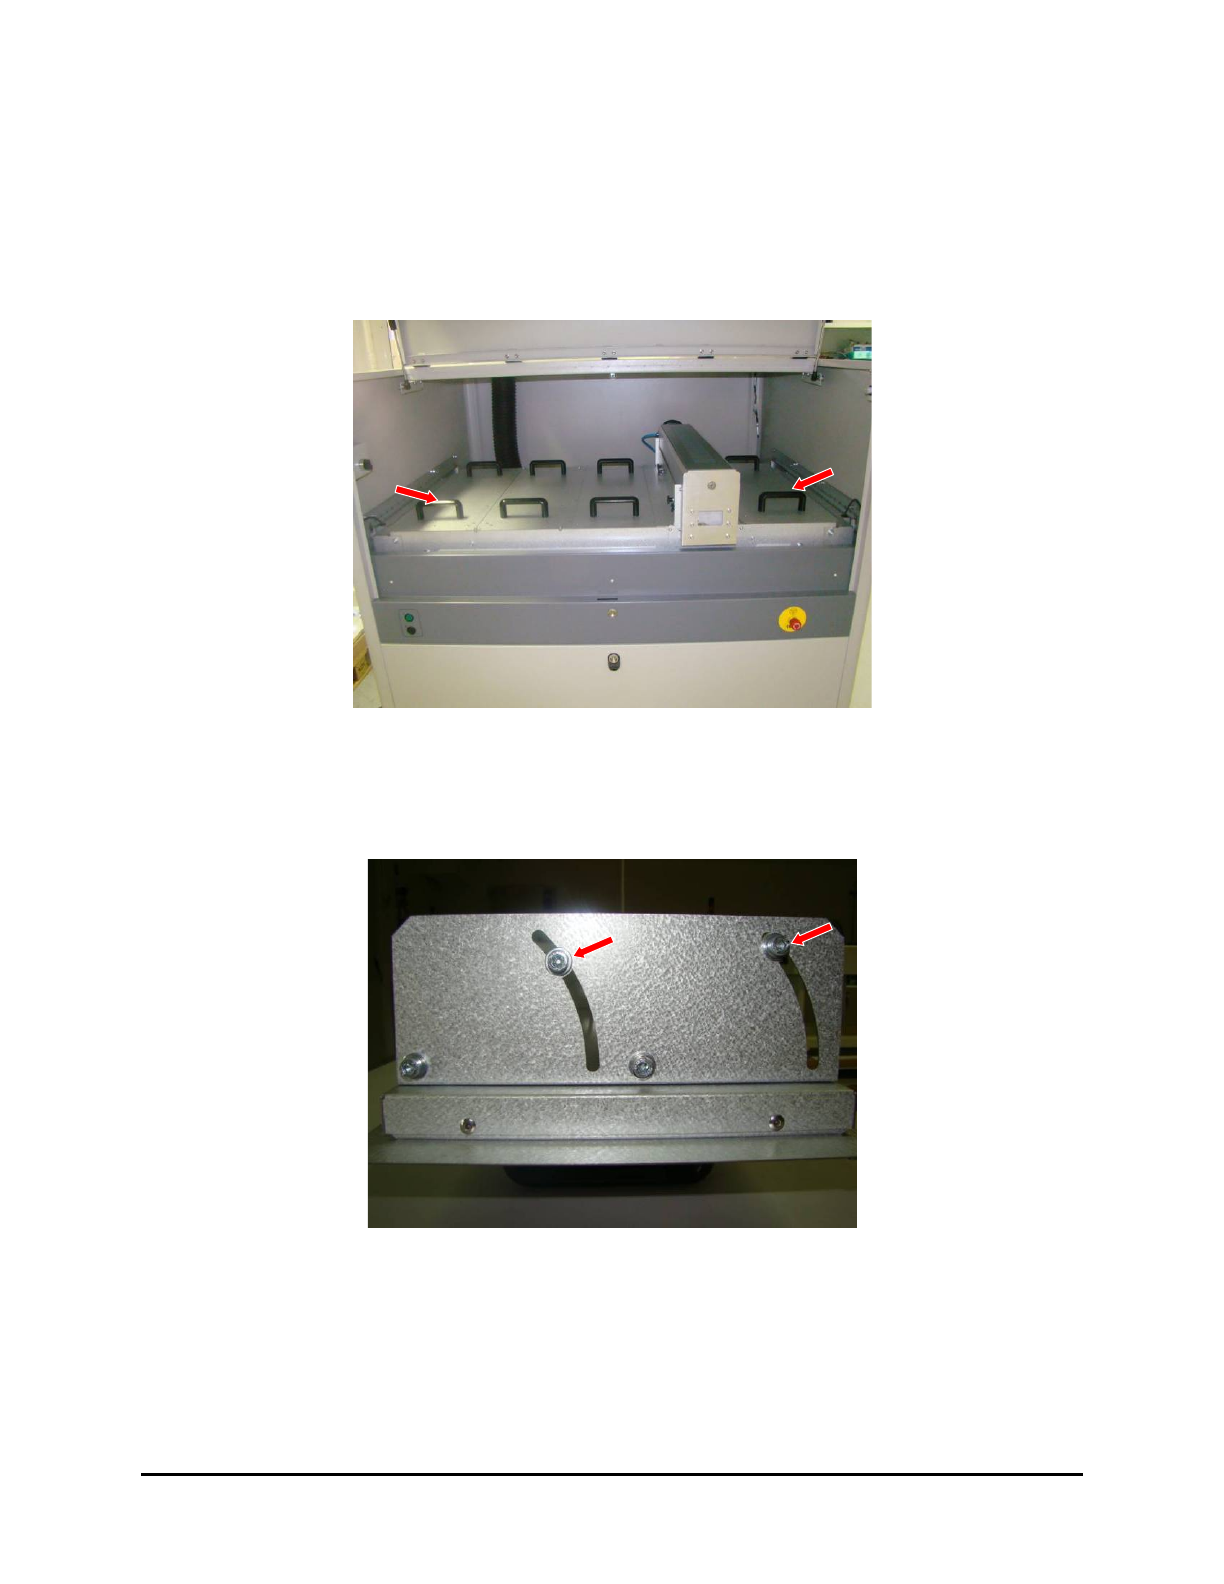
1. Open the hood and remove the two UV radiation traps from the tunnel (Figure 4-5).
Figure 4-5 UV Radiation Trap Modules
2. Place them upside down on a table with the handles underneath.
3. Loosen the four screws (two at each end) (Figure 4-6).
Figure 4-6 Trap Flap Adjustment Screws
4. Pivot the trap flaps to the correct height and re-tighten the screws.
5. Place the UV radiation trap back on the tunnel.
Adjustments 4-5