UV-9+Cure+Module+7269348_B+Manual.pdf - 第95页
6 Maintenance 6.1 Overview Perform ing the recom mended m aintena nce procedure s on the UV -9 Cure Module at the intervals suggested in t his section increases syst em life and ensures high quality curing perfor mance f…
6 Maintenance
6.1 Overview
Performing the recommended maintenance procedures on the UV-9 Cure Module at the intervals
suggested in this section increases system life and ensures high quality curing performance for every
production run. This section covers the following topics:
• Electrical Cabinet
• Opening and Closing the Hood
• Maintenance
WARNING! Maintenance procedures should be performed by trained personnel only.
6.2 Safety First
Before performing any of the UV-9 Cure Module maintenance procedures in this section, please review
the information presented in Section 2 – Safety.
6.3 Electrical Cabinet
You can access the electrical cabinet by opening the front lower door (Figure 1-1). This cabinet contains
all relays, PLC, safety and regulation devices necessary for running the oven except those installed on the
front control panel.
CAUTION! The devices inside the cabinet are under voltage. Turn off and lock the Main Power
Switch when performing maintenance on the electrical cabinet. Only a qualified
technician should perform the maintenance.
6.4 Opening and Closing the Hood
The hood can be lifted to a 90° angle for access during maintenance, conveyor adjustment, or to recover
dropped boards.
6.4.1 Opening
To open the hood:
1. Shutdown the UV-9 Cure Module as described in 5.6 System Shutdown.
2. Unlock the hood with the safety key supplied with the equipment.
3. Lift the hood.
Two (2) gas springs balance the weight of the hood.
A safety switch prevents the UV lamp and conveyor from starting when the hood is open.
Maintenance 6-1
6.4.2 Closing
To close the hood:
1. Close the hood.
2. Relock the hood using the safety key.
3. Restart the UV-9 Cure Module as described in 5.4 System Startup.
WARNING! Make sure all tools/foreign objects are removed from the system that could prevent
closing the hood.
6.5 Maintenance Procedures
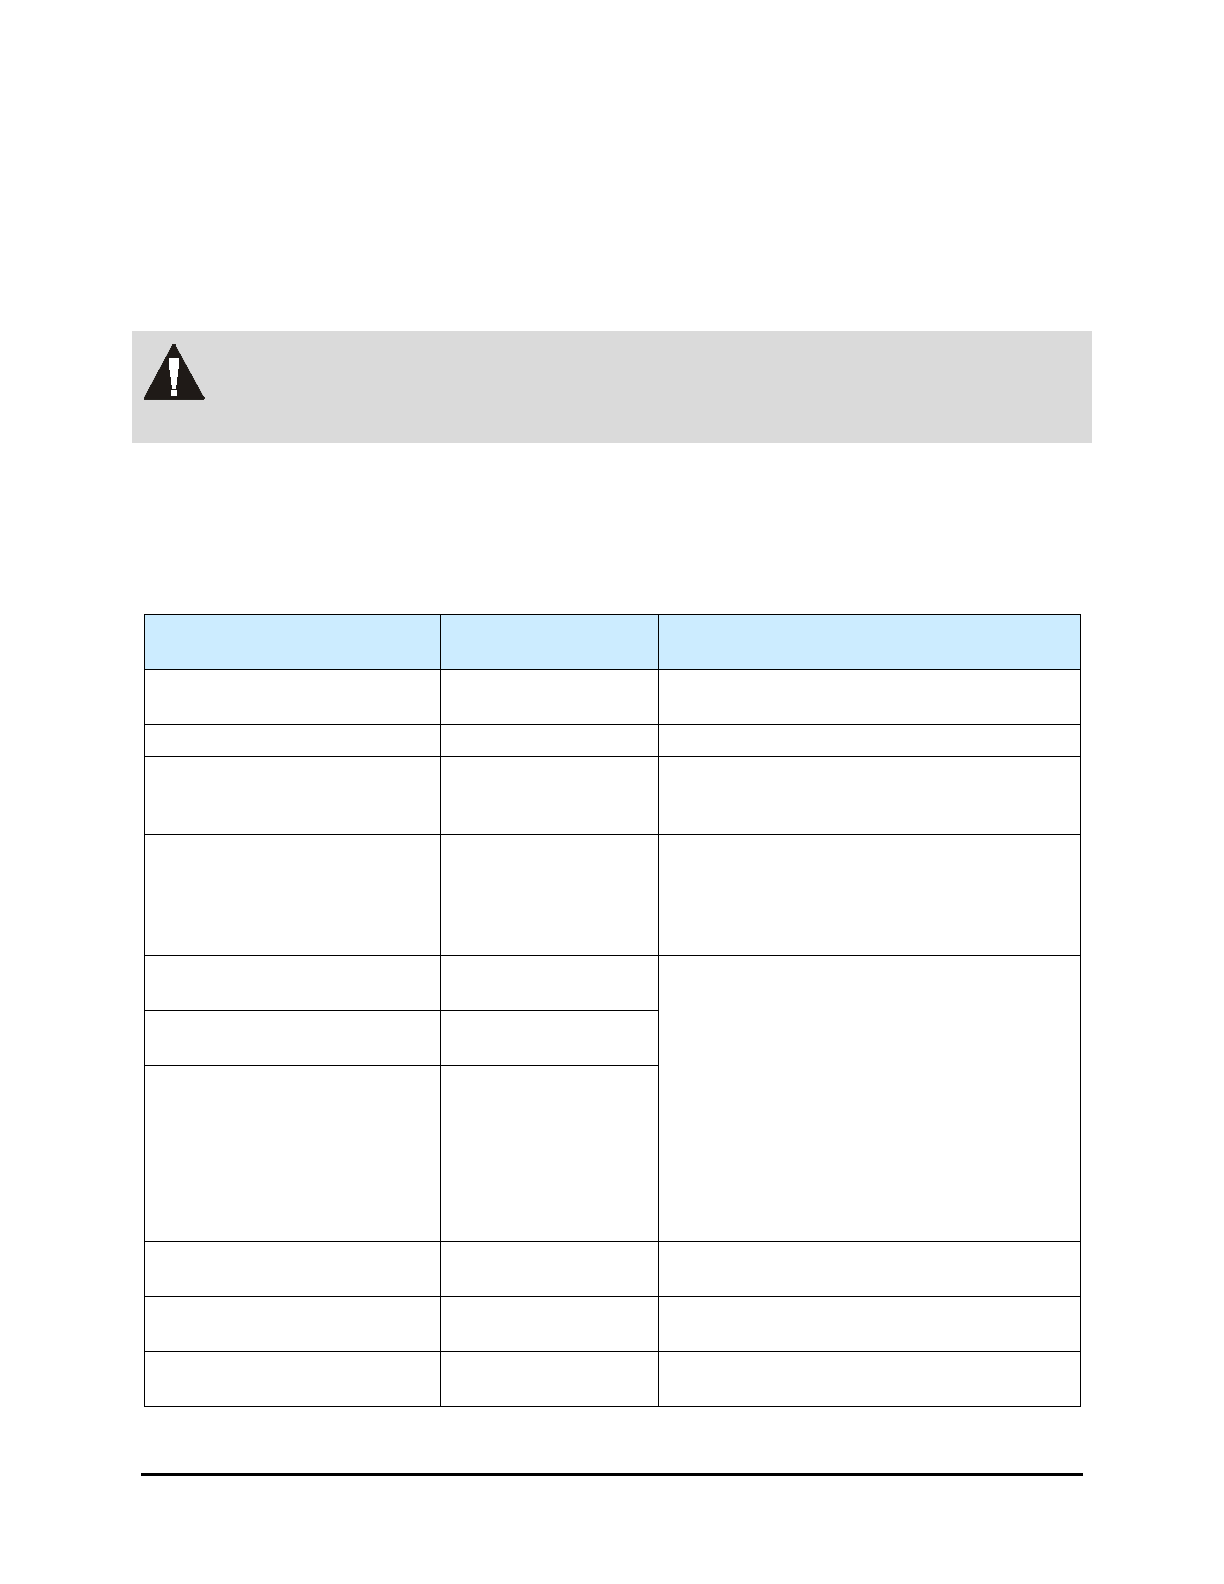
6.5.1 Preventive Maintenance Schedule
Table 6-1 Preventive Maintenance Schedule
Maintenance Procedure
Recommended
Frequency
Instructions
Clean Conveyor Chains Weekly (120h)
Check the conveyor chains and remove all
residues or trace impurities.
Clean UV Sensor Weekly (120h) Clean the UV Sensor.
Clean Quartz Glasses Weekly (120h)
With lint-free cloth moistened with alcohol,
wipe off all impurities from the quartz
glasses.
Clean Reflectors Weekly (120h)
With lint-free cloth moistened with alcohol,
wipe off all impurities.
Note: Bulb must be at room temperature
before cleaning.
Check UV Lamp
(Mercury)
Weekly (120h)
Check the UV radiation intensity with a
radiometer (e.g. Power Puck 2). Using a
recorder with a valid calibration certificate is
recommended.
Replace the lamp if the power output has
reached 100%.
When running in open loop mode, increase
the output power if necessary or replace the
lamp if the power has reached 100%.
To adjust the power output of the UV lamp,
see 4.10 UV Lamp Power Adjustment.
Check UV Lamp
(Gallium-doped Mercury)
Weekly (120h)
Check UV Lamp
(Iron-doped Mercury)
Weekly (120h)
Check Conveyor Chain
Tension
Monthly (500h)
Check and adjust the chain tension if
necessary. See 6.5.4 Chain Tensioning.
Check Emergency Stop Monthly (500h)
Check the function of the E-Stop button.
Repair if necessary.
Check Hood Safety Switch Monthly (500h)
Check the function of the hood safety switch.
Repair if necessary.
6-2 Maintenance