UV-9+Cure+Module+7269348_B+Manual.pdf - 第112页
在线预览 UV-9+Cure+Module+7269348_B+Manual.pdf PDF 文档。
6.6.2 Lower UV Module (Double-Sided Option Only)
To install the quartz glass in the lower module:
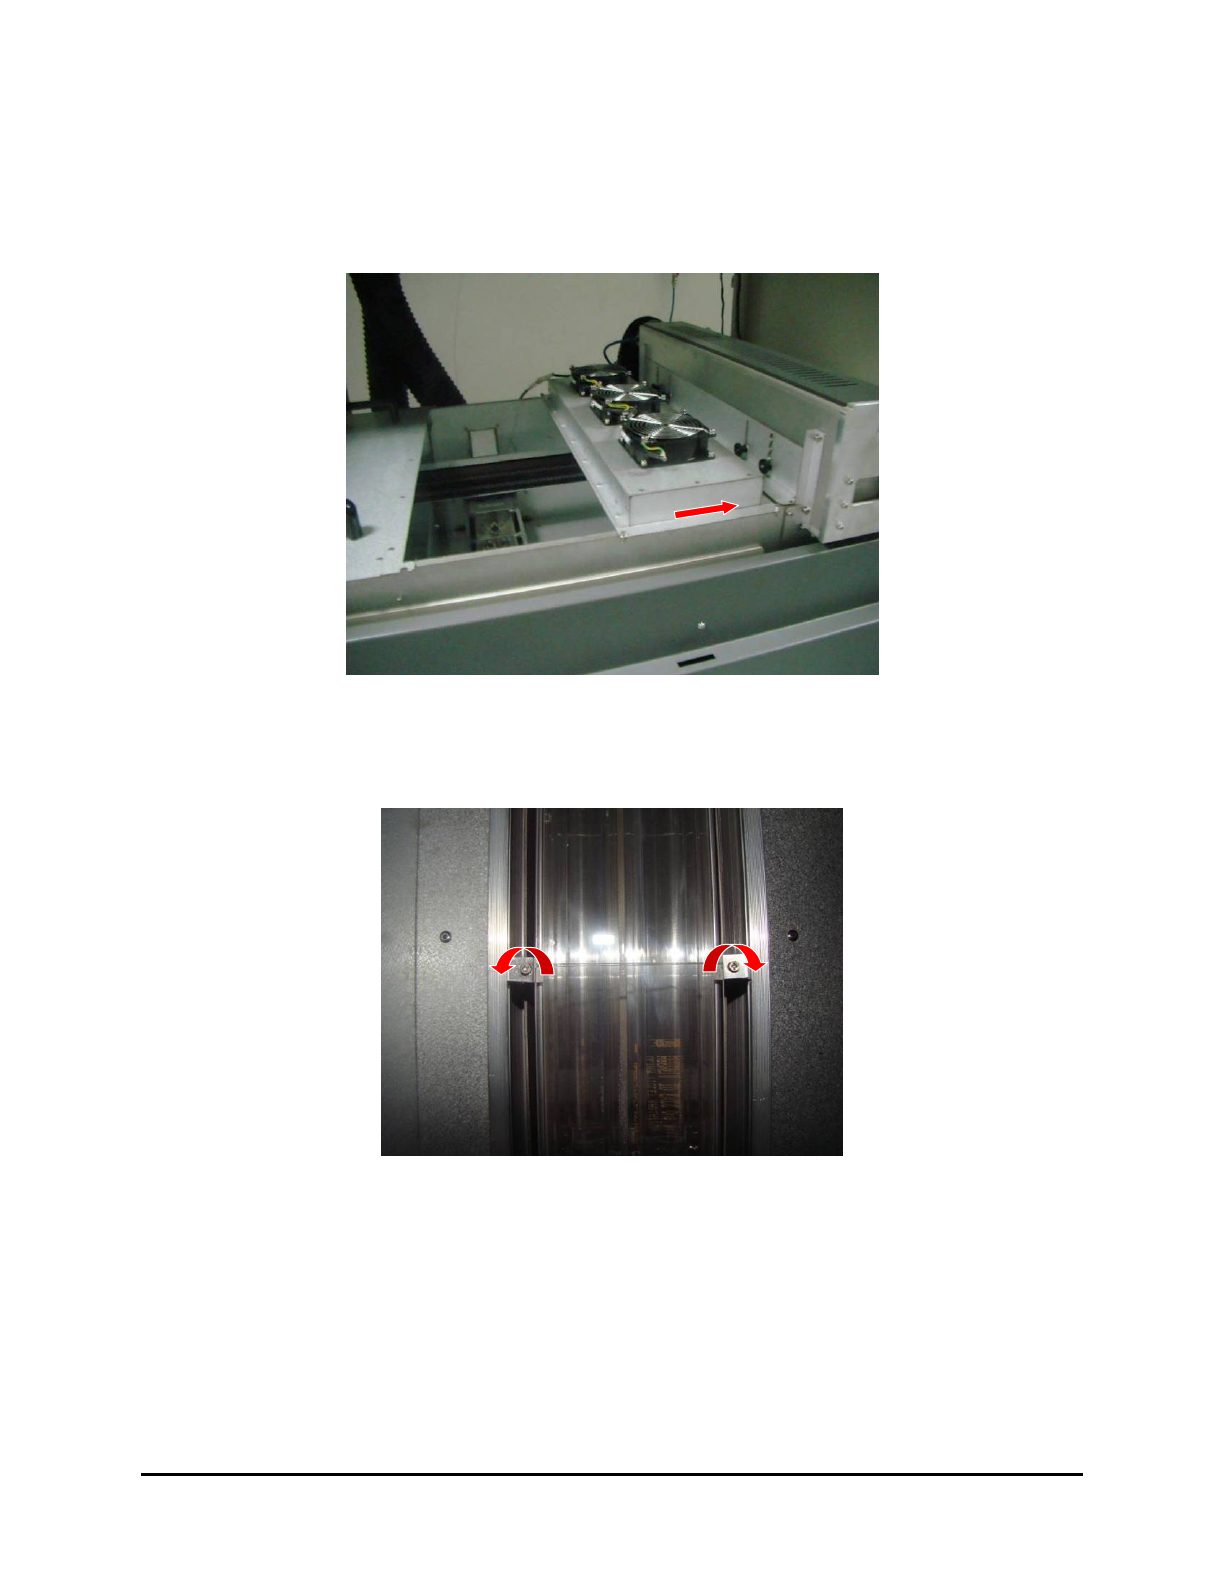
1. Remove the cover next to the upper UV Lamp module and slide the cooling module
towards the upper UV module (Figure 6-21).
Figure 6-21 Accessing the Lower UV Module
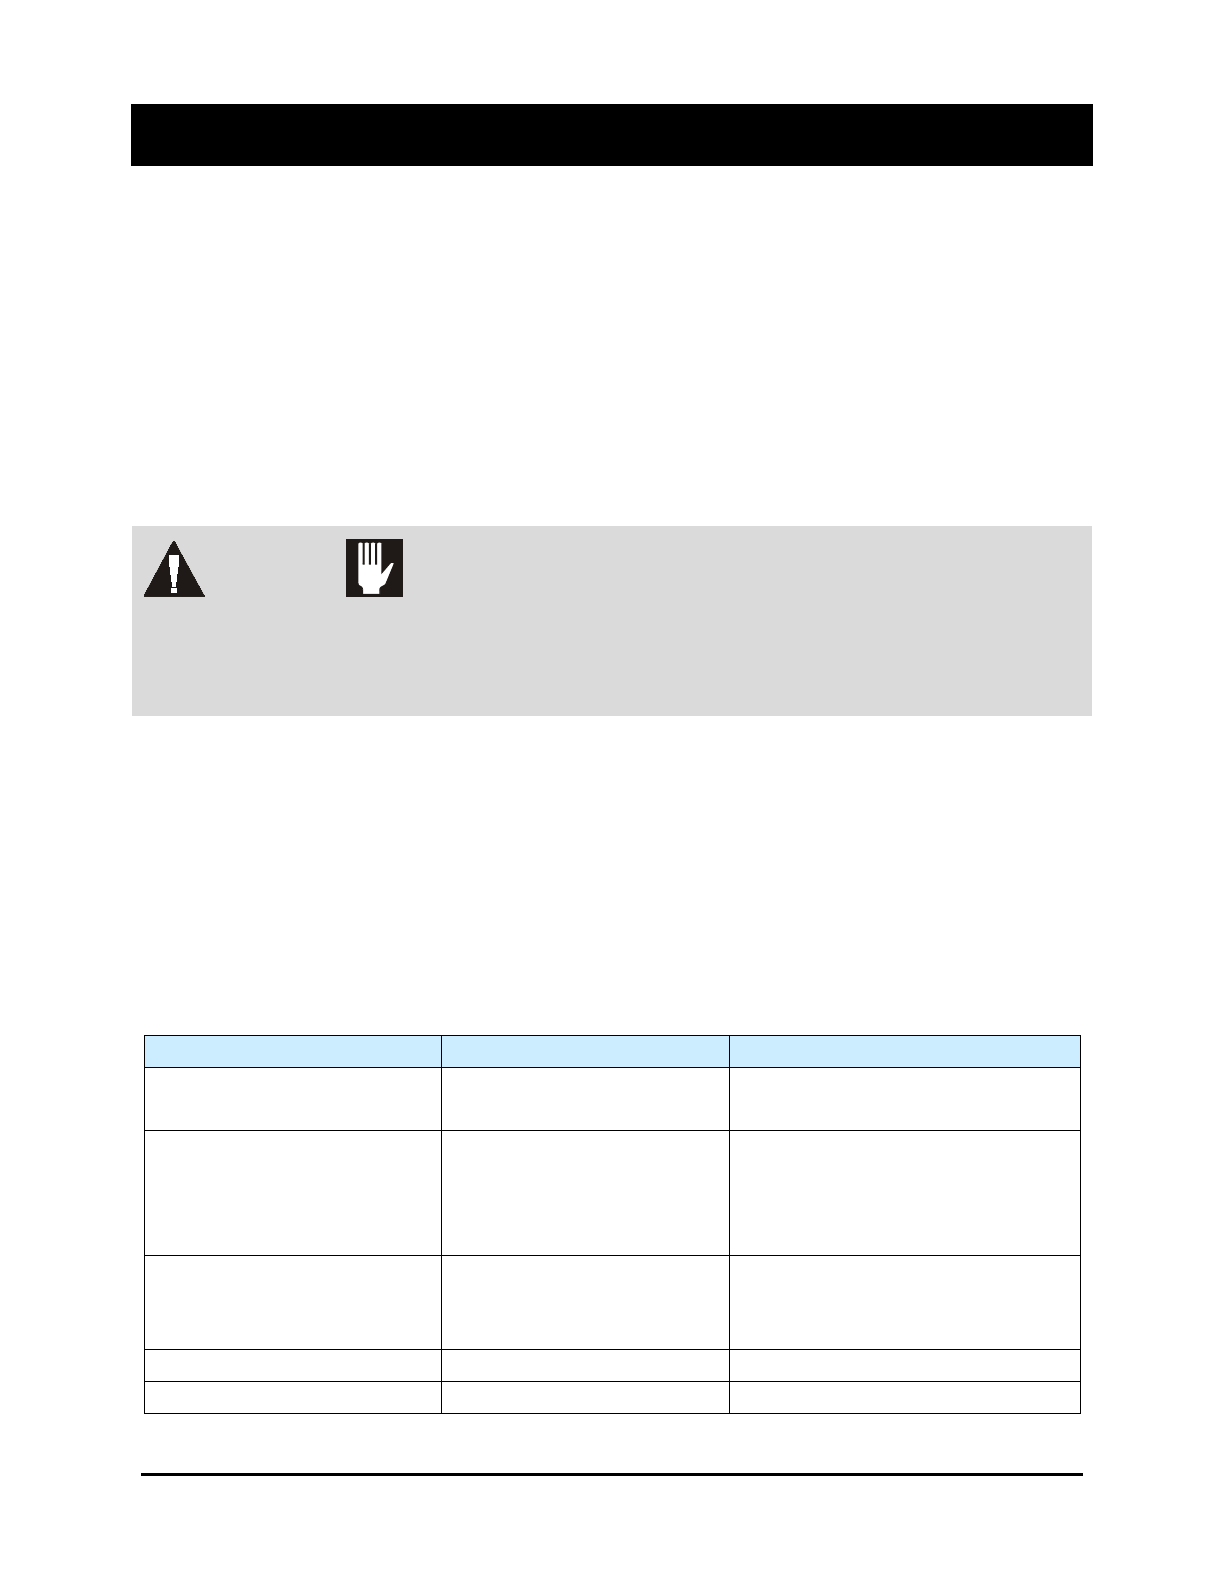
2. Loosen the screws in the quartz glass support brackets (one on each side of the UV module)
without removing them and turn the upper brackets 180° (Figure 6-22).
Figure 6-22 Quartz Glass Support Brackets
3. Slide the quartz glass into the supports.
4. Turn the upper brackets 180° and tighten them down over the quarts glass.
5. Slide the cooling module over the UV module and replace the adjacent cover.
Maintenance 6-17
7 Troubleshooting
7.1 Overview
If you have difficulty operating your cure module, use this section to identify a possible solution to the
problem. If you have difficulties not listed in this section, or the suggested solution does not correct the
problem, contact Nordson ASYMTEK Technical Support.
7.2 Safety First
Operation of your UV-9 Cure Module involves air pressure, electrical power, mechanical devices, and
potentially the use of hazardous materials. It is essential that every person servicing or operating the cure
module fully understands all hazards, risks, and safety precautions. Refer to Section 2 – Safety for
important safety information.
WARNING! CAUTION!
Allow only qualified personnel to perform system troubleshooting. Observe and
follow the safety instructions in this document and all other related documentation.
Failure to do so may cause serious bodily injury to the user or damage to the
equipment.
7.3 Record Keeping
The type of procedure performed should be recorded in maintenance records for the dispensing system.
Dates, part numbers/serial numbers of replaced parts, names of technicians, and other pertinent data
should be recorded.
7.4 Alarms
Table 7-1 lists system alarms, possible causes and suggested recovery procedures.
Table 7-1 Alarms
Alarms
Possible Cause
Recovery
Top Lamp Ballast Fault 1
Wrong connection
Defective ballast
Check connection.
Replace ballast.
Top Lamp Ballast Fault 2
Mains failure
Fuse blown
Short circuit in lamp circuit
Defective ballast
Check if KM1 is ON.
Check the fuses F2.
Check wiring integrity.
Replace ballast.
Top Lamp Ballast Fault 3
UV lamp shut off
UV lamp does not ignite
Disconnection to the lamp
Contact Nordson ASYMTEK.
Top Lamp Ballast Fault 4-1 Ballast overheating See ballast technical sheet.
Top Lamp Ballast Fault 4-2 Ground fault in lamp circuit Check the circuit integrity.
Troubleshooting 7-1