UV-9+Cure+Module+7269348_B+Manual.pdf - 第97页
Maintenance Procedure Recommended Frequency Instructions Replace UV Lamp (Mercury) Bi - Month ly (1500h) Replace the UV Lamp. The lifespan of the UV lamp can in certain ca ses be extended to double the rated lifespan, bu…
6.4.2 Closing
To close the hood:
1. Close the hood.
2. Relock the hood using the safety key.
3. Restart the UV-9 Cure Module as described in 5.4 System Startup.
WARNING! Make sure all tools/foreign objects are removed from the system that could prevent
closing the hood.
6.5 Maintenance Procedures
6.5.1 Preventive Maintenance Schedule
Table 6-1 Preventive Maintenance Schedule
Maintenance Procedure
Recommended
Frequency
Instructions
Clean Conveyor Chains Weekly (120h)
Check the conveyor chains and remove all
residues or trace impurities.
Clean UV Sensor Weekly (120h) Clean the UV Sensor.
Clean Quartz Glasses Weekly (120h)
With lint-free cloth moistened with alcohol,
wipe off all impurities from the quartz
glasses.
Clean Reflectors Weekly (120h)
With lint-free cloth moistened with alcohol,
wipe off all impurities.
Note: Bulb must be at room temperature
before cleaning.
Check UV Lamp
(Mercury)
Weekly (120h)
Check the UV radiation intensity with a
radiometer (e.g. Power Puck 2). Using a
recorder with a valid calibration certificate is
recommended.
Replace the lamp if the power output has
reached 100%.
When running in open loop mode, increase
the output power if necessary or replace the
lamp if the power has reached 100%.
To adjust the power output of the UV lamp,
see 4.10 UV Lamp Power Adjustment.
Check UV Lamp
(Gallium-doped Mercury)
Weekly (120h)
Check UV Lamp
(Iron-doped Mercury)
Weekly (120h)
Check Conveyor Chain
Tension
Monthly (500h)
Check and adjust the chain tension if
necessary. See 6.5.4 Chain Tensioning.
Check Emergency Stop Monthly (500h)
Check the function of the E-Stop button.
Repair if necessary.
Check Hood Safety Switch Monthly (500h)
Check the function of the hood safety switch.
Repair if necessary.
6-2 Maintenance
Maintenance Procedure
Recommended
Frequency
Instructions
Replace UV Lamp
(Mercury)
Bi-Monthly (1500h)
Replace the UV Lamp.
The lifespan of the UV lamp can in certain
cases be extended to double the rated
lifespan, but will need to be monitored
frequently after the recommended
replacement interval. See 6.5.2 UV Lamp
Replacement.
Replace UV Lamp
(Gallium-doped Mercury)
Bi-Monthly (1500h)
Replace UV Lamp
(Iron-doped Mercury)
Bi-Monthly (1500h)
Replace Conveyor Chains
Semi-Annually
(2000h)
Check the integrity of each link and that they
correctly engage into the sprocket teeth.
To check the links, make a mark on the first
link and visually inspect each link as you
manually move the chain.
Check Conveyor Sprockets
Semi-annually
(2000h)
Check that the sprockets freely turn and
there is not too much gap.
Replace them if the gap is too large.
Check Conveyor Rails Wear
Semi-annually
(2000h)
Check for wear of the conveyor rails. The
chains must freely move in the rails.
Chain and Rail Lubrication
Semi-annually
(2000h)
Lubricate the chain and the rail. See 6.5.3
Conveyor Chain Lubrication.
Clean Papst Fans Annually (4000h)
Check the function of the top and bottom
sides. Clean them if necessary.
Check Conveyor Speed Annually (4000h)
The maximum speed is 150 cm/min
A stopwatch and a tape measure are
necessary to measure the conveyor speed.
When the conveyor is running, record the
time to cover a distance, and then calculate
the speed. The calculated speed must be
close to the displayed speed (+/- 1 cm/min).
Recheck if necessary.
Maintenance 6-3
6.5.2 UV Lamp Replacement
To remove and replace the UV lamp:
1. Shut down the UV-9 Cure Module. See 2.11 Service Shutdown.
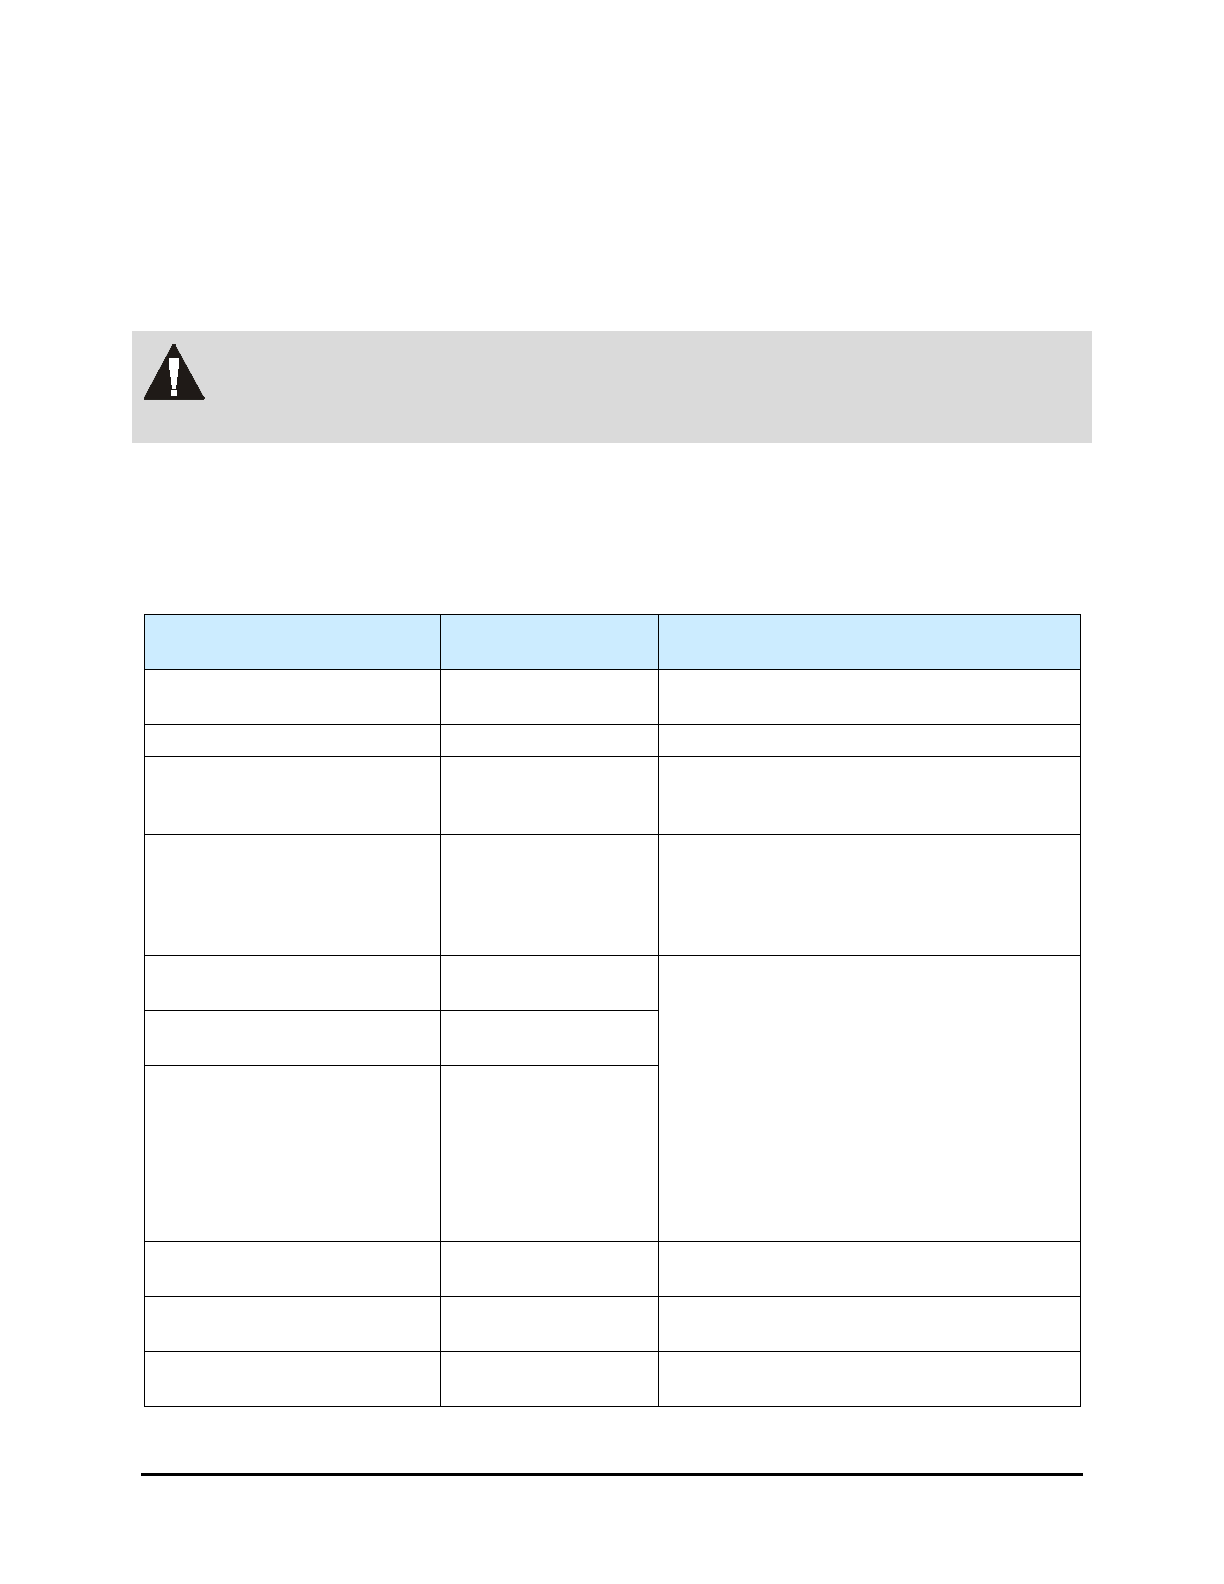
2. Disconnect the power plug located at the rear of the upper UV lamp module (Figure 6-1).
Figure 6-1 Upper UV Lamp Module – Rear
3. Open the front cover.
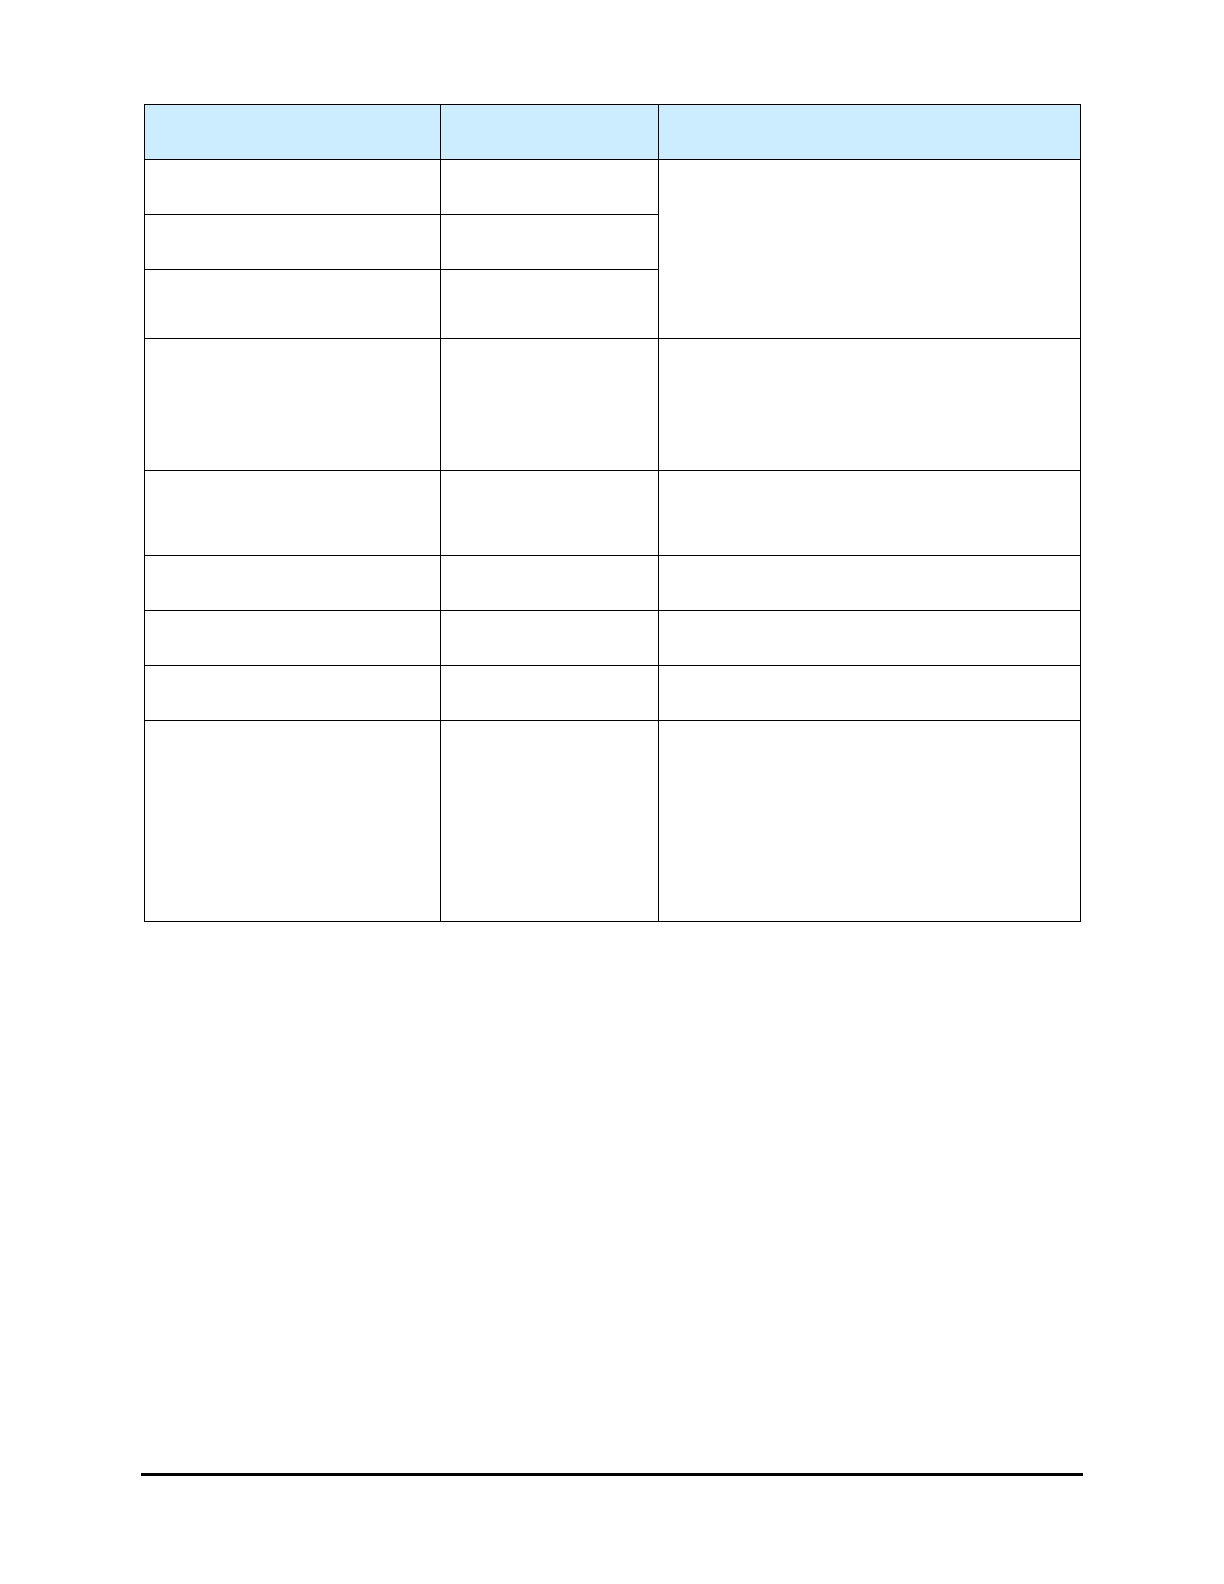
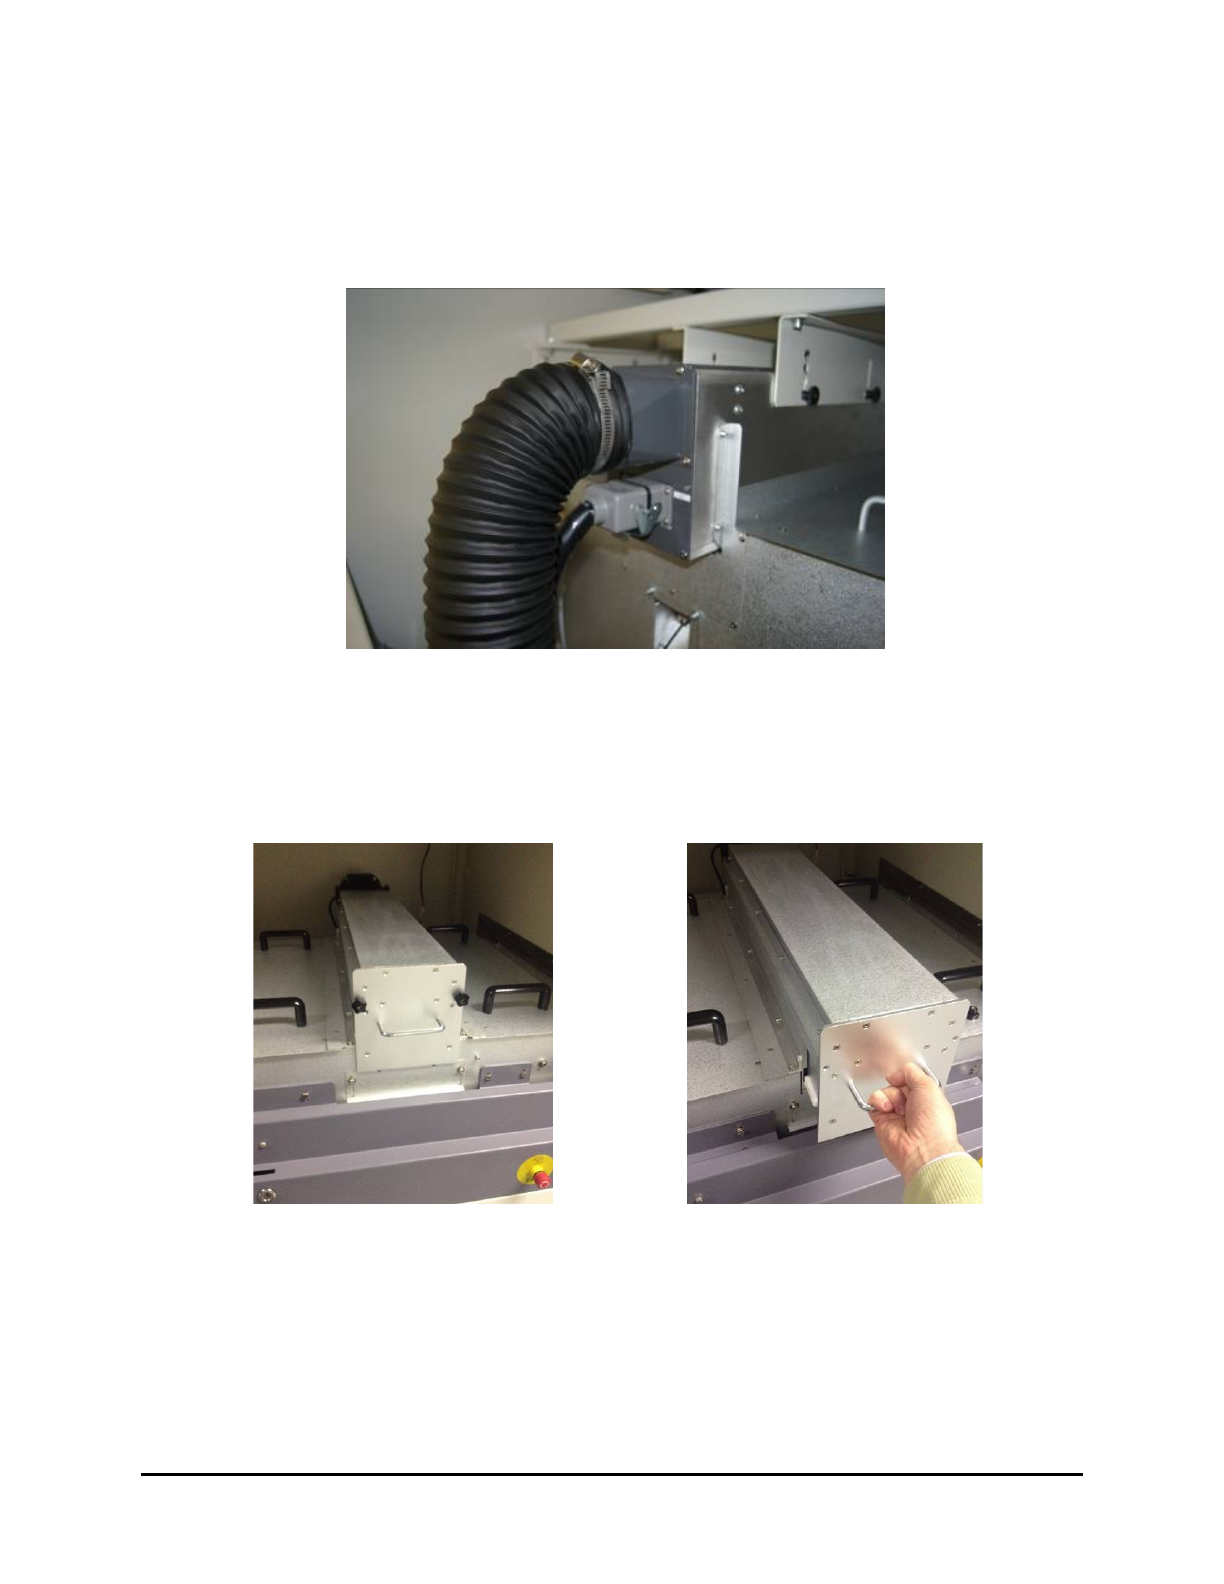
4. Remove the two nuts on the UV lamp module (Figure 6-2).
5. Use the handle to slide out the module (Figure 6-3).
Figure 6-2 Remove the Nuts from the Module
Figure 6-3 Slide out the Module
6. Hold the module by placing one hand on the handle and the other hand at the back of the
module (Figure 6-4).
6-4 Maintenance