OptimaUserManual.pdf - 第15页
INTRO DUCT IO N Opti ma User M anual 9 4. Choose the destination l ocation. We recomm end t hat you select the default directory, C: \Optim a . 5. Sel ect TYPI CAL on the Set -up Type dialog box. 6. Sel ect the system fo…
INTRODUCTION
Optima User Manual
8
Installing the Optima Windows Software
Follow these steps to install Optima Windows on your computer:
1. Insert the Optima Release CD-ROM into the appropriate drive on your computer.
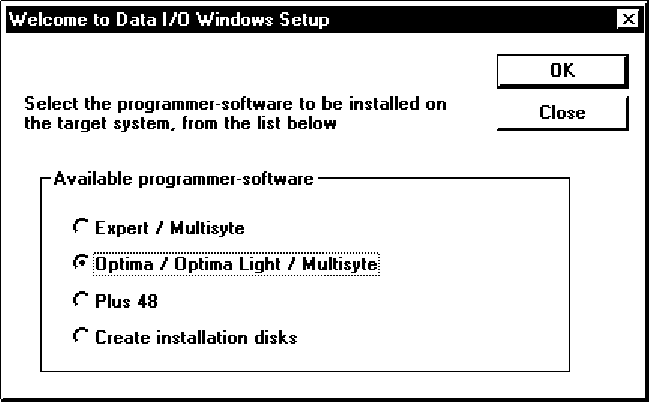
Windows starts the SetupWin.exe installation program and you will see the
Welcome to Data I/O Windows Setup dialog box:
2. Select one of the listed options, then click OK:
q Optima / Optima Light / Multisyte—most cases
q Plus 48—if connected to a programmer marked PLUS 48
q Create installation disks—if installing onto a PC that does not have a CD-
ROM drive
Note: Do not select the Expert/Multisyte option. It is for older
hardware configurations that are not supported.
3. Click NEXT as you proceed through the Welcome and ReadMe Information
dialog boxes.
INTRODUCTION
Optima User Manual
9
4. Choose the destination location. We recommend that you select the default
directory, C:\Optima.
5. Select TYPICAL on the Set-up Type dialog box.
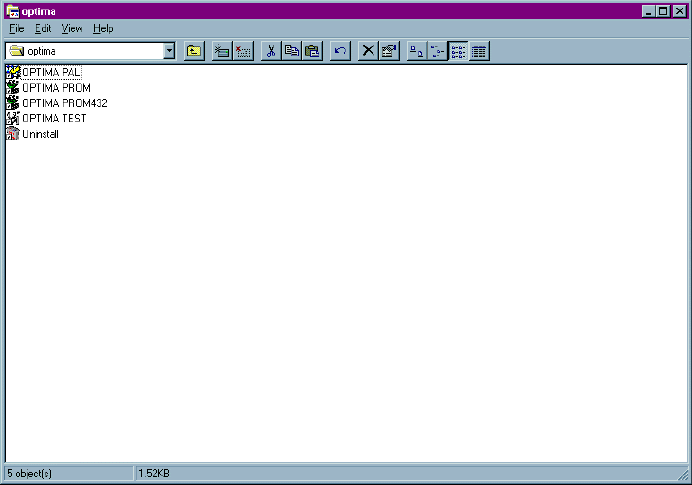
6. Select the system folder where you wish to have the Optima software stored.
The system creates the Optima window:
7. Drag the icons for Optima PAL, Optima PROM, Optima PROM432, and Optima
TEST to the Windows desktop.
8. Close all Optima applications.
INTRODUCTION
Optima User Manual
10
Running Optima Windows Self-Test and Calibration
After Optima Windows is installed you will need to initialize it so it can establish
communications with the programmer and load the basic system configuration.
To run the Optima Windows Self-Test and Calibration, complete the following steps:
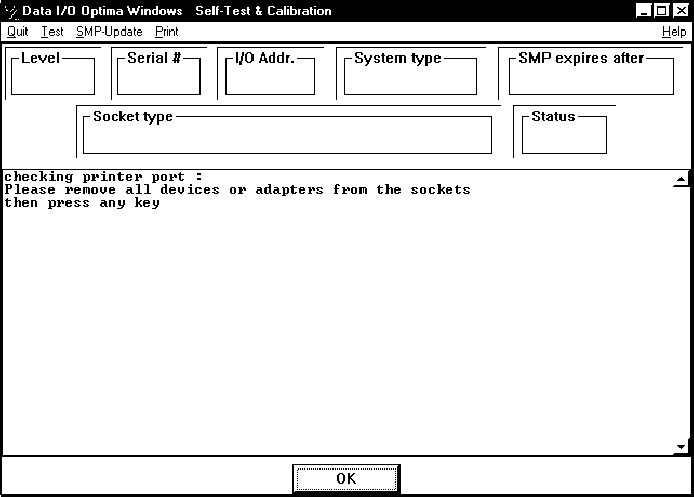
1. Make sure that all Optima applications are closed.
2. Double-click the Optima Test icon on the desktop to start the Self-Test. The
Self-Test & Calibration dialog box will be displayed:
3. Follow the instructions in the dialog box, then click OK or YES