ALFeeder_E.pdf - 第16页
1. Overview 1-4 Chapter 1 Overview 1.2 Handling pr ecautions T ake the following precautions when using Auto Loading Feeder to maintain the performance. █ Available softwar e versions The using of Auto Loading Feeder (he…
1. Overview
1-3
Chapter 1 Overview
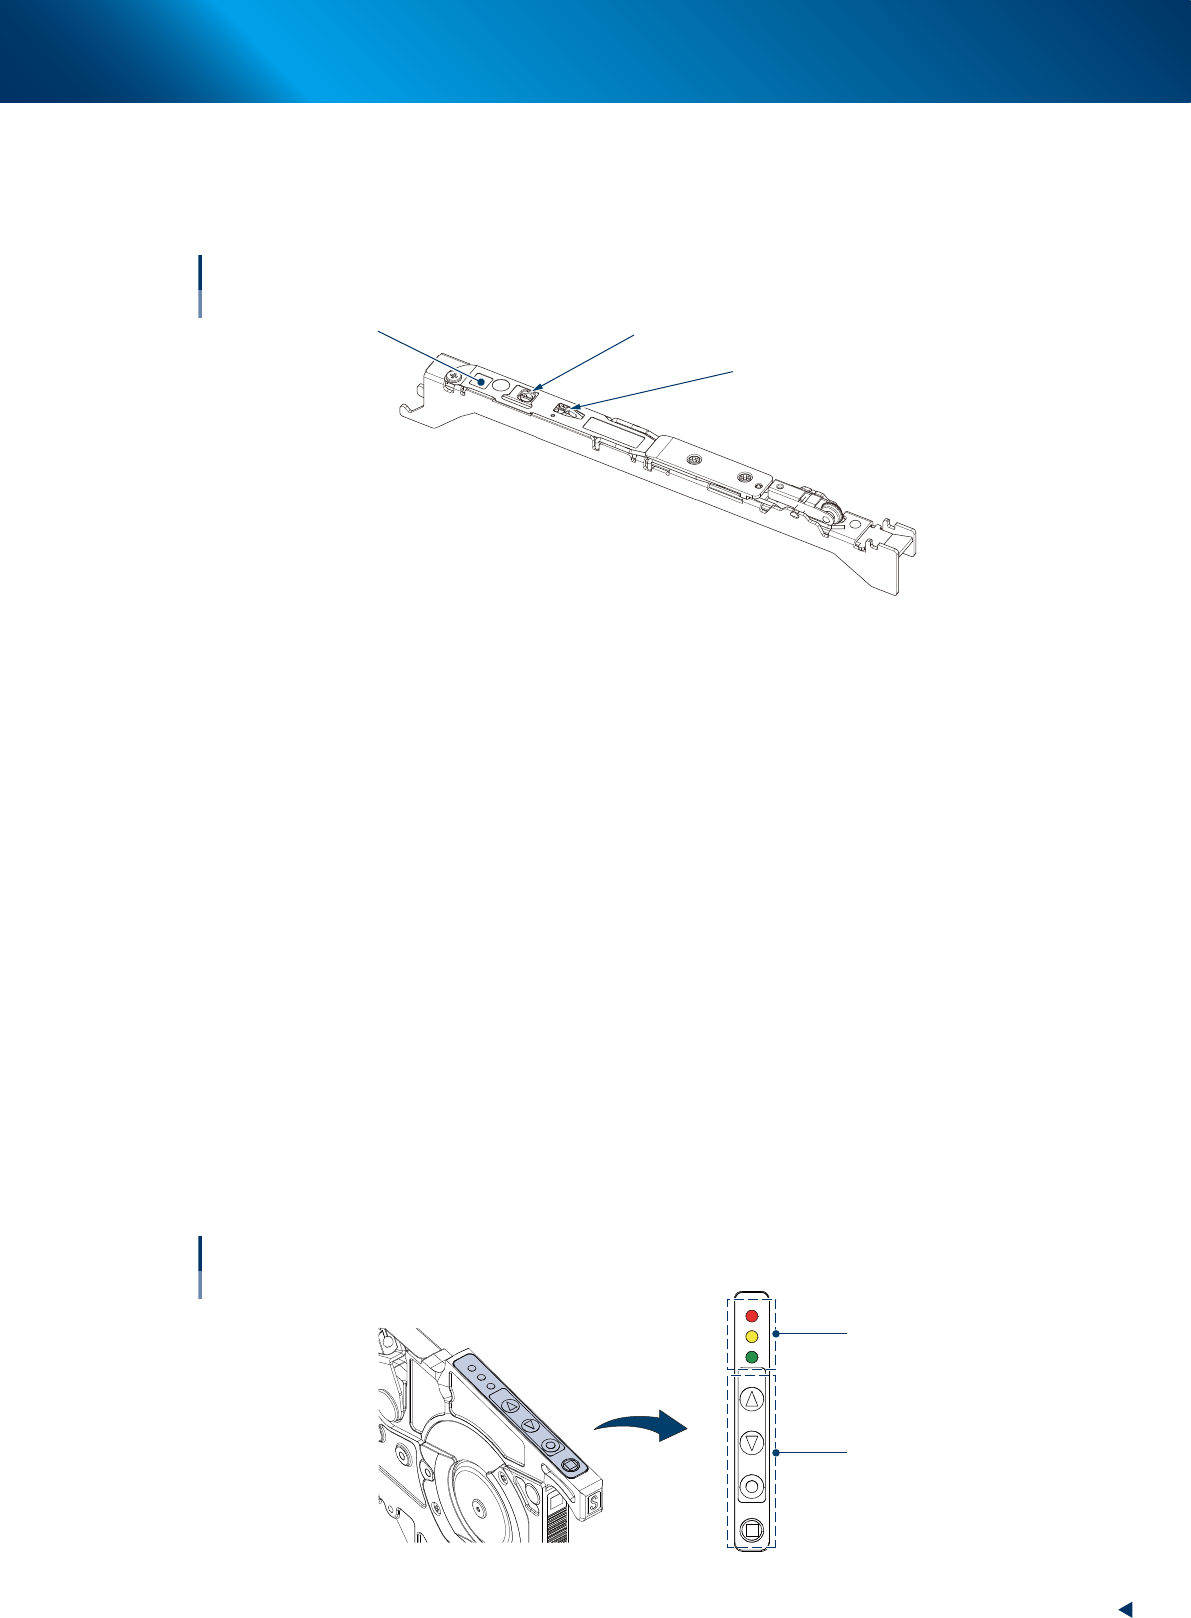
10. Tape guide
The tape guide contains a blade within, and cut the cover of component tape to open, then close the
tape after picking up the component. The dedicated tape guides are provided for each component
sizes.
Type display
(S, M, L, LL)
Tape guide
Pick up position
Blade
63103-KLU-40
11. Tape guide front lever
Used to fix the front side of tape guide. Push up the lever to detach tape guide.
12. Under rail
Used to prevent the floating up by sliding along feeder bank and getting stuck to it, upon attaching the
auto loading feeder.
13. Clamp lever assembly
Used to clamp/unclamp the feeder by opening/closing. It unclamps upon gripping the unclamp lever,
clamps upon releasing.
14. Operation panel
LEDs
The feeder status is indicated by flashing and lighting up with 3 LED colors (Red, Yellow, and Green).
The main indications are "Setup change" and "Out of components".
Operation buttons
The [FEED] button feeds component tape.
The continuous feed is available by pressing and holding the [FEED] button.
The [FUNC] button is used with the [FEED] button or [BACK] button.
[FUNC]+[FEED]: Ejects component tape forcibly from the front side of feeder.
[FUNC]+[BACK]: Unloads component tape to the rear of feeder.
LED1
LED2
LED3
FEED
BACK
FUNC
LOAD
Buttons on operation panel and LEDs
LEDs
Operation buttons
63104-KLU-30
1. Overview
1-4
Chapter 1 Overview
1.2 Handling precautions
Take the following precautions when using Auto Loading Feeder to maintain the performance.
█
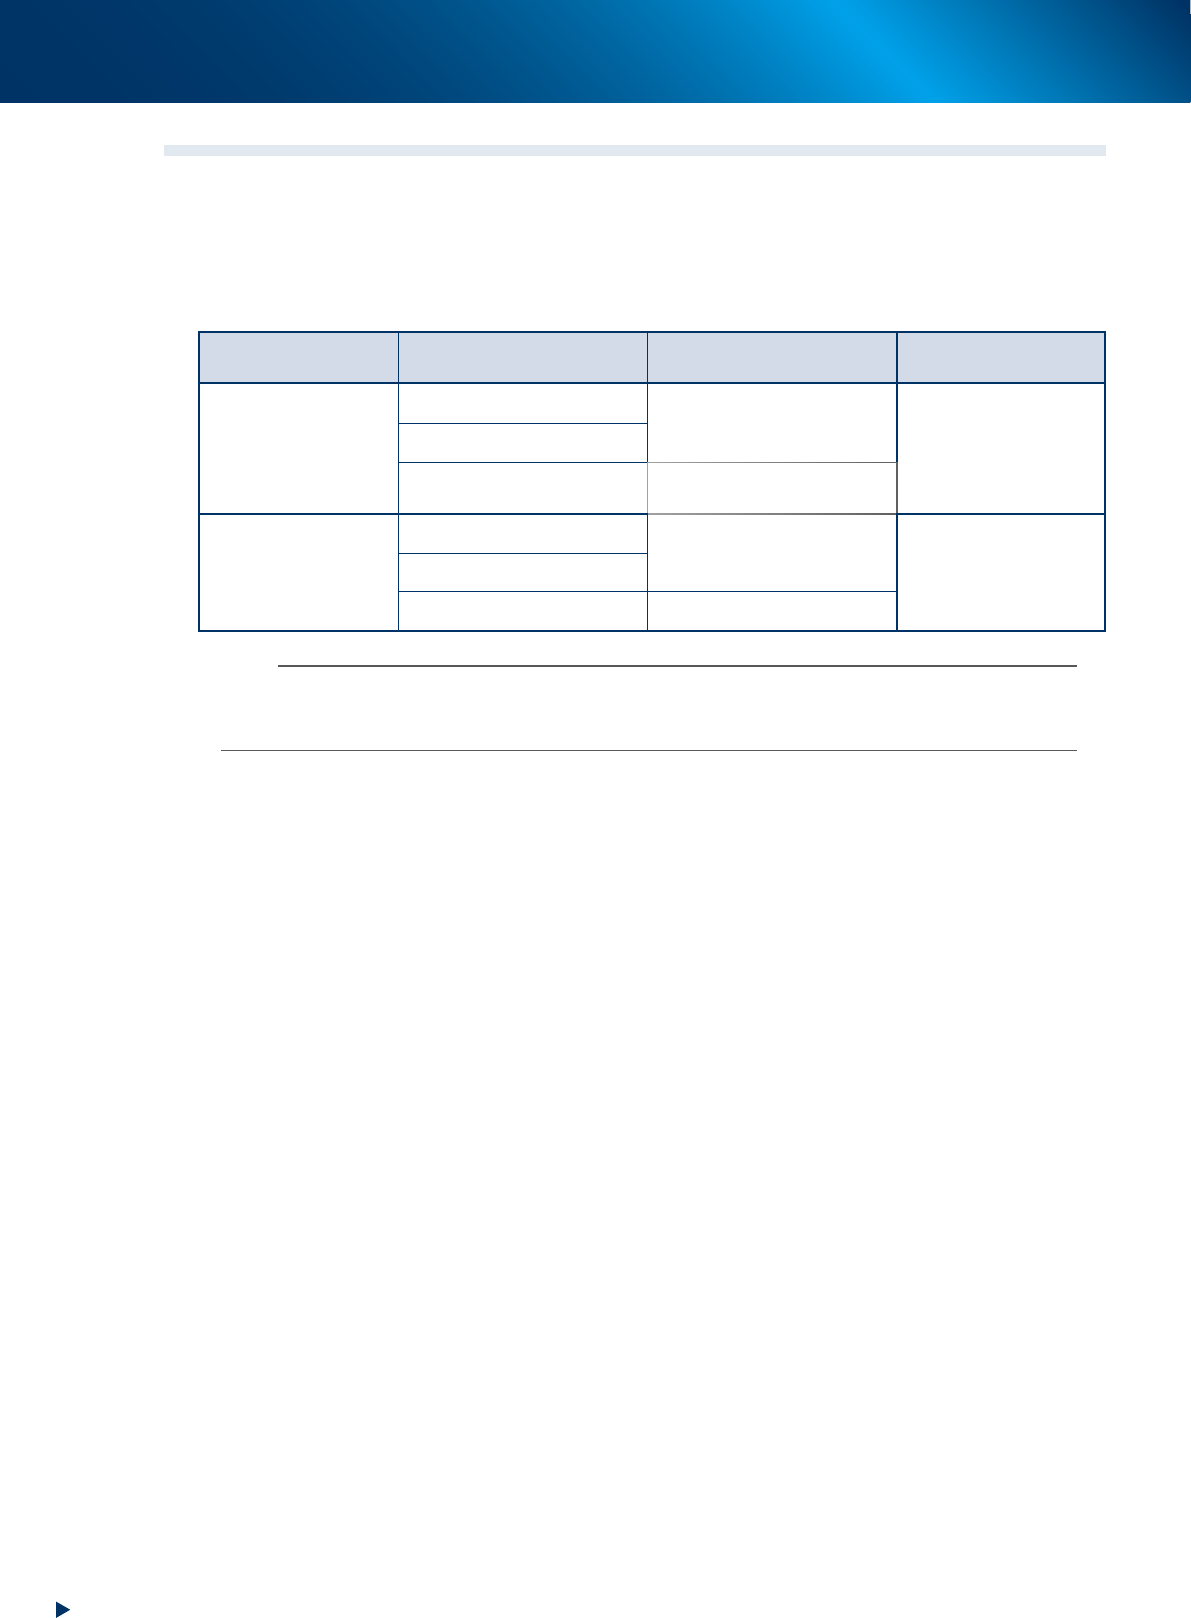
Available software versions
The using of Auto Loading Feeder (hereinafter referred to as "feeder") requires the following software
according to your operating conditions.
Feeder type Machine system
Off-line software
(YFacT, IT-System or YSUP)
SS pickup position
adjusting station
2S size is not used
V3.49 STD R3.000 or later
V1.63 STD R1.000 or later
V3.47 STD R9.000
V4.63 STD R4.000 or later
V5.01 STD R5.000 or later
(first release)
V5.01 STD R2.000 or later
(first release)
2S size is used
V3.53 STD R1.000 or later
V1.71 STD R1.000 or later
V3.53 STD R1.000V4.71 STD R1.000 or later
V5.03 STD R1.000 or later V5.03 STD R1.000 or later
n
NOTE
Handling of Auto loading feeder varies depending on whether the optional software such as IT Option are installed or not.
Although Auto loading feeder can be used with the machine that IT Option is not installed, Auto loading feeder functions
related to IT Option are not available.
1. Overview
1-5
Chapter 1 Overview
█
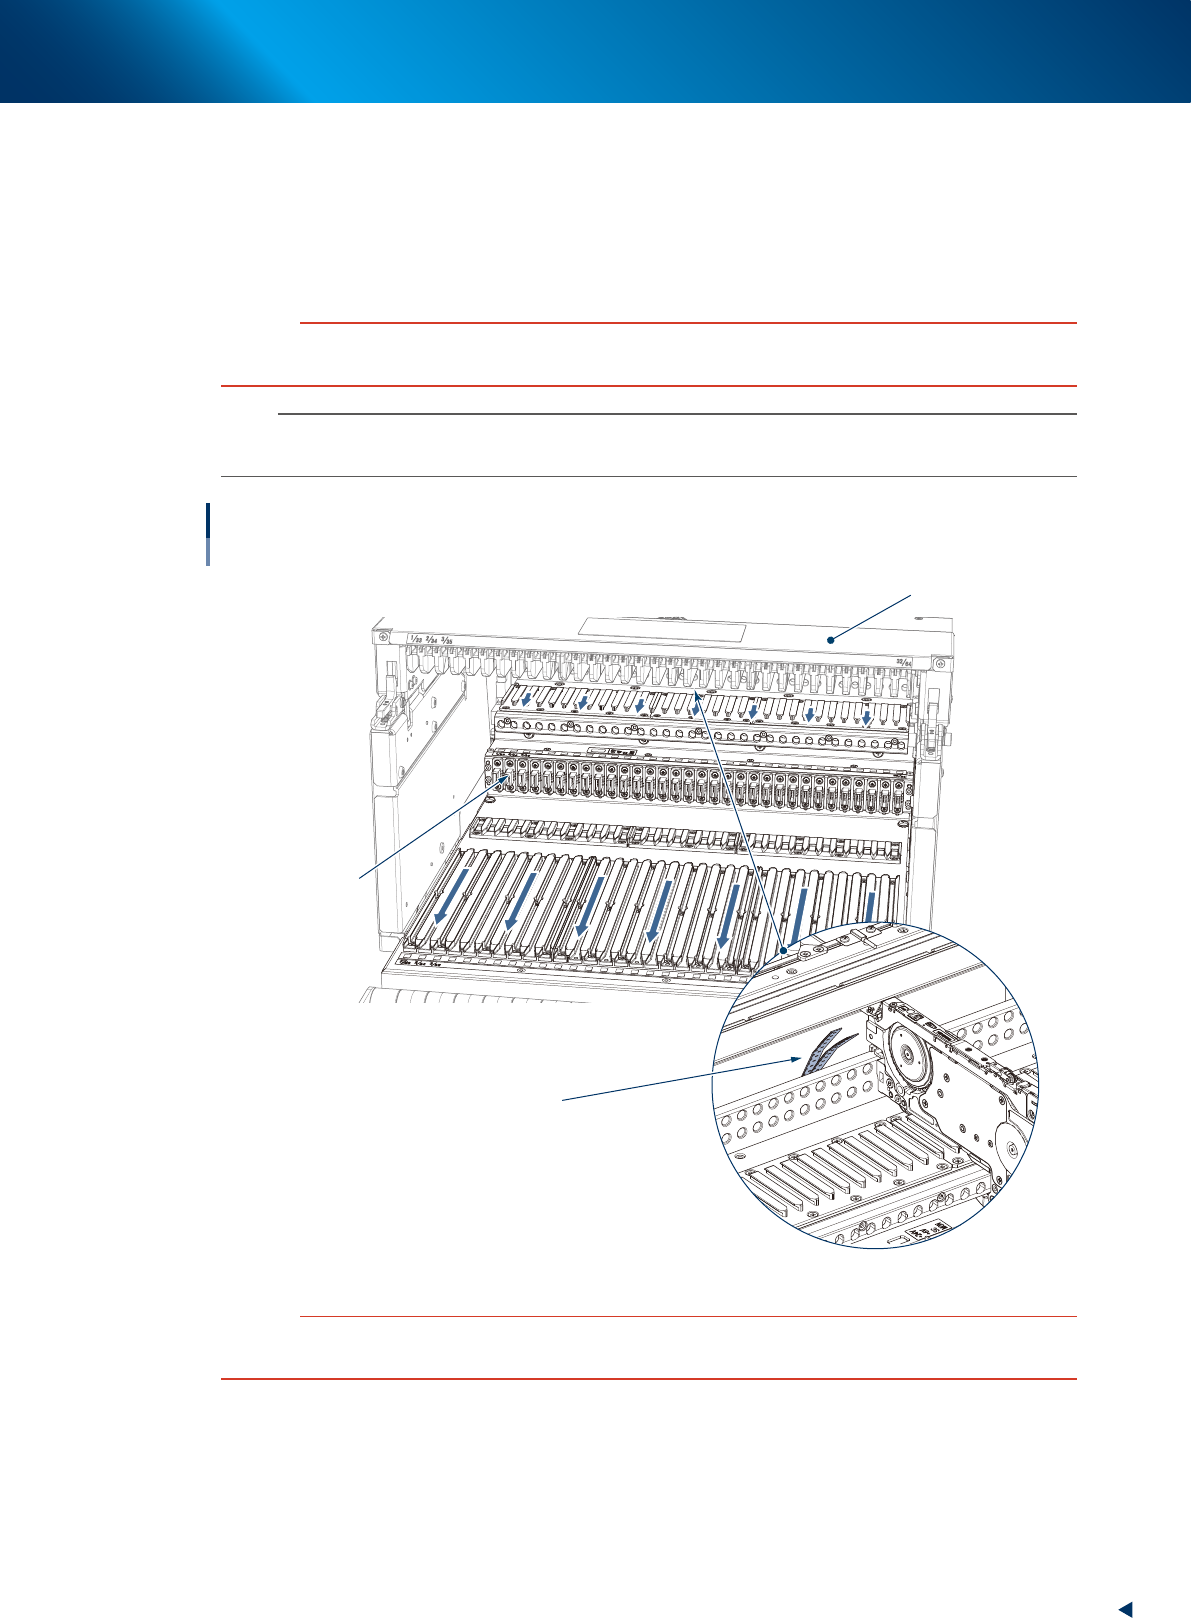
Precautions when setting feeder
• Make sure to clean the feeder bank surface before setting feeders.
• If tape remains on slope, remove them. It is recommended to clean the inside of slope periodically
(once a week).
• When attaching a feeder exchange carriage with feeders to a machine, check that no component or
tool remains on the guide rail cover.
c
CAUTION
If an Auto Loading Feeder is set on a feeder bank with foreign objects, feeder may be damaged and cause pickup error.
Make sure to prevent dust or dirt from entering through connection of connector when cleaning.
n
NOTE
Filling the empty slots with dummy feeders or other feeders is always recommended to prevent inserting the hands when
the auto loading feeders are set with intervals.
Peripheral of feeder bank
Connection of
connector
Guide rail cover
Tapes remaining on slope
63003-KLU-30
c
CAUTION
When setting feeders between feeders already set on left and right, do not set feeders by moving feeders left and right
aside. If not, the set positions are deformed and results in pickup error.