ALFeeder_E.pdf - 第38页
2. Loading/Unloading component tape 2-8 Chapter 2 Handling component tape 4 Set th e compone nt tape t o be added to th e loading uni t. 1. Keep pressing down the tape clamp lever and insert the component tape to be adde…
2. Loading/Unloading component tape
2-7
Chapter 2 Handling component tape
2. Loading/Unloading component tape
The following describes the procedure for loading the component tape to Auto loading feeder after
cutting and folding top of the component tape. When an optional software (IT Option) is installed, the
loading procedure varies a little.
2.1 Loading component tape
2.1.1 Standard type
This section describes about the procedure for standard type machine without IT Option software.
1
Set a component tape.
1. Open the "Production" tab on monitor screen, or the "Setup assignment" screen.
2. Set a tape reel to the preset holder at the position same as confirmed above.
2
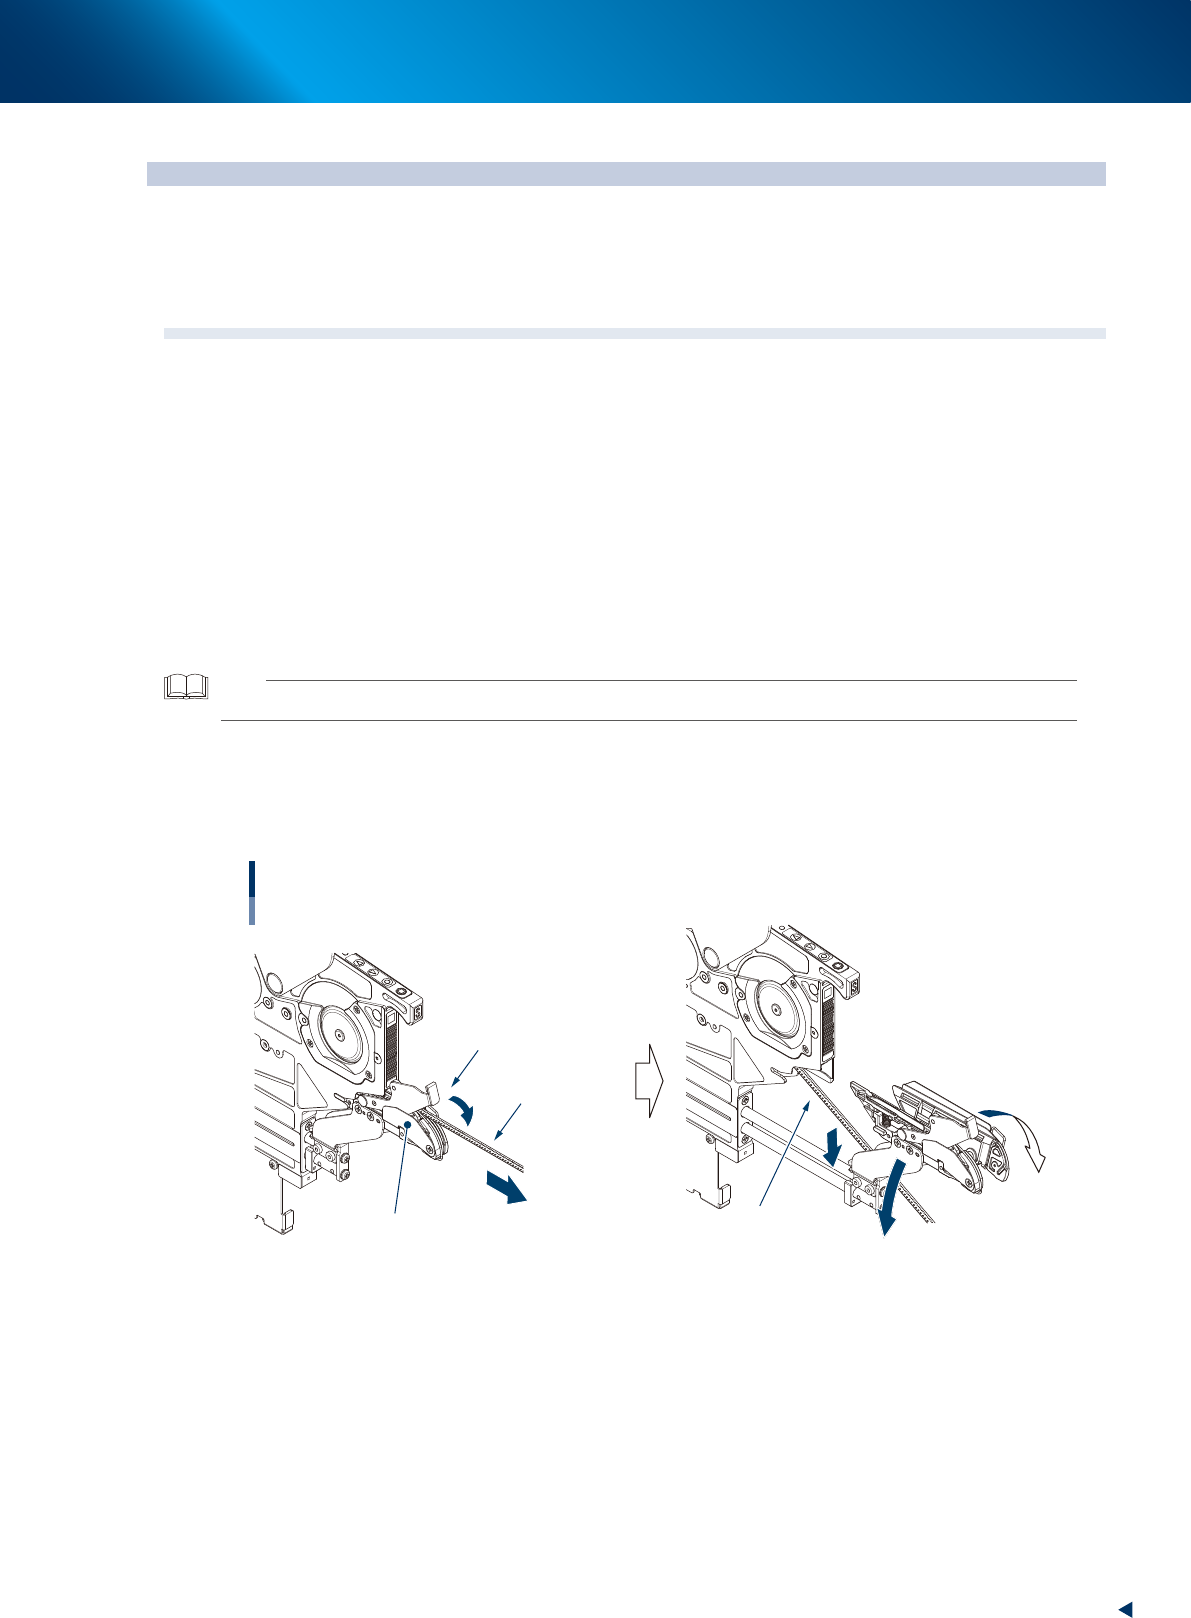
Pull the loading unit forward.
Keep pressing down the tape clamp lever and pull the loading unit forward. Do not pull the
component tape and the loading unit together.
TIP
When the component tape is set newly, skip step 3 and proceed to step 4.
3
Move down the component tape in operation.
1. The loading unit opens by releasing finger from the tape clamp lever.
2. Move down the component tape in operation.
Pulling loading unit forward
Moving down component tape in operation
Release finger from
tape clamp lever, then the clamp unit
opens to right and left.
Tape clamp lever
Loading unit
Component tape
in operation
Component tape
in operation
63231-KLU-40
2. Loading/Unloading component tape
2-8
Chapter 2 Handling component tape
4
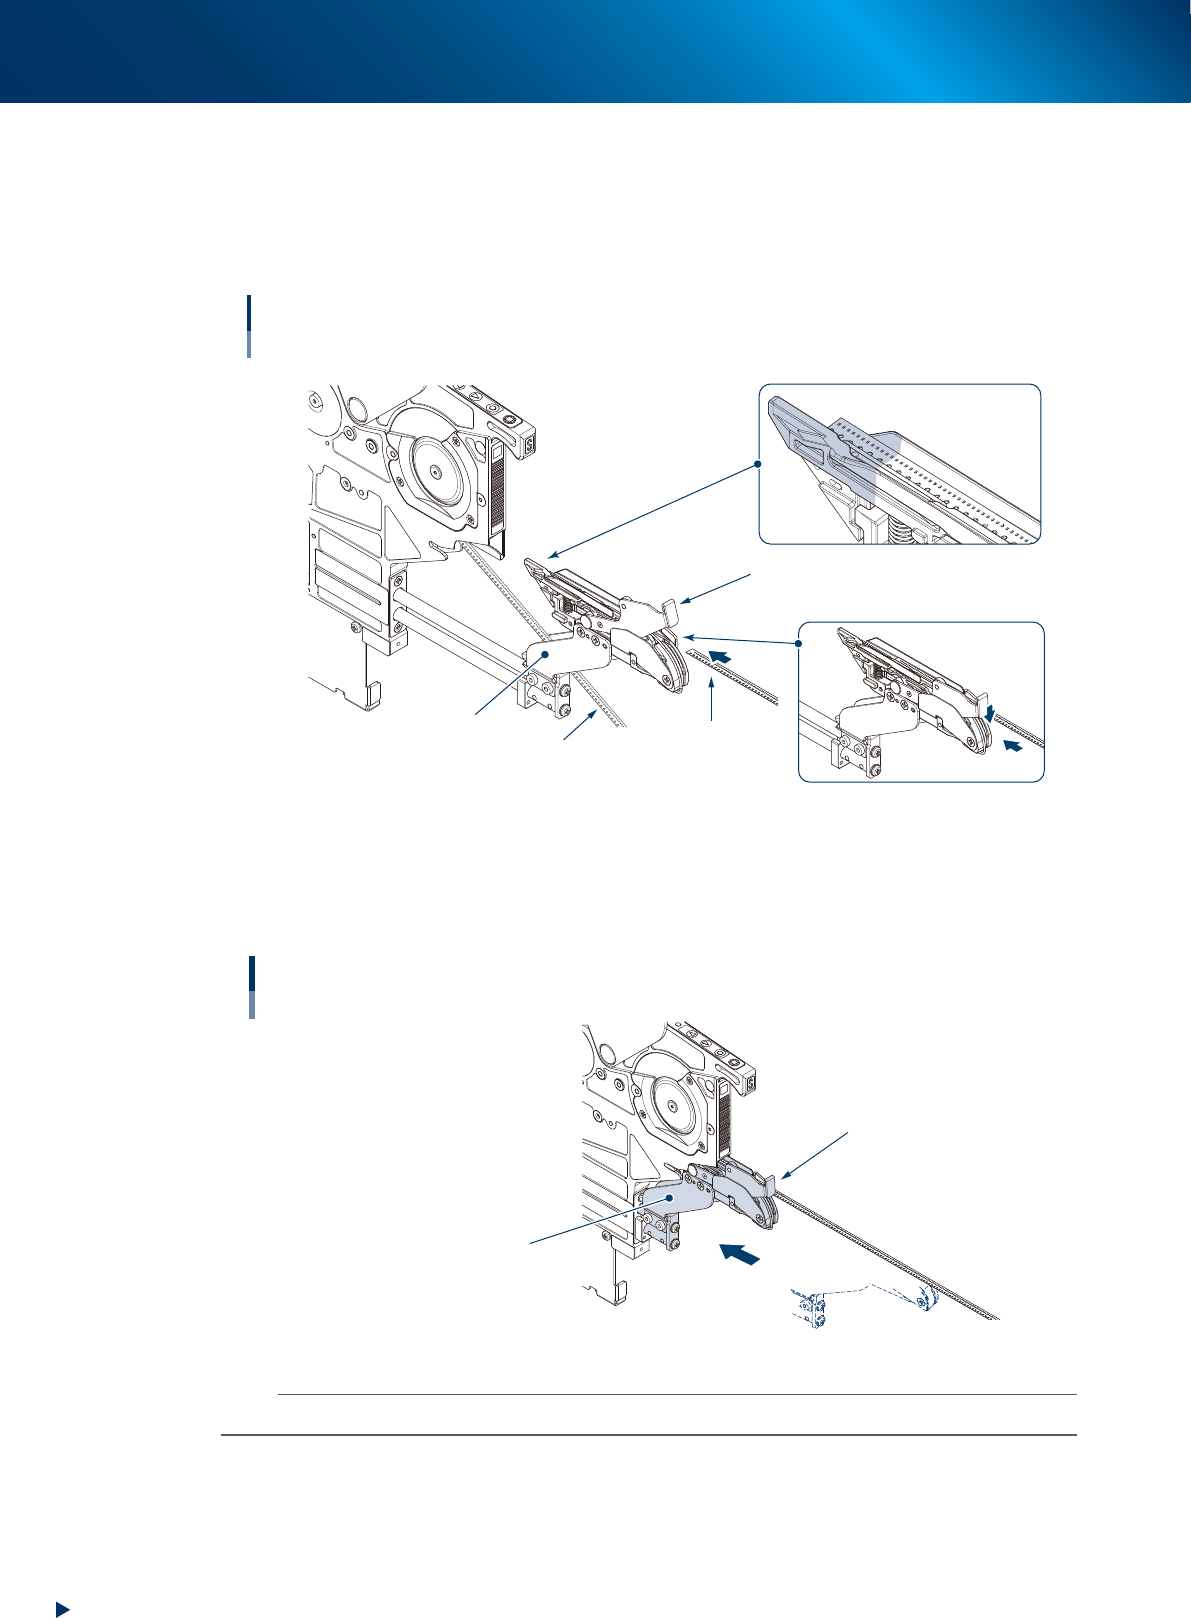
Set the component tape to be added to the loading unit.
1. Keep pressing down the tape clamp lever and insert the component tape to be added to the
loading unit.
2. Keep pressing down the tape clamp lever and insert the top of component tape to the set area
as shown in the figure below.
Setting component tape to be added
Loading unit
Component tape
to be added
Component tape
in operation
Tape clamp lever
Keep pressing down
tape clamp lever.
Set area
Clamp unit
Set top of component
tape in this area.
63222-KLU-40
5
Insert the loading unit into the feeder.
Keep pressing down the tape clamp lever and insert the loading unit into the feeder. Then release the
tape clamp lever.
Inserting loading unit
Loading unit
Tape clamp lever
63223-KLU-40
n
NOTE
A loading error may occur unless the loading unit is inserted into the end.
2. Loading/Unloading component tape
2-9
Chapter 2 Handling component tape
6
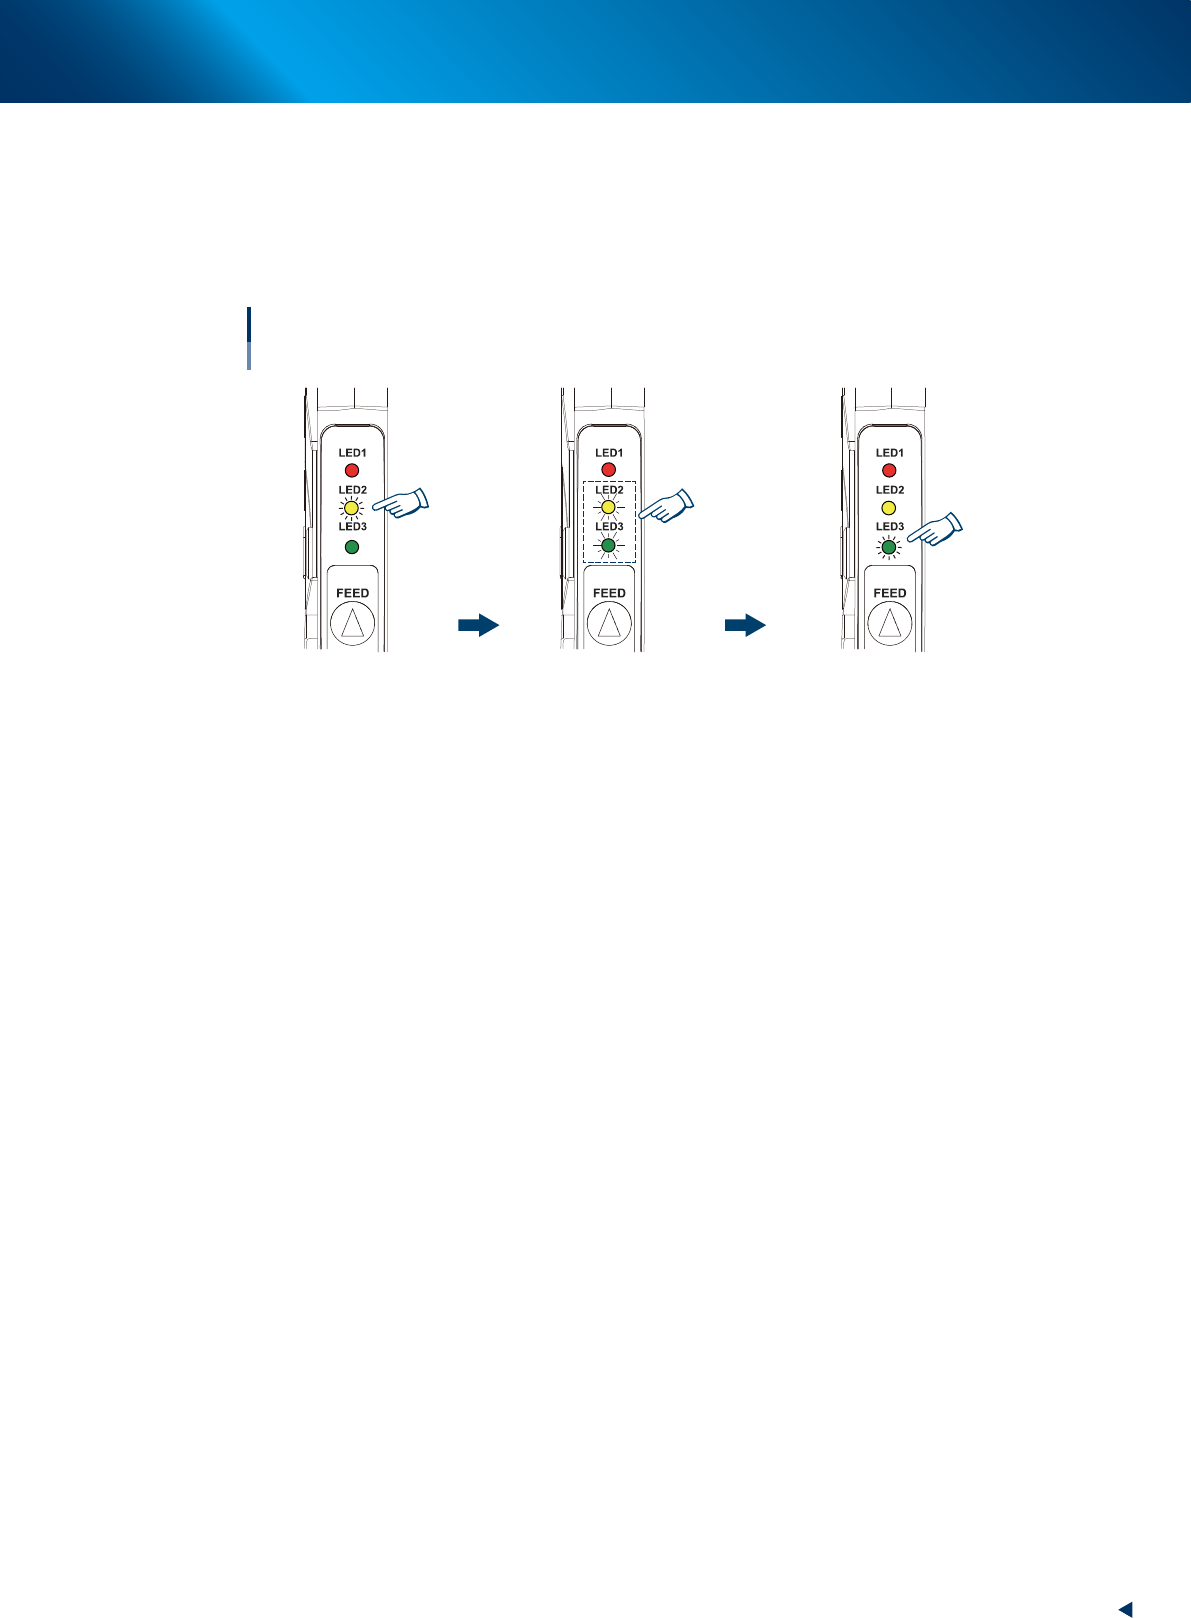
Check that the component tape is set correctly.
The component tape is set correctly if the followings are applied.
1. The yellow LED lights up for 1 second upon detecting tape insertion.
2. The yellow and green LED flash for 4 seconds simultaneously.
3. The green LED turns into lighting upon completing tape setting.
Tape setting is completed
Completing the tape setting
Optional software is not used
Yellow and green LED
flash for 4 seconds
Yellow LED lights
for 1 second
Green LED lights
63228-KLU-00