ALFeeder_E.pdf - 第89页
1. Maintenance 4-1 Chapter 4 Maintenance and parts replacement 1. Maintenance This section describes the inspection, cleaning, and replacing parts to operate Auto loading feeder in good condition. Make sure to maintain A…

Chapter 4 Maintenance and parts
replacement
Contents
1. Maintenance 4-1
1.1 Maintenance sections/Replaceable parts 4-1
2. Preparation for maintenance 4-2
2.1 Required tools 4-2
2.2 Maintenance sections 4-2
2.3 Replaceable parts 4-3
3. Maintenance / Replacing procedure 4-5
3.1 Tape guide 4-5
3.1.1 Cleaning 4-5
3.1.2 Replacing tape guide assembly 4-7
3.2 Maintaining tape guide assembly 4-8
3.2.1 Cleaning tape path/Replacing leaf spring 4-8
3.2.2 Replacing pusher assembly 4-9
3.2.3 Replacing discharge assembly 4-9
3.3 Front block 4-10
3.3.1 Replacing front block 4-10
3.4 Connecting section for feeder bank 4-11
3.4.1 Replacing under rail 4-11
3.4.2 Replacing reel holder bracket 4-11
3.5 Clamp section 4-12
3.5.1 Replacing clamp lever assembly 4-12
3.5.2 Replacing tail pin 4-13
3.6 Electrical connecting section 4-14
3.6.1 Replacing board connector 4-14
3.7 Operation section 4-15
3.7.1 Replacing handle 4-15
3.8 Loading unit 4-16
3.8.1 Replacing clamp units 4-16
3.9 Preset holder section 4-17
3.9.1 Replacing sliding stopper 4-17
1. Maintenance
4-1
Chapter 4 Maintenance and parts replacement
1. Maintenance
This section describes the inspection, cleaning, and replacing parts to operate Auto loading feeder in
good condition. Make sure to maintain Auto loading feeder periodically.
c
CAUTION
Only trained personnel should perform maintenance of Auto loading feeder, both carefully and in accordance with the
procedures specified.
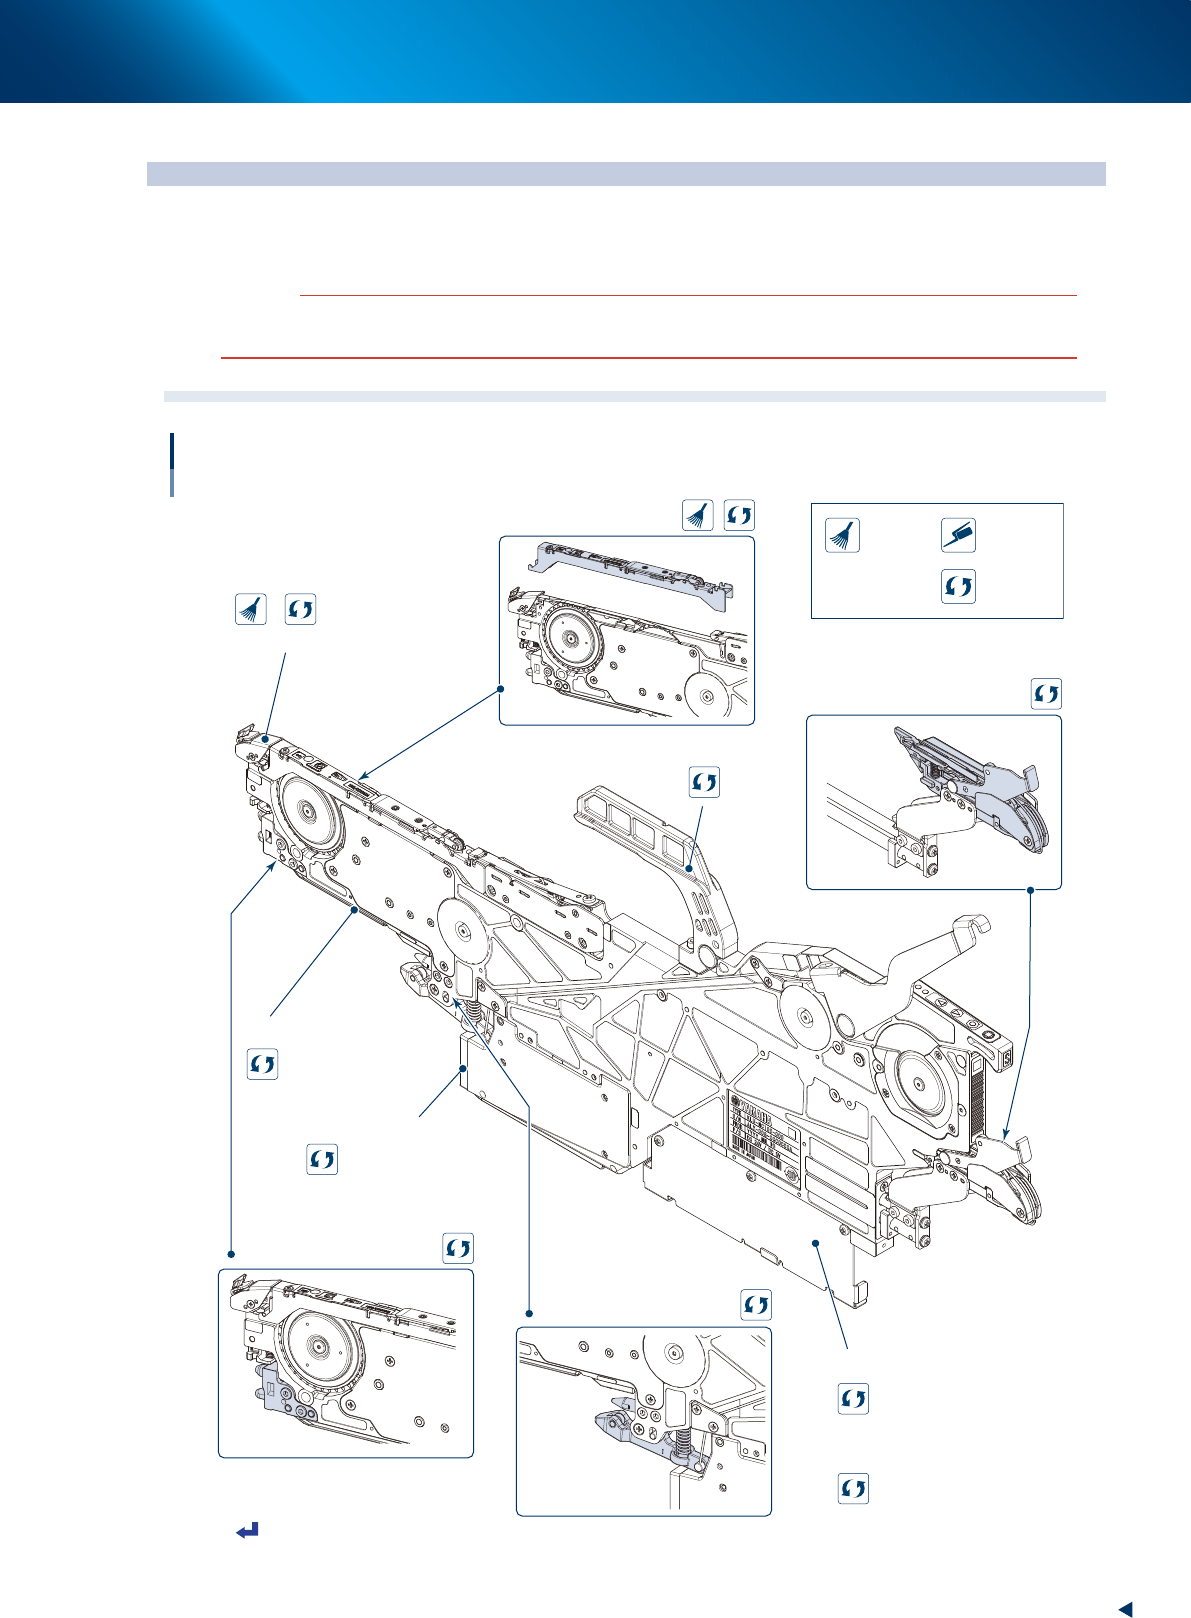
1.1 Maintenance sections/Replaceable parts
Maintenance sections/Replaceable parts
3.1 Tape guide
3.2 Tape guide section
3.7 Operation section
3.3 Front block
3.5 Clamp section
3.6 Electrical
connecting section
3.8 Loading unit
3.4 Connecting section
for feeder bank
3.4 Connecting section
for feeder bank
Clamp unit
Under rail
Reel holder bracket
Clamp lever assembly
Cleaning
Lubricating
Replacing
Leaf spring/Pusher/Discharge assembly
Tape guide assembly
Handle
Board connector
3.9 Preset holder section
Sliding stopper
Front block
Tail pin
* Jumps to target page by clicking from 3.1 to 3.9.
Click to return to this page.
63401-KLU-50
2. Preparation for maintenance
4-2
Chapter 4 Maintenance and parts replacement
2. Preparation for maintenance
c
CAUTION
Parts (part numbers) in this manual are at the time of issuing this manual. Parts (part numbers) are subject to change
without prior notice. Make sure to verify the latest part numbers before ordering parts.
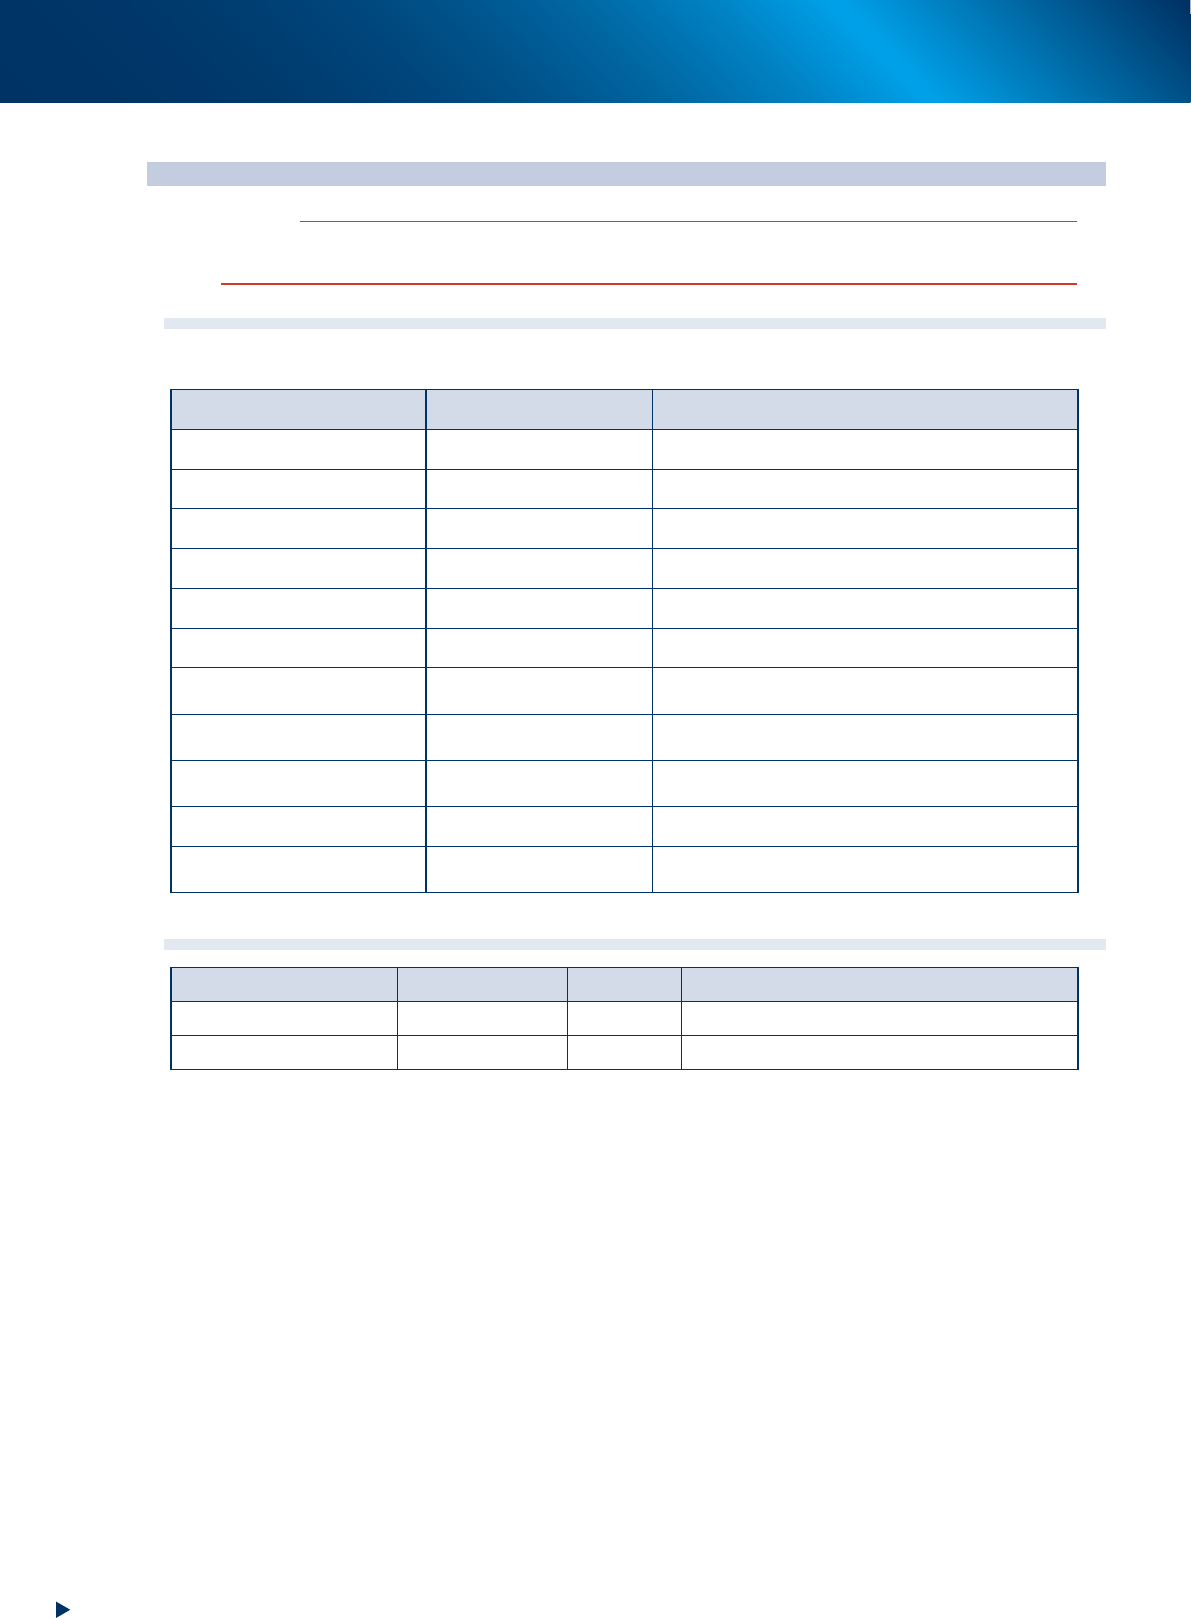
2.1 Required tools
Prepare following tools required for maintenance and replacing parts.
Name Description Remark
Phillips screwdriver Large/Small No. 1/No. 2 (of Japanese Industrial Standards)
Hex wrench set 1 set
Precision screwdriver Flat-head Large/Small Attaching/Detaching E-ring, etc.
Thread lock LOCTITE 241 Fixing under plate/handle
Cloth Paper cloth, etc. Lint-free cloth/paper cloth
Alcohol IPA or ethanol Never use to sections other than specified.
Tape pin attaching jig
(KHJ-ME101-00X JIG. TAIL PIN
)
For attaching tape pin Provided with KHJ-MD4A0-02X Master feeder assembly.
Tape guide brush
(KLU-MY500-00X)
For cleaning Cleaning tape guide
Vacuum tool
(KHY-M88V0-A0X)
For cleaning
Air blow gun For cleaning Never use to sections other than specified.
Air blow tool
(KU4-M8590-00X)
For cleaning Never use to sections other than specified.
2.2 Maintenance sections
Section Description Interval Remark
Tape guide For cleaning 1-month Air blow gun/ Air blow tool/Tape guide brush
Board connector For checking/cleaning 6-month Air blow gun/Air blow tool