MR8740T_Quick guide_eng_20191016H.pdf - 第167页
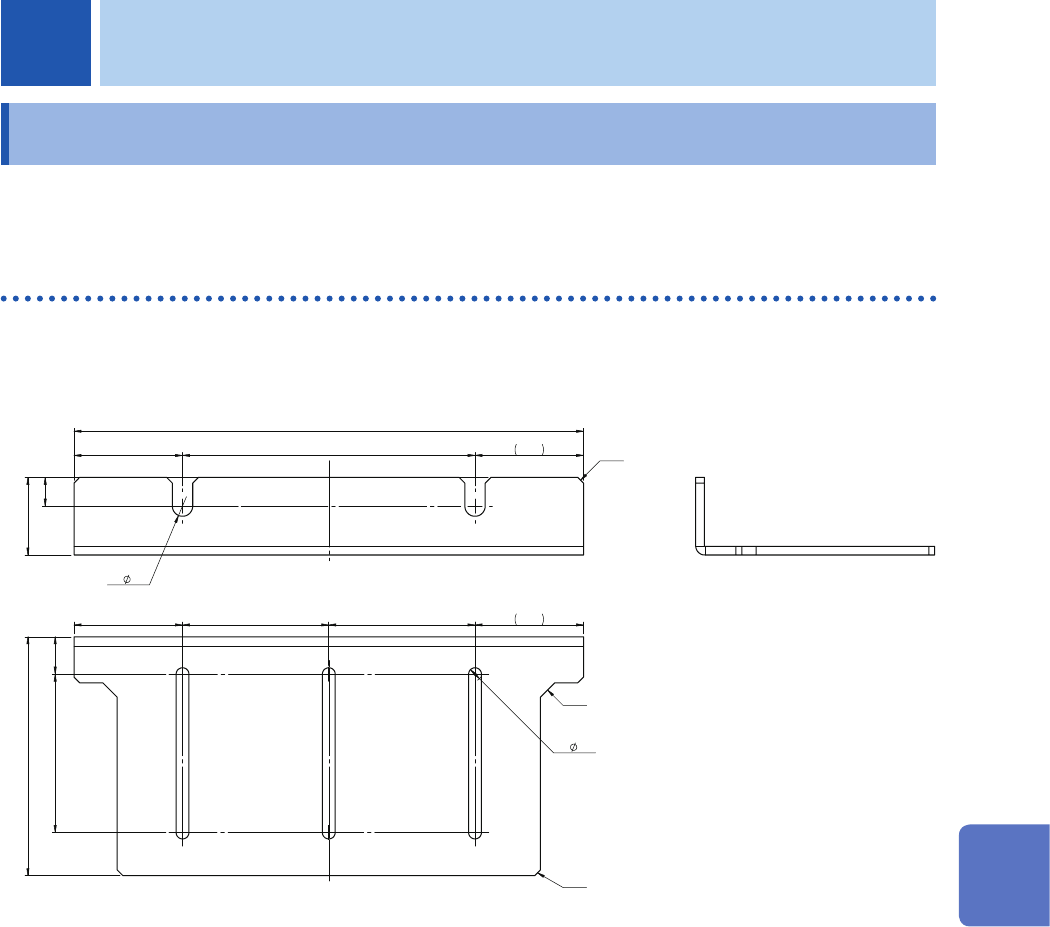
161 7 Appendix 7.1 Mounting the instrument in a rack The instrument can be installed in a rack using rack-mount brackets. Rack-mount brackets EIA standard Material: EN AW -5052 (EN), 5052 (ASTM) Thickness: 3 27 177 37.7 …
160
Disposing of the Instrument (Removing the lithium battery)
Removing the battery and lithium batteries
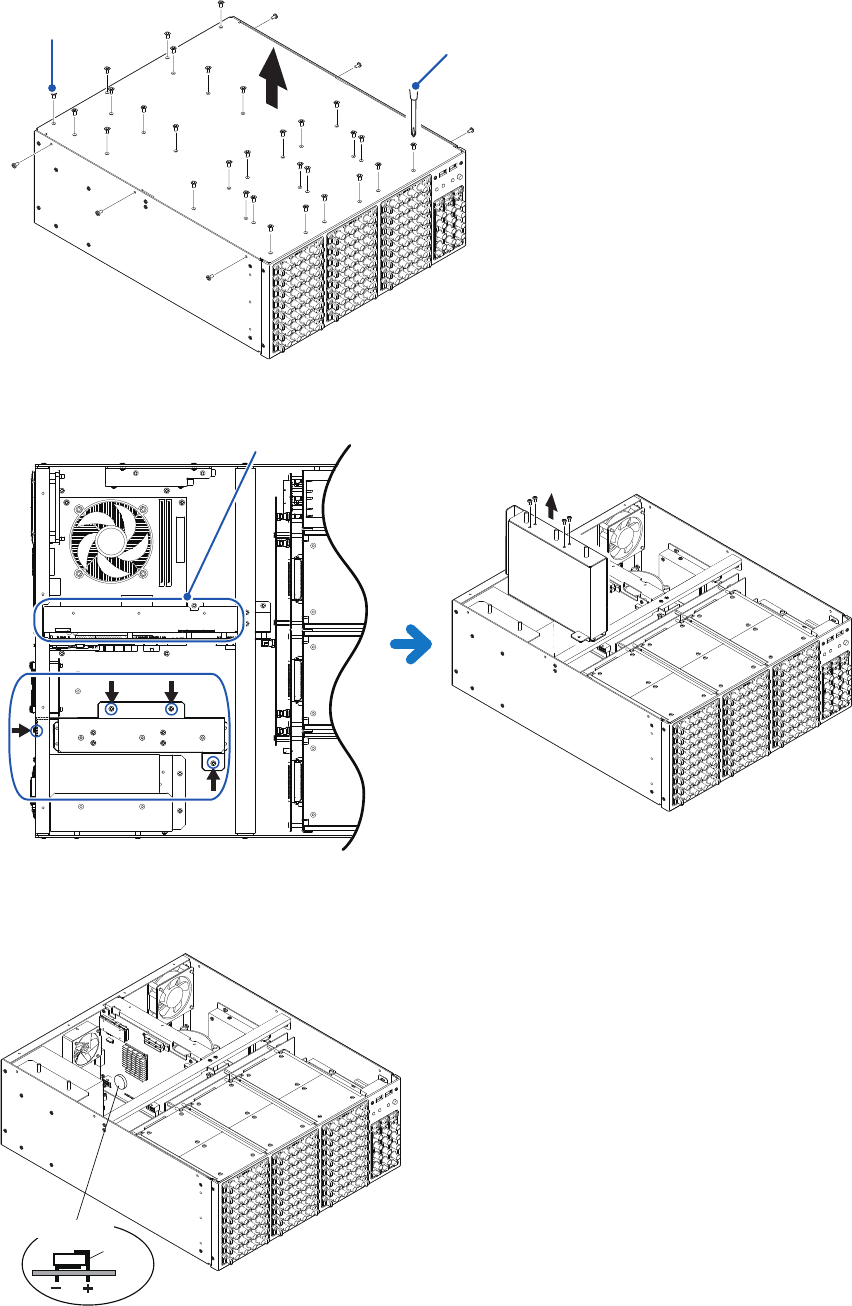
Required tools: Phillips-head screwdriver (No. 2) ×1, nippers ×1
1
Turn off the instrument and remove any cords.
2
Remove the upper panel.
Screws
Phillips-head screwdriver (No. 2)
3
Remove the four screws that secure the battery and remove the battery
You can nd the lithium battery on the CPU board here.
4
Remove the two lithium batteries from the boards.
Pull the lithium battery up from the circuit board, and cut the positive and negative leads with the nippers.
Put the lithium battery up out of the CPU board, and cut the leads with the nippers.
Lithium battery
Lead
Board
161
7
Appendix
7.1 Mounting the instrument in a rack
The instrument can be installed in a rack using rack-mount brackets.
Rack-mount brackets
EIA standard
Material: EN AW-5052 (EN), 5052 (ASTM)
Thickness: 3
27
177
37.7
101.6
10
2x
7.1
37.7
6xC2
83
37.7 50.8 50.8 37.7
13
6x
4.5
55
2xC5
2xC2
(Unit: mm)
7 Appendix
7
Appendix
162
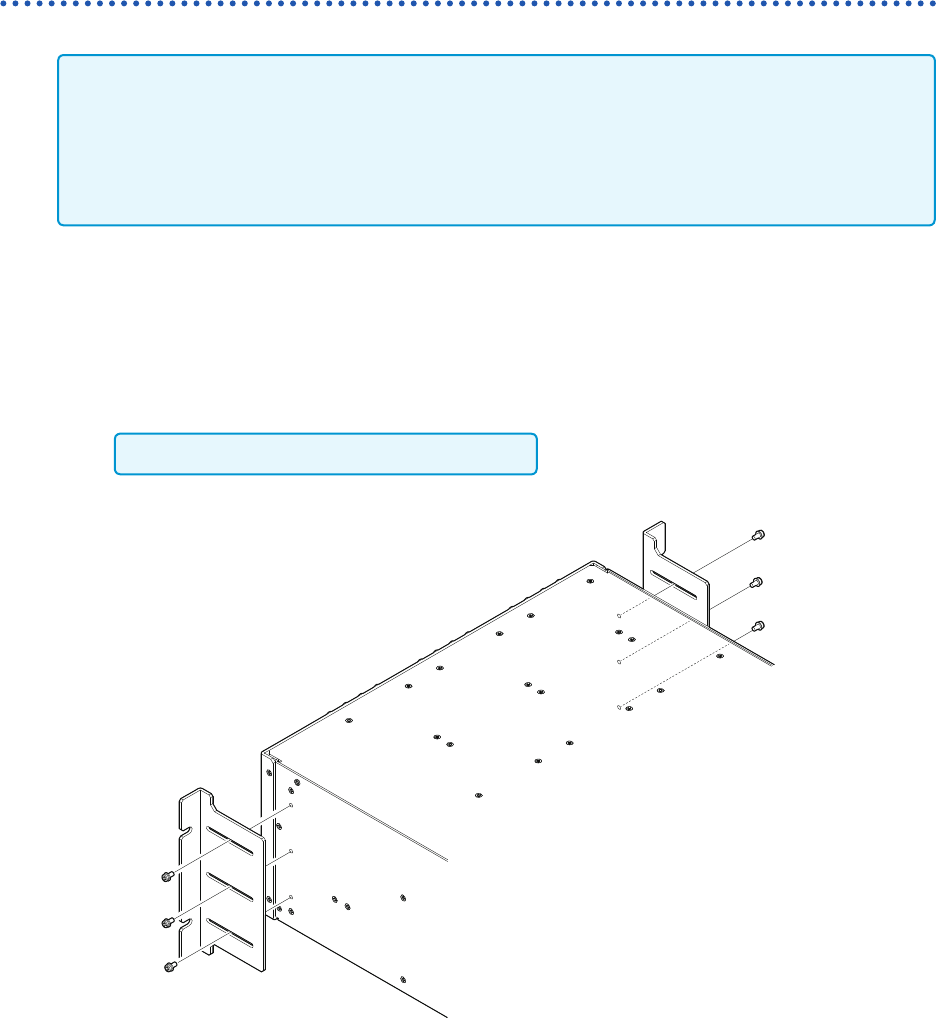
Mounting the instrument in a rack
How to secure the rack-mount brackets
• Support the instrument by installing commercially-available support angles in the rack because
the instrument is heavy.
• Leave 20 mm or more from the bottom side and the sides that have the vents (upper, right, left,
and bottom sides).
• If you need the screws (M4 × 8 mm), please contact your authorized Hioki distributor or
reseller.
EIA
1
Check that the instrument is turned off and remove any cables and the power cord.
2
Secure each rack-mount bracket using three screws (M4 × 8 mm).
Do not use any screws longer than 8 mm.