MR8740T_Quick guide_eng_20191016H.pdf - 第81页
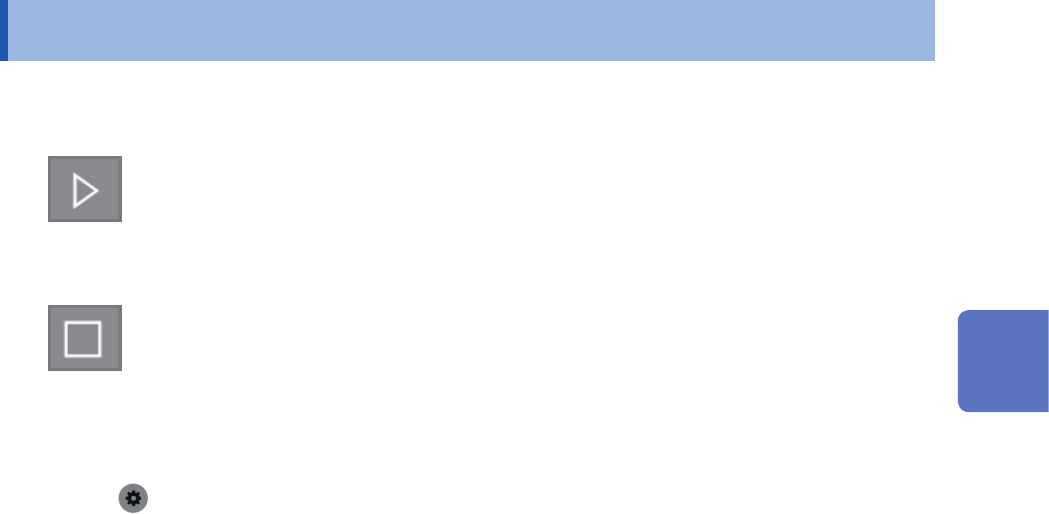
75 Starting/Stopping Measurement 3.5 Starting/Stopping Measurement Starting a measurement When you click the start icon, the instrument starts a measurement. W aveform data shown on the screen is cleared once the measure…
74
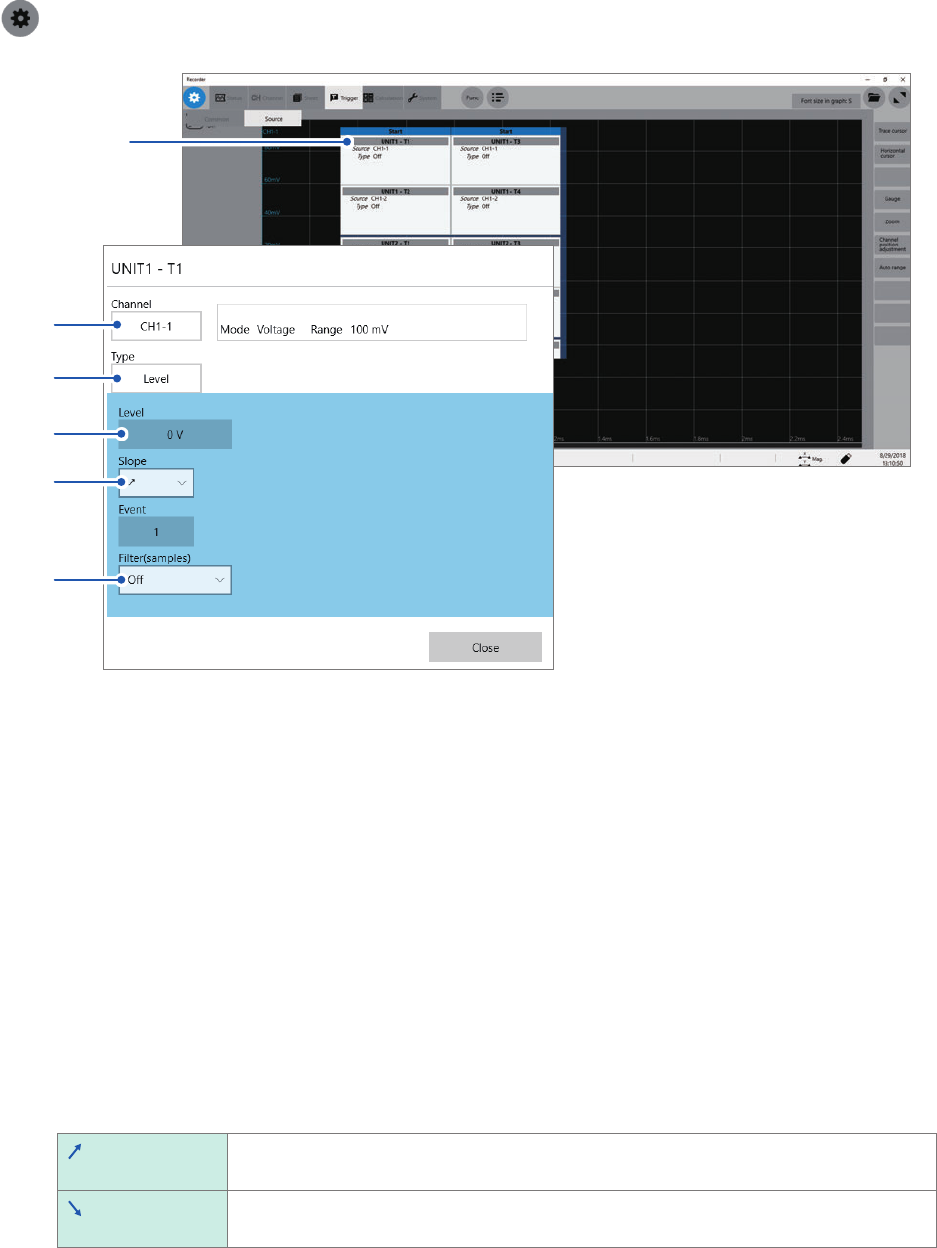
Conguring the Level Trigger Settings
Conguring the trigger source settings
> [Trigger] > [Source]
1
3
2
4
5
6
1
Click a trigger source you want to specify.
The setting dialog box will appear.
You can set four triggers per module.
2
Click the [Channel] box, and then choose a channel to be used for the level trigger from the
list.
3
Click the [Type] box, and then choose [Level] from the list.
4
In the [Level] box, enter a threshold value the level trigger condition is satised at.
5
Click the [Slope] box, and then choose a signal direction that allows the level trigger
condition to be satised from the list.
Choose a direction used to trigger the instrument when the signal crosses the threshold value specied in
[Level].
The level-trigger condition is satised when a signal crosses the threshold value in the
positive direction.
The level-trigger condition is satised when a signal crosses the threshold value in the
negative direction.
6
Click the [Filter] box, and then choose a sampling count of the lter from the list.
Only after the level-trigger condition is continuously satised during the specied period, an analog trigger is
generated. This is useful to prevent the instrument from triggering due to noise.
75
Starting/Stopping Measurement
3.5 Starting/Stopping Measurement
Starting a measurement
When you click the start icon, the instrument starts a measurement.
Waveform data shown on the screen is cleared once the measurement starts.
Stopping the measurement
Clicking the stop icon causes the setting dialog box to open.
Leave the instrument performing the measurement. Once the instrument has acquired
the waveforms with the specied recording length, it stops the measurement.
Clicking [OK] stops the measurement immediately.
Initializing the instrument (Restoring the basic settings)
Select > [System] > [Initialize] to restore the instrument settings to the factory default. The
setting after the initialization is suitable for simple measurement. If any unexpected or complicated
behavior is observed, initialize the instrument.
Refer to “6.2 Initializing the Instrument” (p. 147).
To conguring measurement settings automatically
Clicking [Auto range] on the waveform screen automatically species the sampling rate,
measurement range, and zero position of the input waveform and start a measurement.
Refer to “3.7 Measuring Signals With the Auto-range Setting” (p. 78).
3
Measurement Method
76
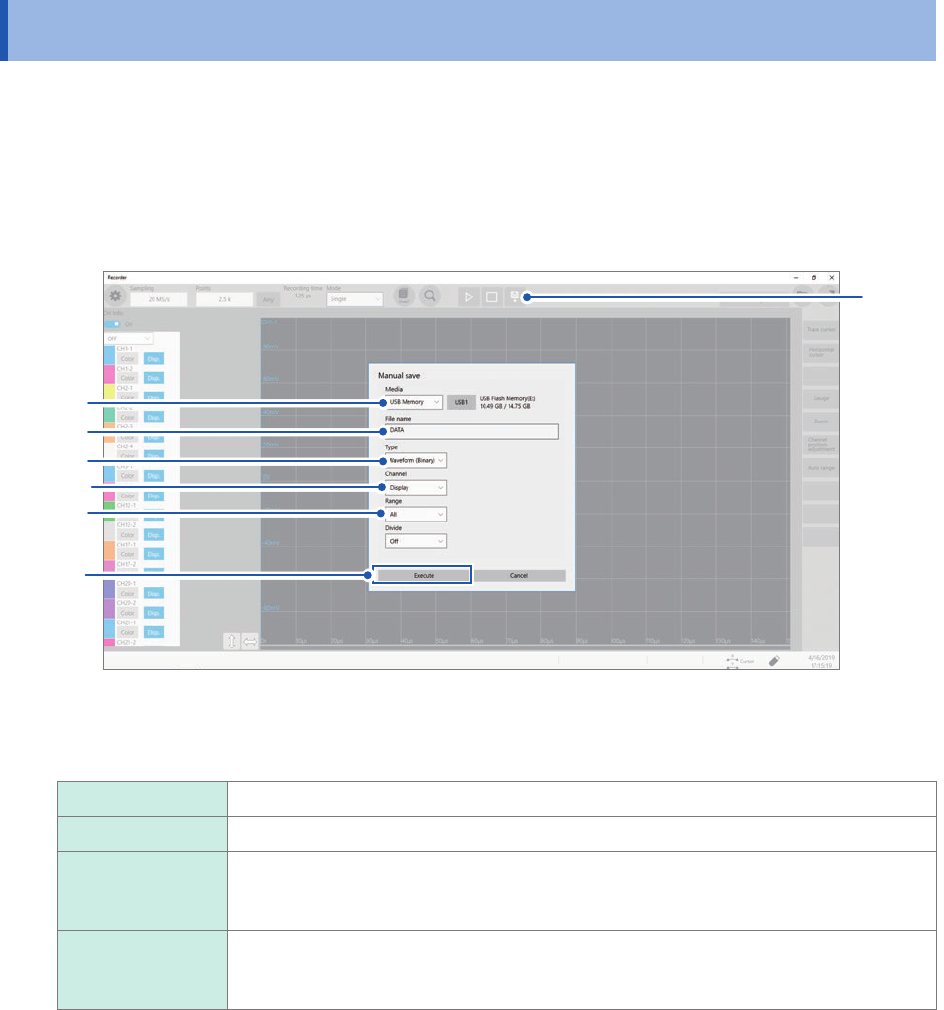
Saving Data Consisting of Items Selected
3.6 Saving Data Consisting of Items Selected
Clicking the save icon allows you to select any of the following items and save them:
• Waveform data
• Screenshot
• Numerical calculation result
• Setting
Refer to “4 Saving/Loading Data and Managing Files” of the Instruction Manual.
1
3
4
5
6
2
7
1
Click the save icon.
2
Click the [Media] box, and then choose a destination to save from the list.
SSD/HDD
Saves data on the built-in SSD.
USB Memory Saves data on the USB ash drive.
E-mail
transmission
Sends emails with waveform data attached to computers in the network or to a remote
computer.
Refer to “11.4 Sending E-mails” of the Instruction Manual.
FTP transfer Sends waveform data to a computer connected to a network.
Refer to “11.3 Sending Data to a Computer With the FTP Client Function” of the
Instruction Manual.
3
Enter the le name in the [File name] box.
Number of characters for a le name: Up to 100 characters
The maximum length of a le name that includes its path: Up to 255 characters
Some characters or symbols are not accepted due to the le system restrictions.