MR8740T_Quick guide_eng_20191016H.pdf - 第39页
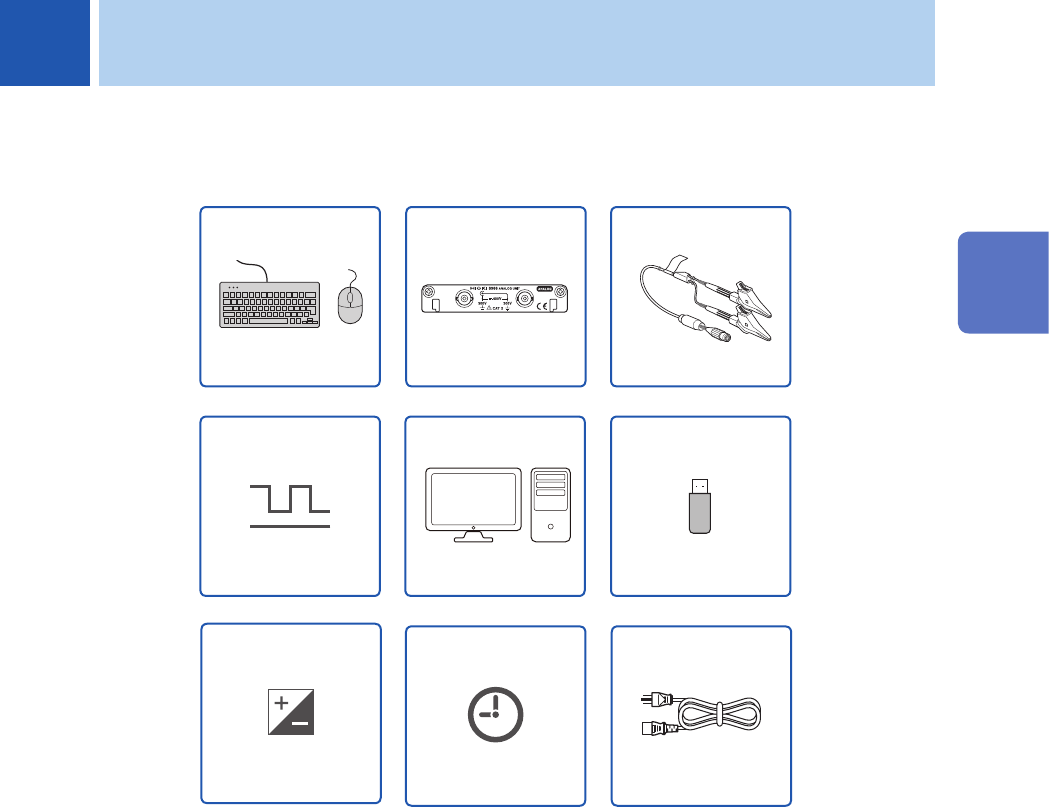
33 2 Preparing for Measurement Carefully read “Operation Precautions” (p. 8) before starting preparation. (p. 60) Power cord (p. 62) Setting the clock (p. 63) Zero-adjustment (p. 57) Storage devices (p. 55, p. 84) Comput…
32
Basic Operation
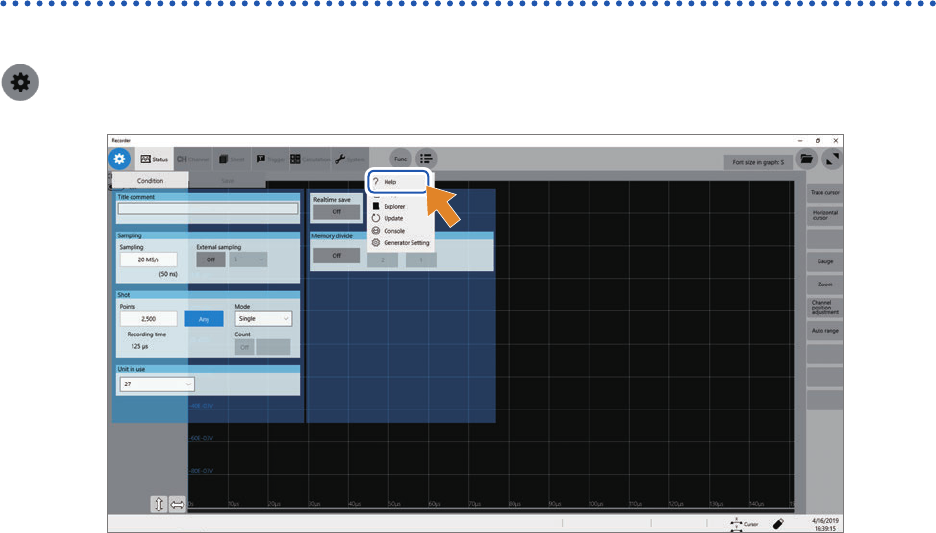
Help Function (Displaying Instruction Manual)
The HTML le of a selected manual appears.
> [Func] > [Help]
33
2
Preparing for Measurement
Carefully read “Operation Precautions” (p. 8) before starting preparation.
(p. 60)
Power cord
(p. 62)
Setting the clock
(p. 63)
Zero-adjustment
(p. 57)
Storage devices
(p. 55, p. 84)
Computer
External control
terminals
(p. 53)
(p. 34)
Modules
(p. 36)
Connection cords
(p. 29)
Keyboard, mouse
2 Preparing for Measurement
2
Preparing for Measurement
34
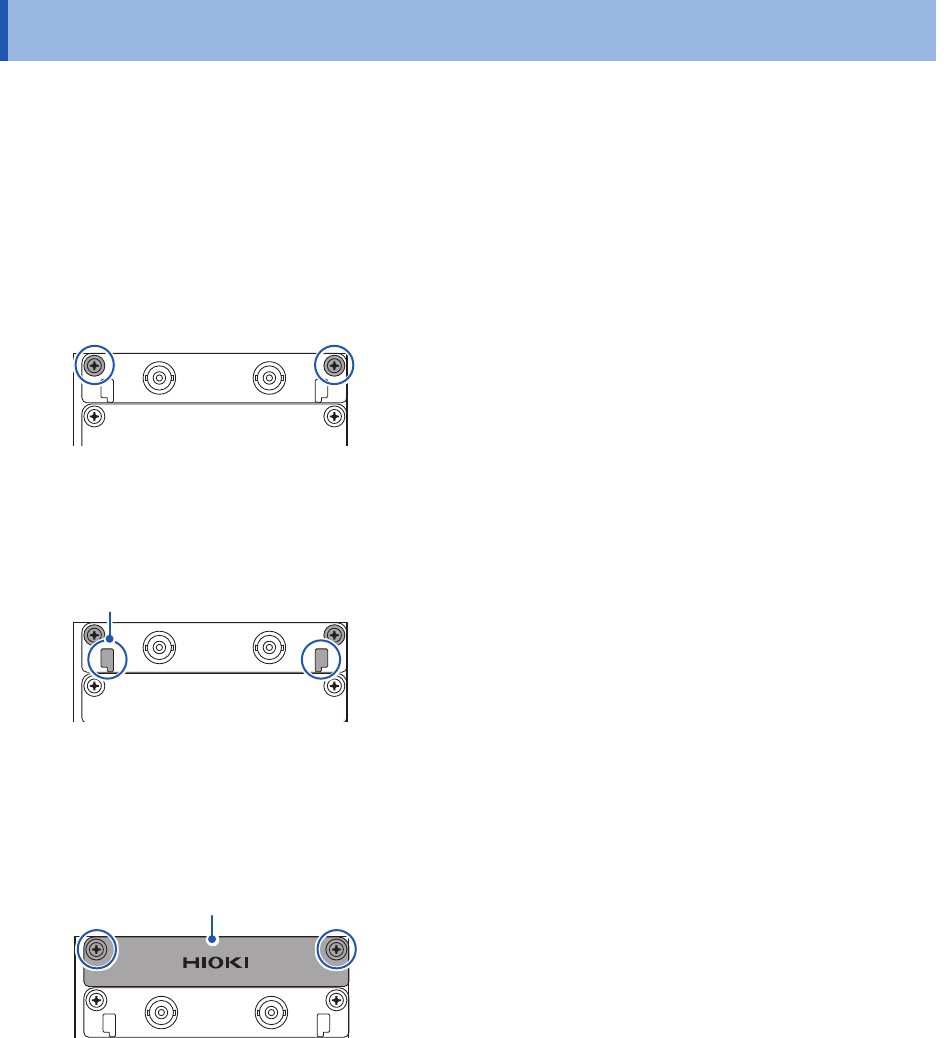
Installing and Removing Modules
2.1 Installing and Removing Modules
If you order the instrument with modules specied, the instrument will be delivered with the modules
pre-installed. Follow the procedures below to install a module additionally, replace modules, or
remove a module. Up to four modules of Model 8971 Current Unit and up to three modules of
Model 8973 Logic Unit can be installed to the instrument.
Refer to “Handling the instrument and modules” (p. 10).
Required items: Phillips-head screwdriver (No. 2)
How to install a module
Right side
1
Orient and insert the module all the way into the
instrument.
2
Tighten the two screws with the Phillips-head
screwdriver to secure the module.
How to remove the module
Knob
1
Loosen the two module mounting screws with the
Phillips-head screwdriver.
2
Pinch the two knobs and pull out the module.
When not installing any module after removal
Install a blank panel. To order additional blank panels, contact your authorized Hioki distributor or
reseller.
Blank panel
1
Place a blank panel.
2
Tighten the two screws with the Phillips screwdriver
to secure the blank panel.