MR8740T_Quick guide_eng_20191016H.pdf - 第70页
64 Regulating the Zero Position (Zero-Adjustment) Re-execute zero-adjustment in the following cases: • After replacing any modules • After cycling the instrument • After initializing the instrument • After switching betw…
63
Regulating the Zero Position (Zero-Adjustment)
2.8 Regulating the Zero Position (Zero-Adjustment)
Executing zero-adjustment regulates the zero positions of all channels in each module on the
reference potential of the instrument. Zero-adjustment involves all ranges of all channels.
Before executing zero-adjustment
• Warm up the instrument for about 30 minutes after the power-on to stabilize the internal
temperature of the modules, and then execute zero-adjustment.
• Execute zero-adjustment with no signals inputted. Zero-adjustment may not correctly be executed
with a signal inputted.
• Note that you cannot execute zero-adjustment during measurement.
• No key operation is acceptable during zero-adjustment.
• The time required for the zero-adjustment varies depending on types and the number of modules
installed in the instrument (in some cases, it takes more than 10 seconds).
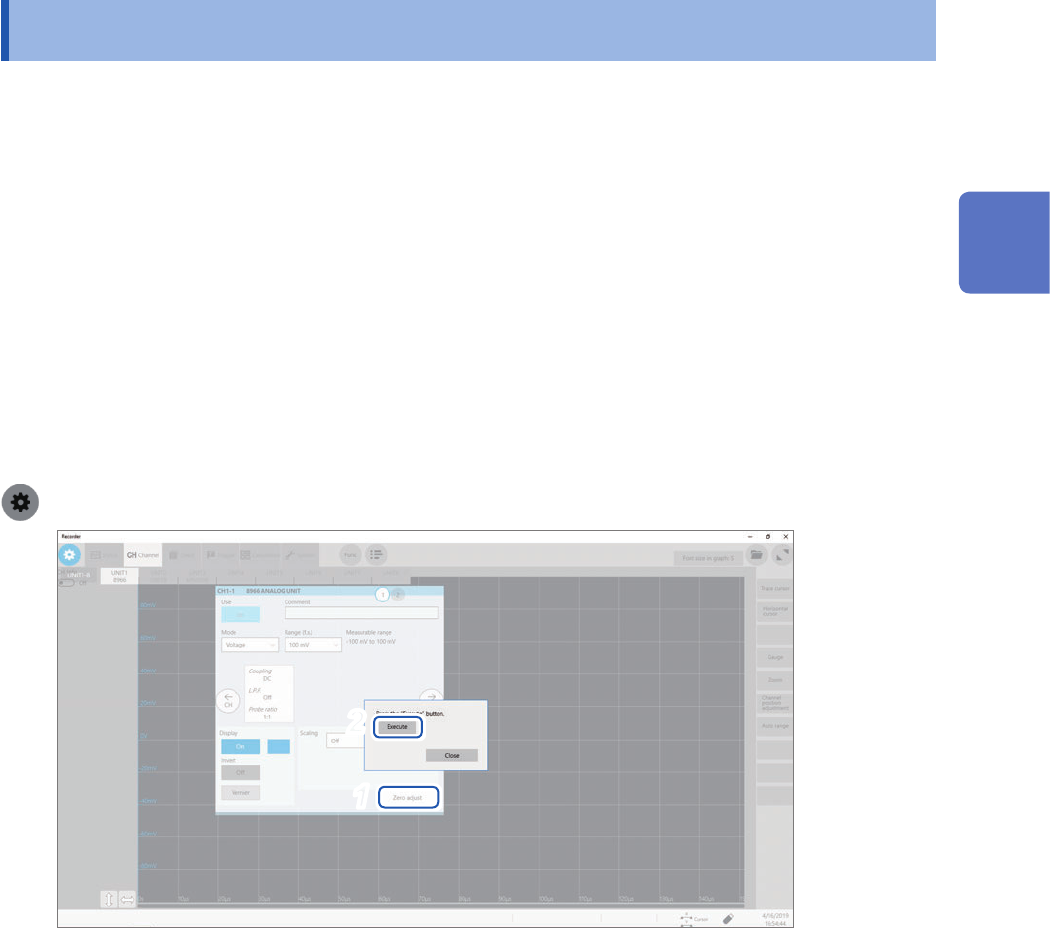
To execute zero-adjustment
> [Channel] > each module (UNIT)
2
1
1
Click [Zero adjust].
2
Click [Execute].
The instrument performs zero-adjustment.
The instrument also calibrates Model MR8990 Digital Voltmeter Unit.
Zero-adjustment is invalid for Model U8969 Strain Unit. Regulate the zero position using the auto-balance.
Refer to “Model U8969 Strain Unit” (p. 107).
Refer to “Settings of the Model U8969 Strain Unit” in “3.6 Conguring Module-Specic Settings” of the
Instruction Manual.
2
Preparing for Measurement
64
Regulating the Zero Position (Zero-Adjustment)
Re-execute zero-adjustment in the following cases:
• After replacing any modules
• After cycling the instrument
• After initializing the instrument
• After switching between DC mode and RMS mode on Model 8971 Current Unit, Model 8972 DC/
RMS Unit, or Model U8974 High Voltage Unit.
• When the ambient temperature has signicantly changed
The zero position may drift*.
*: Drift:
A phenomenon where a shift in the operating point of an operational amplier causes a false
output. Drift can result from a change in temperature and component aging over a period of use.
65
Executing Calibration (For the Instrument With Model MR8990 Installed)
2.9 Executing Calibration (For the Instrument With
Model MR8990 Installed)
Executing calibration regulates the zero position of each channel in Model MR8990 Digital
Voltmeter Unit on the reference potential of the instrument. Calibration involves all ranges of all
channels.
Before executing calibration
• Warm up the instrument for about 30 minutes after the power-on to stabilize the internal
temperature of the modules before executing calibration.
• You cannot execute calibration during measurement. However, the instrument performs
calibration at the start of measurement with the calibration setting set to on.
• No key operation is acceptable during calibration.
• The time required for calibration varies depending on the type and number of modules installed in
the instrument (it may take several seconds).
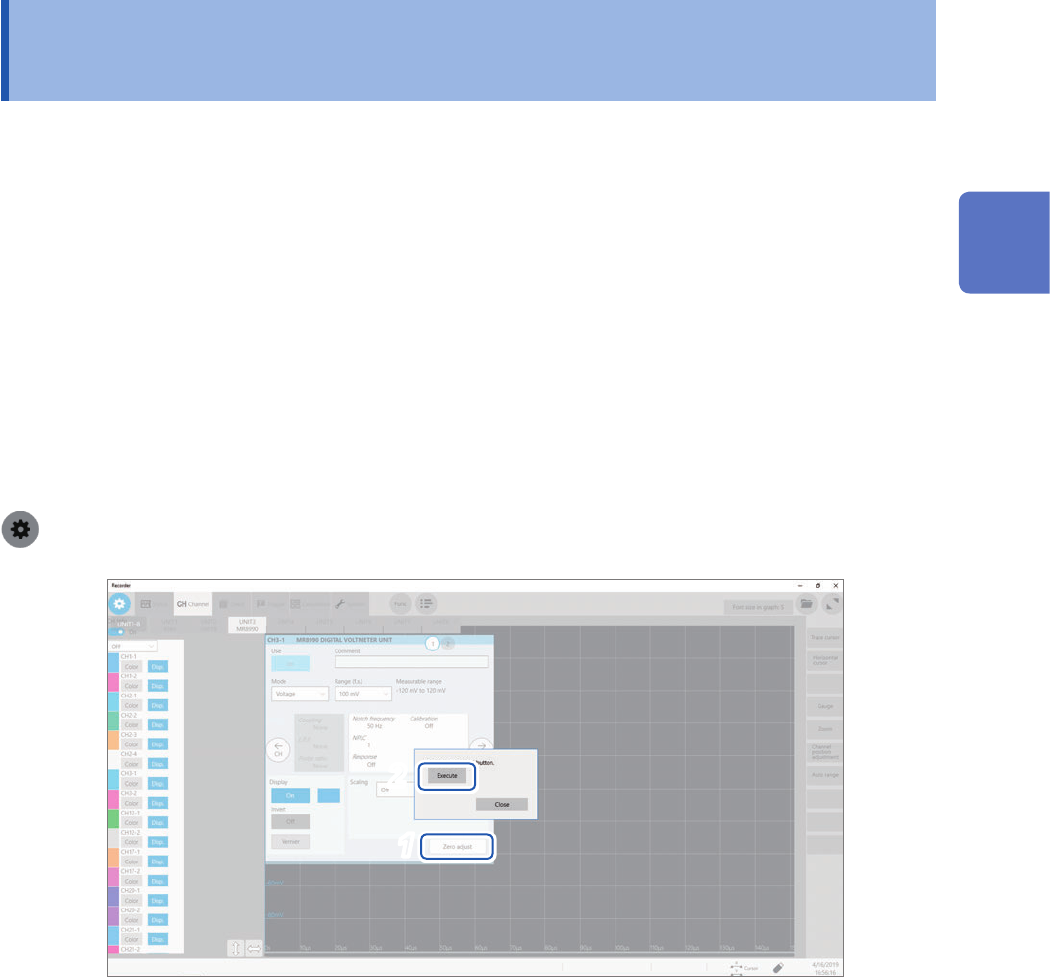
Executing calibration
> [Channel] > [MR8990]
2
1
1
Click [Zero adjust].
2
Click [Execute].
The instrument starts to calibrate Model MR8990.
Execute calibration again in the following cases:
• After replacing any modules
• After cycling the instrument
• After initializing the instrument
• When the ambient temperature has signicantly changed
The zero position may drift.
2
Preparing for Measurement