MR8740T_Quick guide_eng_20191016H.pdf - 第66页
60 Supplying Power to the Instrument 2.6 Supplying Power to the Instrument Refer to “Before turning on the instrument” (p. 18). T urning on the instrument On 1 3 2 T o grounded type outlet 1 Rear side 1 Connect the power…
59
Preparing Storage Devices (Recording Media)
Formatting storage devices
The instrument can format USB ash drives and the built-in drive. Once they are formatted, the
“HIOKI_MR8740T” folder is created.
IMPORTANT
Note that formatting a storage device deletes all the information stored on the storage device and
information deleted cannot be recovered.
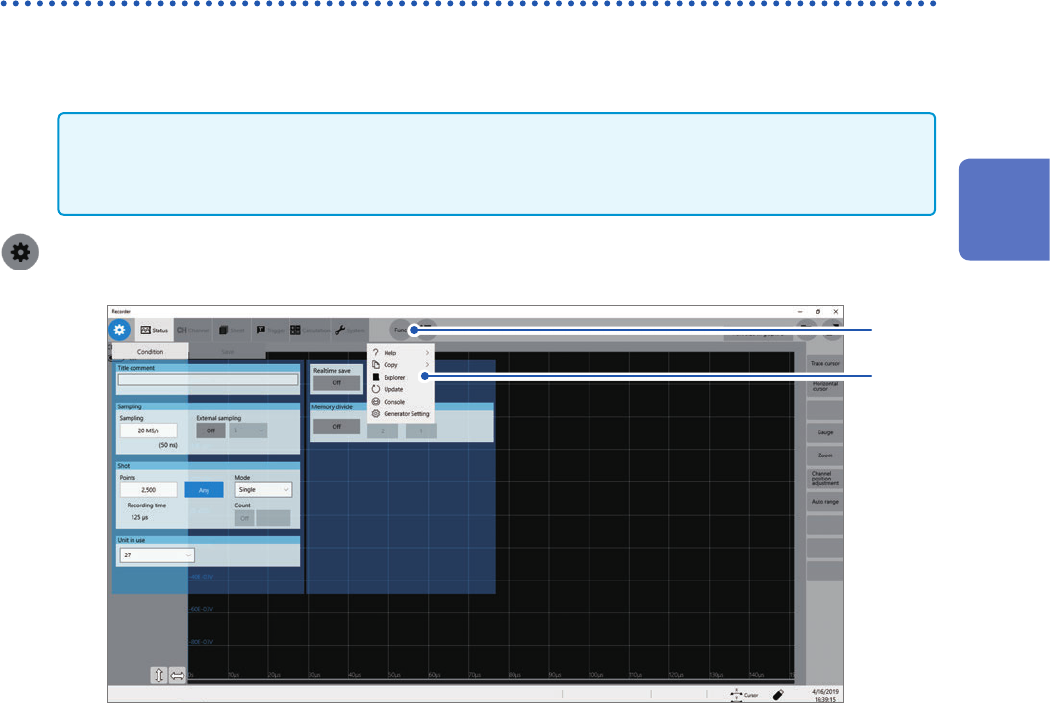
> [Func] > [Explorer]
2
1
1
Click [Func].
2
Choose [Explorer].
Explorer appears.
3
Right-click a storage device to be formatted.
4
Click [Format] on the shortcut menu.
2
Preparing for Measurement
60
Supplying Power to the Instrument
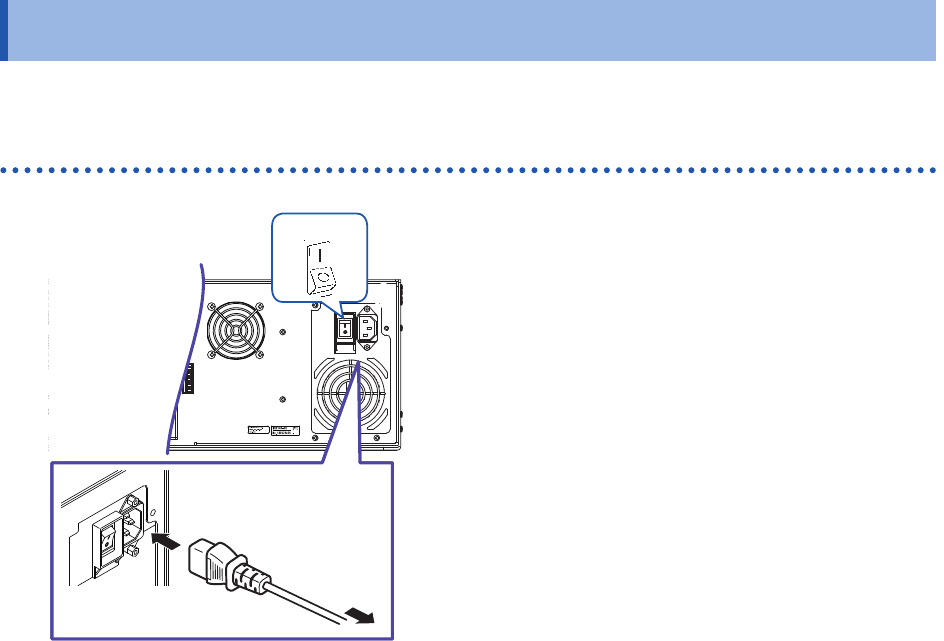
2.6 Supplying Power to the Instrument
Refer to “Before turning on the instrument” (p. 18).
Turning on the instrument
On
1
3
2
To grounded
type outlet
1
Rear side
1
Connect the power cord to the power inlet
on the instrument.
2
Connect the plug to a grounded type outlet.
3
Set the main power switch on the back side
of the instrument to on.
The POWER orange LED lights up.
4
Press the start button to turn on the
instrument.
The splash screen appears followed by the waveform
screen.
5
Warm up the instrument for about
30 minutes.
This warm-up stabilizes the temperature in the
modules, yielding accurate measurement.
6
Execute zero-adjustment.
Refer to “2 Regulating the Zero Position (Zero-
Adjustment)” (p. 63).
7
Start a measurement.
Refer to “3.5 Starting/Stopping Measurement”
(p. 75).
61
Supplying Power to the Instrument
Turning off the instrument
IMPORTANT
When the instrument is turned off, data recorded in the internal memory is deleted. To retain the
recorded data, save the data to an external storage device before turning off the instrument.
Refer to “3.6 Saving Data Consisting of Items Selected” (p. 76).
1
Save the acquired data if needed.
2
Press the start button.
Click [OK] to turn off the instrument according to the message.
Alternatively, pressing the start button again turns off the instrument. After the instrument has been turned on
again, the settings congured before the instrument was turned off are loaded.
Conrm that the instrument is turned off before setting the main power switch to off.
IMPORTANT
Do not set the main power switch on the rear to off while Windows
®
is running. Doing so may
cause the instrument to start properly.
2
Preparing for Measurement