MR8740T_Quick guide_eng_20191016H.pdf - 第3页
F AQs T o set the measurement range automatically Refer to “3.7 Measuring Signals With the Auto-range Setting” (p. 78). T o change the measurement range Refer to “Analog channel” (p. 71). T o add a comment to the data Re…

FAQs
To set the measurement range automatically
Refer to “3.7 Measuring Signals With the Auto-range Setting” (p. 78).
To change the measurement range
Refer to “Analog channel” (p. 71).
To add a comment to the data
Refer to “Analog channel” (p. 71).
To minimize inuence of noise (Low-pass lter, LPF)
Refer to “Analog channel” (p. 71).
To change the sampling rate
Refer to “3.2 Setting Measurement Conditions” (p. 68).
To congure the trigger settings
Refer to “3.4 Conguring the Level Trigger Settings” (p. 73).
To scroll through the waveform display
Refer to “4.2 Handling Waveforms” (p. 83).
To read measured values (cursor values) with cursors
Refer to “4.1 Reading Measured Values (Trace Cursors)” (p. 81).
To save data les
Refer to “3.6 Saving Data Consisting of Items Selected” (p. 76).
To estimate le size
Refer to “13.1 Information for Reference Purposes” of Instruction Manual.
To open data les with a computer
Refer to “4.3 Loading Data With Your Computer (Wave Viewer)” (p. 84).
MR8740C963-01
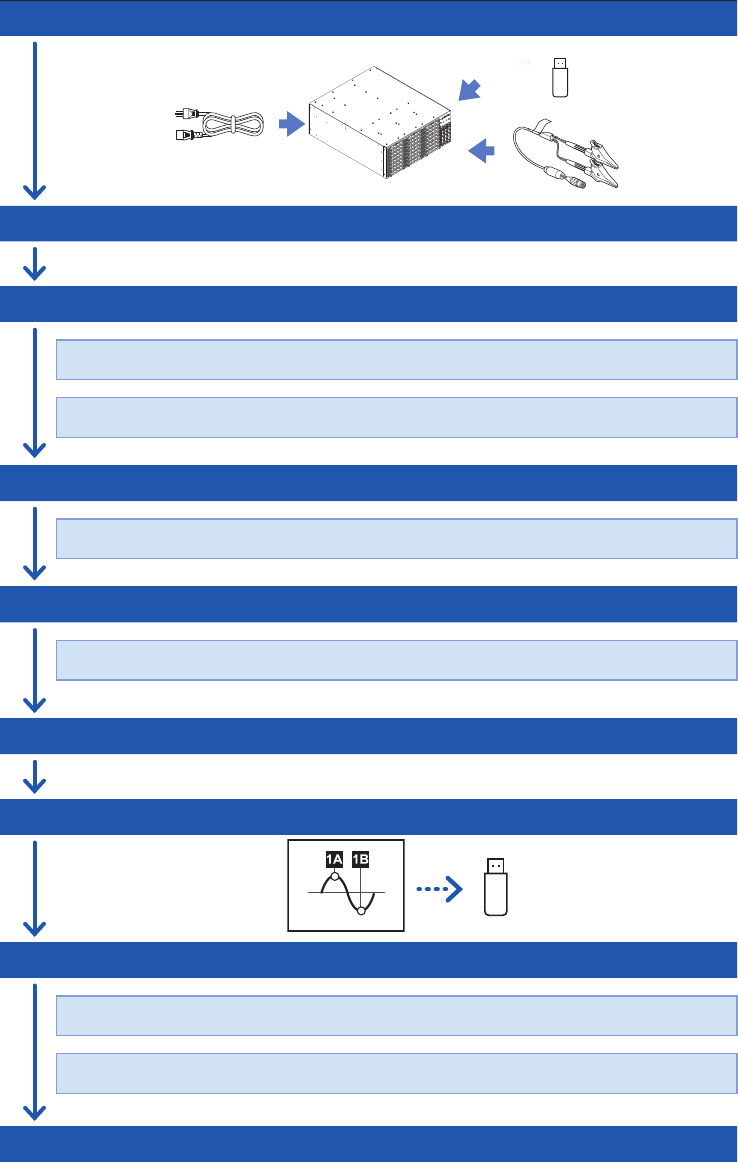
Measurement Procedure
The basic measurement procedure is as follows. For advanced use, refer to the Instruction Manual
(PDF) in the accompanying CD.
Preparing for measurement
(p. 33)
Inspecting the instrument before measurement
(p. 67)
Conguring the basic settings for measurement
(p. 68)
Choose a sampling rate.
Choose a recording length (shot).
Conguring the input channel settings
(p. 70)
Congure the analog channel settings.
Conguring the trigger settings
(p. 73)
Congure the trigger settings.
Starting/Stopping measurement
(p. 75)
Saving measured data les
(p. 76)
Analyzing waveforms
(p. 81)
Scroll through, zoom in, and zoom out waveforms.
Read measured values (with the trace cursors).
Finishing the measurement