MR8740T_user_manual_eng_20191016H.pdf - 第103页
98 T rigger Setting Procedure 5.1 T rigger Setting Procedure • The instrument is triggered based on trigger logical-conditions (logical AND or OR operation) among trigger sources except for the forcible trigger . (p. 105…
97
5
Conguring the Trigger Settings
The trigger function allows you to start and stop measurements using specic signals.
When recording is started by specic signals, it is called “The instrument is triggered.”
In this chapter, the mark
represents the point the start trigger is activated.
In the descriptions of each trigger source, the mark
represents a point each trigger condition is
satised and a point each trigger is generated.
When the real-time save is set to [On], you cannot use the trigger function.
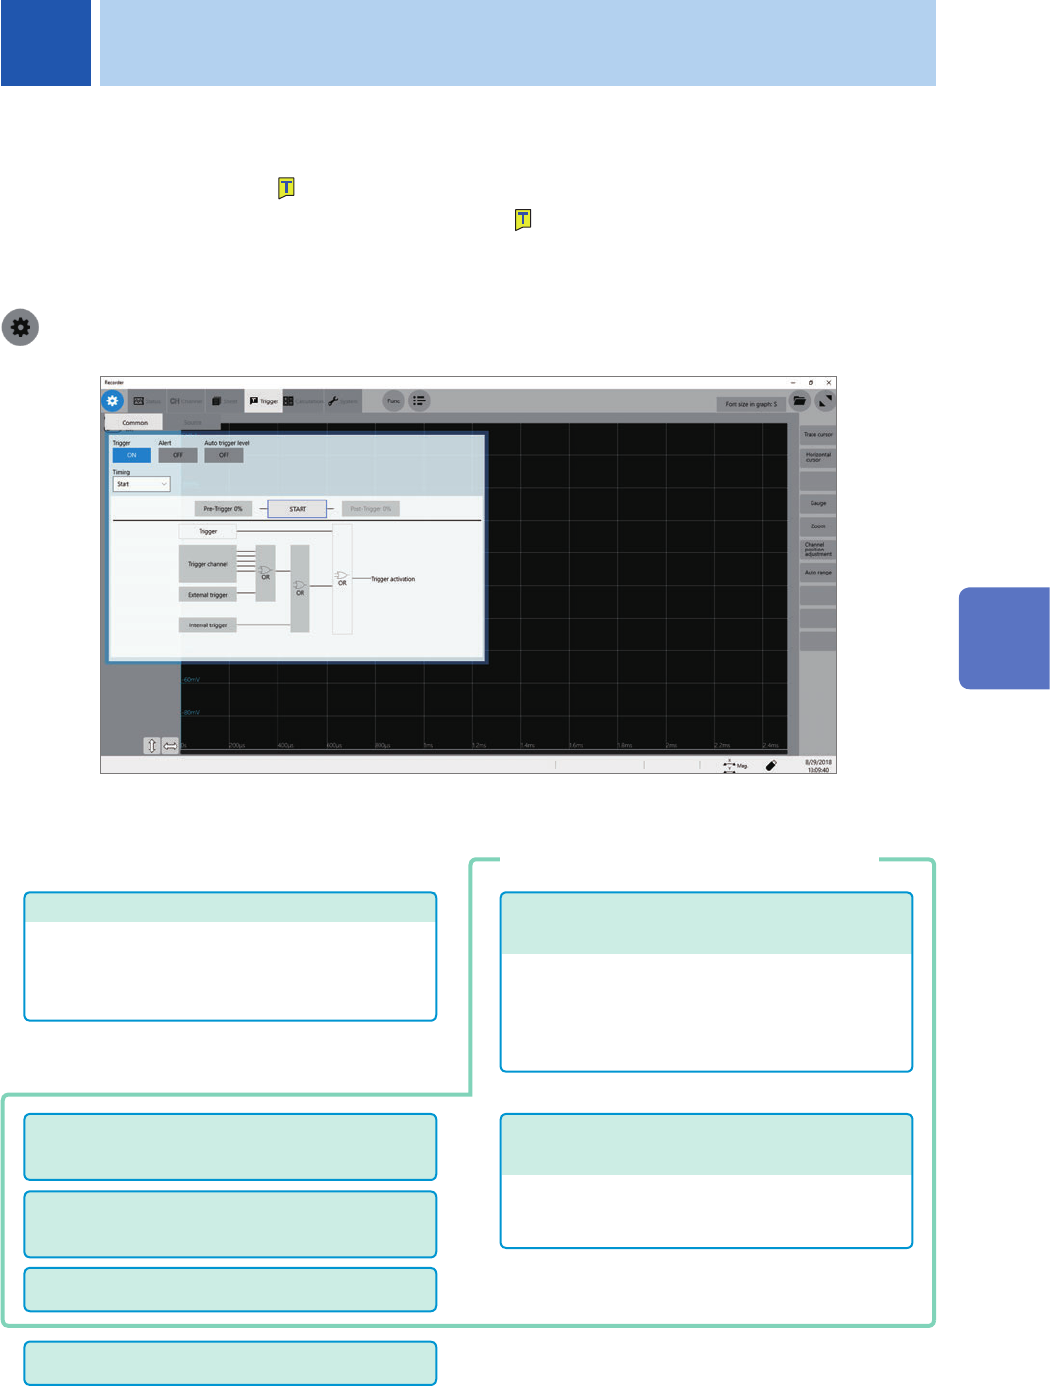
> [Trigger] > [Common]
Operation available on the [Trigger] screen
Conguring the logic trigger settings
(p. 114)
• Logic-trigger satisfaction conditions
• Trigger lter
• Trigger pattern
Conguring the analog trigger settings
(p. 106)
• Level trigger
• Window trigger
• Period trigger
• Glitch trigger
• Voltage drop trigger
Conguring the trigger setting
• Trigger timing (p. 100)
• Pre-Trigger (p. 102)
• Trigger satisfaction condition (logical AND or OR
operation) among the trigger sources (p. 105)
Conguring the interval trigger settings
(p. 116)
Conguring the external trigger settings
(p. 118)
Forcible trigger (p. 118)
Trigger output (p. 213)
Conguring the trigger source settings
5 Conguring the Trigger Settings
5
Conguring the Trigger Settings
98
Trigger Setting Procedure
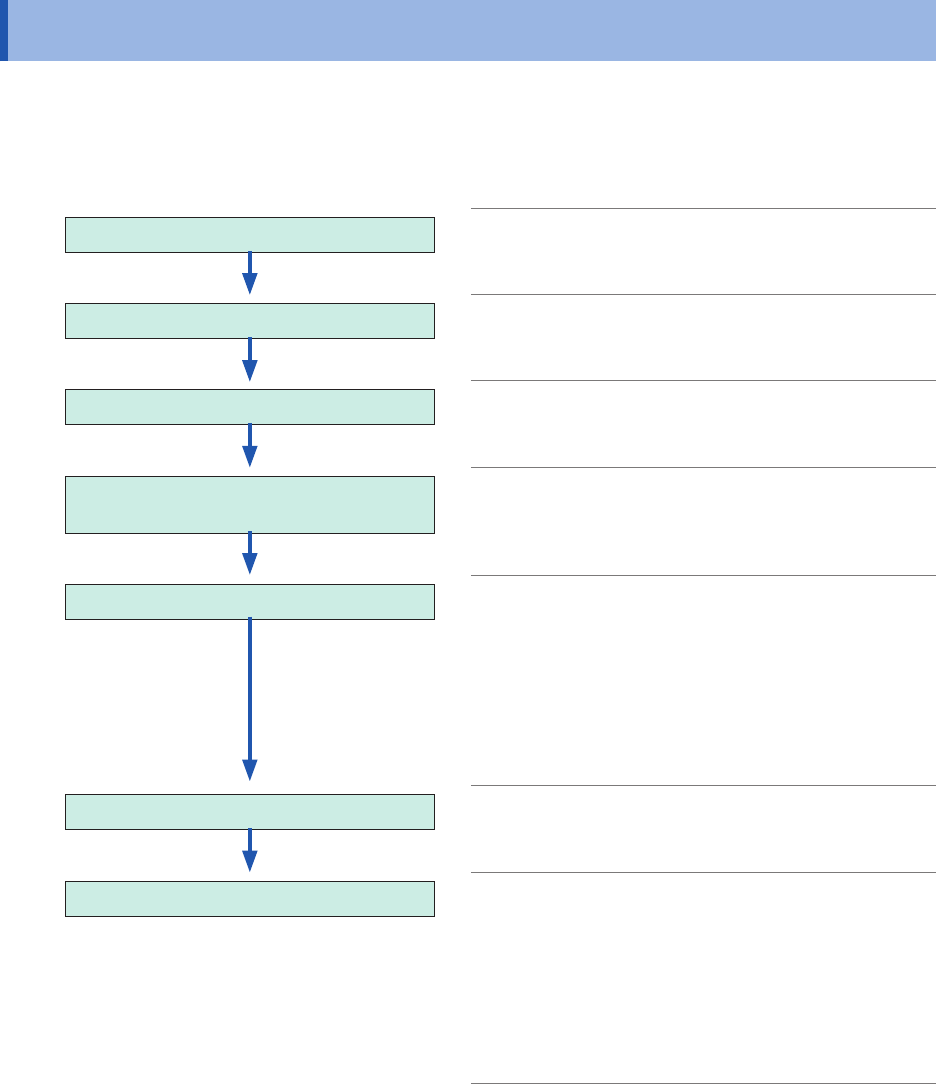
5.1 Trigger Setting Procedure
• The instrument is triggered based on trigger logical-conditions (logical AND or OR operation)
among trigger sources except for the forcible trigger. (p. 105)
• When triggered, the instrument outputs the TRIG OUT signal from the external control terminal.
(p. 213)
Congure the trigger function setting
Enables the trigger function. (p. 99)
Conguring the trigger timing setting
Specify the start timing of recordings
controlled by triggers.
(p. 100)
Conguring the pre-trigger settings
Specify a recording length that precedes
the start trigger point.
(p. 102)
Setting trigger logical-conditions (AND or
OR operation) among trigger sources
Setting trigger logical-conditions (AND or
OR operation) among the analog, logic,
external, and interval triggers to trigger the
instrument.
(p. 105)
Conguring the trigger type settings
Set trigger conditions for each trigger.
• Analog trigger (p. 106)
• Logic trigger (p. 114)
• Interval trigger (p. 116)
• External trigger (p. 118)
• Forcible trigger (p. 118)
Choosing a measurement mode
Choose whether the instrument repeatedly
waits for a trigger after a measurement has
been stopped.
(p. 6)
Starting a measurement
Click the start icon to start a measurement. (The key
green LED lights up.)
When a trigger condition is satised, the instrument
starts to acquire data.
To stop the measurement, click the stop icon.
Click the icon once: Stops the measurement once the
instrument has acquired the recording-length data.
Click the icon twice: Immediately stops the recording.
99
Enabling the Trigger Function
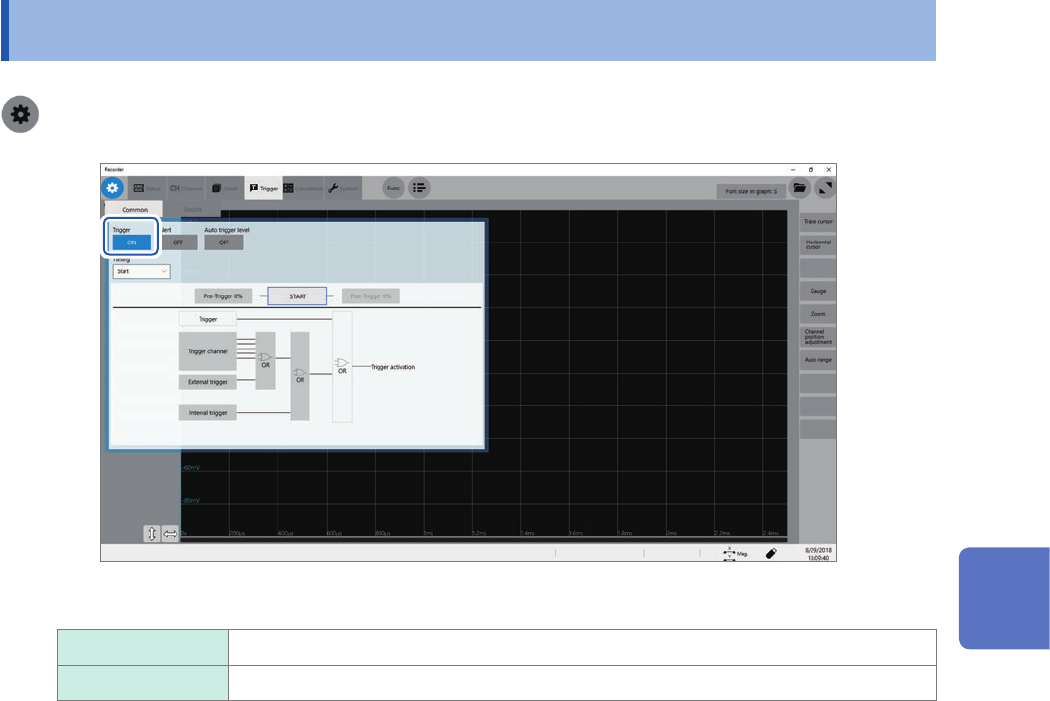
5.2 Enabling the Trigger Function
> [Trigger] > [Common]
Click the [Trigger] button to set it to [On].
On
Enables the trigger function.
Off Disables the trigger function.
To copy settings to other channels
You can copy settings on the analog trigger setting screen.
Refer to “3.5 Copying Settings (Copy Function)” (p. 45).
5
Conguring the Trigger Settings