MR8740T_user_manual_eng_20191016H.pdf - 第42页
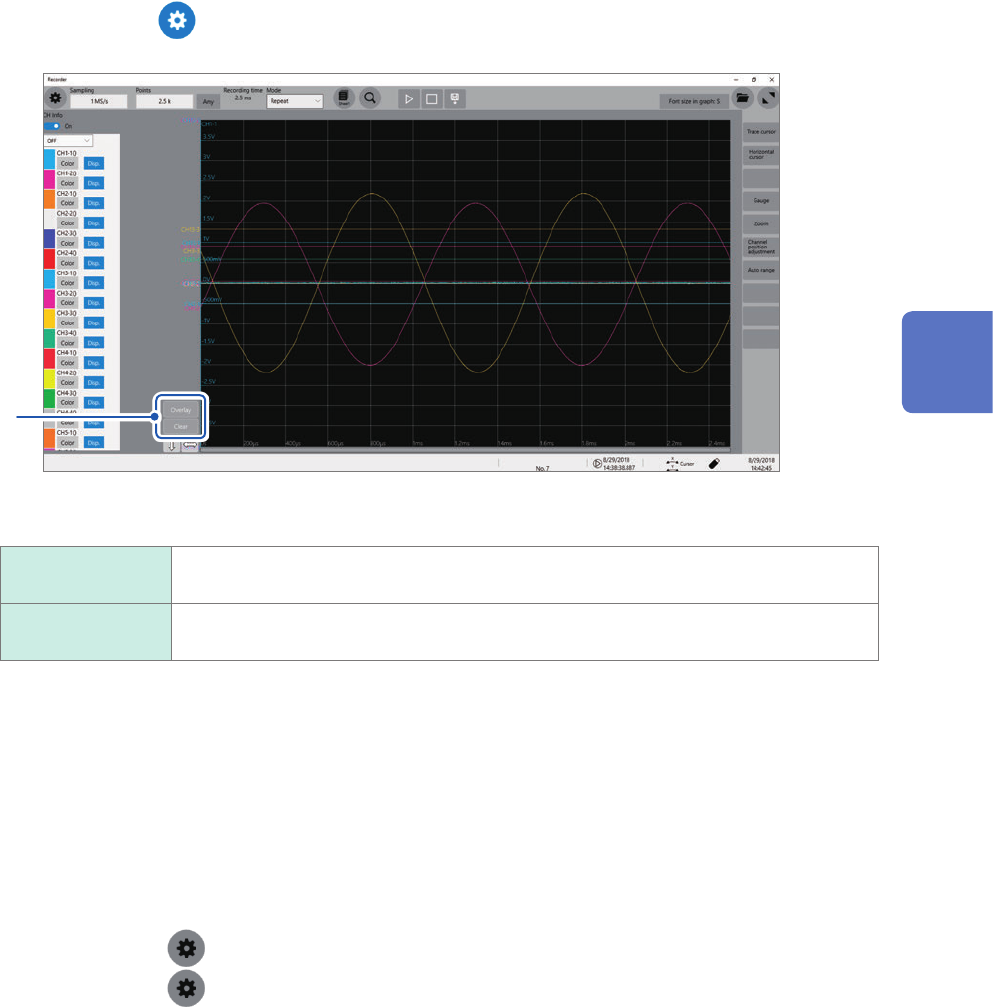
37 Overlaying New W aveforms With Previously Acquired Waveforms 2 Click the button to display the waveform screen. 3 3 Overlay the waveforms manually (leaving any waveforms to be displayed on the screen). Overlay Leaves …

36
Overlaying New Waveforms With Previously Acquired Waveforms
3.1 Overlaying New Waveforms With Previously
Acquired Waveforms
New waveforms can be overlaid with the presently displayed waveforms.
• You can compare the new waveforms with those recorded before. (When [Mode] is set to
[Repeat]) (p. 6)
• Two methods are available to overlay waveforms: the automatic overlaying during measurement
and the manual overlaying.
> [Status] > [Condition]
1
1
Click the [Overlay] box, and then choose an overlaying method from the list.
Off
Does not overlay any waveforms.
Auto Overlays waveforms newly acquired with the presently displayed waveforms every
time the instrument acquires new ones.
When [Mode] is set to [Repeat], the instrument overlays the new waveforms with
the presently displayed waveforms beginning from the start until the stop of the
measurement.
Manual Manually overlays the new waveforms with the presently displayed waveforms.
Refer to Step 3 “Overlay the waveforms manually (leaving any waveforms to be
displayed on the screen).” (p. 37).
Refer to “When the overlay function is enabled (When [Overlay] is set to [Auto] or [Manual])” (p. 37).
37
Overlaying New Waveforms With Previously Acquired Waveforms
2
Click the button to display the waveform screen.
3
3
Overlay the waveforms manually (leaving any waveforms to be displayed on the screen).
Overlay Leaves the acquired waveforms displayed on the screen.
The overlay setting continues to be available until the waveforms are cleared.
Clear Clears all the overlaid waveforms displayed on the screen.
No cleared waveforms can be displayed again.
When the overlay function is enabled (When [Overlay] is set to [Auto] or [Manual])
• The instrument displays the waveforms always after the data has been acquired.
• The trace cursors show the measured values of the waveforms most recently acquired.
• The following operation is not available on the waveform screen:
Scrolling through waveforms, switching the zoom function between on and off, changing the
magnication, and changing the zero position.
• The instrument leaves the waveforms most recently displayed only and clears the others in the
following cases:
• After selecting
> [Sheet] and changing its setting
• After selecting > [Channel] and changing the waveform display settings (switching
between on and off for the display setting or changing a waveform color)
• After executing the search.
• After changing the waveform display settings (switching between on and off for the display
setting or changing waveform color) in [CH info] on the waveform screen.
3
Advanced Functions
38
Converting Input Values (Scaling Function)
3.2 Converting Input Values (Scaling Function)
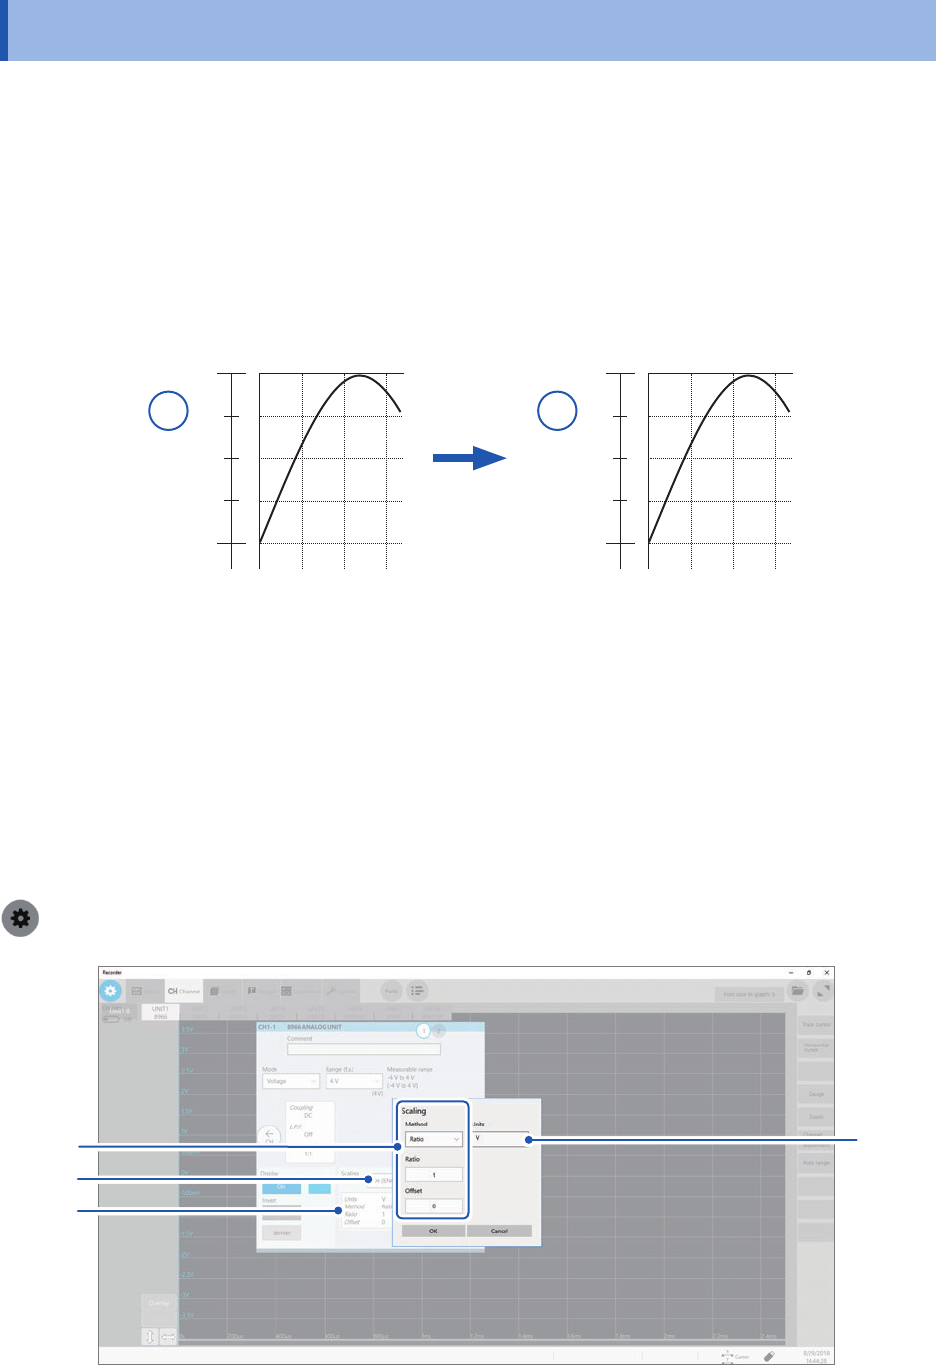
About the scaling function
The scaling function enables you to convert voltage outputted from measuring devices such as
sensors into physical quantities of measuring objects.
Hereafter, the term “scale” refers to converting numerical values using the scaling function.
Gauge scales, scaled values (upper and lower limits of the vertical axis or voltage axis), and
measured values using trace cursors are represented as scaled values in the specied units.
You can congure different scale settings for each channel.
Before scaled After scaled
[
V
]
0
0.1
0.2
[
A
]
0
5.0
10
Scaling methods
The following six methods are available:
• Specifying a conversion ratio and offset
• Specifying two points
• Choosing a model name of a connected current sensor or differential probe
• Choosing an output rate
• Specifying an input value in decibels and value after scaled
• Specifying a rated capacity and rated output according to an inspection record of a strain gauge
converter (for Model U8969 Strain Unit only)
> [Channel]
3
4
1
2