HS50_advance_level 2.pdf - 第101页
Stud ent Gu ide HS-5 0 Adva nced II 07/2 002 Ed ition 3 Power Supply 63 PLEASE NOT E: Do not o vertigh ten the M5 hexago n head screws : the panel mig ht bre ak. ➠ Switch t he plac ement sy stem on. Main c ontactor SZ …
07/2002 Edition Student Guide HS-50 Advanced II
3 Power Supply
62
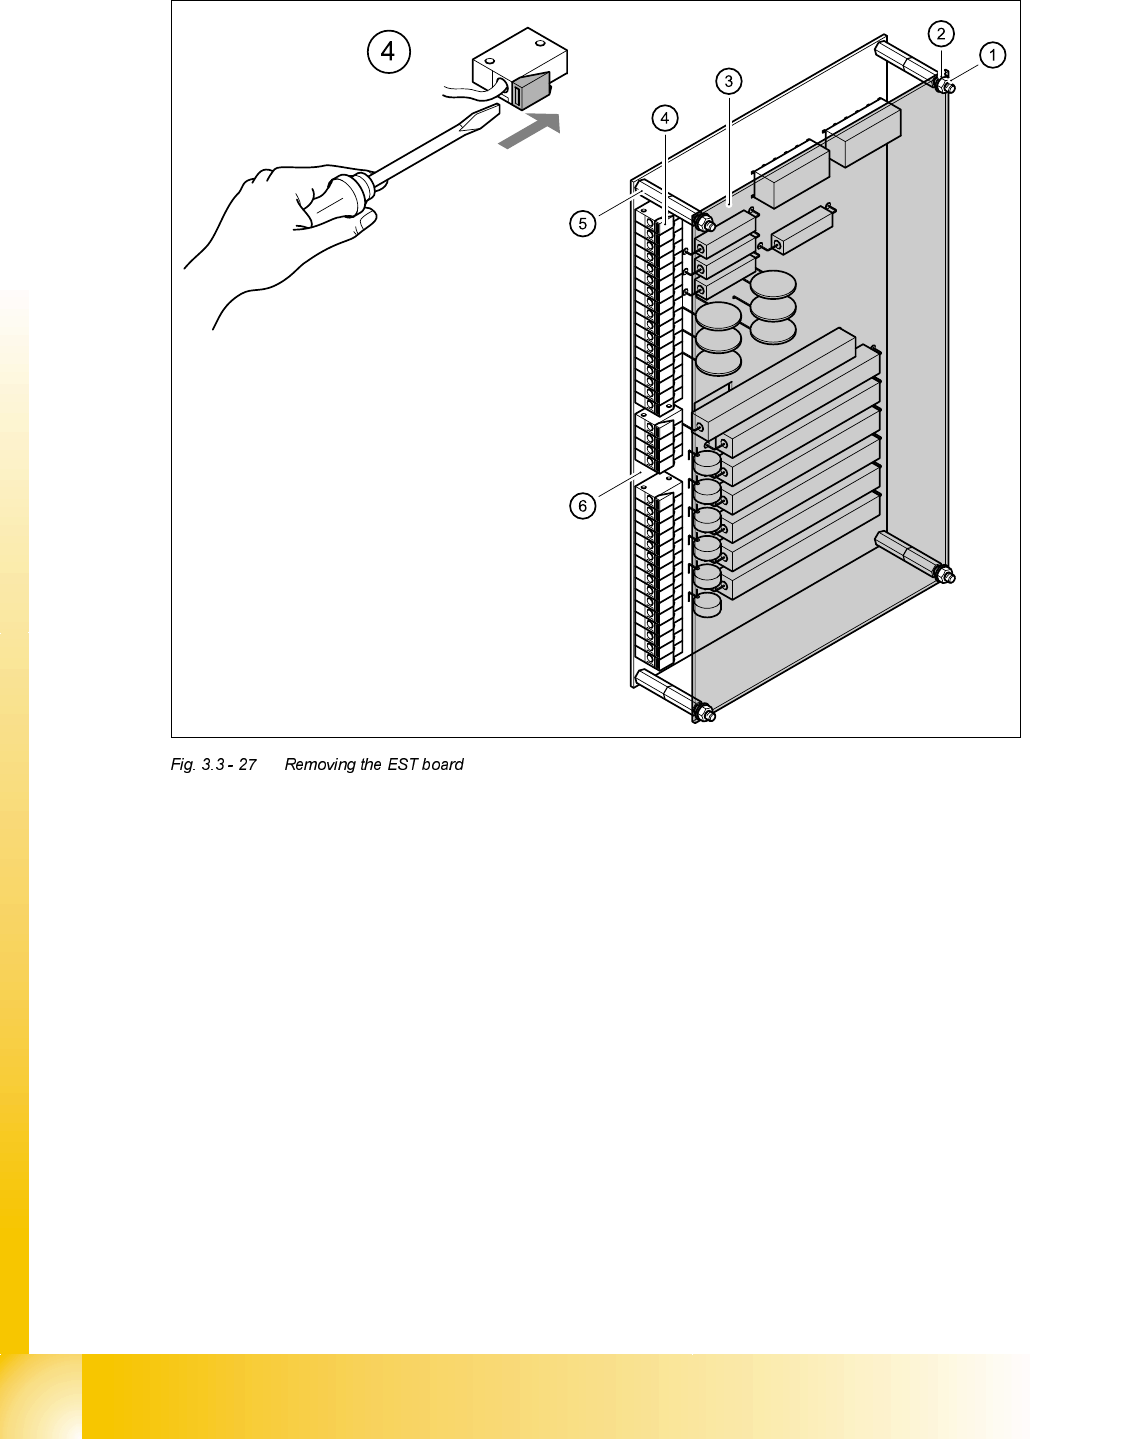
➠ Loosen the M5 hexagon nuts (1) and remove together with the retaining rings (2).
➠ Remove the perspex panel (3).
➠ Detach the terminal wires from the terminal block one by one by pushing the terminal link (4)
in the direction indicated by the arrow.
➠ Identify the terminal wires with adhesive labels.
➠ Remove the M5 hexagon bolts.
➠ Remove the board.
)LWWLQJWKH(67ERDUG
➠ Fit the board and fix in place with M5 hexagon bolts.
➠ Connect up the terminal wires.
➠ Attach the perspex panel and fix in place with the retaining rings and M5 hexagon nuts.

Student Guide HS-50 Advanced II 07/2002 Edition
3 Power Supply
63
PLEASE NOTE:
Do not overtighten the M5 hexagon head screws: the panel might break.
➠ Switch the placement system on. Main contactor SZ1 will pick up.
➠ Measure the 30 VDC control voltage between terminals A1 (+) and A2 (-) on the main contactor
SZ1.
➠ Complete the servicing work as described in 3.3.3 on page 3 - 29.

07/2002 Edition Student Guide HS-50 Advanced II
3 Power Supply
64