HS50_advance_level 2.pdf - 第238页
07/2002 Editio n Student G uide HS -50 Advanc ed II 8 Y-Axis 20 ➠ Remove the perm anent m agnets from th e gantry concerned : *DQWU\ RU ➠ Loosen the fo ur M6 x 12 hex agon soc ket-hea d screws on the perma nent m…
Student Guide HS-50 Advanced II 07/2002 Edition
8 Y-Axis
19
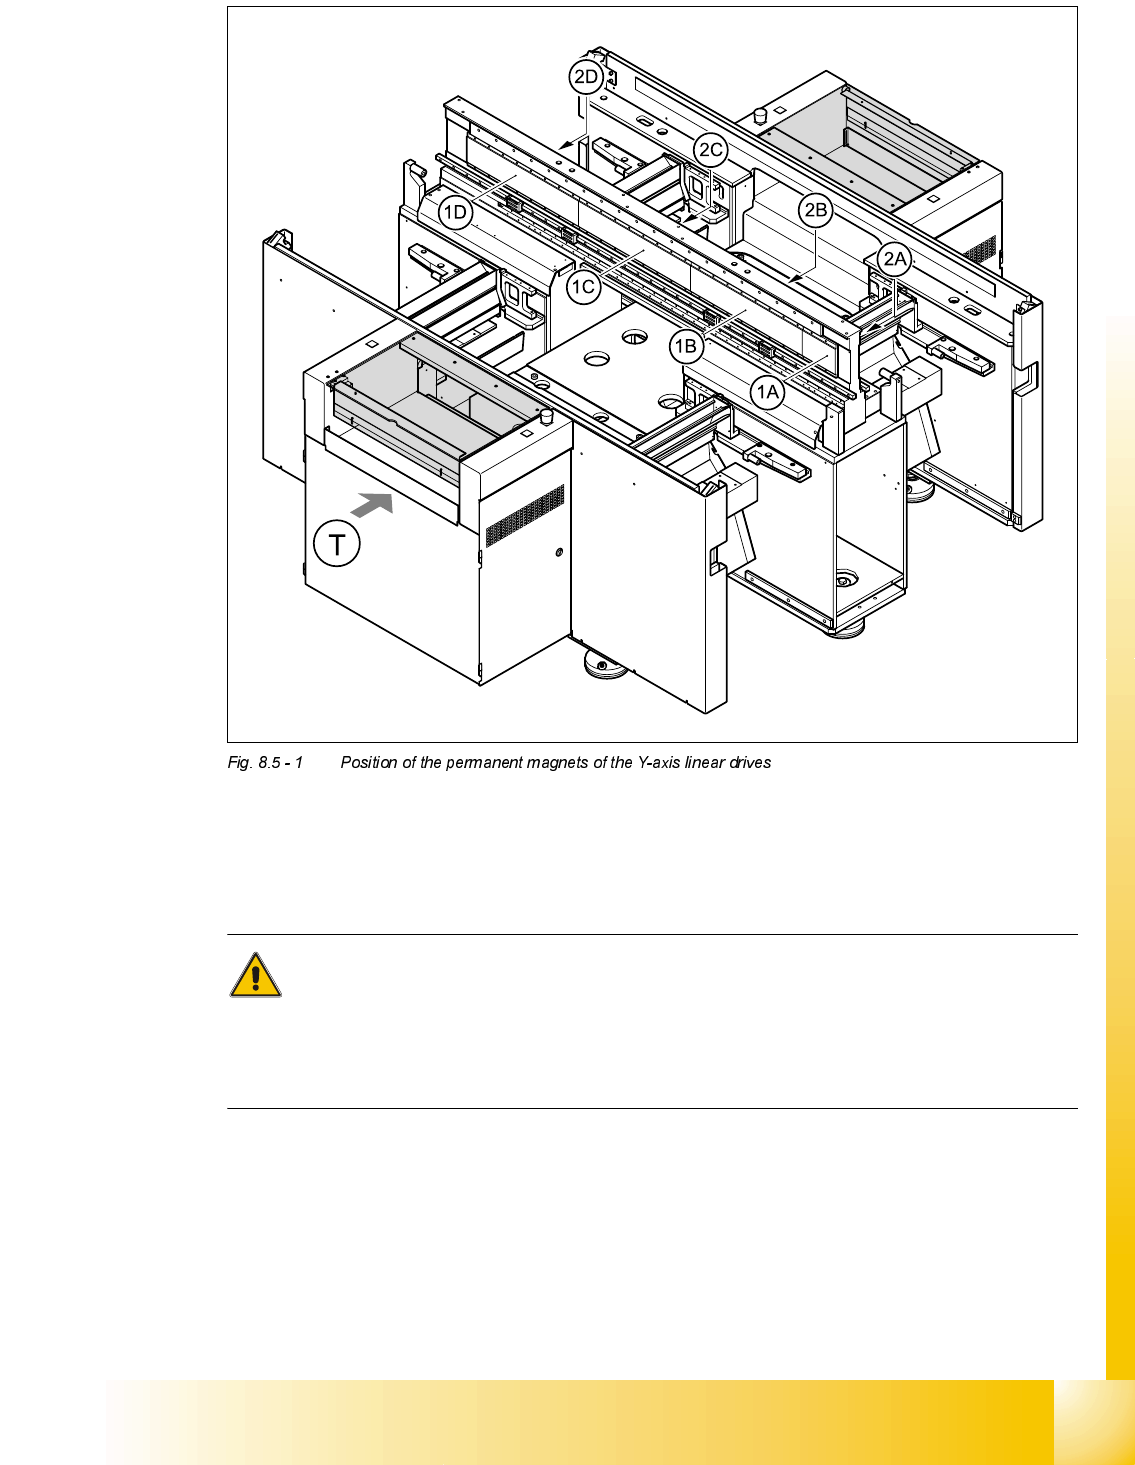
1A, 1B, 1C, 1D Permanent magnets for the Y-axis linear drive for gantries 1 and 4
2A, 2B, 2C, 2D Permanent magnets for the Y-axis linear drive for gantries 2 and 3
T Transport direction
CAUTION
When permanent magnets are placed on a magnetic surface (e.g. iron, nickel or steel), be ex-
tremely careful not to catch your hands or fingers between the surface and the permanent magnet.
If you do, you will not be able to lift the magnet from the surface on your own.

07/2002 Edition Student Guide HS-50 Advanced II
8 Y-Axis
20
➠ Remove the permanent magnets from the gantry concerned:
*DQWU\RU
➠ Loosen the four M6 x 12 hexagon socket-head screws on the permanent magnet (see item 1A
or 2A in Fig. 8.5 - 1
).
➠ Lift the permanent magnet and place it on a clean, non-magnetic surface (such as a plank of
wood).
➠ Loosen the 16 M6 x 12 hexagon socket-head screws on the permanent magnet (item 1B or 2B
in Fig. 8.5 - 1
).
➠ Set down the permanent magnet.
*DQWU\RU
➠ Loosen the 16 M6 x 12 hexagon socket-head screws on the permanent magnets (see item 2C
and 2D or 1C and 1D in Fig. 8.5 - 1
).
➠ Lift the permanent magnet and place it on a clean, non-magnetic surface (such as a plank of
wood).

Student Guide HS-50 Advanced II 07/2002 Edition
8 Y-Axis
21
5HPRYLQJWKHSULPDU\SDUWRIWKHOLQHDUPRWRU
➠ Remove the X-axis motor unit.
(1) Linear motor - primary part
(2) X-axis motor unit
(3) X/Y distributor
(4) Socket X4 for the connecting cable of the primary part
(5) Gantry