HS50_advance_level 2.pdf - 第310页
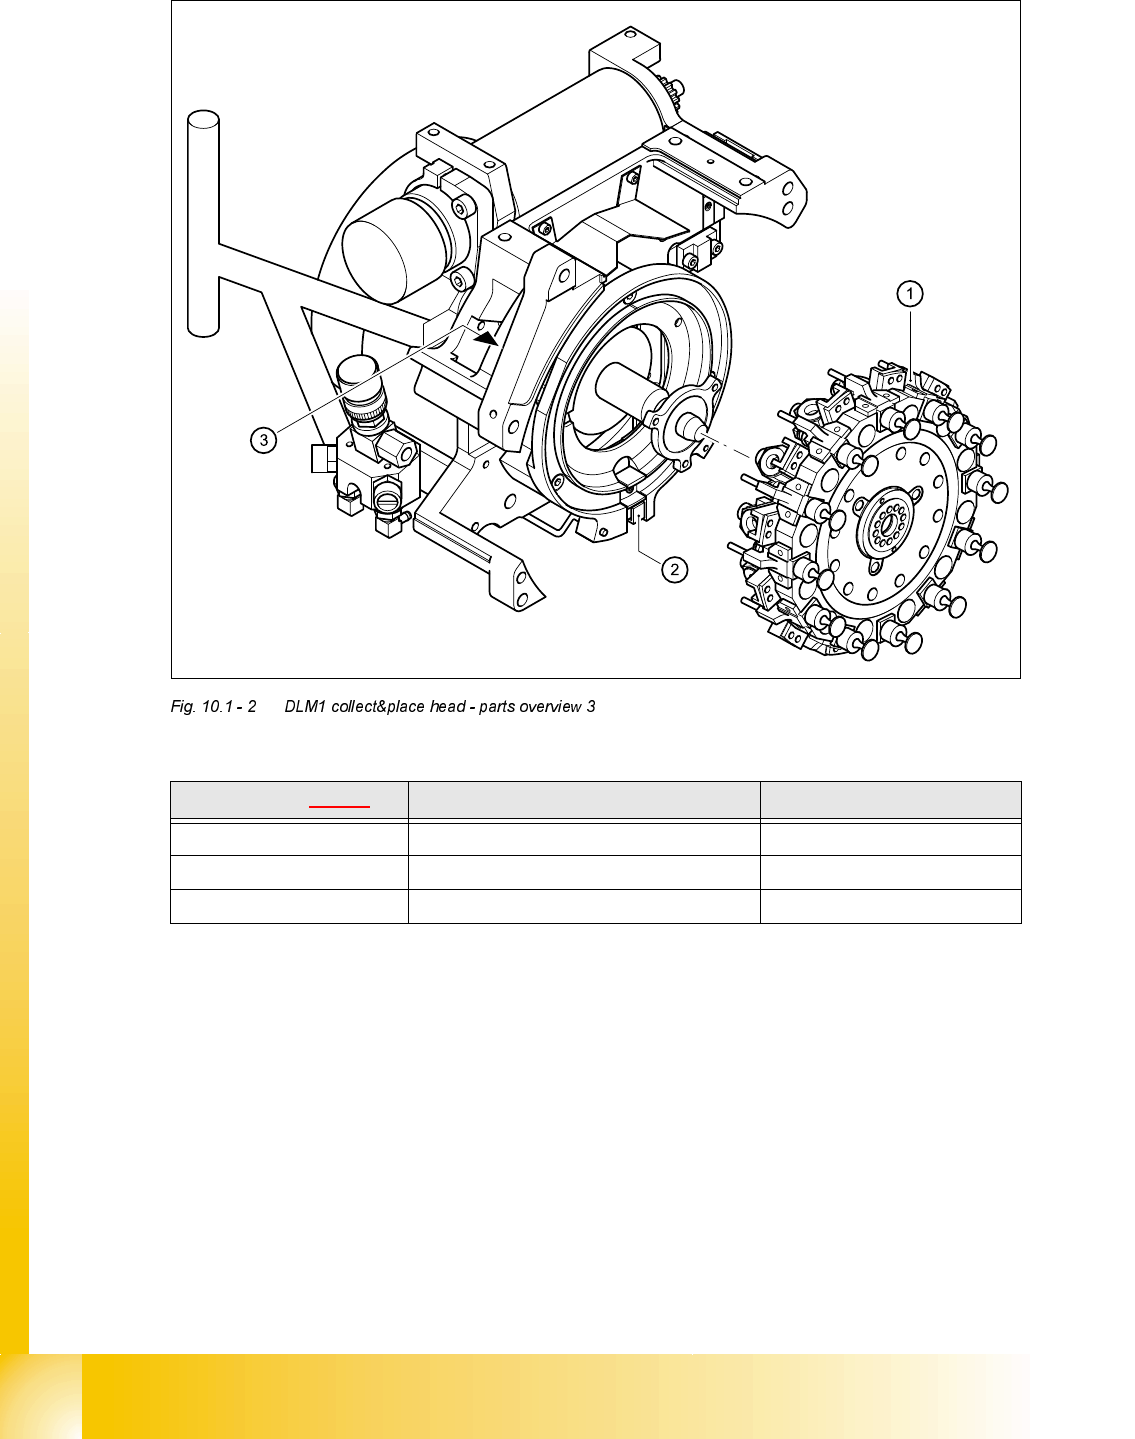
07/2002 Editio n Student G uide HS -50 Advanc ed II 10 Star Axis 6 ,WHP LQ ) LJ 'H VLJQDWLRQ ,WHPQR 1 Star fi tted / DLM1 0034118 1-01 2 "Z-axis down" sen sor 0032152 4-04 3 RSF dig i…
Student Guide HS-50 Advanced II 07/2002 Edition
10 Star Axis
5
6WDU$[LV
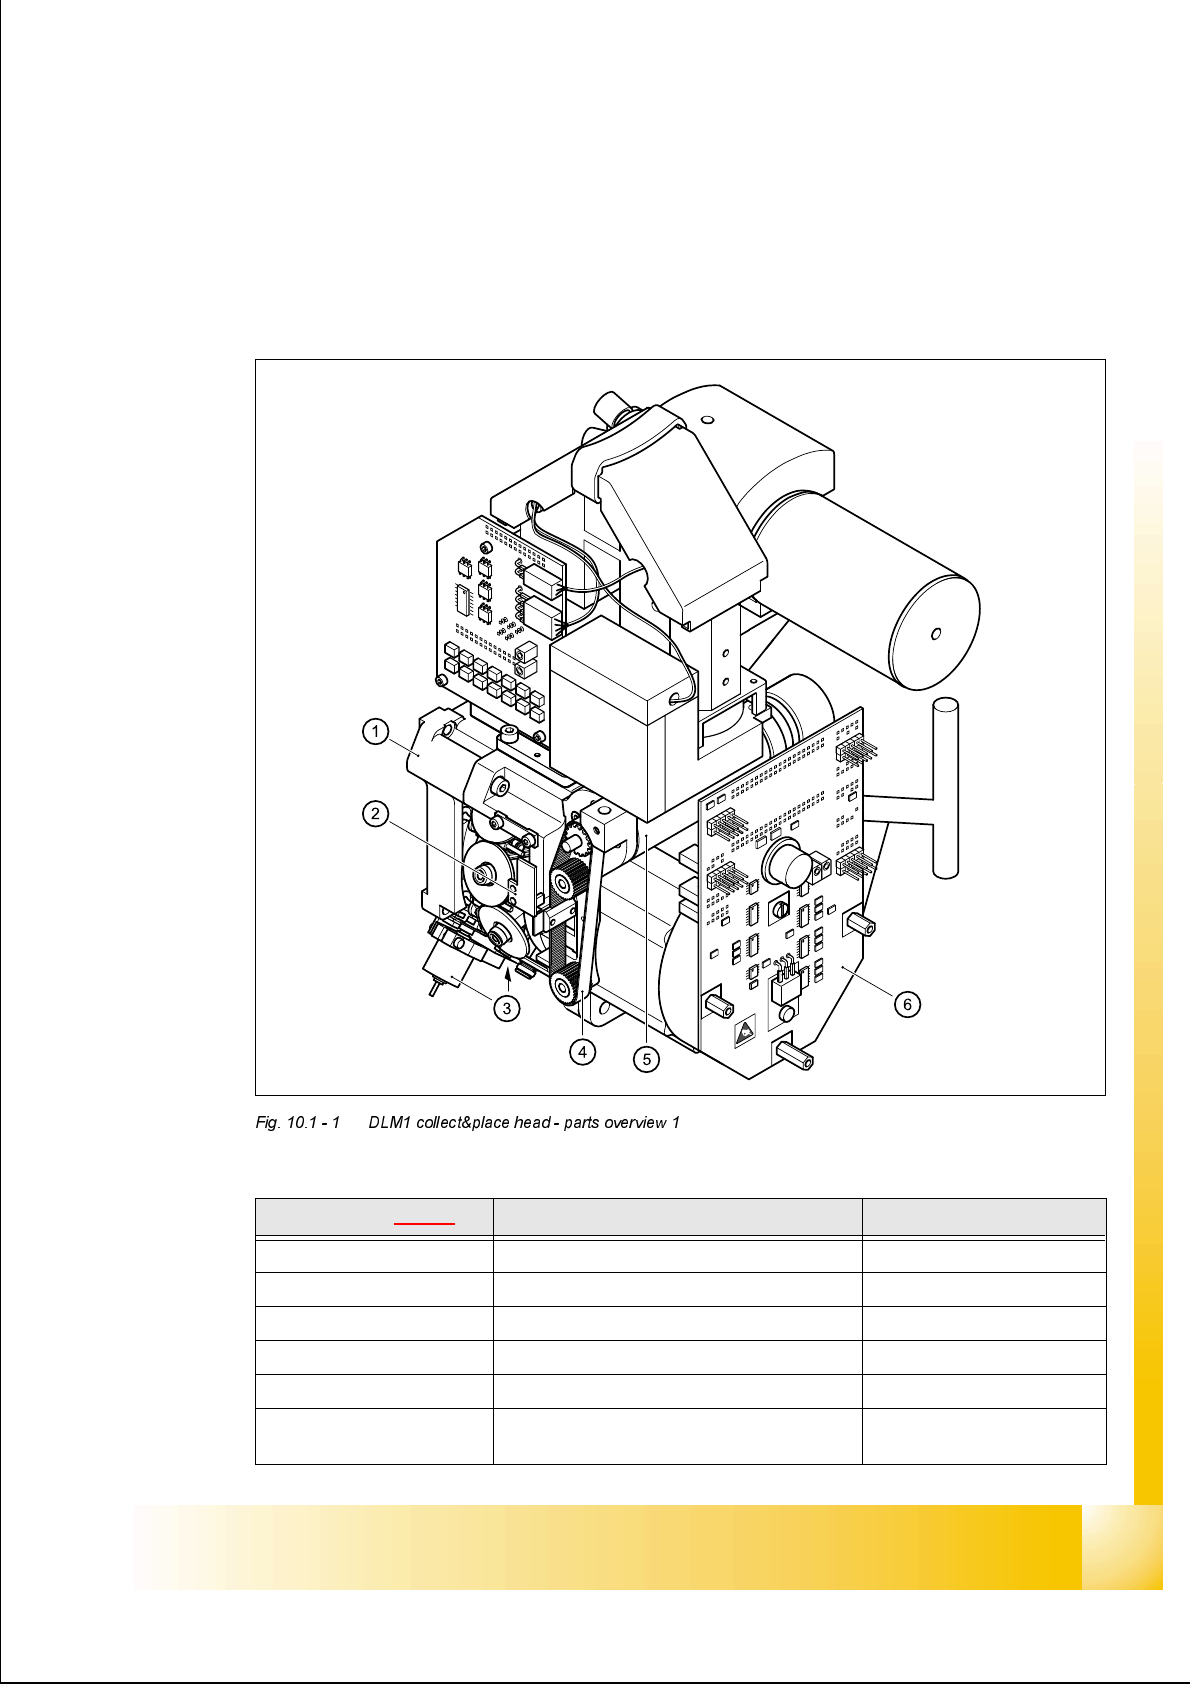
3DUWV2YHUYLHZ
,WHPLQ)LJ 'HVLJQDWLRQ ,WHPQR
1 Collect&place head SP12 complete / DLM1 00333700-01
2 Light barrier for "Z-axis up" 00321213-05
3 Valve positioning drive 00319826-05
4 Toothed belt T2 / DLM1 00334936-01
5 Z-axis drive / DLM1 00341011-01
6
SP6_12 intermediate distribution board, digi-
tal
00330648-03

Student Guide HS-50 Advanced II 07/2002 Edition
10 Star Axis
7
5HSODFLQJVSDUHSDUWV
5HSODFLQJWKHVWDUGULYH
7RROVDQGHTXLSPHQW
– Set of DIN 911 Allen keys
– Gauge for the star (collect&place head / DLM1), article number 00326164-01
– Power pack for the collect&place head / DLM1, article number 00353277-01
– Tray for transporting the collect&place head
– Laboratory gloves
3DUWV
Star drive, digital / DLM1, article number 00337571-01
'LVPDQWOLQJWKHVWDUGULYH
➠ Dismantle the intermediate terminal block.
➠ Dismantle the front part of the collect&place head.
➠ Dismantle the star.
➠ Undo the four M5x16 hexagon socket head screws (item 2 in Fig. 10.2 - 1).
➠ Lift the star drive off the front part of the collect&place head.
)LWWKHVWDUGULYH
➠
Place the star motor on the front part of the collect&place head so that the connecting cable
for the star drive points to the position marked (A) in Fig. 10.2 - 1
.
➠ Fix the star drive in place with the four M5x16 hexagon socket head screws (item 2 in Fig. 10.2
- 1).
➠ Fit and adjust the star.
➠ Fit the front part of the collect&place head.