HS50_advance_level 2.pdf - 第72页
07/2002 Editio n Student G uide HS -50 Advanc ed II 3 Power Sup ply 34 ➠ Check the overcu rrent tri p and s hort-circu it cu rrent trip thresho ld set tings. ➠ Insert th e motor trip bloc k. ➠ Push the yell ow locki ng…
Student Guide HS-50 Advanced II 07/2002 Edition
3 Power Supply
33
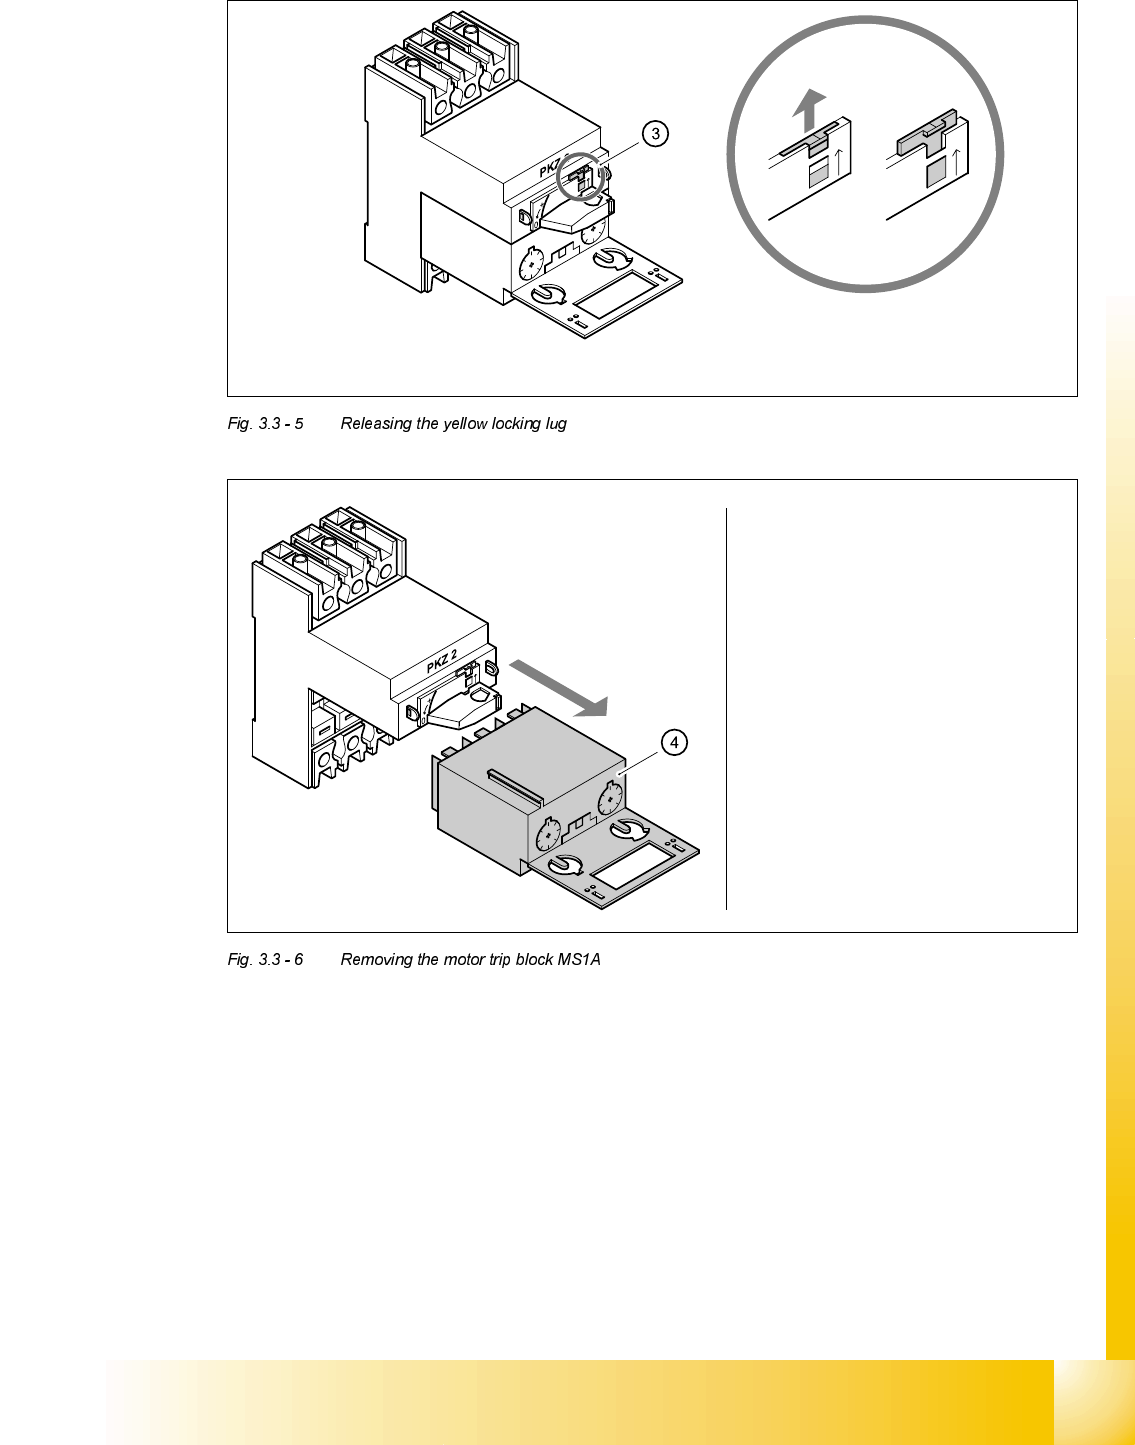
)LWWLQJWKHPRWRUWULSEORFN
➠ Check the type of motor trip block before inserting it. The type is dependent on the operating
voltage.
Use the screwdriver to push the yellow locking lug (3) upwards
Remove the motor trip block (4)
0DLQSRZHUYROWDJHV 7\SH
415 VAC ± 5 % ZM-16-PKZ2
400 VAC ± 5 % ZM-16-PKZ2
380 VAC ± 5 % ZM-16-PKZ2
230 VAC ± 5 % ZM-32-PKZ2
204 VAC ± 5 % ZM-32-PKZ2
07/2002 Edition Student Guide HS-50 Advanced II
3 Power Supply
34
➠ Check the overcurrent trip and short-circuit current trip threshold settings.
➠ Insert the motor trip block.
➠ Push the yellow locking lug down.
➠ Close the grey safety flap.
➠ Turn the rotary switch clockwise as far as the stop.
➠ Switch the placement system on at the main switch.
➠ Use the digital voltmeter to measure the main power supply voltage at terminals L1, L2, L3 and
T1, T2 and T3.
➠ Complete the servicing work as described in 3.3.3 on page 3 - 29.
5HSODFLQJPRWRUFLUFXLWEUHDNHU06
7RROVDQGHTXLSPHQW
– Set of slotted-head screwdrivers
– Self-adhesive labels
– Digital multimeter
– HS-50 detailed circuit diagrams
0RWRUWULSEORFN
<HOORZGLDOIRUVHWWLQJWKH
RYHUFXUUHQWWULSWKUHVKROG
5HGGLDOIRUVHWWLQJWKHVKRUW
FLUFXLWFXUUHQWWULSWKUHVKROG
ZM-16-PKZ2 12 A 190 A
ZM-32-PKZ2 24 A 375 A
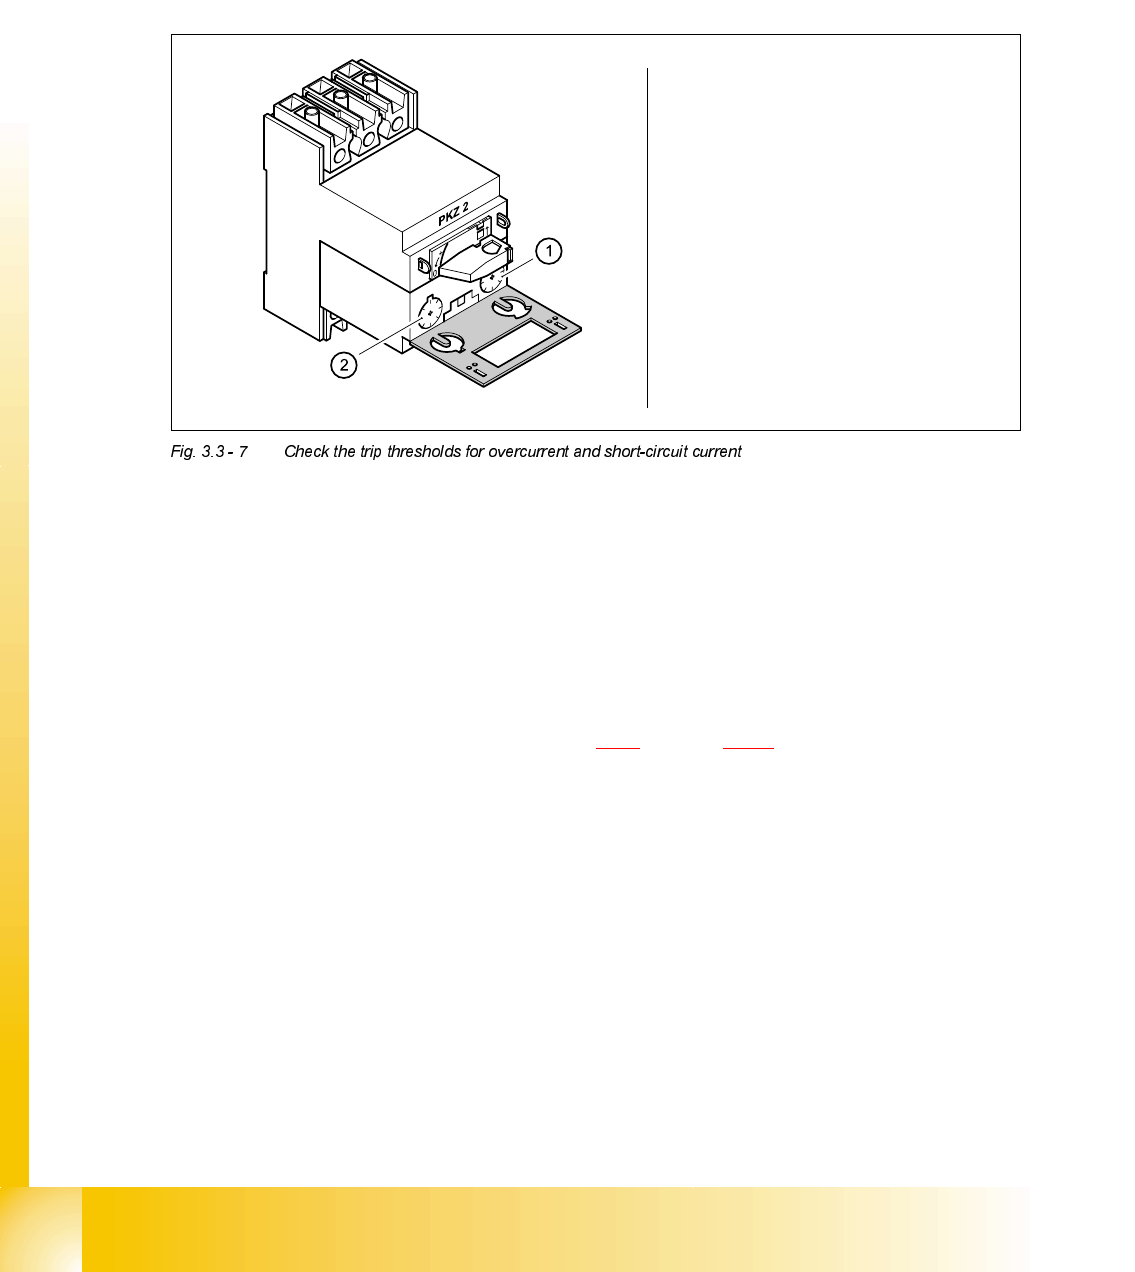
Check the overcurrent trip
threshold (yellow dial)
Check the short-circuit
current trip threshold
(read dial)
Student Guide HS-50 Advanced II 07/2002 Edition
3 Power Supply
35
3DUWV
PKZ2/3-pole/40 motor circuit-breaker, item number 00342494-01.
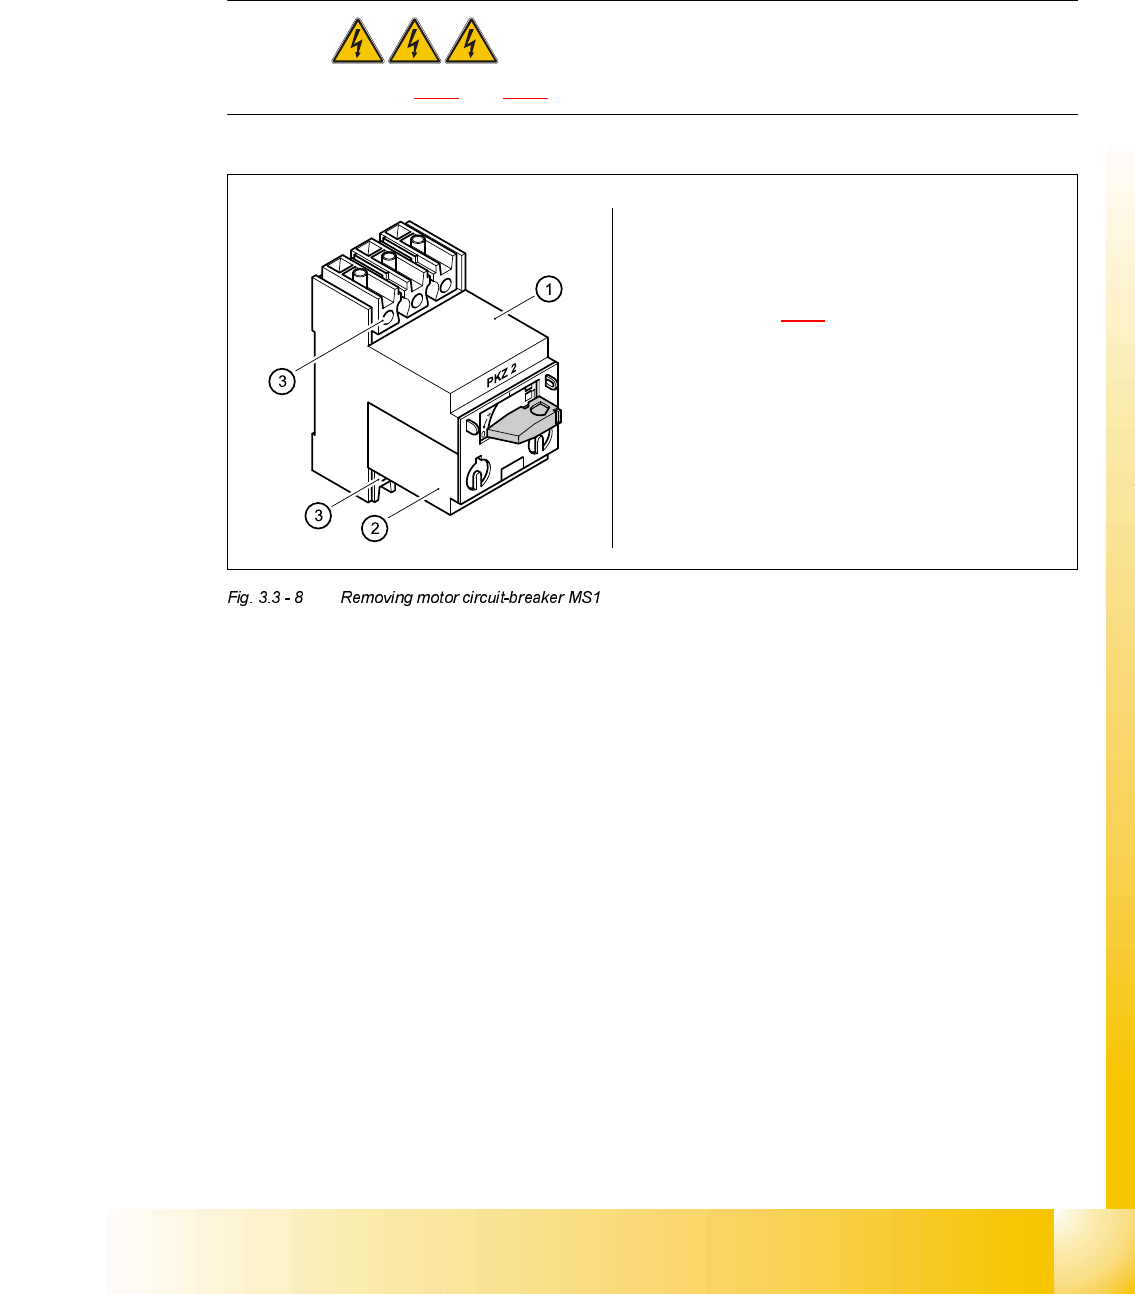
5HPRYLQJPRWRUFLUFXLWEUHDNHU06
DANGER Switch off the placement system and disconnect from the power
supply (see sections 3.3.1 and 3.3.2).
Remove the motor trip block (2)
(see Section 3.3.5
)
Loosen the clamping screws (3) on
the motor circuit breaker (1)
Remove the terminal wires one by one
and identify with adhesive labels