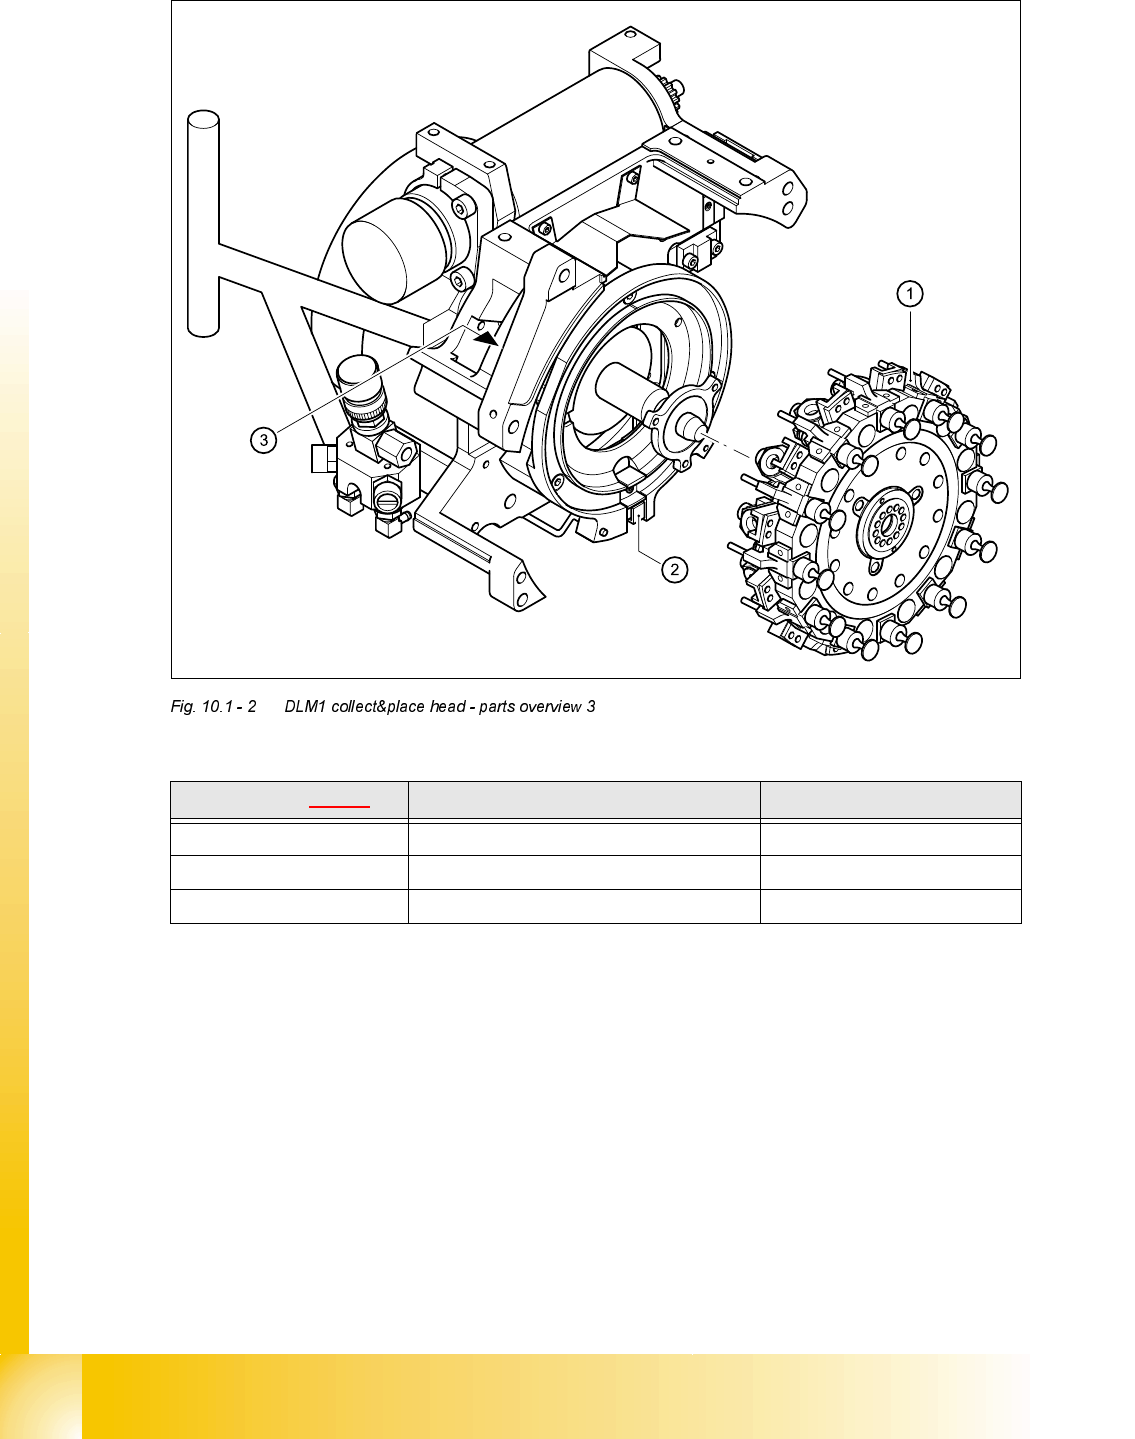
HS50_advance_level 2.pdf - 第311页
Stud ent Gu ide HS-5 0 Adva nced II 07/2 002 Ed ition 10 Star Axis 7 5HSODFLQJVS DUHS DUW V 5HSODFLQJWKHVW DUGULYH 7 RROVDQGHTXLS PHQW – Set of DIN 9 1 1 All en keys – Gauge fo …

Student Guide HS-50 Advanced II 07/2002 Edition
10 Star Axis
7
5HSODFLQJVSDUHSDUWV
5HSODFLQJWKHVWDUGULYH
7RROVDQGHTXLSPHQW
– Set of DIN 911 Allen keys
– Gauge for the star (collect&place head / DLM1), article number 00326164-01
– Power pack for the collect&place head / DLM1, article number 00353277-01
– Tray for transporting the collect&place head
– Laboratory gloves
3DUWV
Star drive, digital / DLM1, article number 00337571-01
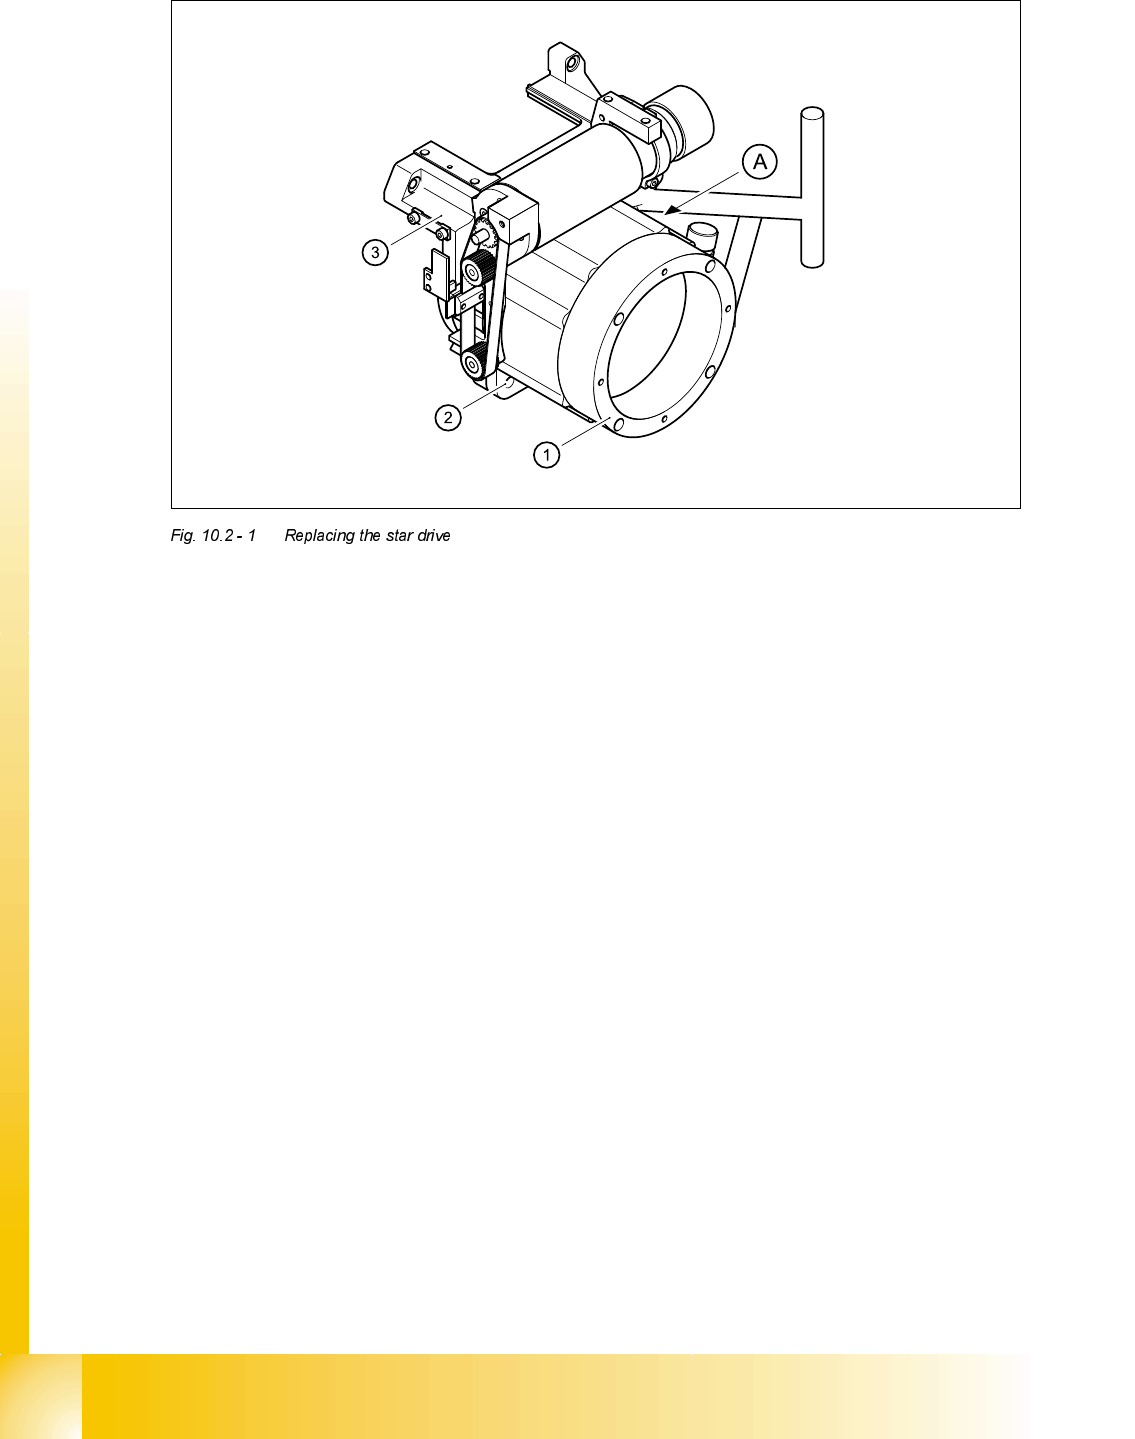
'LVPDQWOLQJWKHVWDUGULYH
➠ Dismantle the intermediate terminal block.
➠ Dismantle the front part of the collect&place head.
➠ Dismantle the star.
➠ Undo the four M5x16 hexagon socket head screws (item 2 in Fig. 10.2 - 1).
➠ Lift the star drive off the front part of the collect&place head.
)LWWKHVWDUGULYH
➠
Place the star motor on the front part of the collect&place head so that the connecting cable
for the star drive points to the position marked (A) in Fig. 10.2 - 1
.
➠ Fix the star drive in place with the four M5x16 hexagon socket head screws (item 2 in Fig. 10.2
- 1).
➠ Fit and adjust the star.
➠ Fit the front part of the collect&place head.
07/2002 Edition Student Guide HS-50 Advanced II
10 Star Axis
8
(1) Star drive, digital / DLM1
(2) M5x16 hexagon socket head screws, 4x
(3) Front part of collect&place head
(A) Connecting cable for the star drive on this side